


Welcome back to Extreme Rigs, today we will be reviewing the new “Eisblock XPX” CPU block from Alphacool. It’s been a while since the last Alphacool block launched and while their blocks have usually performed well in the past we haven’t always been a big fan of the mount, restriction or the quality. Hopefully the Eisblock XPX will have corrected the prior flaws. A big thanks to Alphacool and AquaTuning for supporting our efforts with a review sample:
![]()
The new block is part of the new product line refresh that is all Ice (“Eis”) related. We recently reviewed the Eisbrecher radiator and the Eispumpe VPP755 along with it’s Eisdecke pump top. So we have already covered a fair amount of the new product line up. Neither the Eisbrecher nor the Eispumpe were quite perfect at the time of review, and the good news is that Alphacool has since improved the Eispumpe to remove one of our minor criticisms. Therefore we are expecting a good but not perfect product that might need another iteration to perfect.
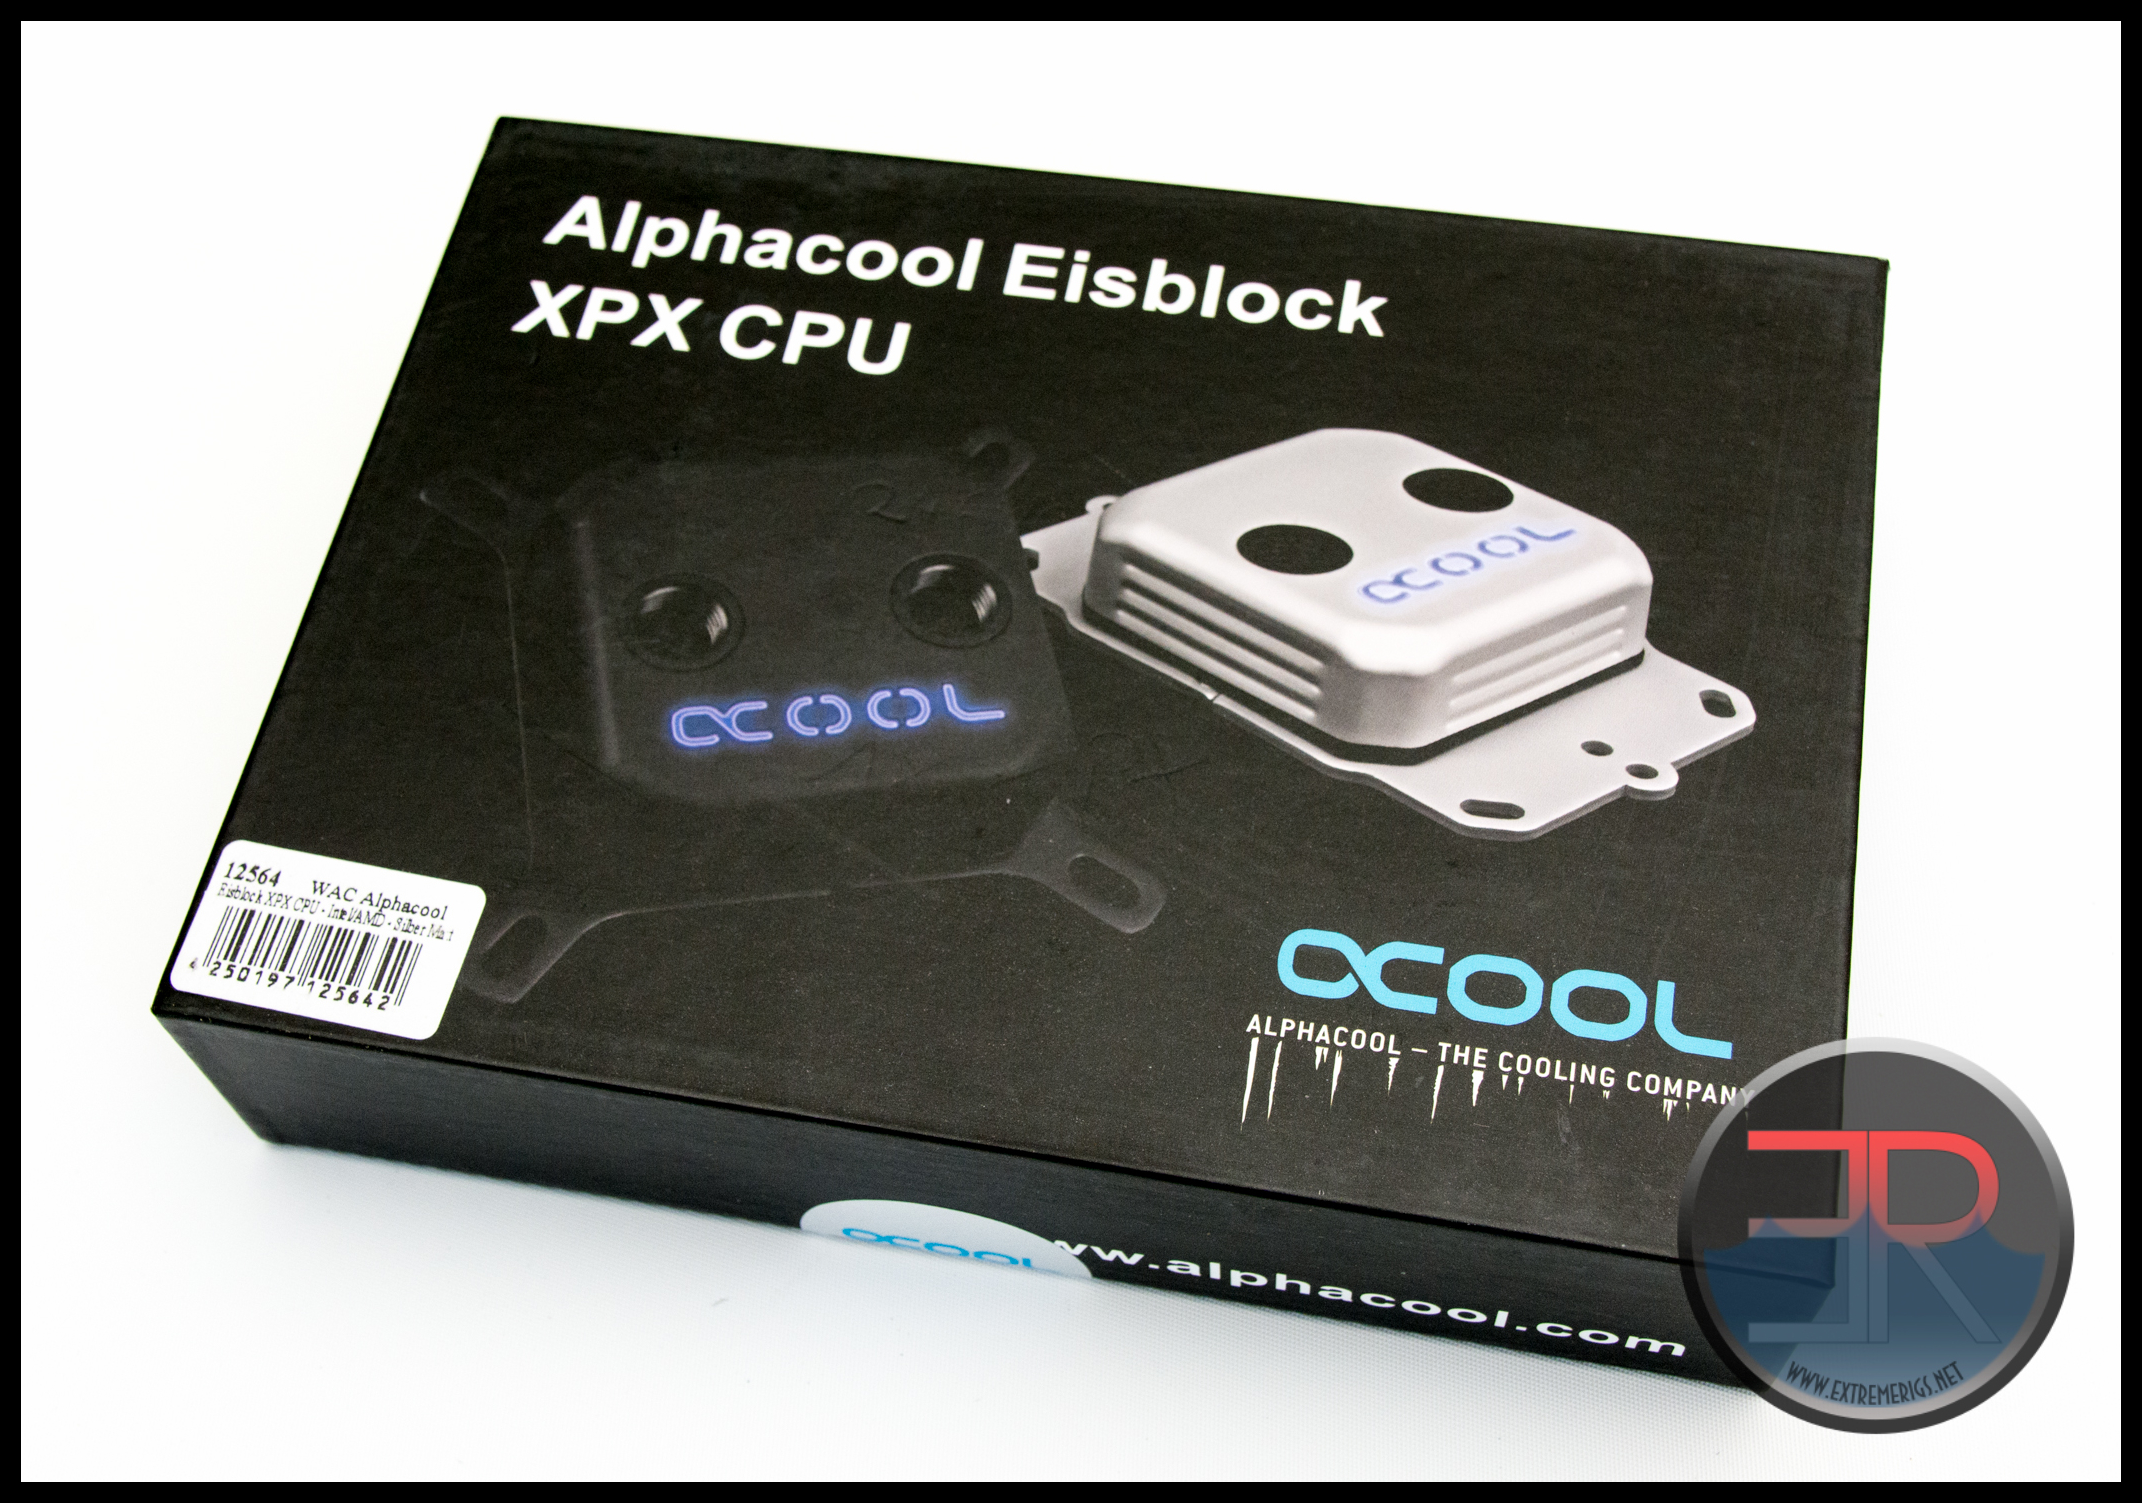
The Eisblock XPX box is higher quality than we’ve seen in the past. While this doesn’t really matter Alphacool has sometimes had a hit and miss record with quality and so seeing attention to detail on a box gives us a good feeling about the rest of the product.
The box has a picture of the block and the SKU details but no real marketing information at all. While this is unusual, the majority of waterblocks are not sold in a “brick and mortar” store and so it’s rare for a potential customer to actually decide to buy a product based on the packaging. While plain, the box is at least sealed for security purposes.
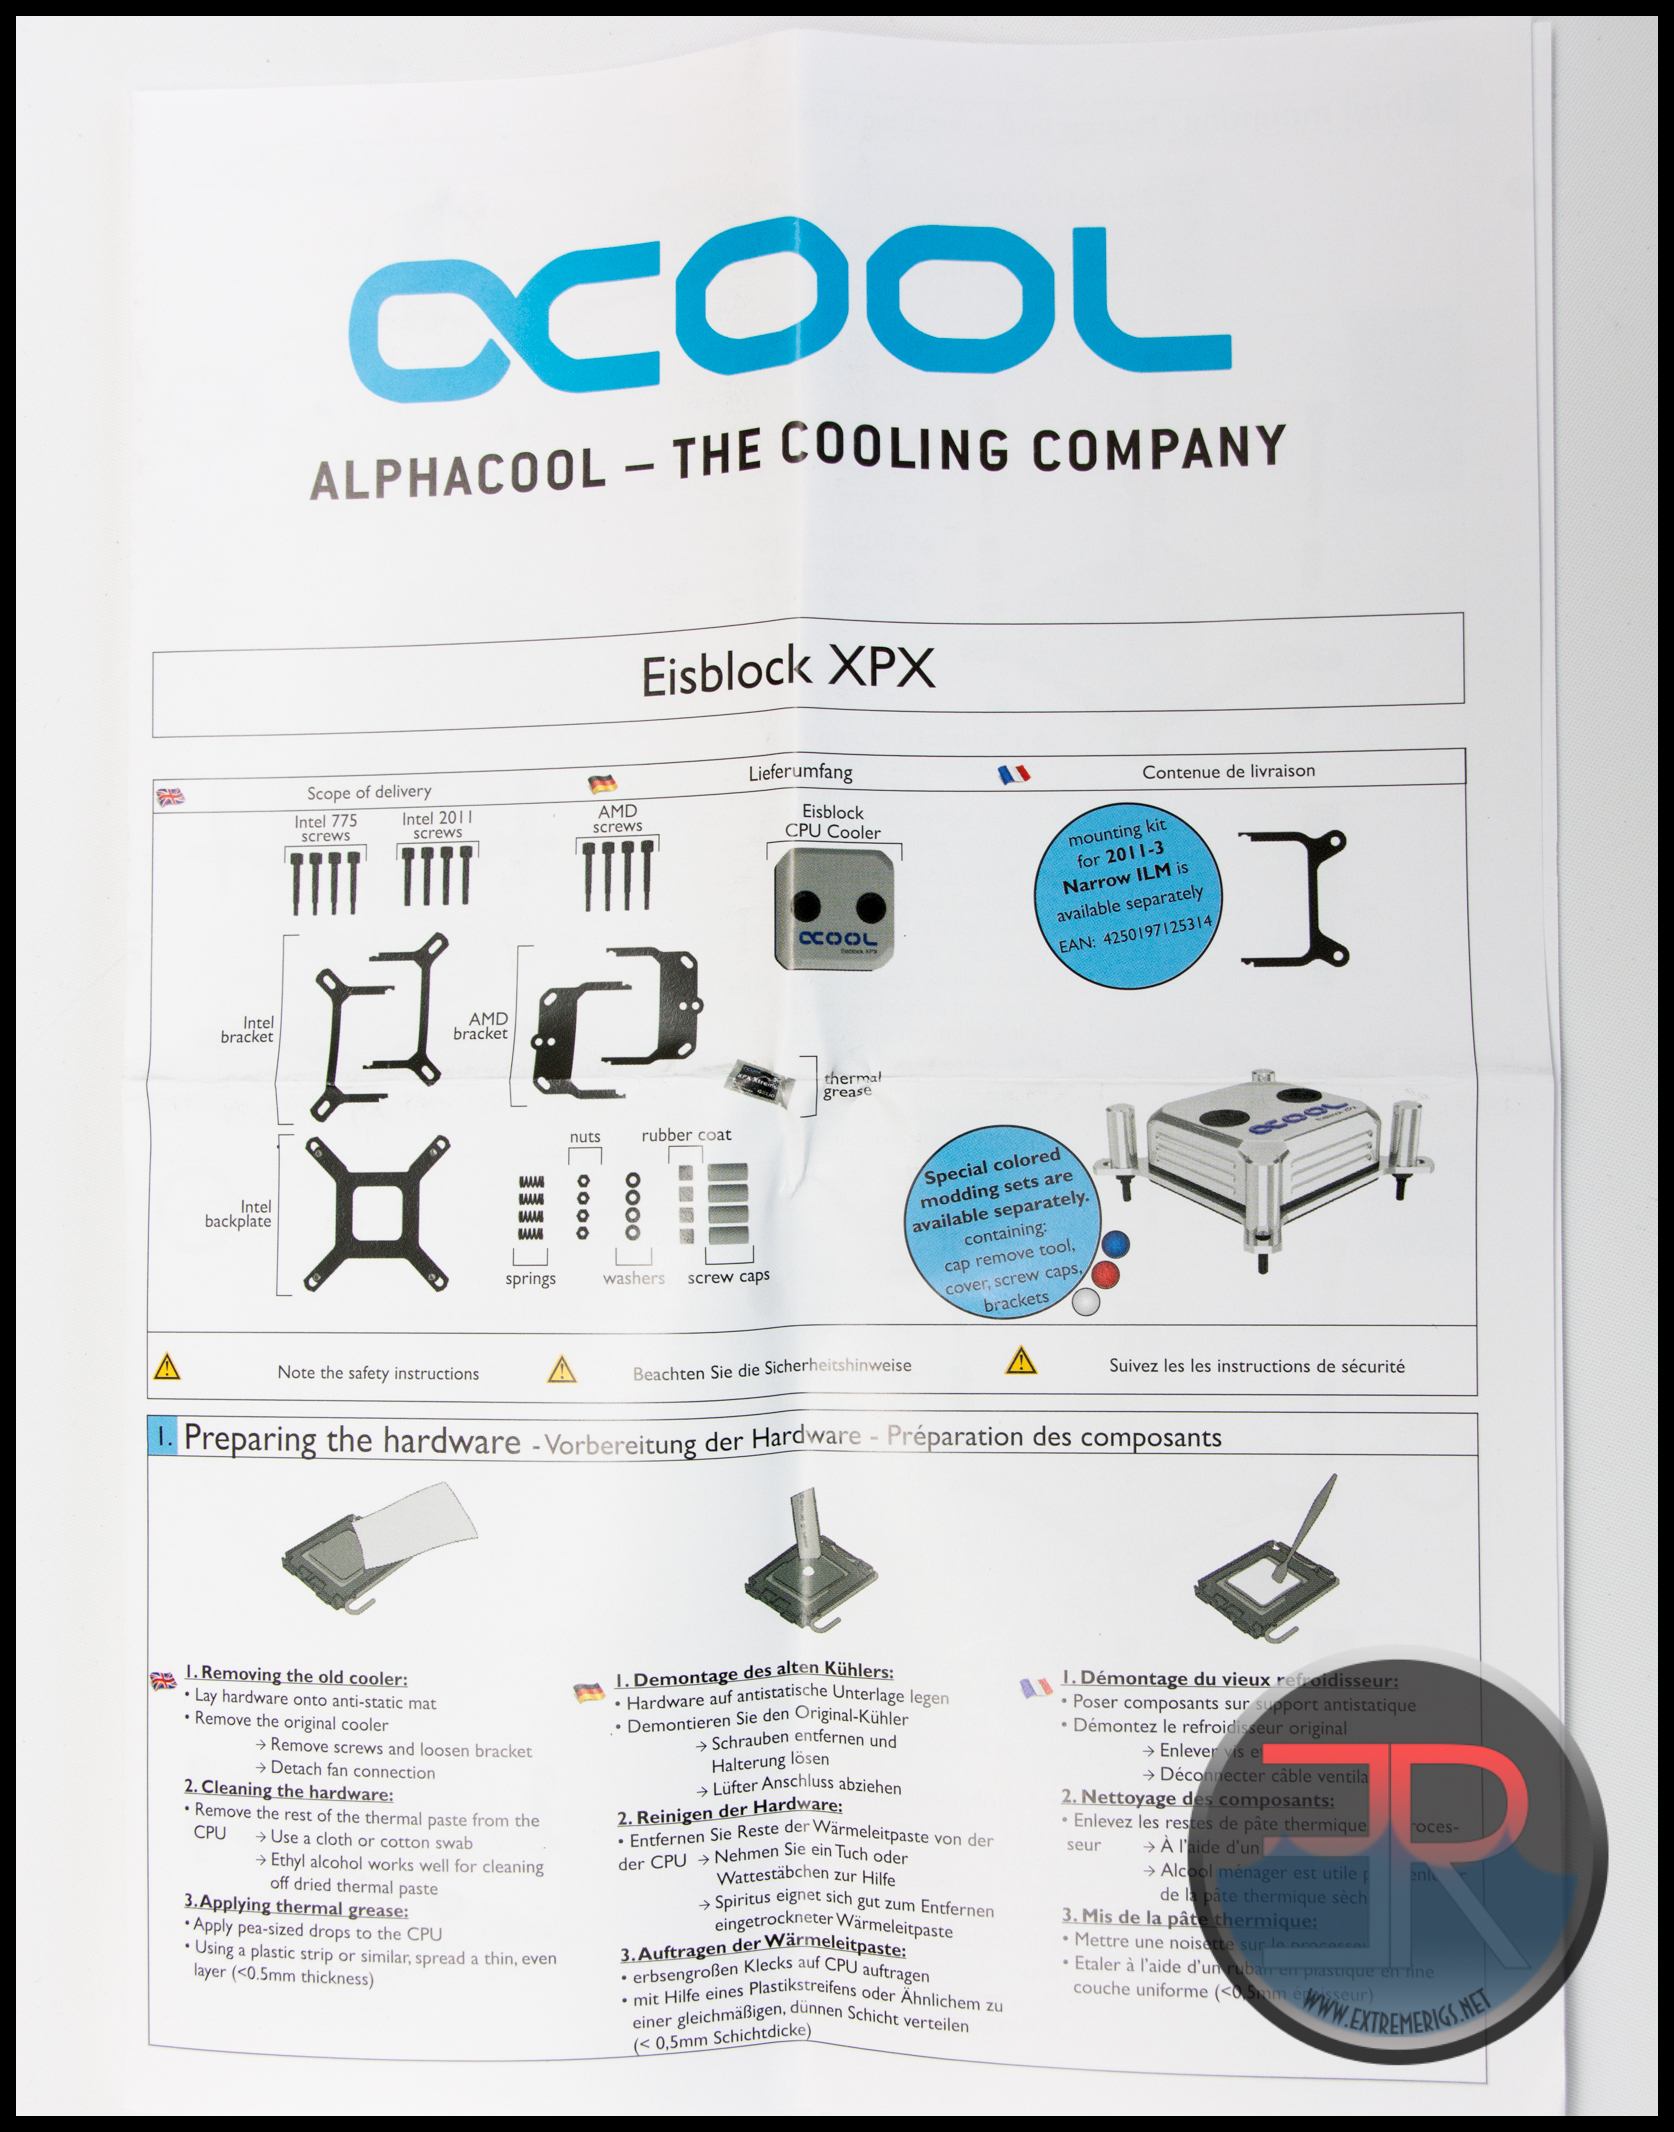
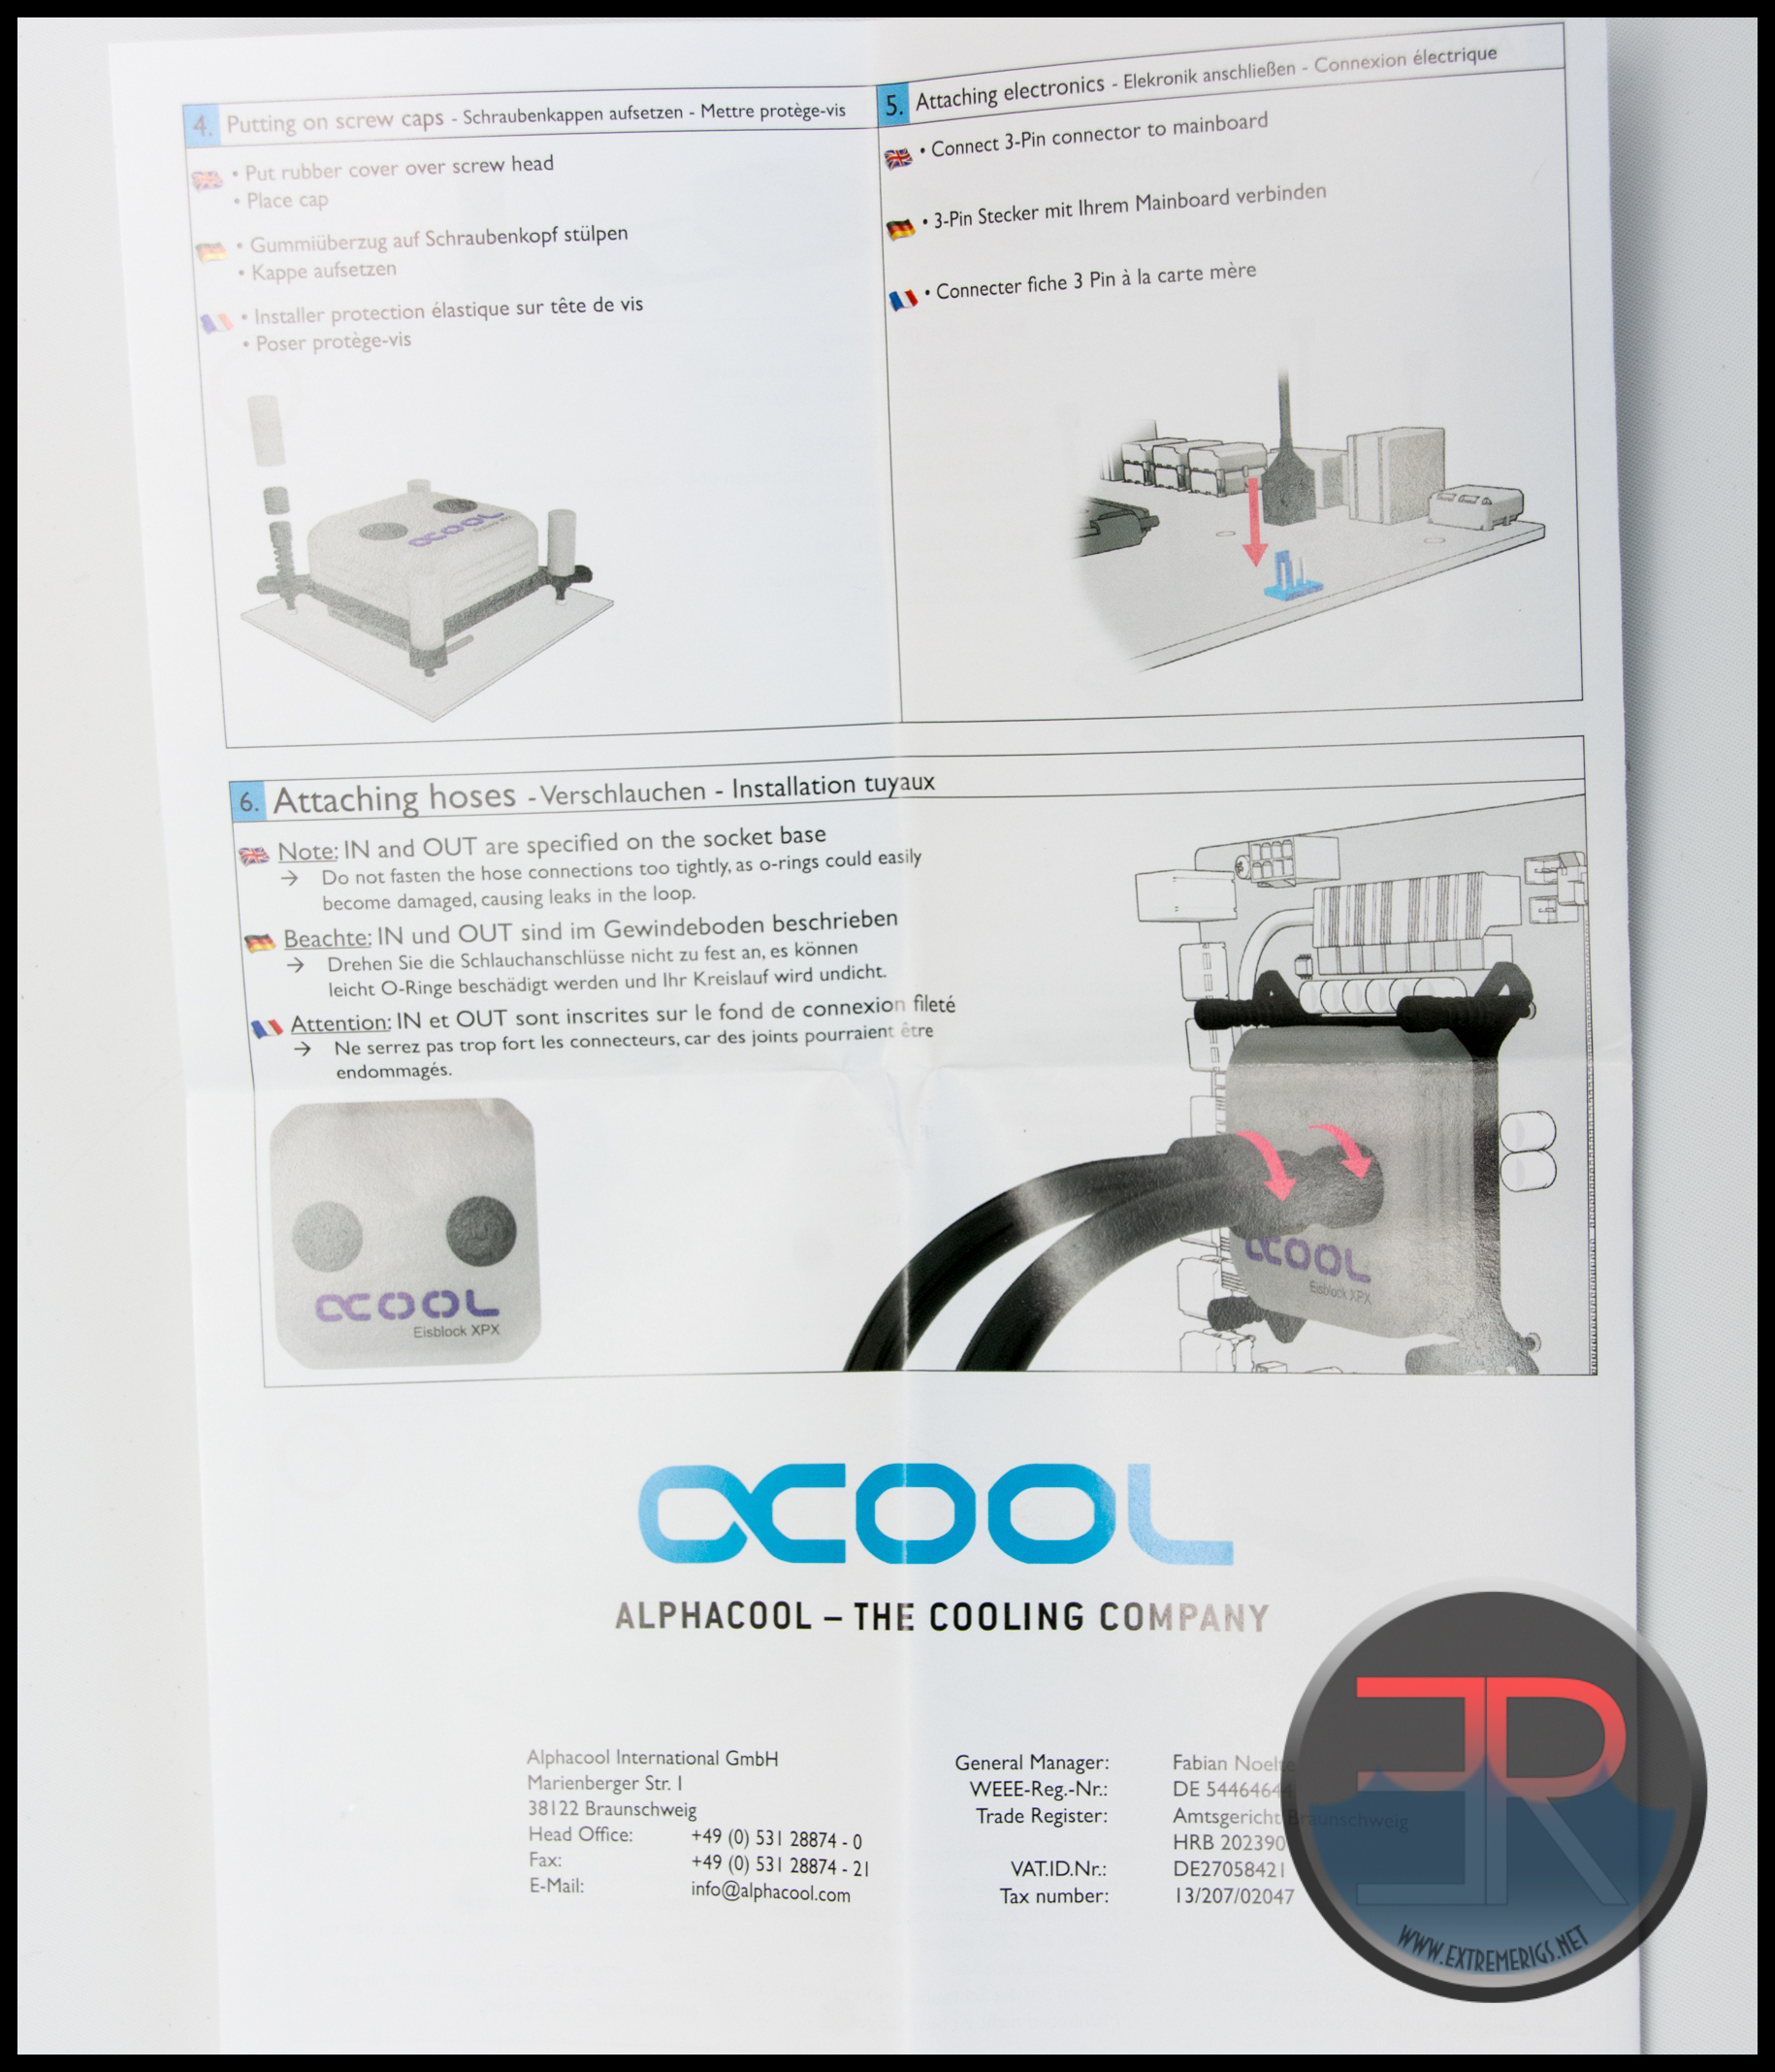
Breaking open the seal we get a view of the instructions handily placed on top:

You can find a copy of these instructions online here. Underneath we find the block and the accessories separated by foam packing cut to size:
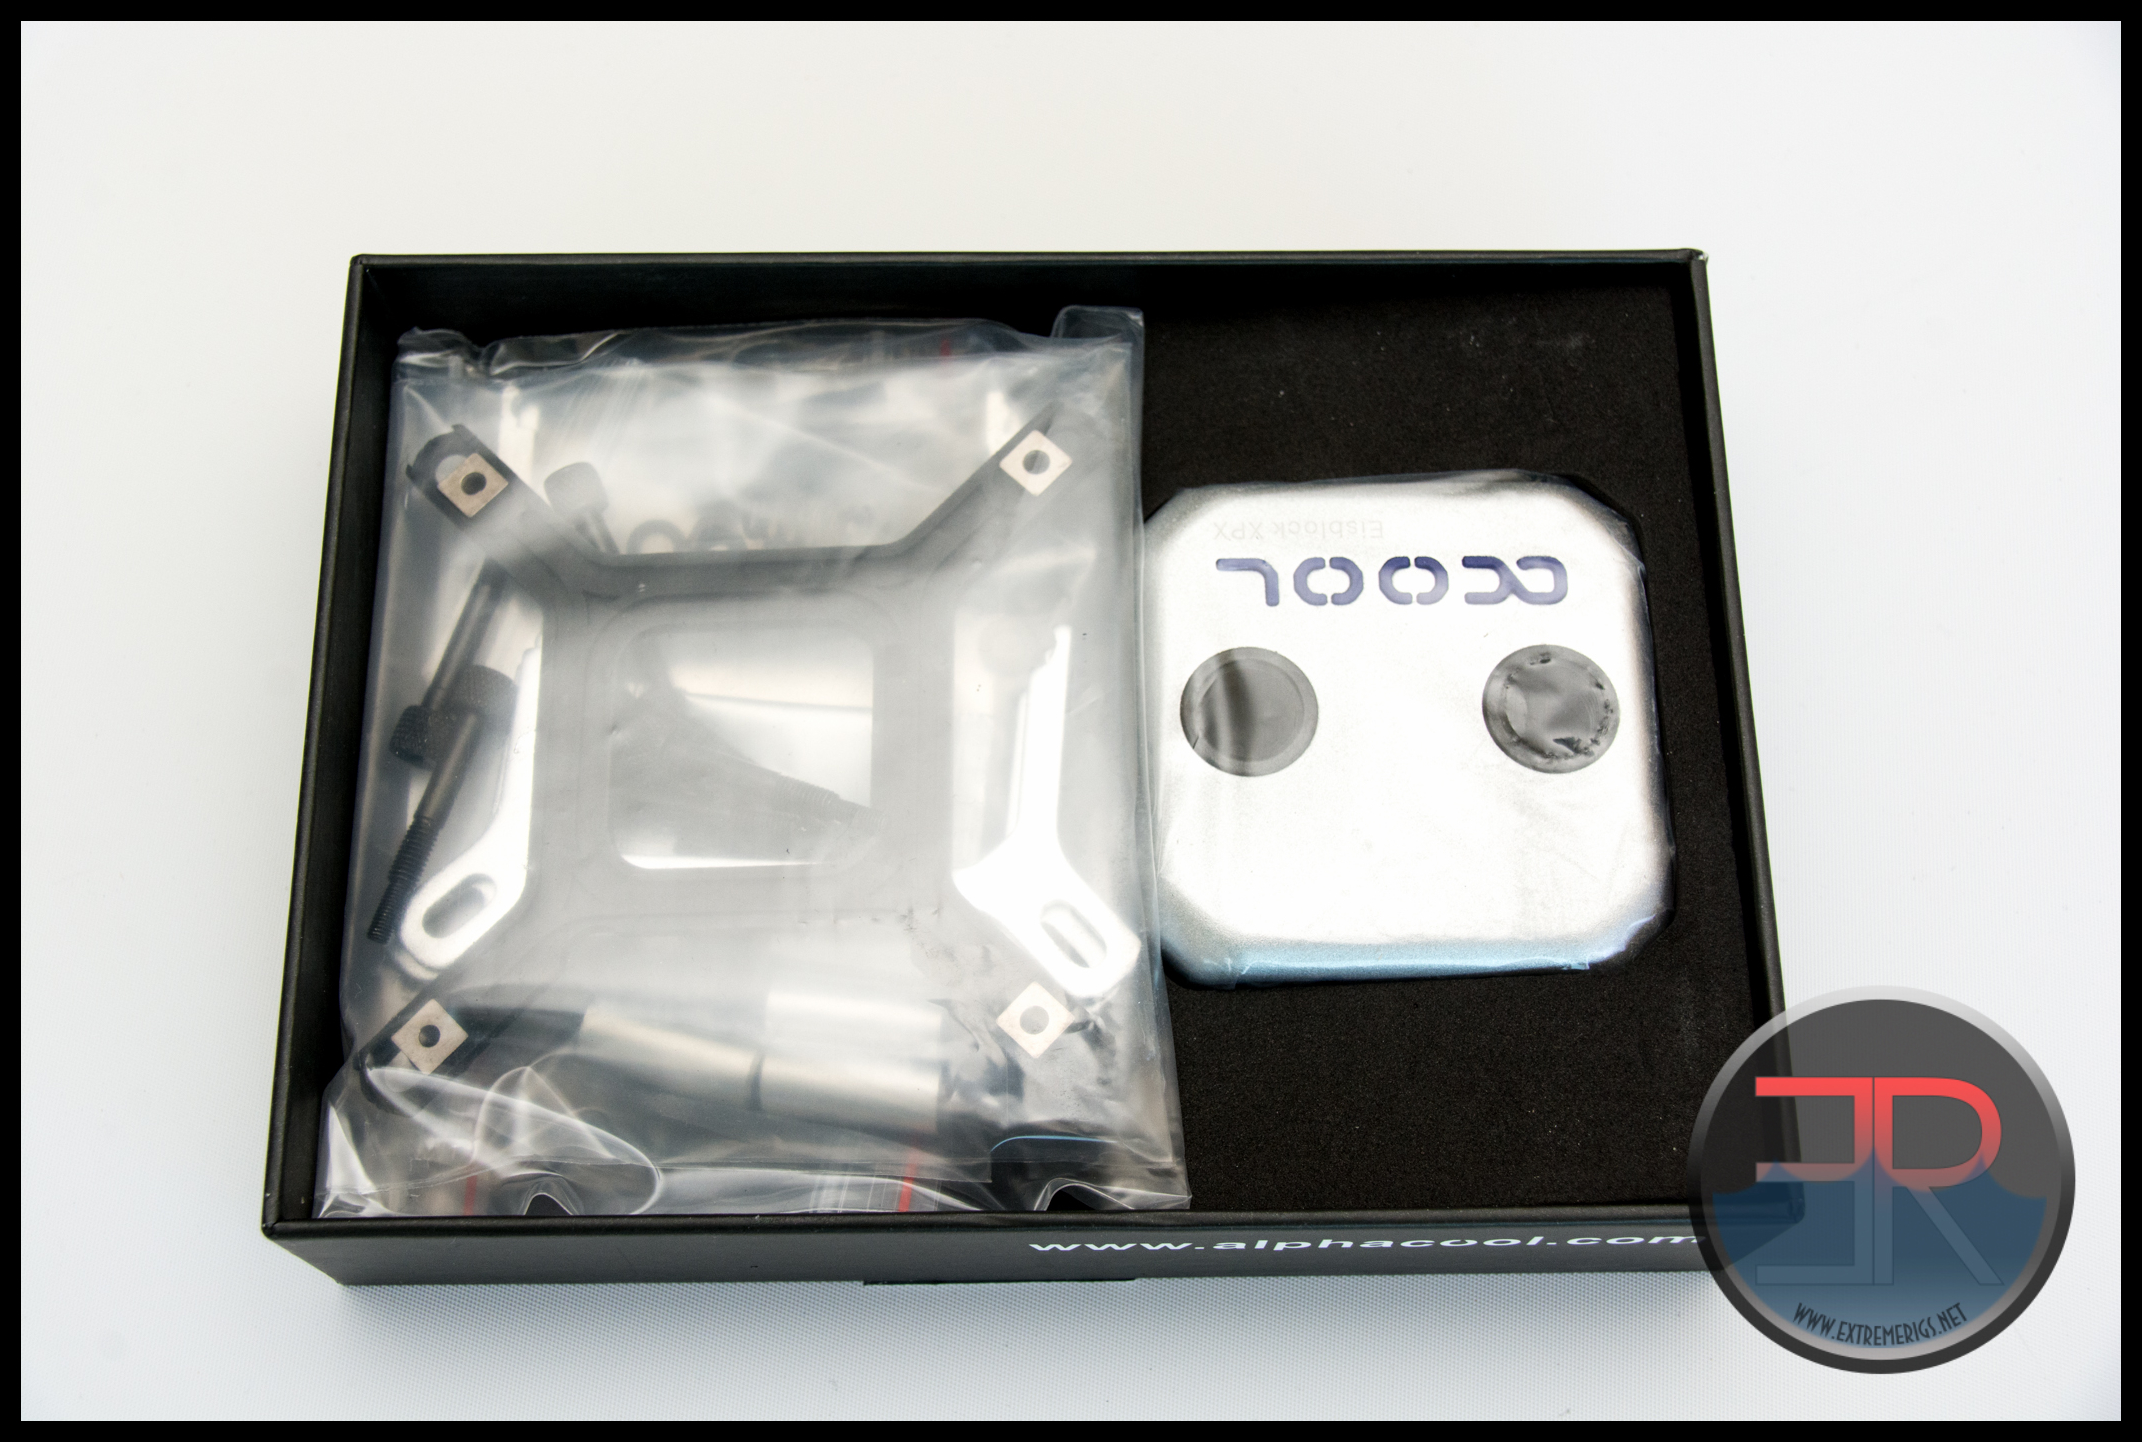
The block itself then is quite well protected against physical damage and any water damage is protected by wrapping in plastic as well.
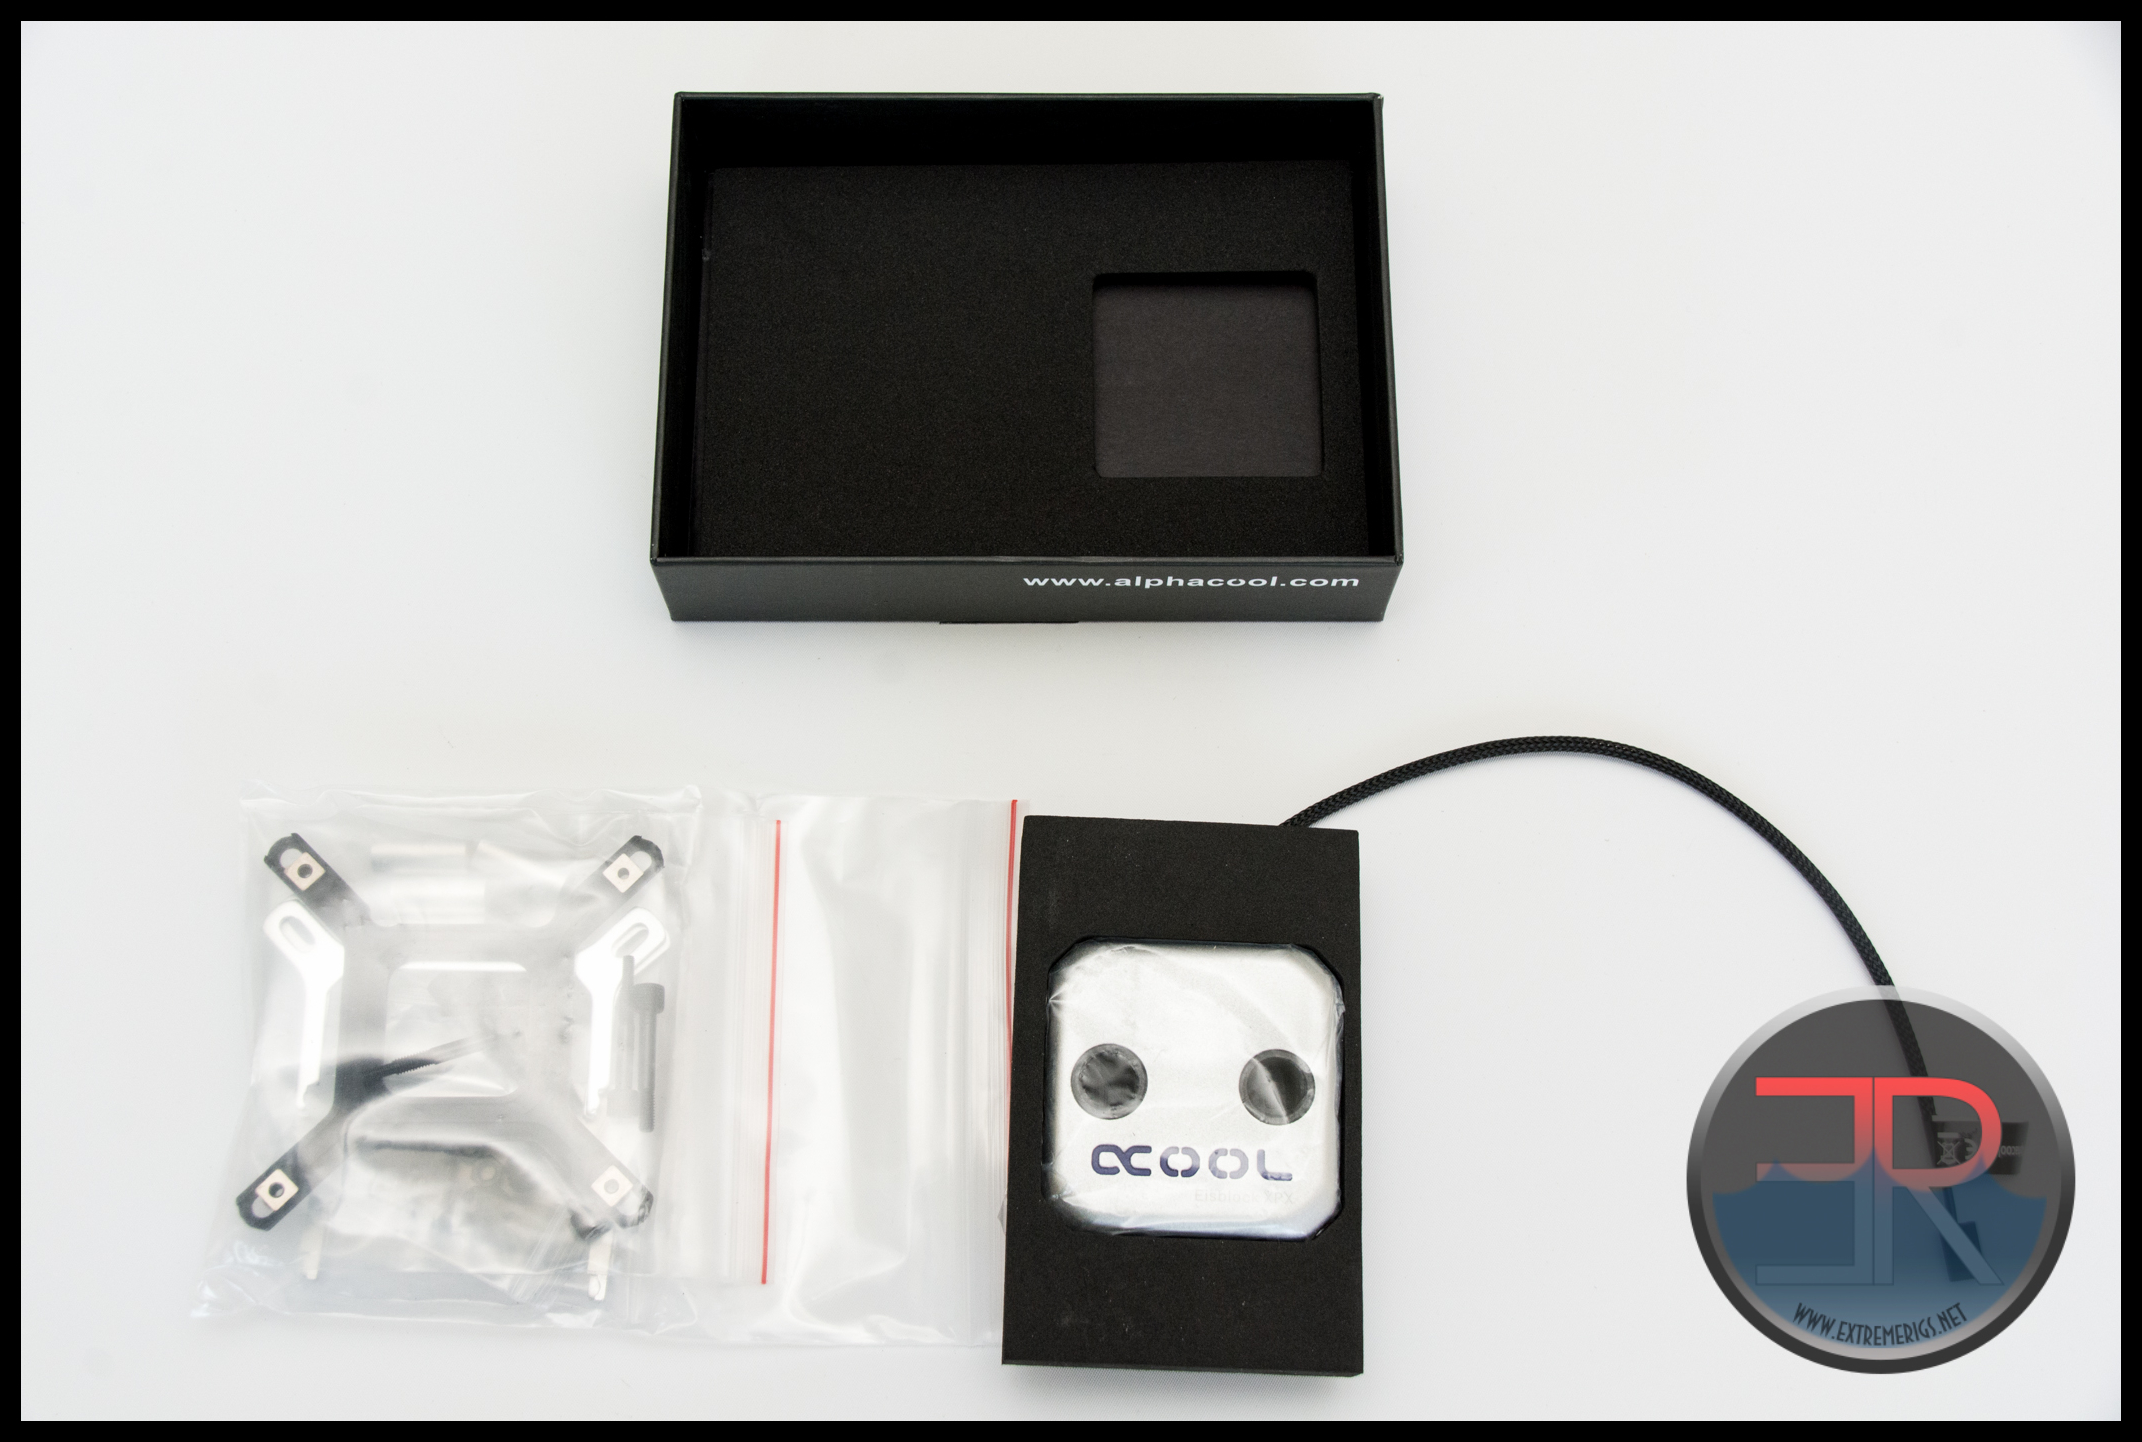
Separating out the accessory bag and we see a backplate, two types of mounting bracket, nuts, springs, washers, screws, TIM and caps.
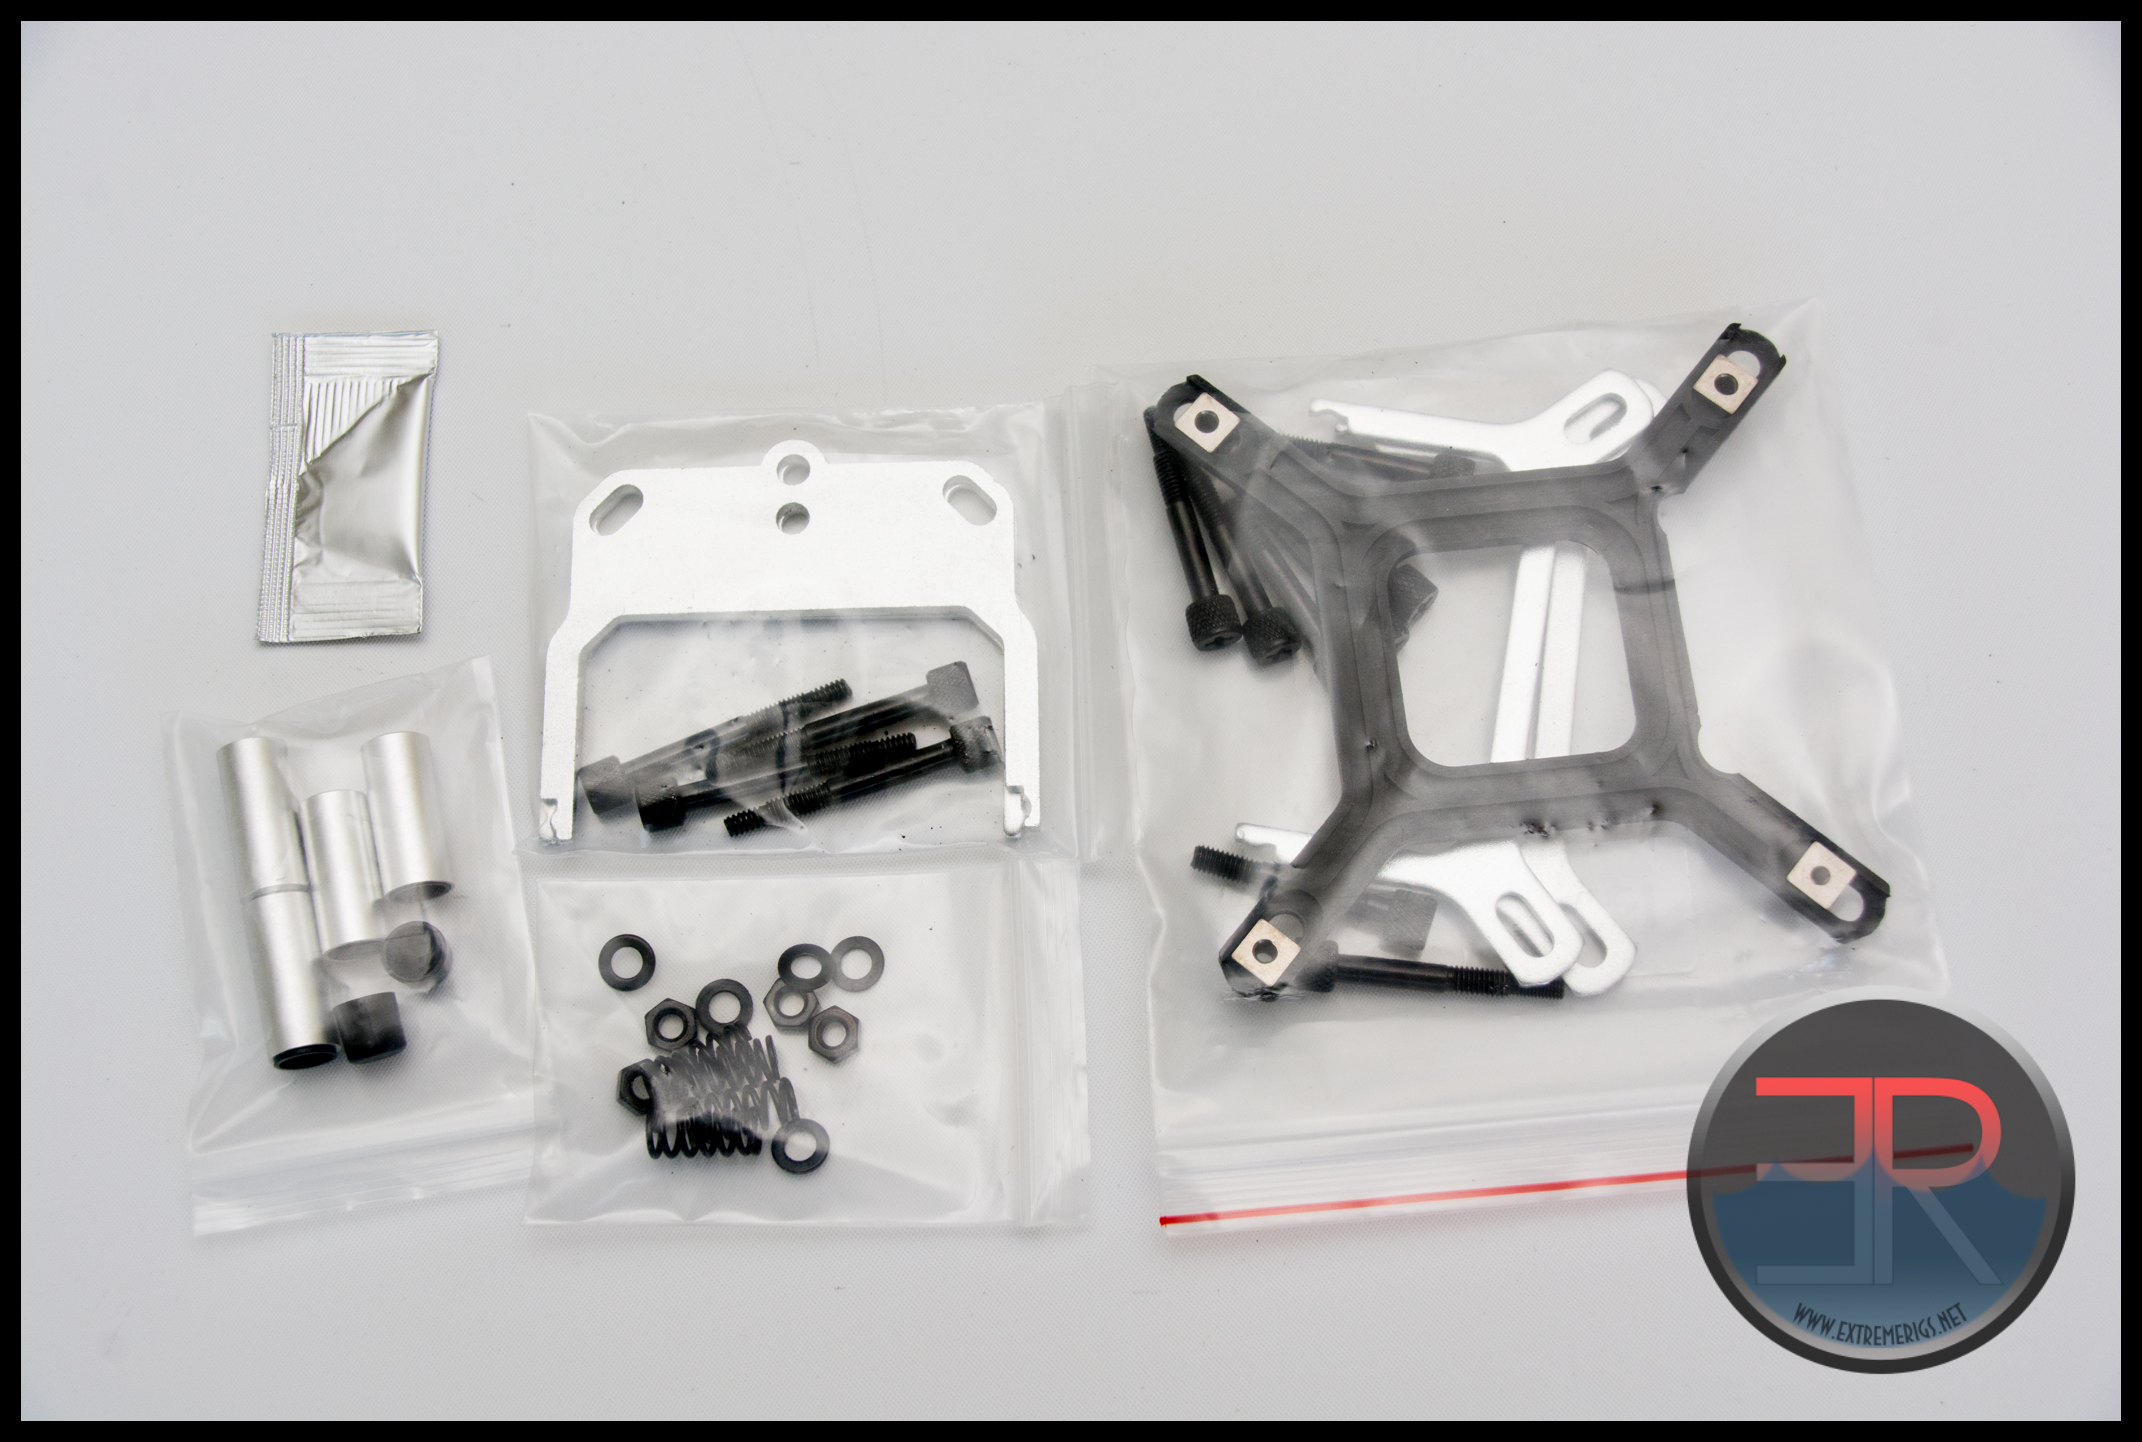
The TIM is unmarked so assume that this will not be a high performance TIM and would suggest to use something higher quality. The variety of mounts is great though and will be appreciated if you are an upgrade junky.
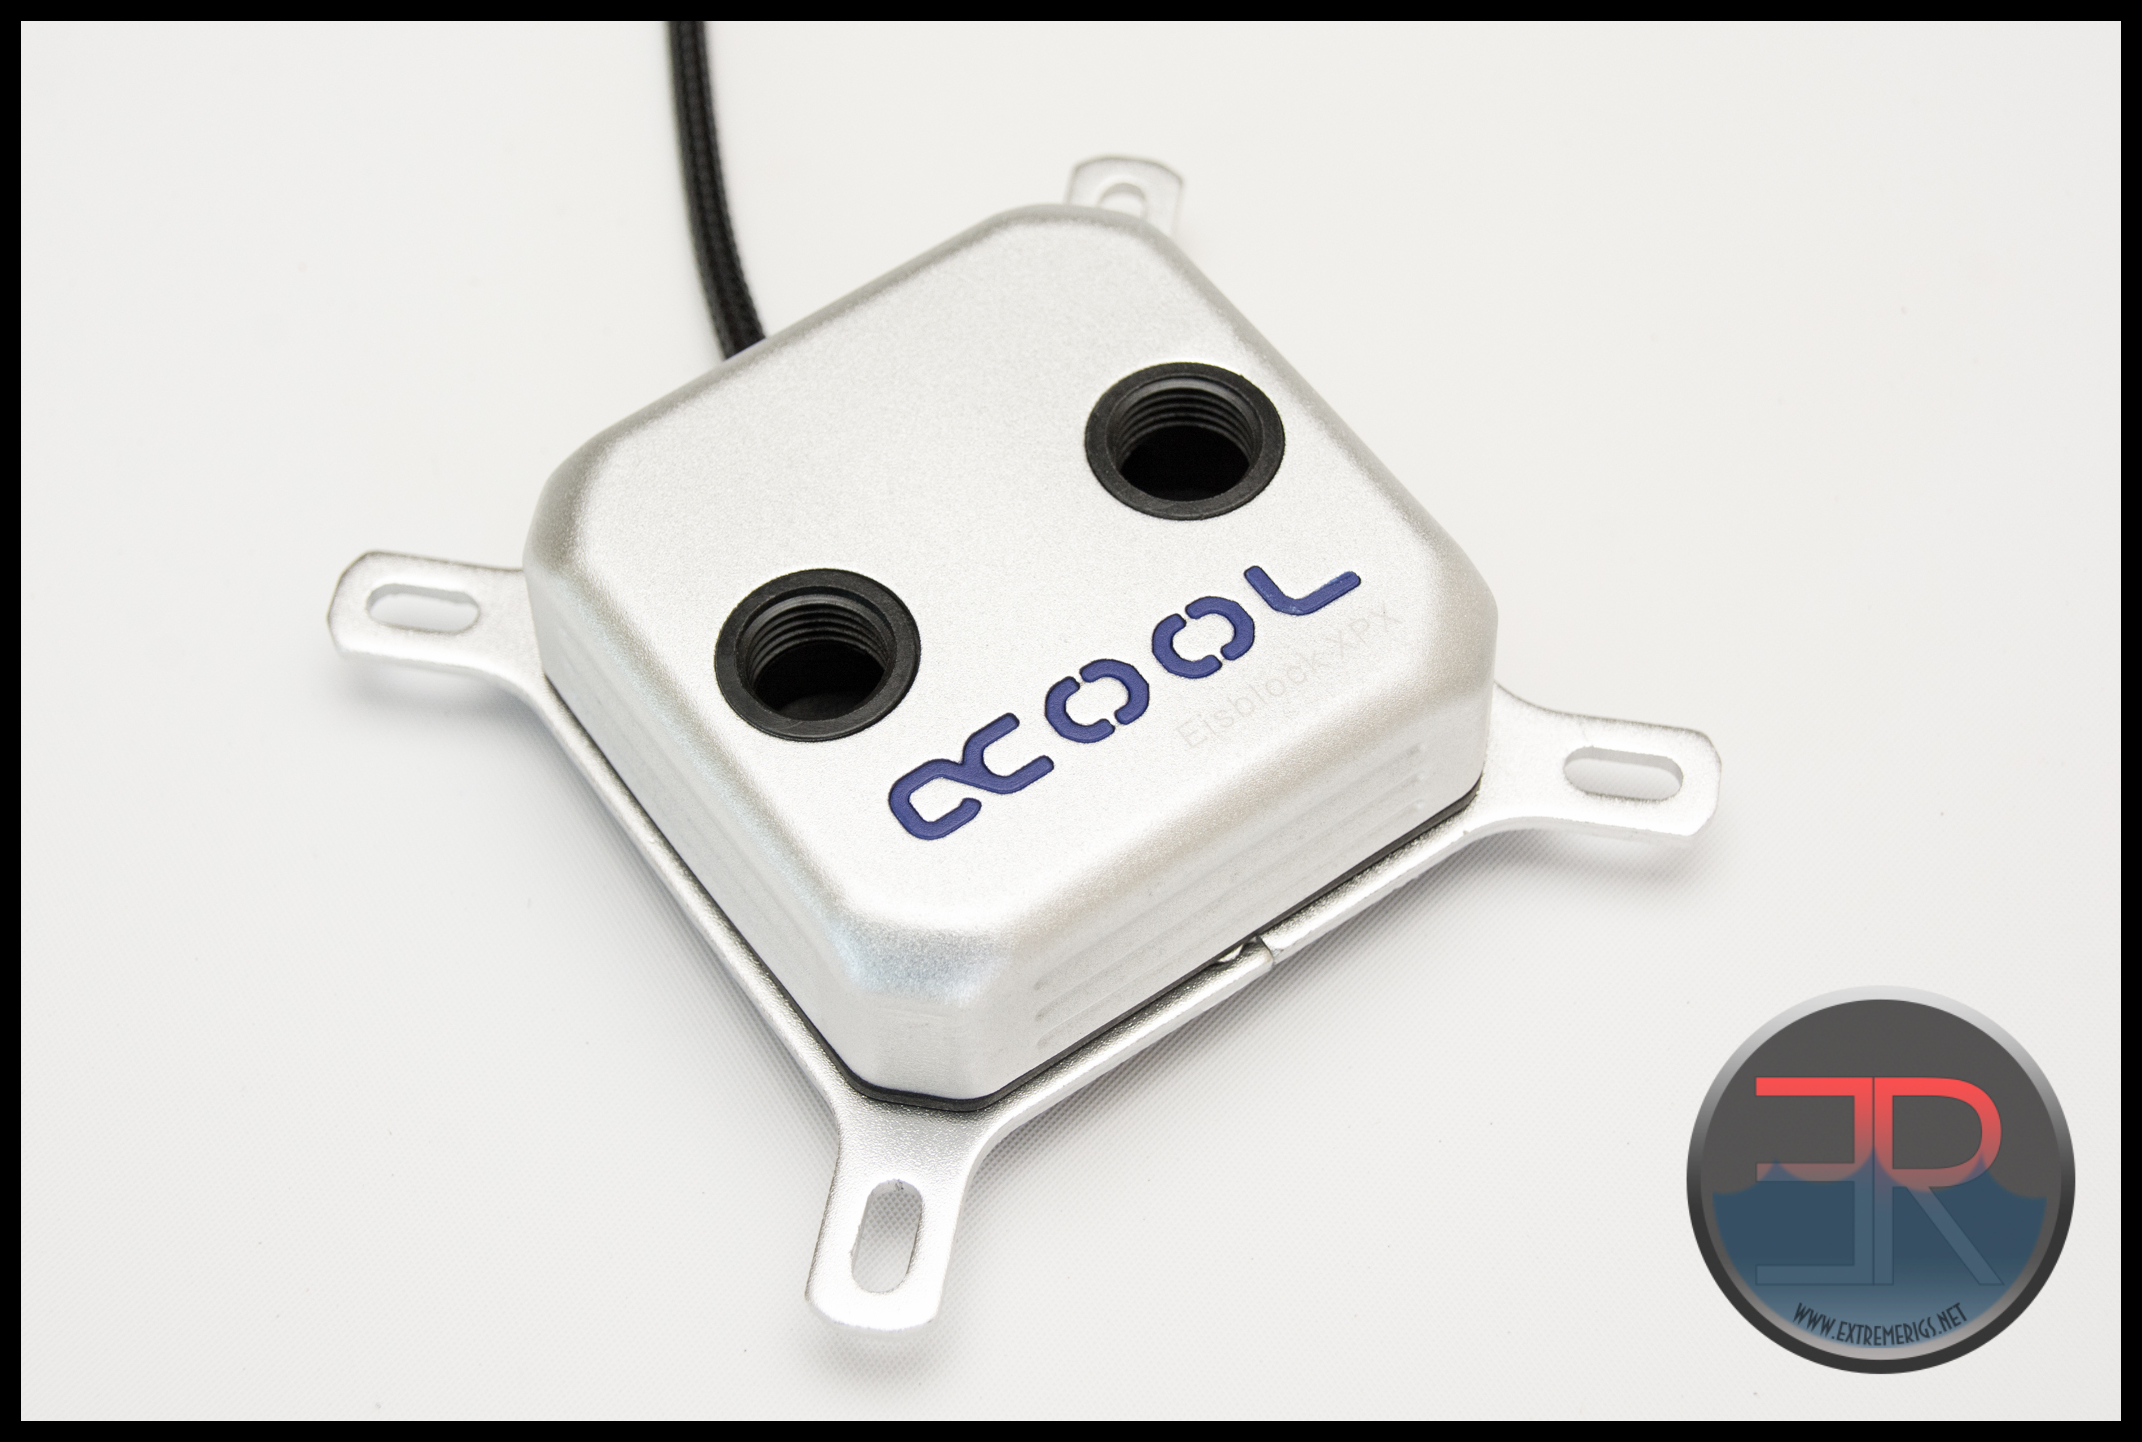
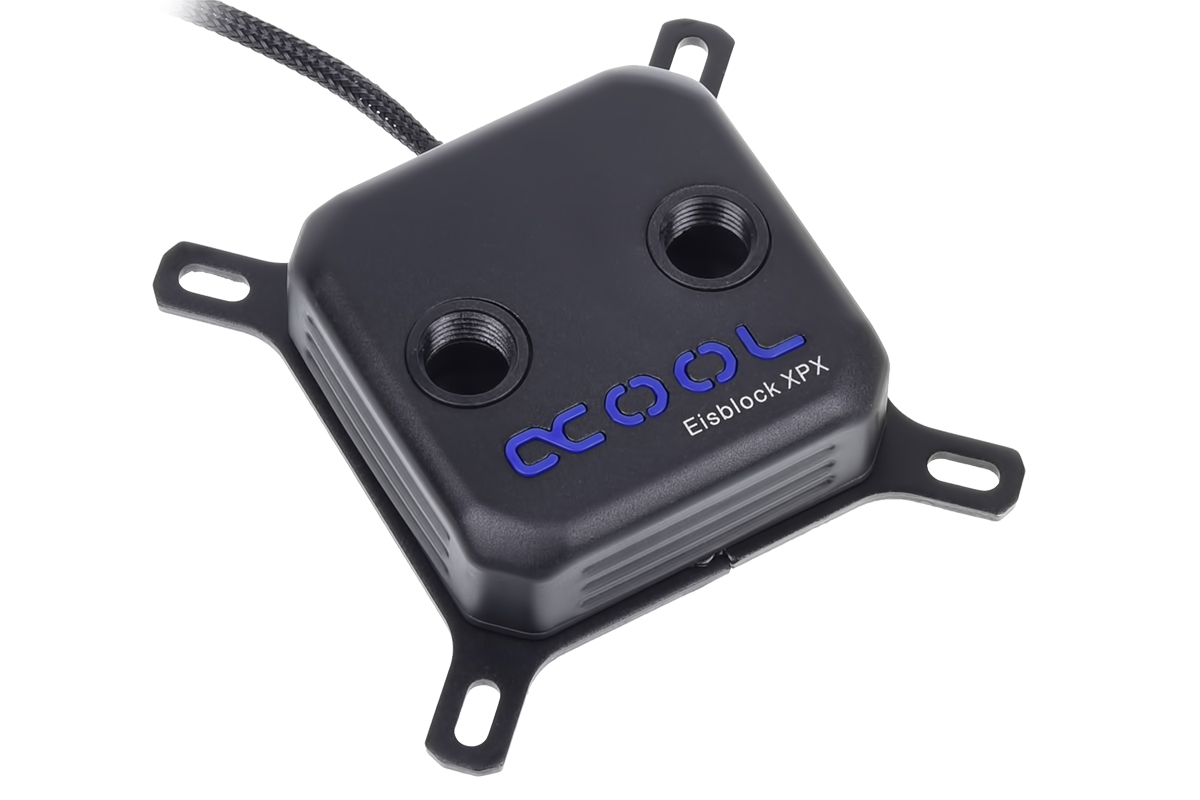
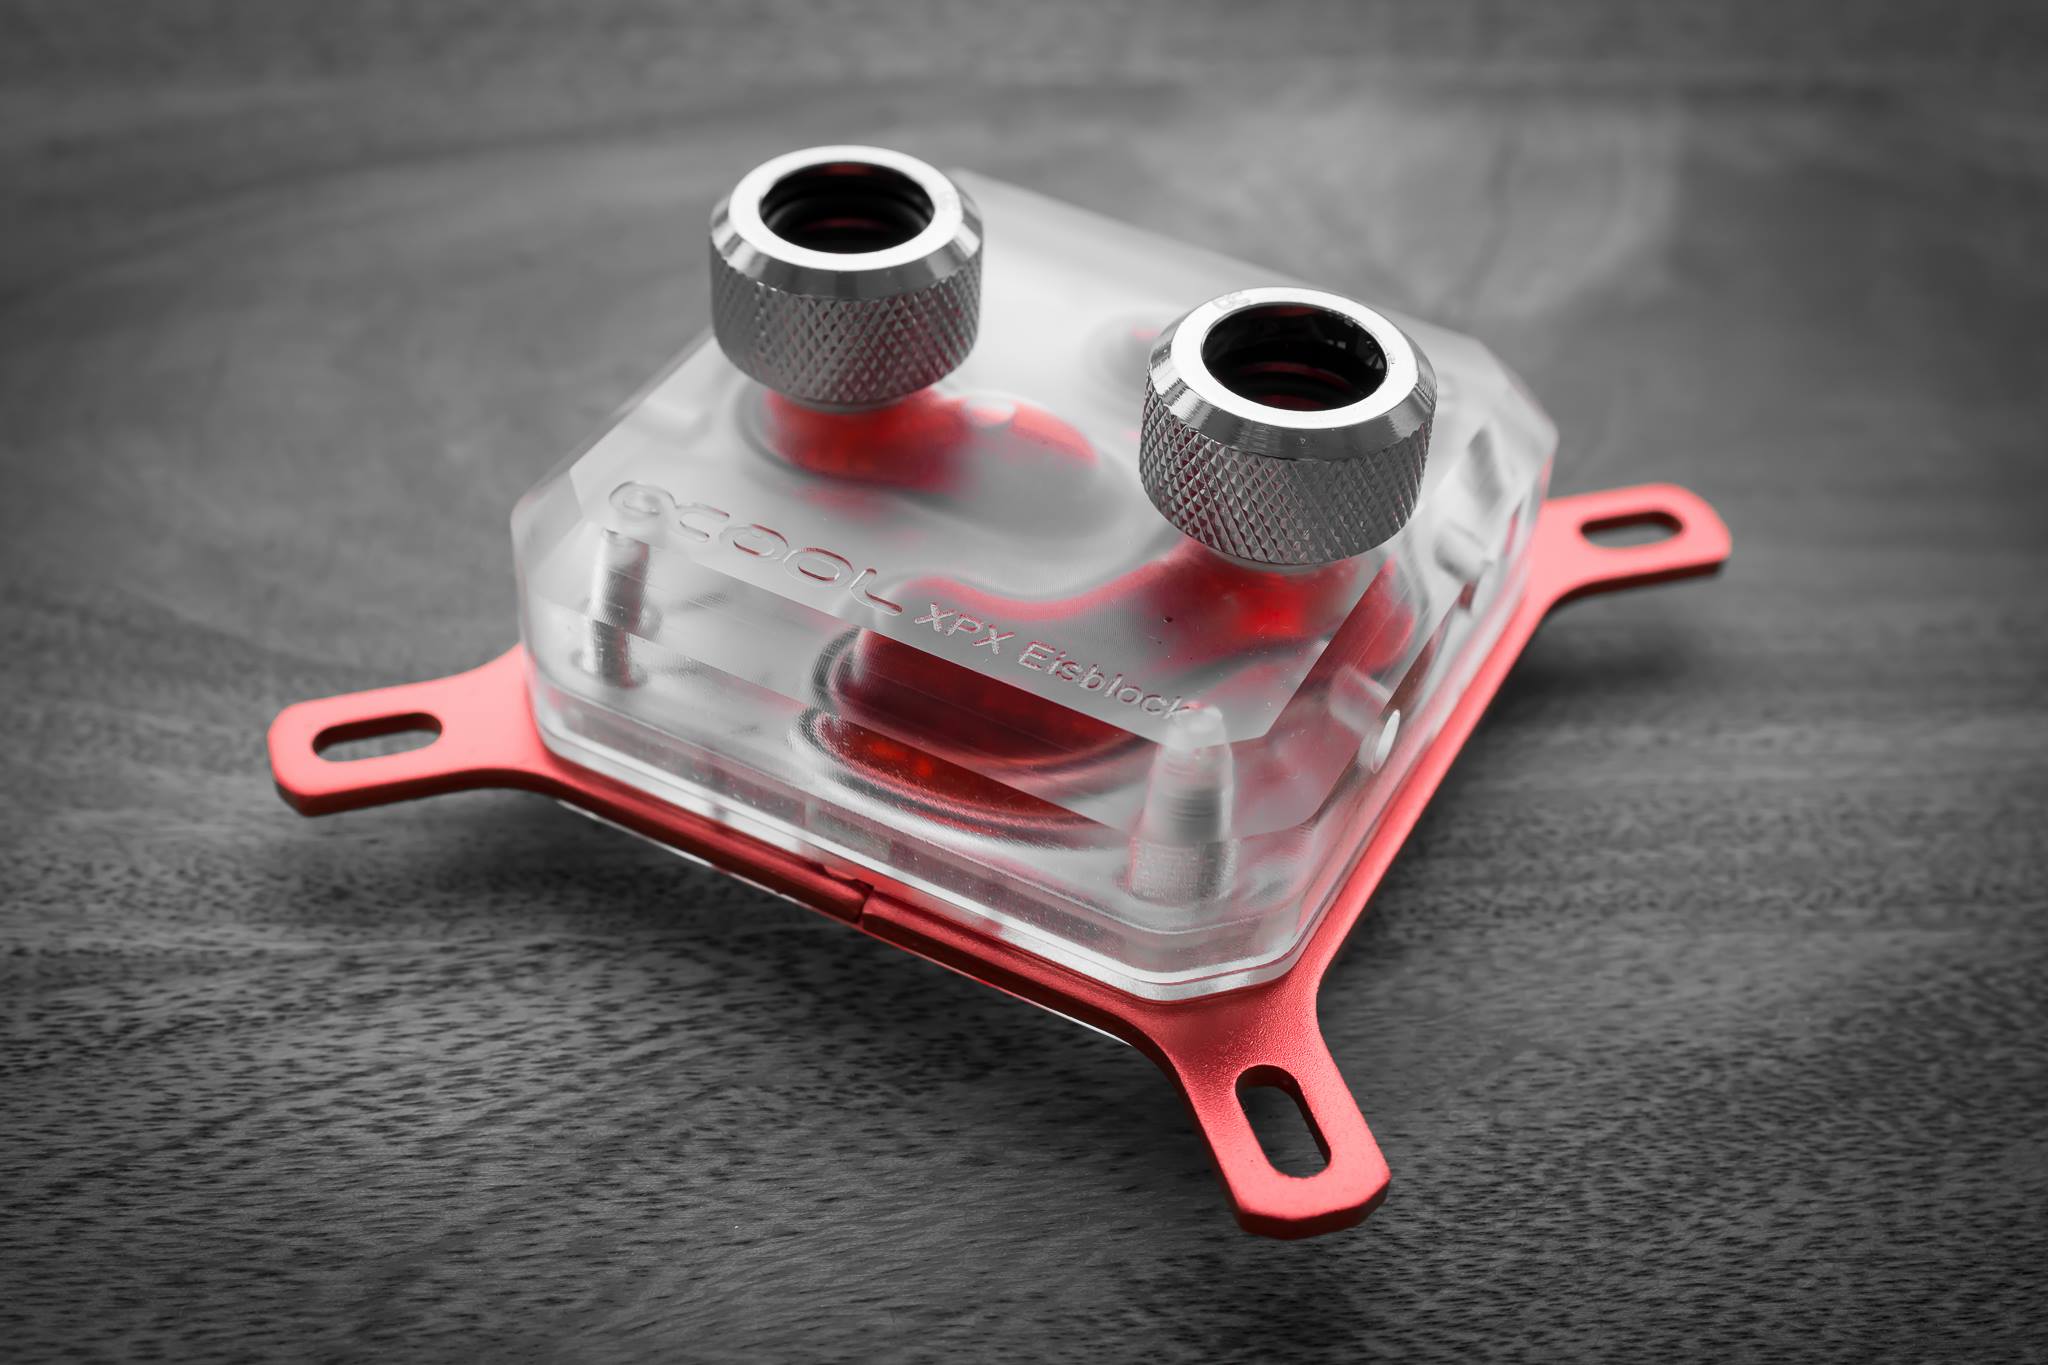
Once the Eisblock is unwrapped itself we can see the design in more detail:

The block itself seems to be made of cast acetal with a thin Aluminum cover. The cover is so thin and the finish so rough that you could be mistaken in thinking it was just spray painted plastic – it’s not, but it’s not good that the quality is such that it could be mistaken. Sadly the G 1/4 port threads are also plastic which means it is easier to strip them than if they were metal. The good news is that the threads are 4-5 complete turns and that should make stripping less likely.
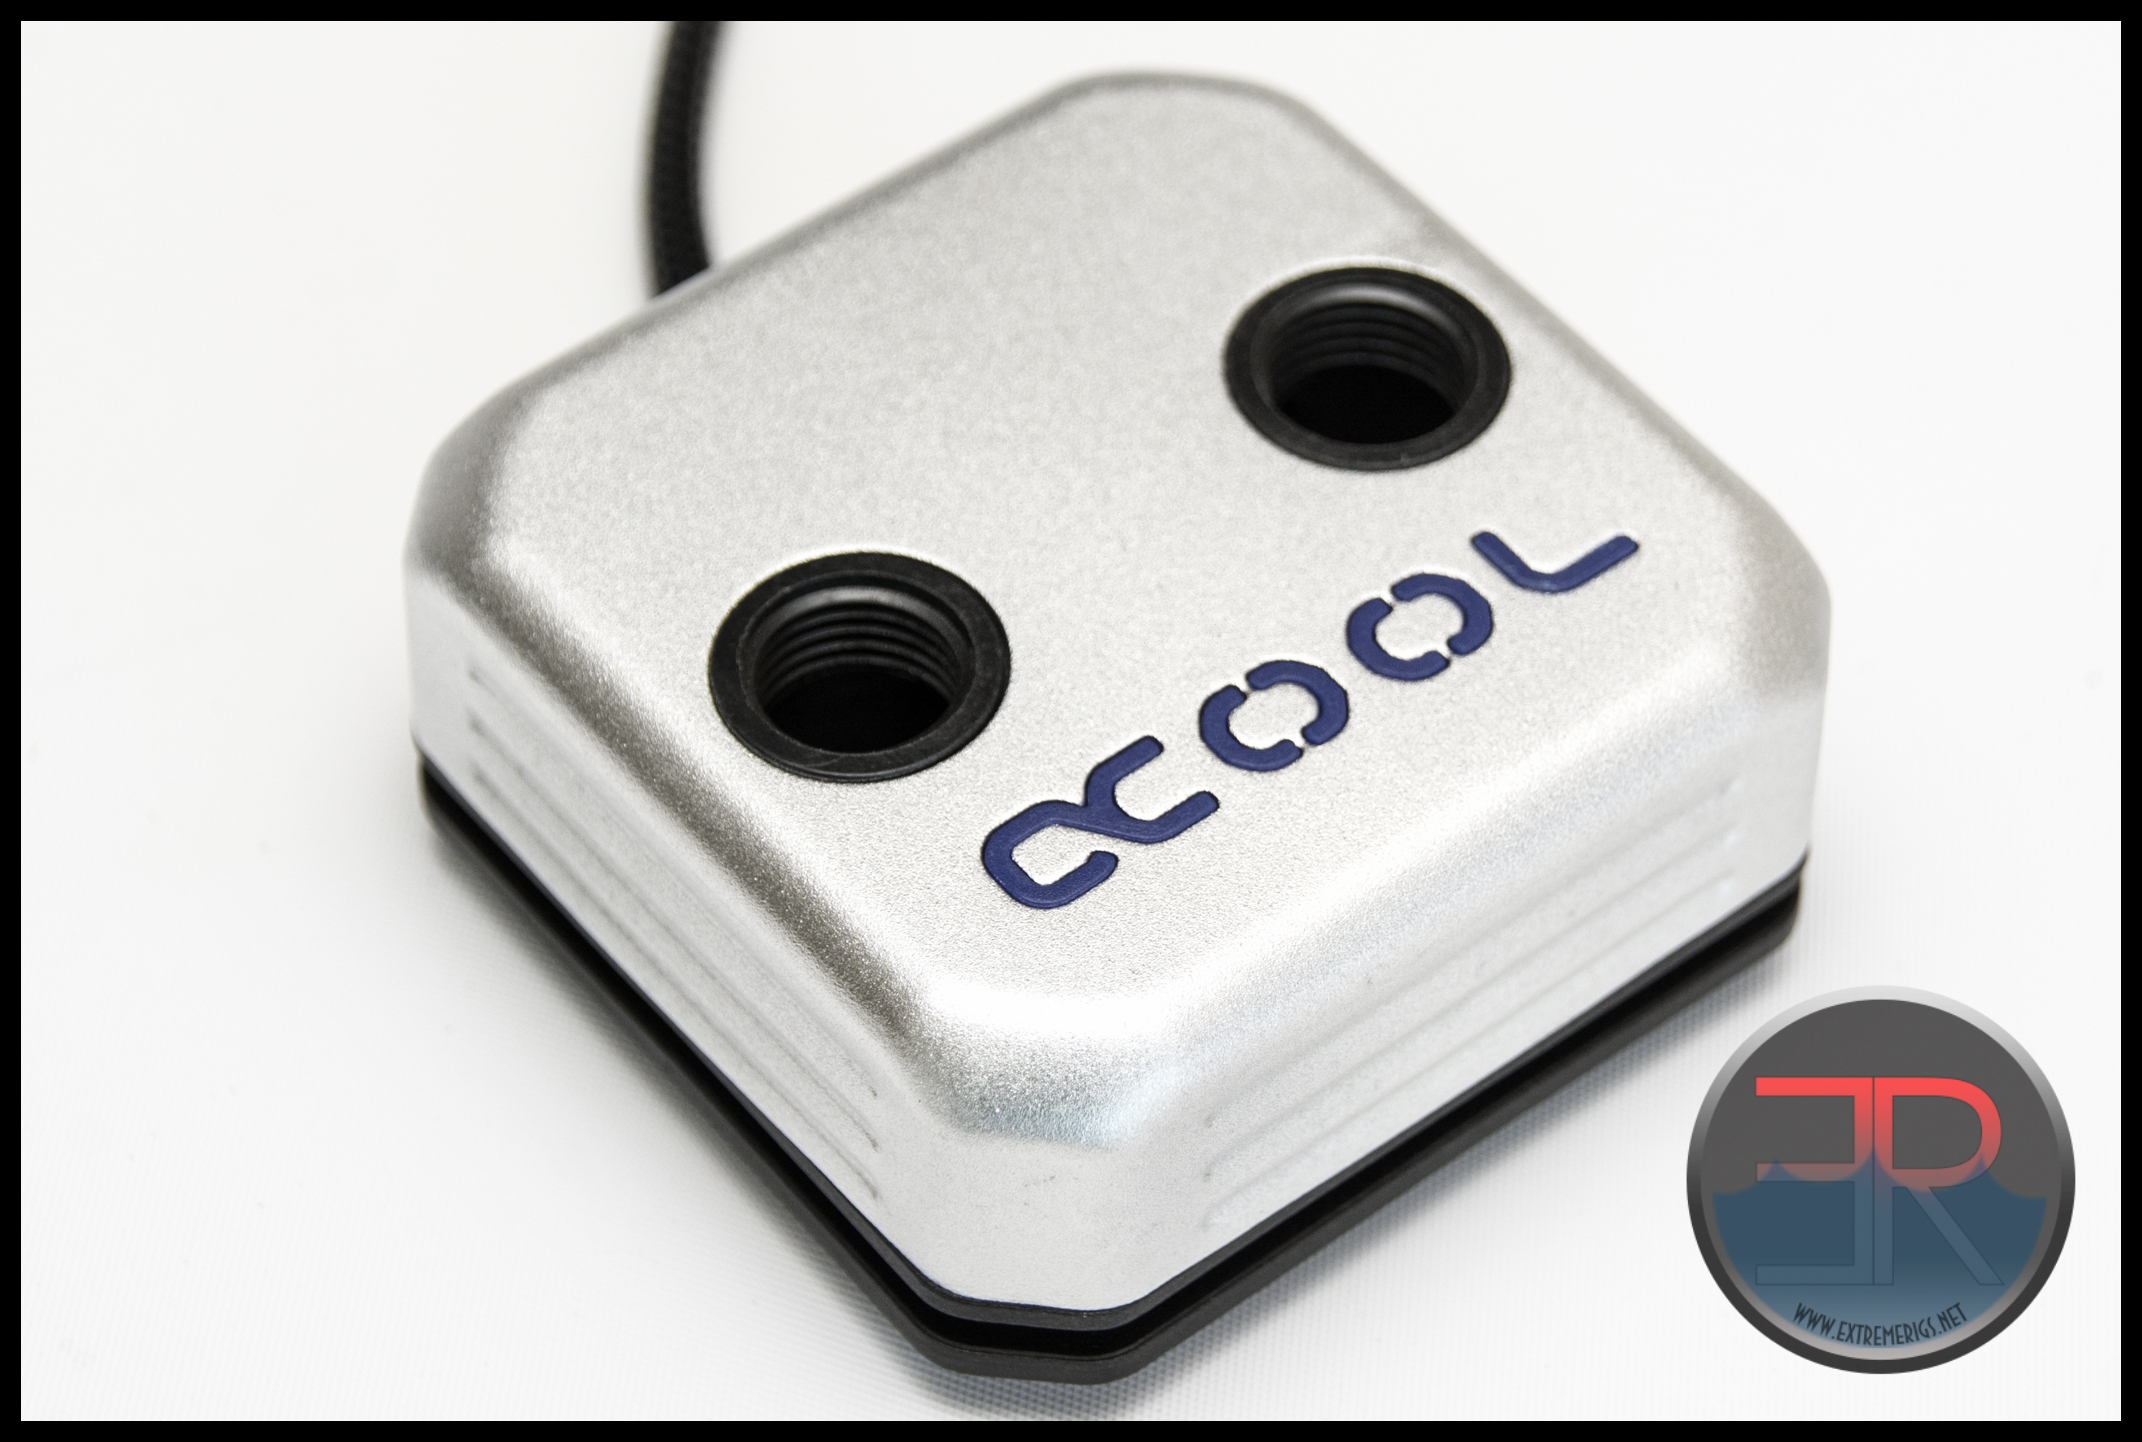
The Alphacool logo is also quite prominent. It’s also blue by default and it can be lit up by a built in LED. Although you can buy alternative color inserts we’d rather the default be white. In fact we’d rather the logo be smaller, subtler and not lit up at all. Our opinion is that LED’s should be RGB and light up the internals of clear plexi blocks. This design is, in our opinion, bordering on the tacky and obtrusive. The good news is that the new tops that are set to launch look a lot better with their glossy finish even if the logo is still the same.
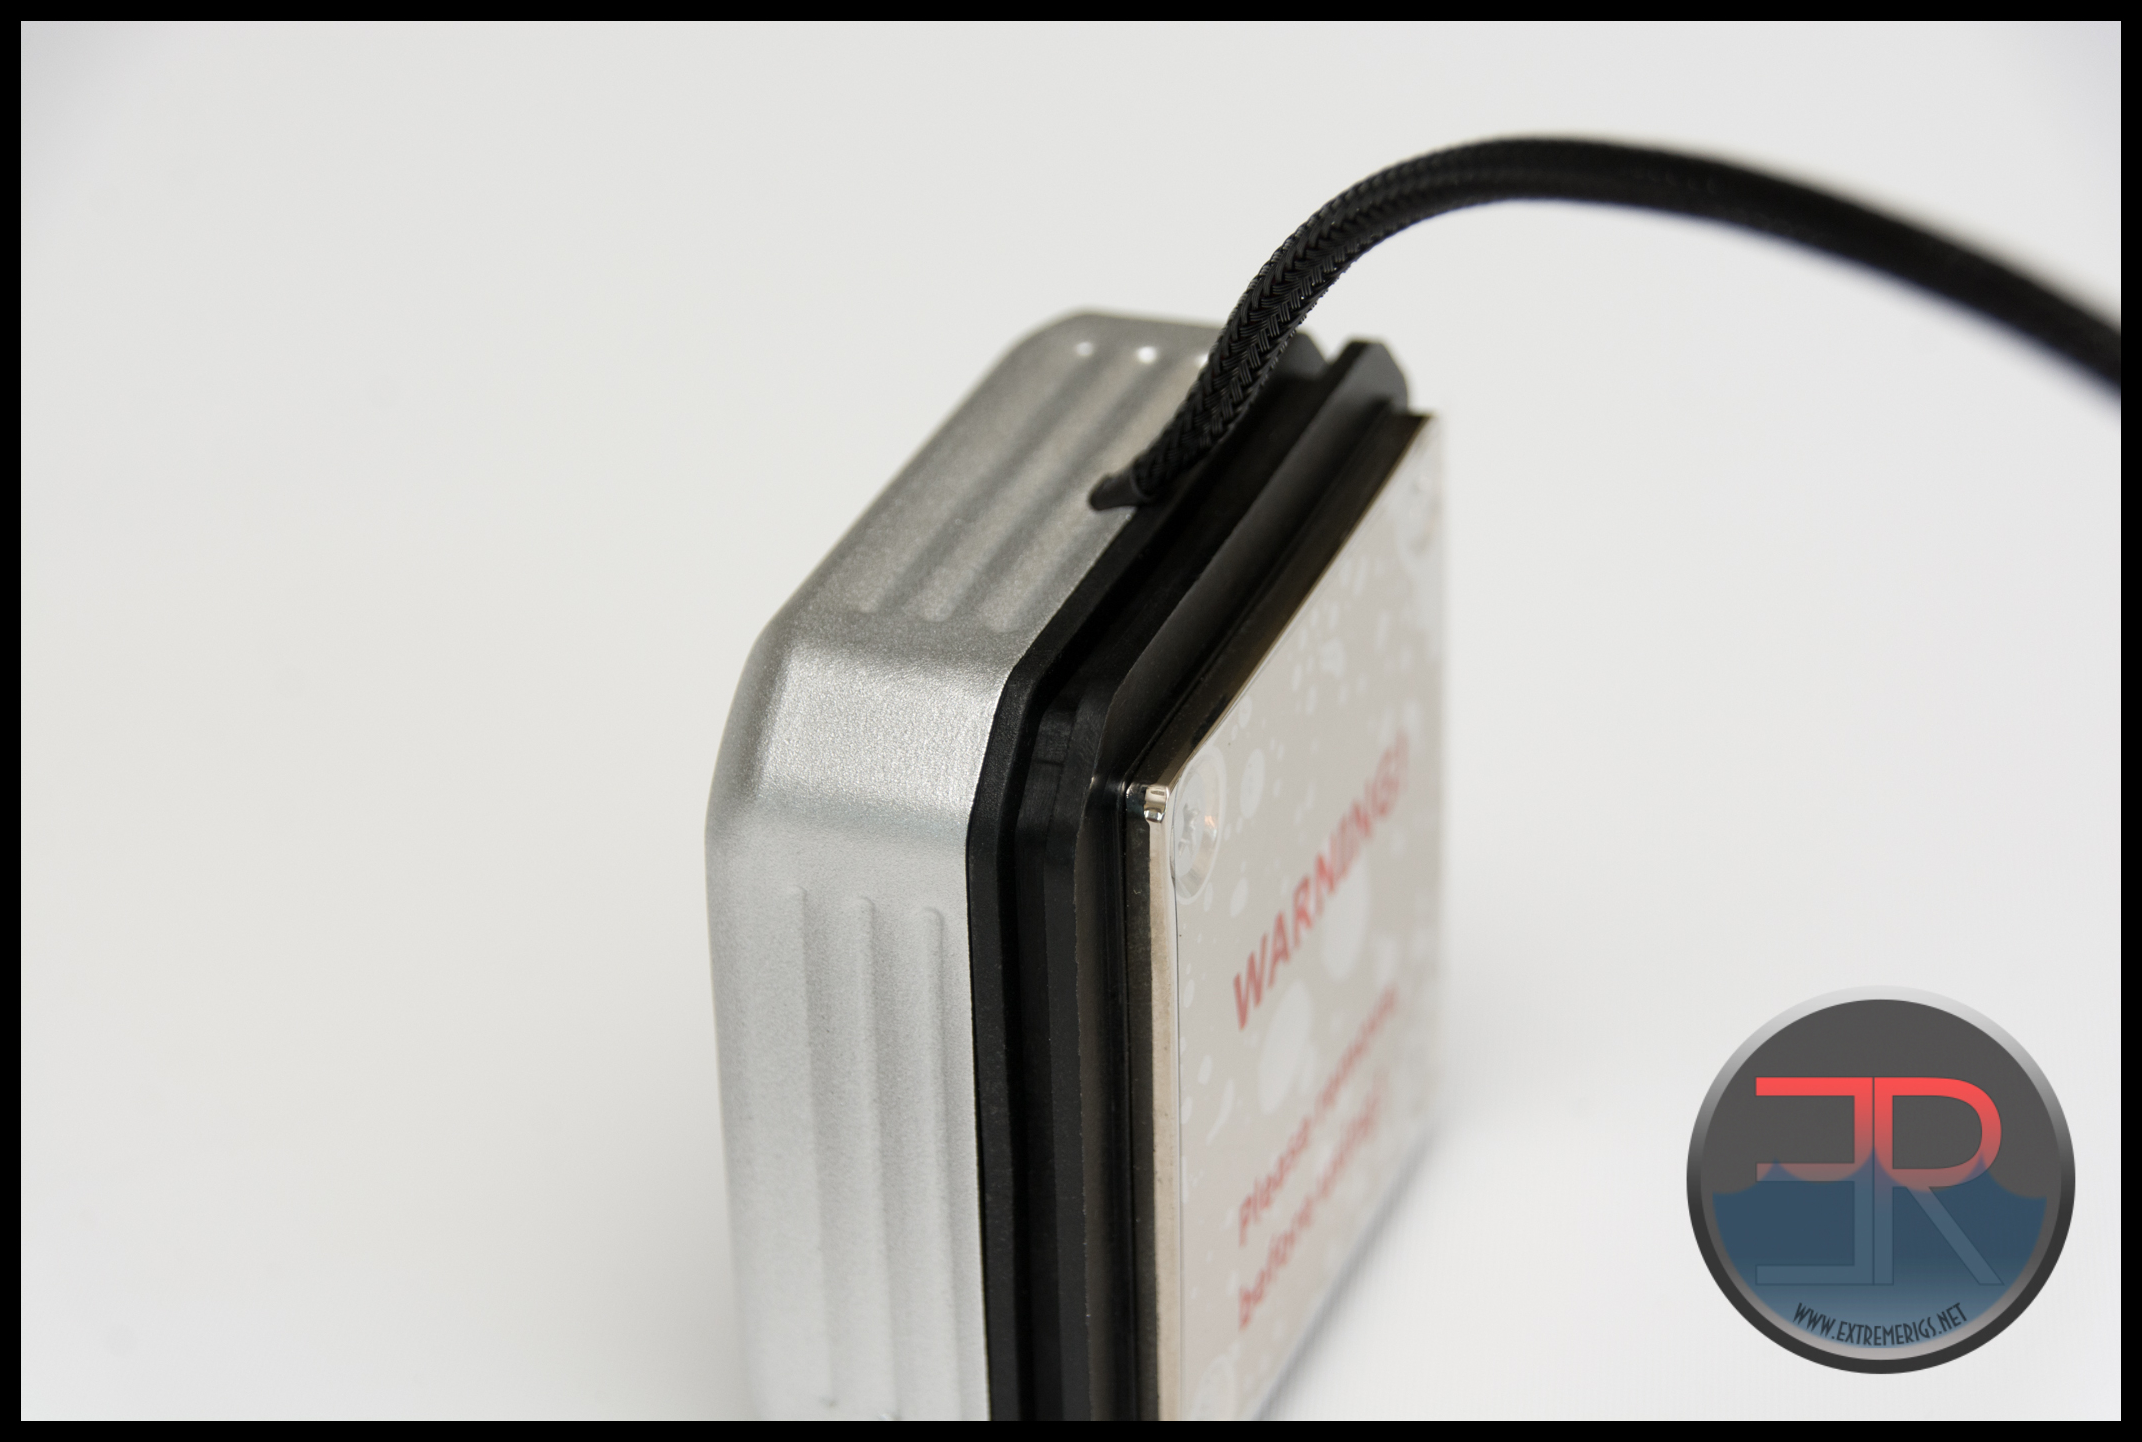
The metal cover doesn’t fully cover the block but ends with about 1/3 of the block remaining. The plastic has a notch carved into all the way round into which the mounting bracket slots. Here we can see that the base is nickel plated copper as is quite standard.
It’s surprising that this is nickel plated, because there is no way to see it once mounted and the nickel plating has zero effect on performance. The base is protected with a clear plastic sticker:
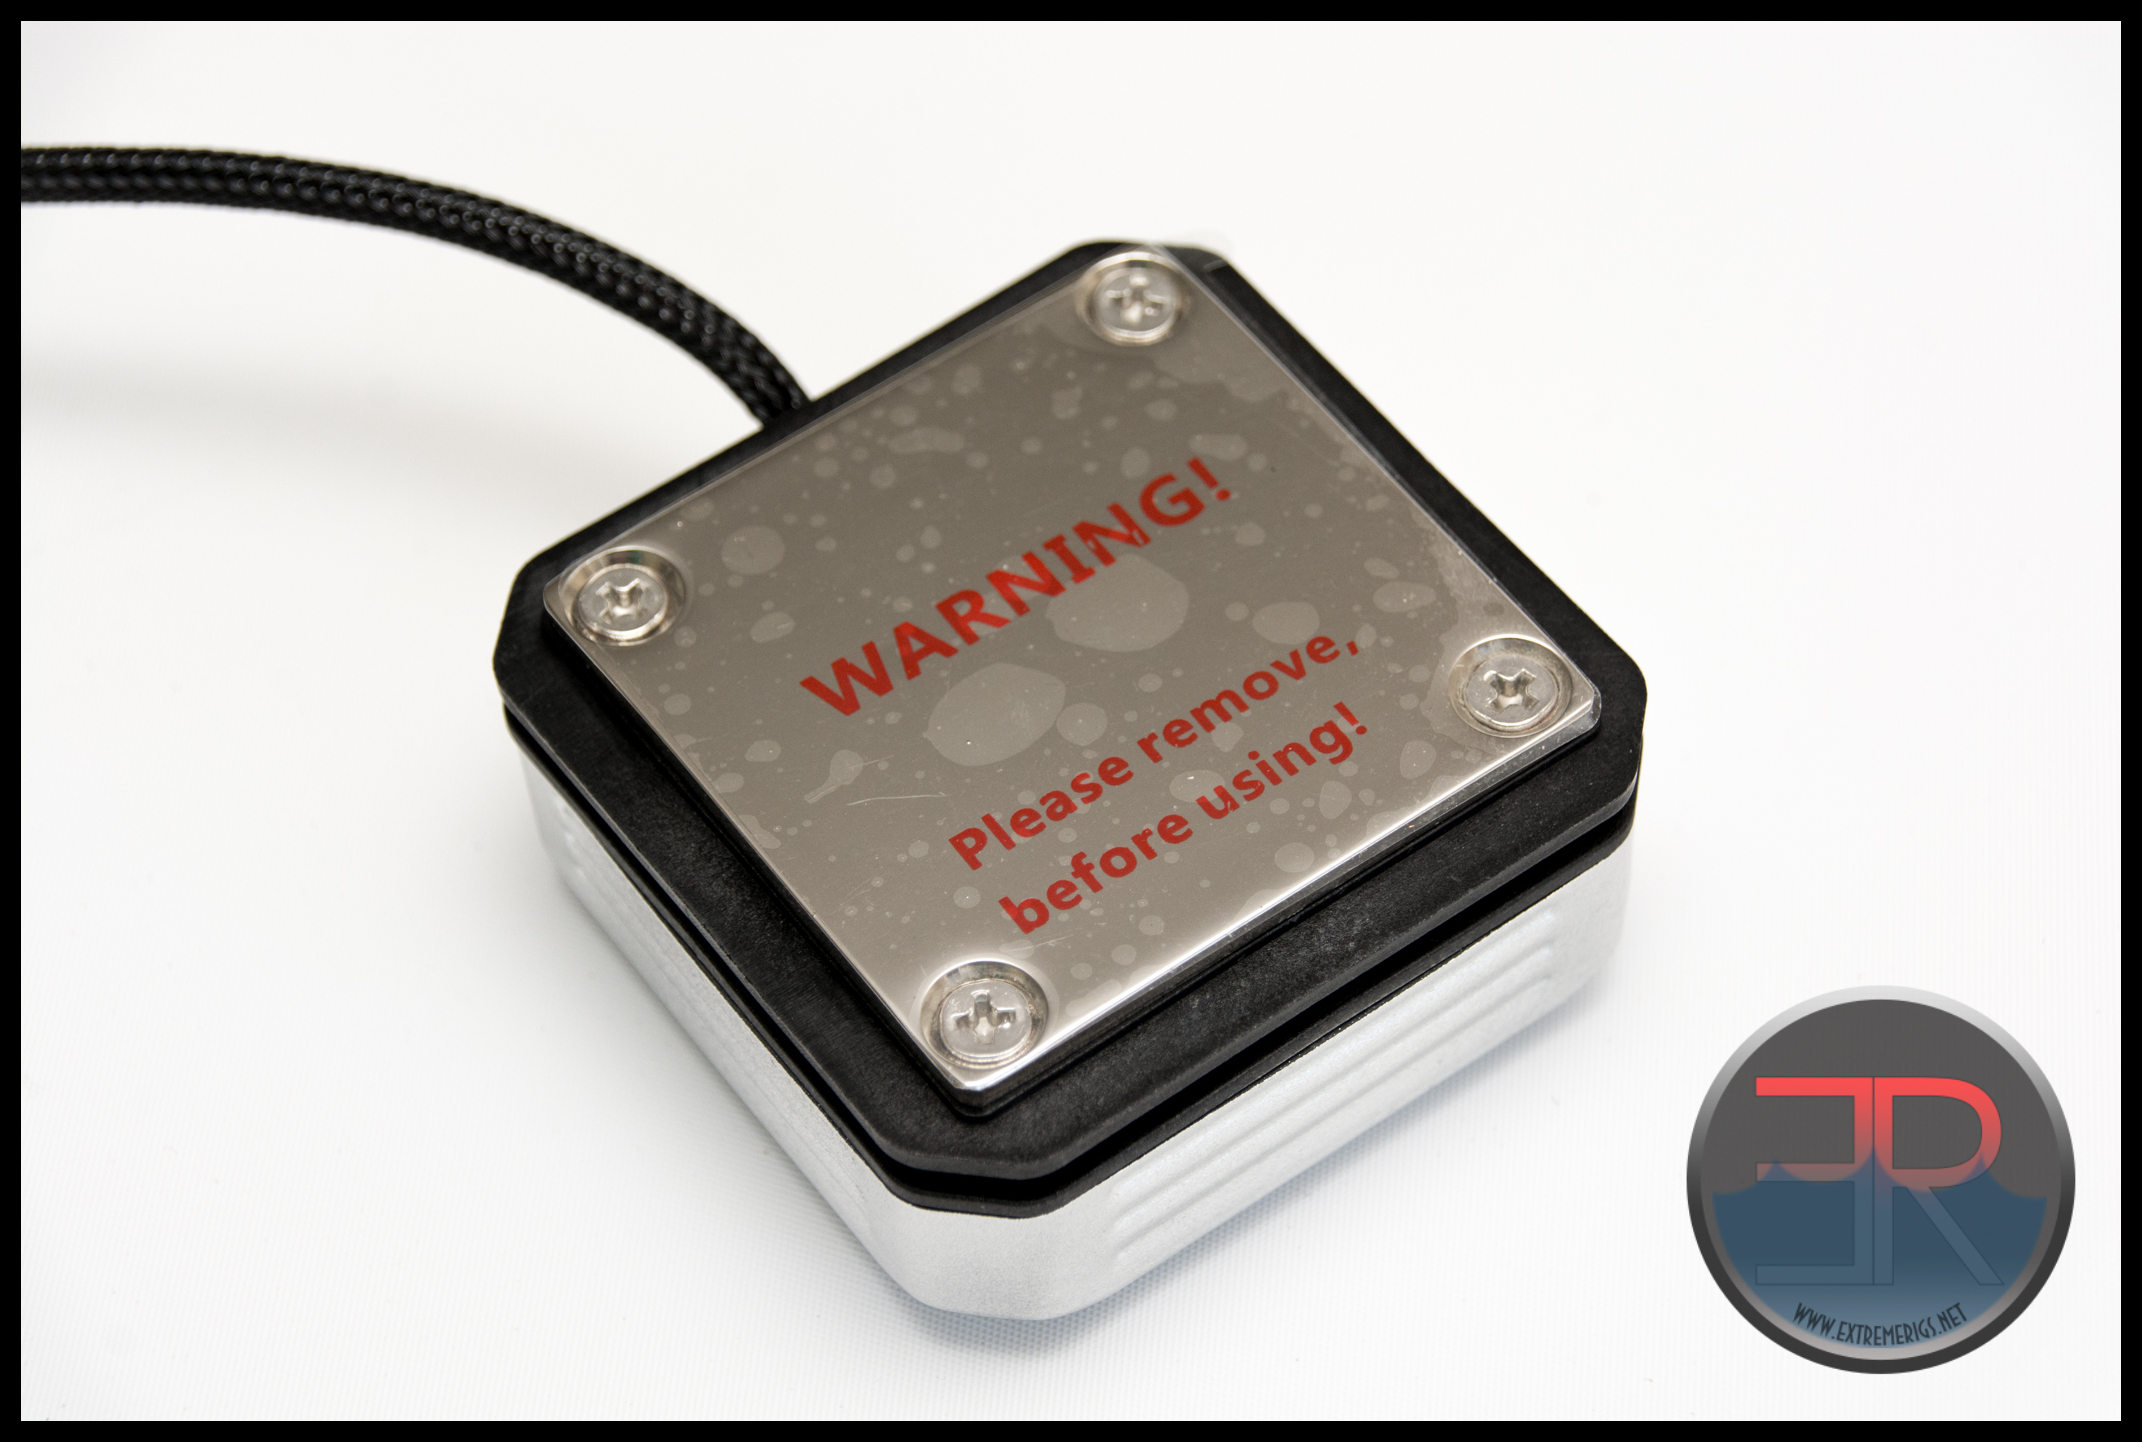
This is a good thing, but the choice of Philips head screws to secure the base is not our favorite. This has been standard for Alphacool for a while now. While Philips head screws are common of course the soft screw heads that Alphacool have used in the past have been easy to strip. These screws felt harder than previous versions and we had no problem this time at all. We still would have preferred a torx head screw like the CPU-390, or an oversized allen key like the NEXT block.
The Eisblock’s mounting plates consist of two pieces which snap together without requiring the block to be taken apart. This is better than EK’s Supremacy for example who make you take the block apart, or XSPC’s Raystorm where the mount is loose. The system works well although whether it will tolerate high mounting pressure over a long time remains to be seen.
The Eisblock XPX aesthetic is quite simple despite the logo and the rounded bevels and ribbing. Personally I think the black version looks better than this matte silver one.
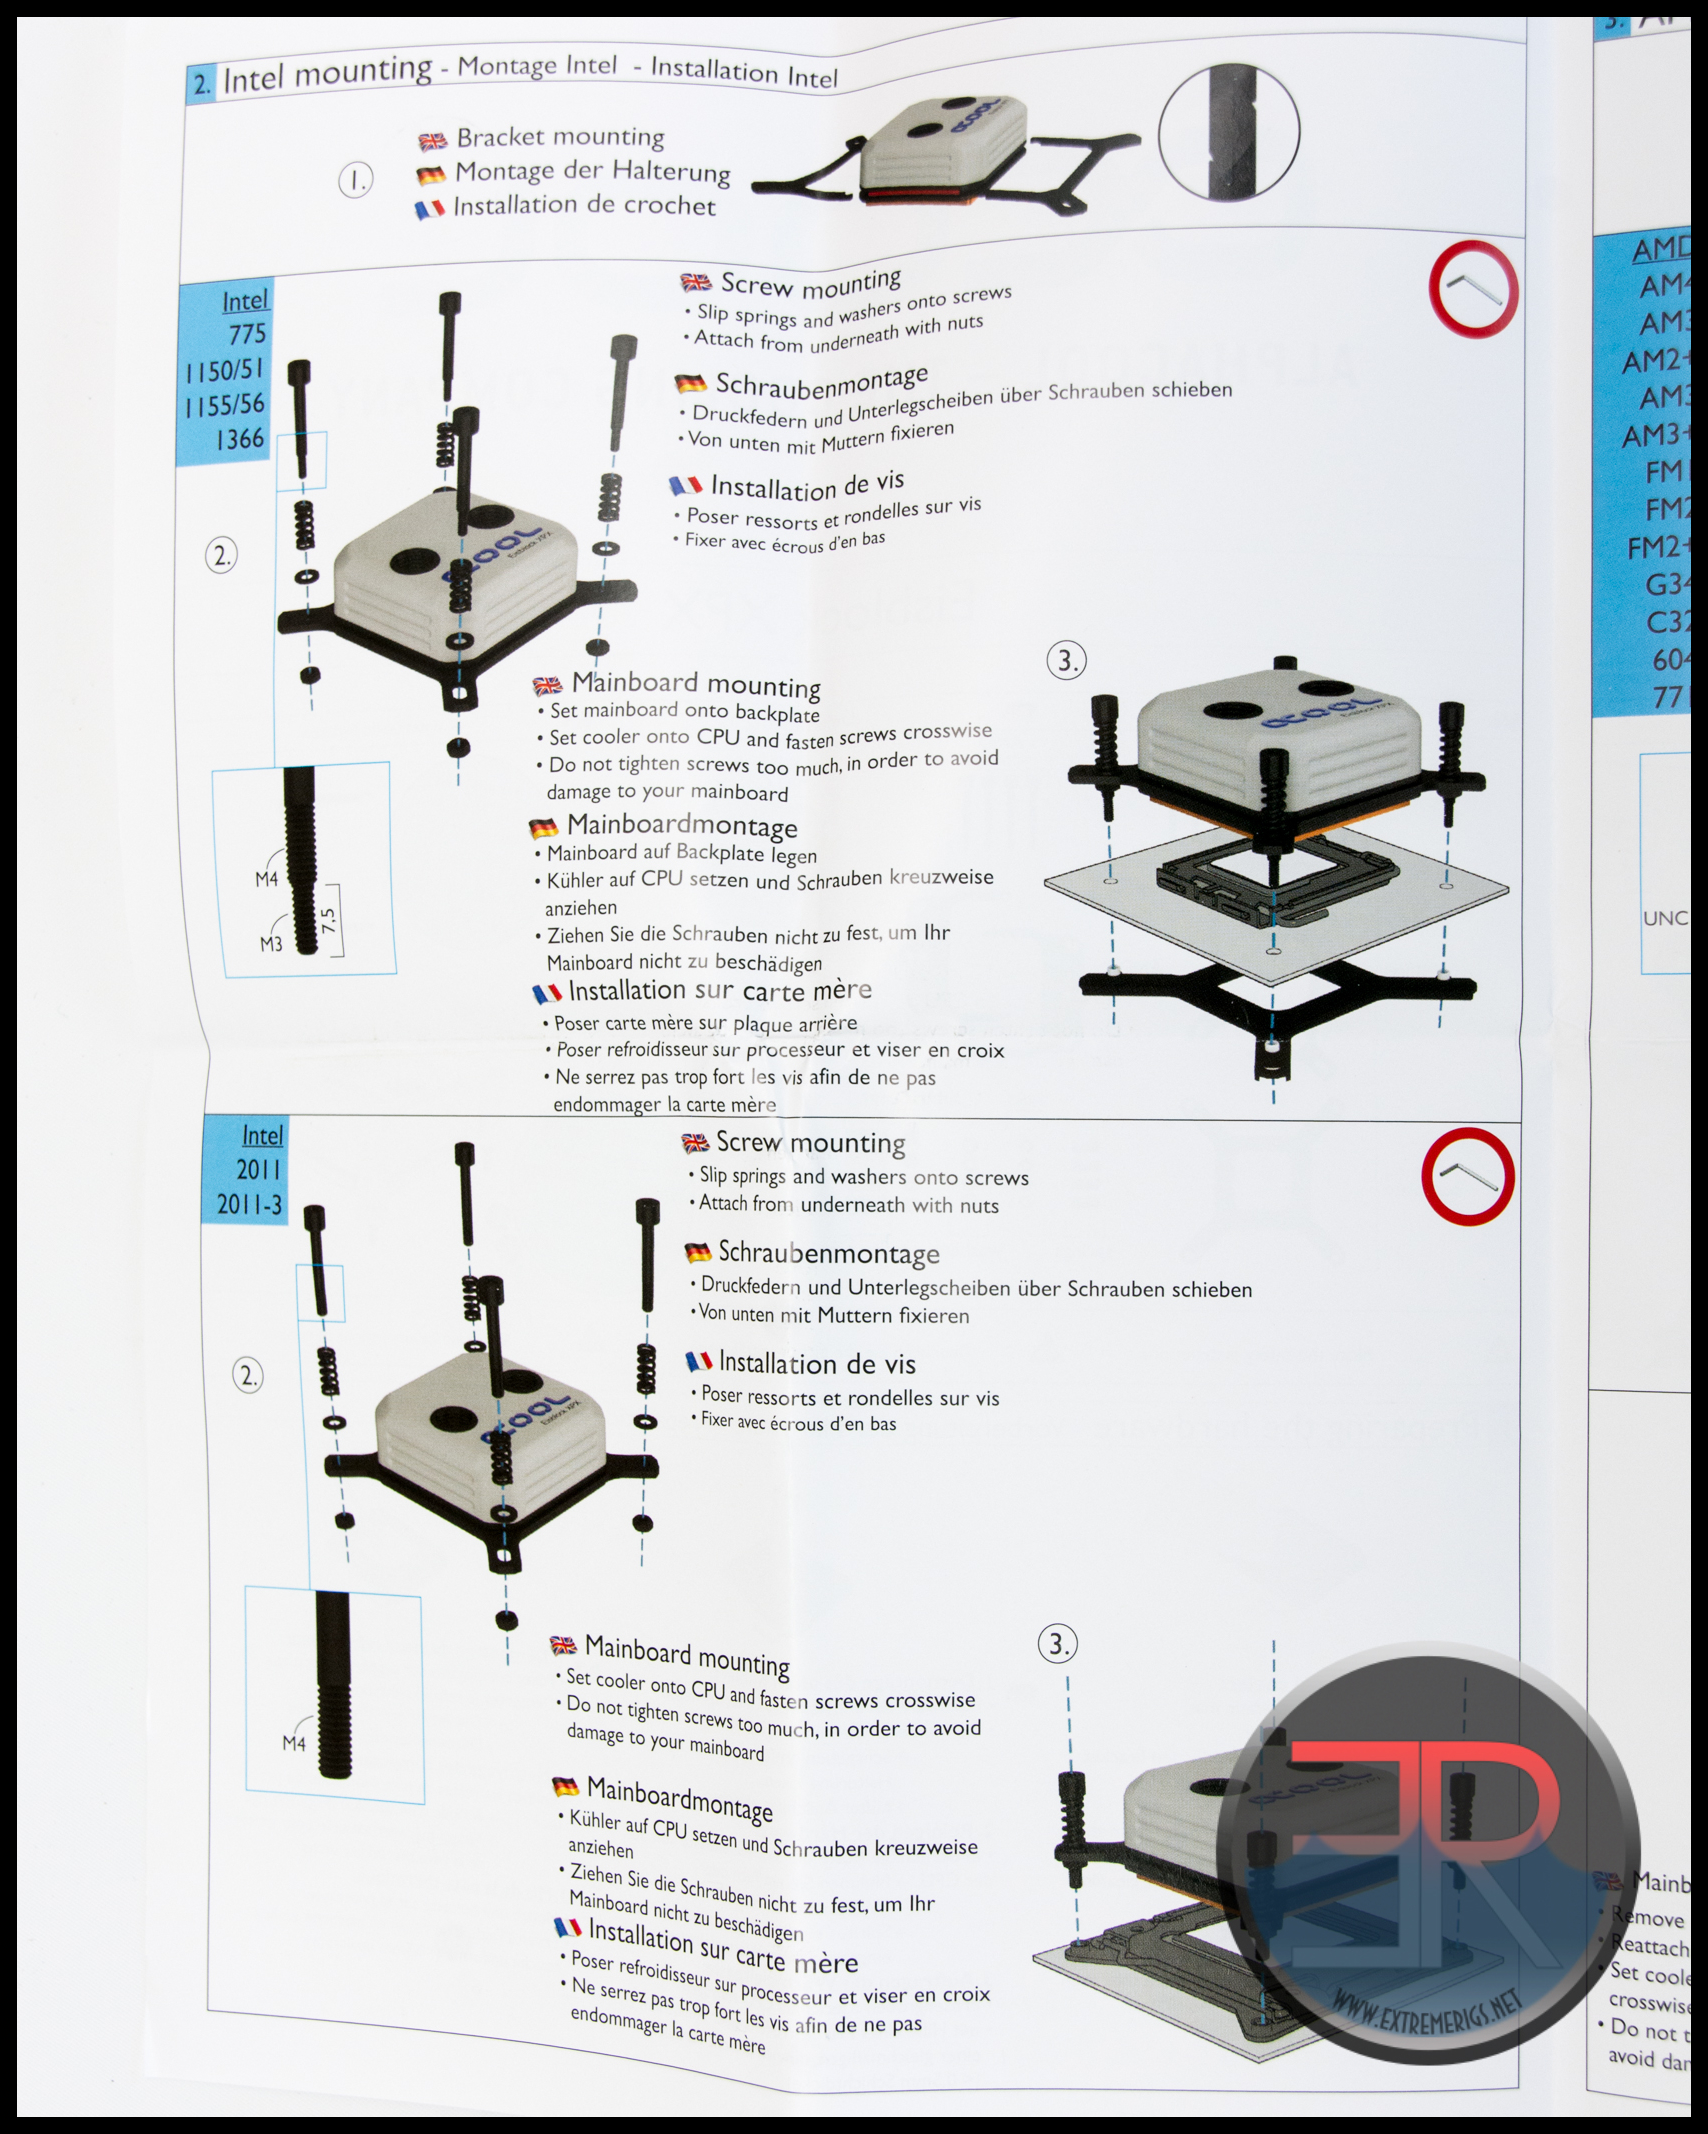
The Intel mount consists of thumbscrews coupled with the usual washer and spring combination. The instructions at launch said to use nuts to secure the thumbscrews to the mounting plate. Later on this was changed to remove them only on socket 2011 boards. I tested the block before this happened and so the nuts were left on as below:
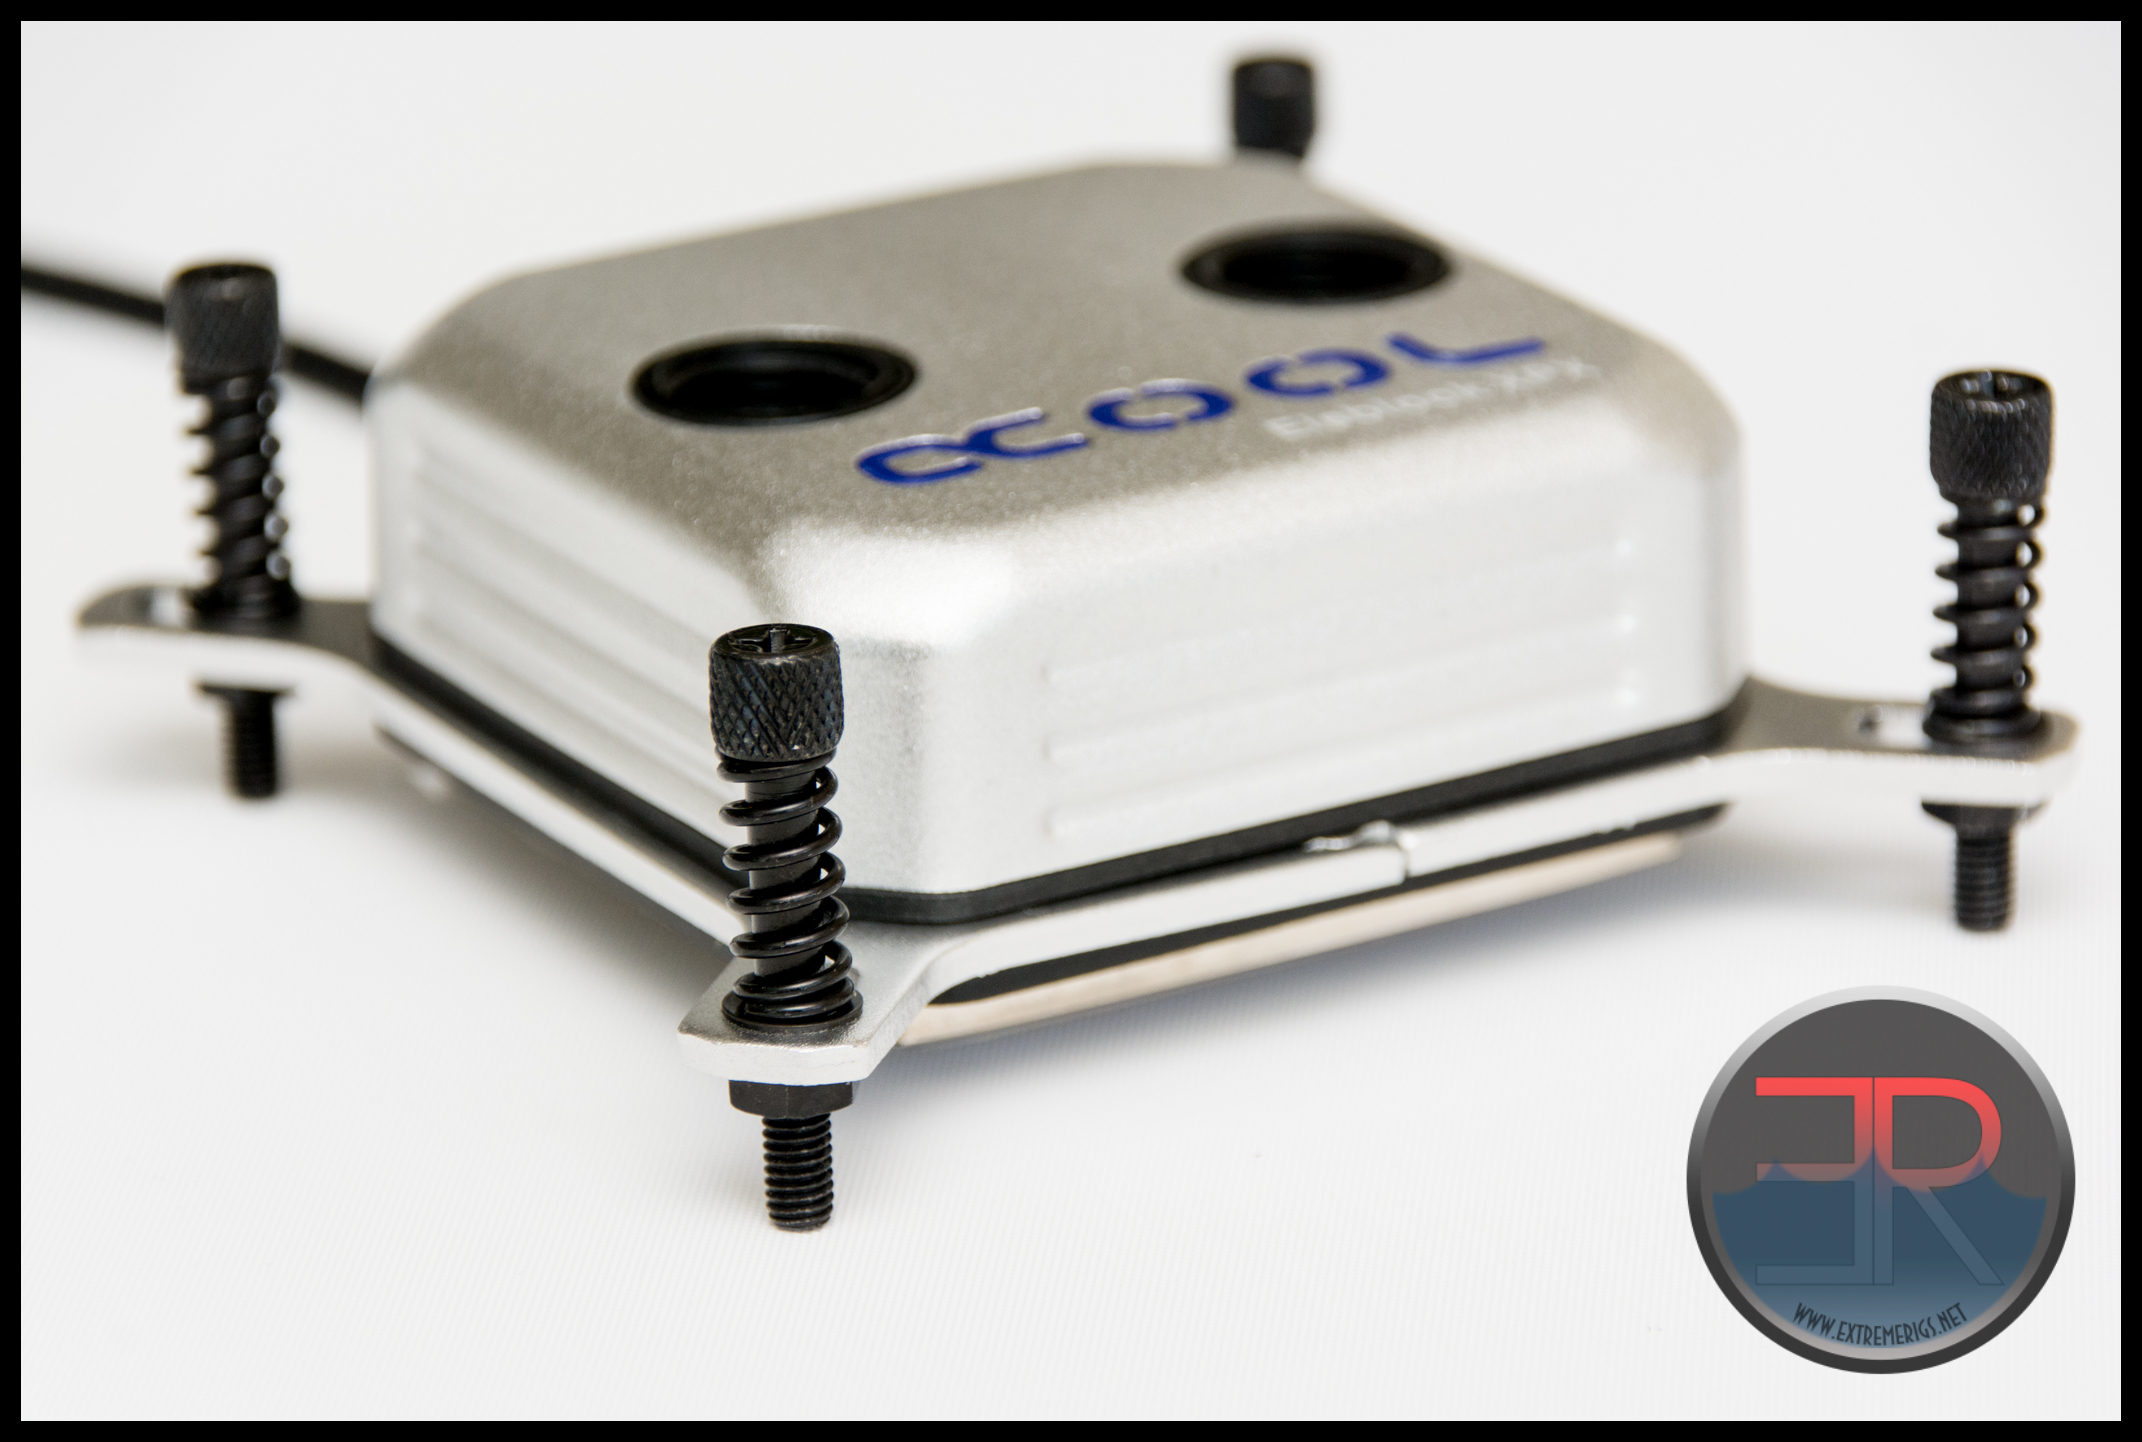
The mounting pressure was perfect on my EVGA Micro 2 X99 board. It’s possible that boards with other sockets, such as Asus’ own custom socket may cause problems the nuts.
Once the block is mounted there are plastic caps that can be pushed on over the thumbscrews. This is a great simple solution to the ugly aesthetic problem of what to do with the thumbscrews:
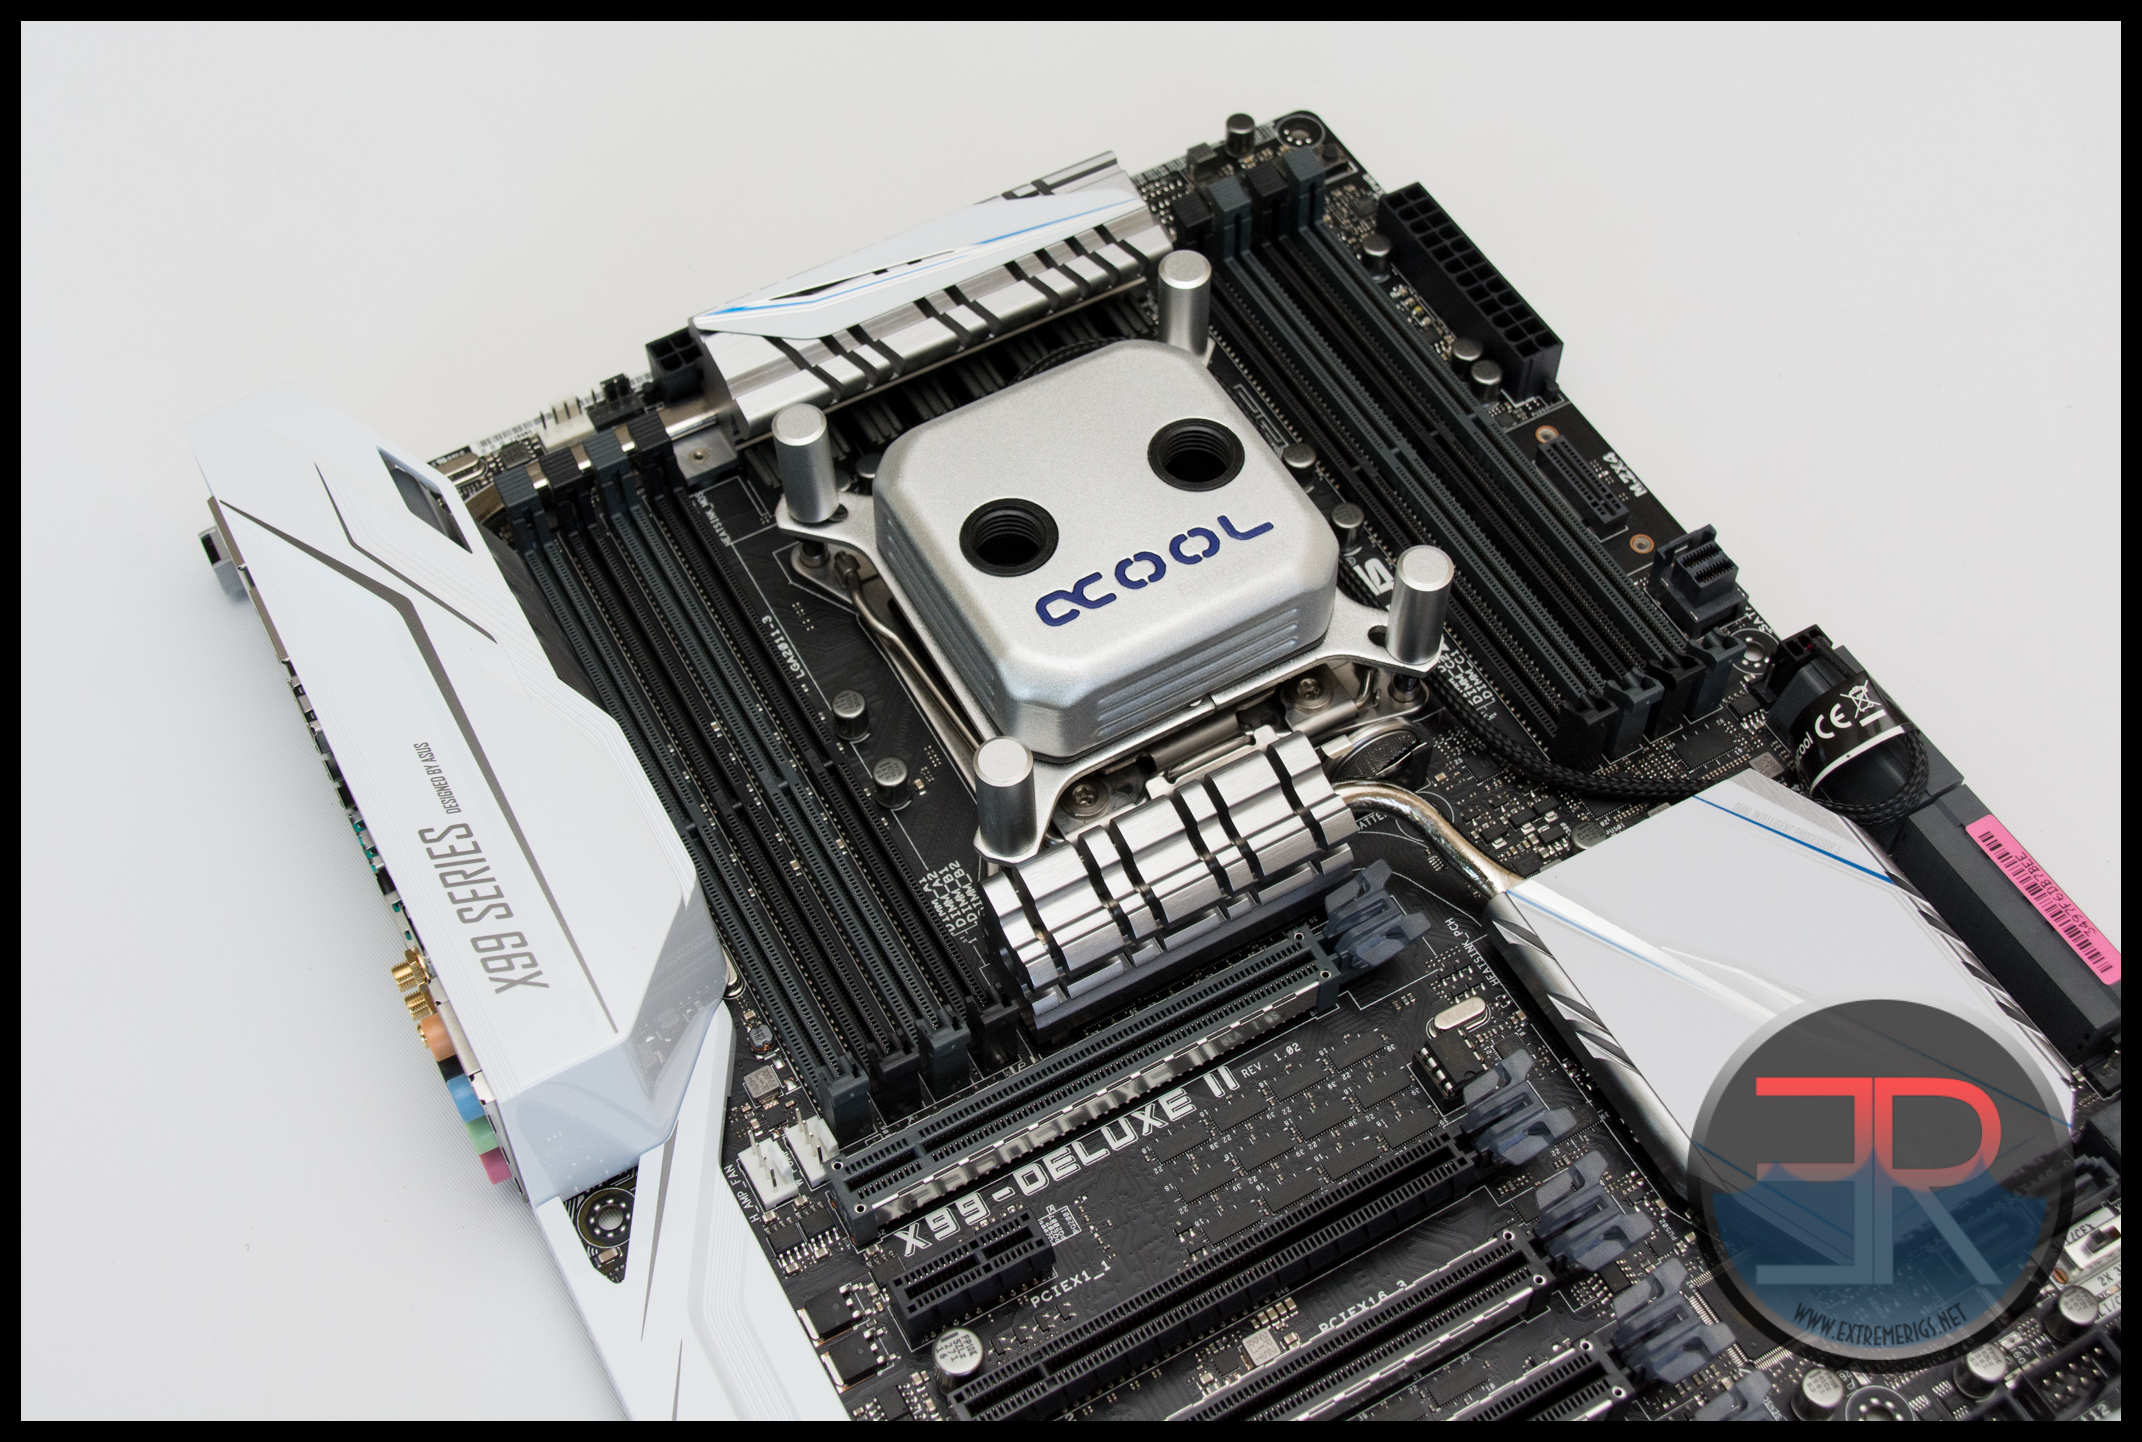 While the thumbscrew caps still stick out due to their height, they still look far better than the raw screws:
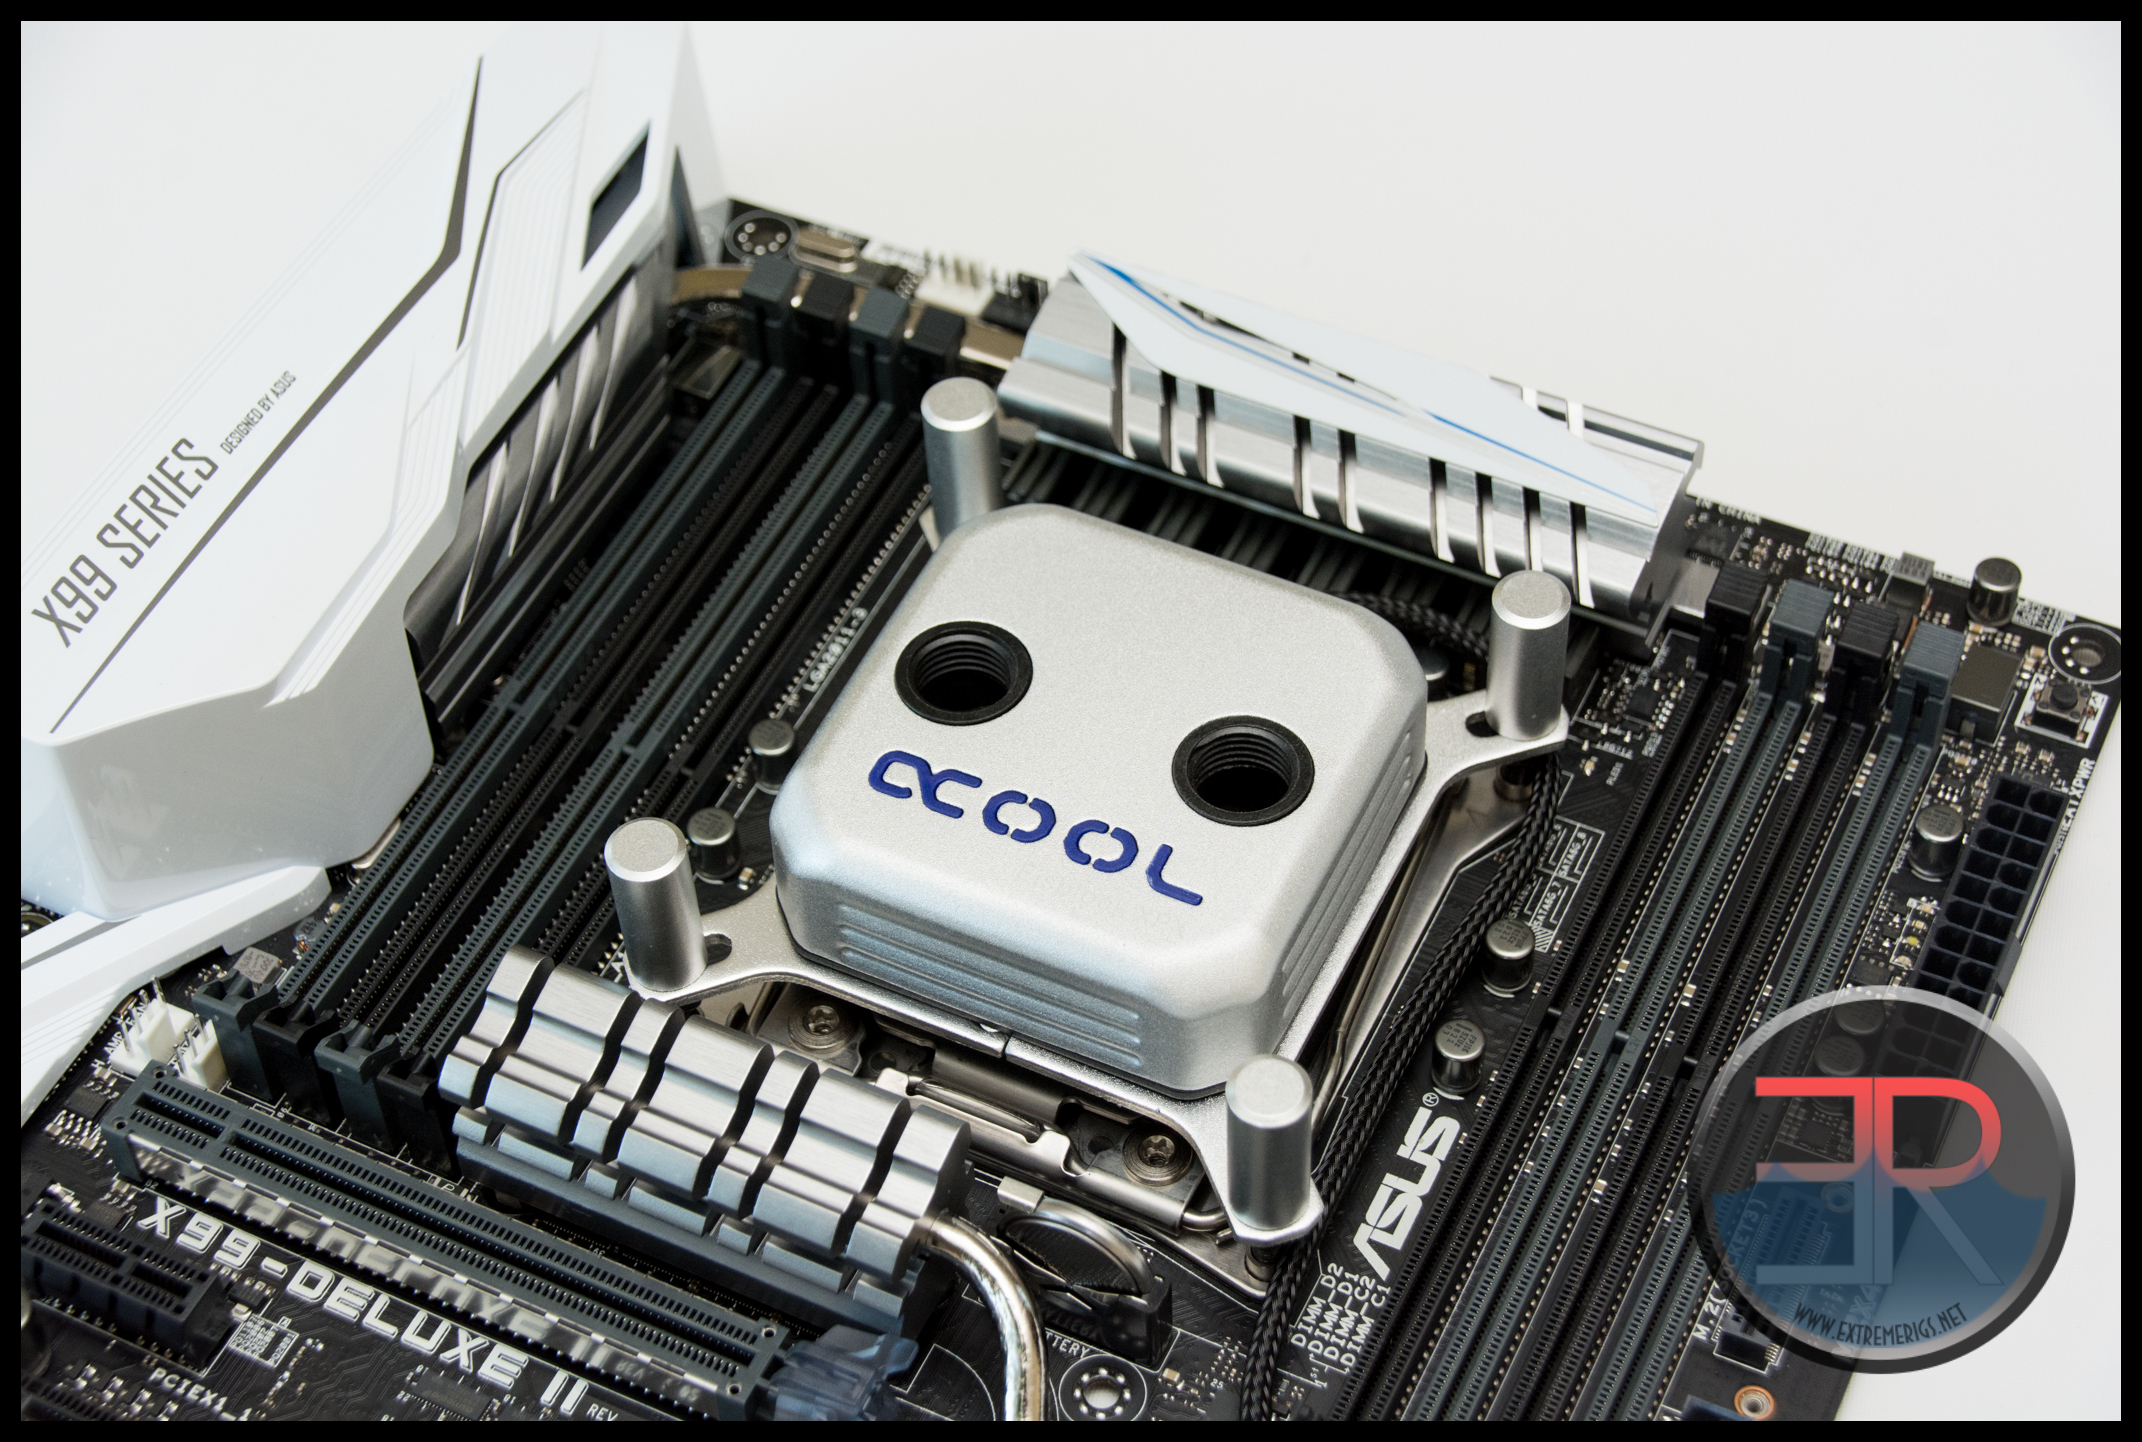
The color is also a perfect match for the rest of the block, and indeed for our Asus X99 Deluxe board.
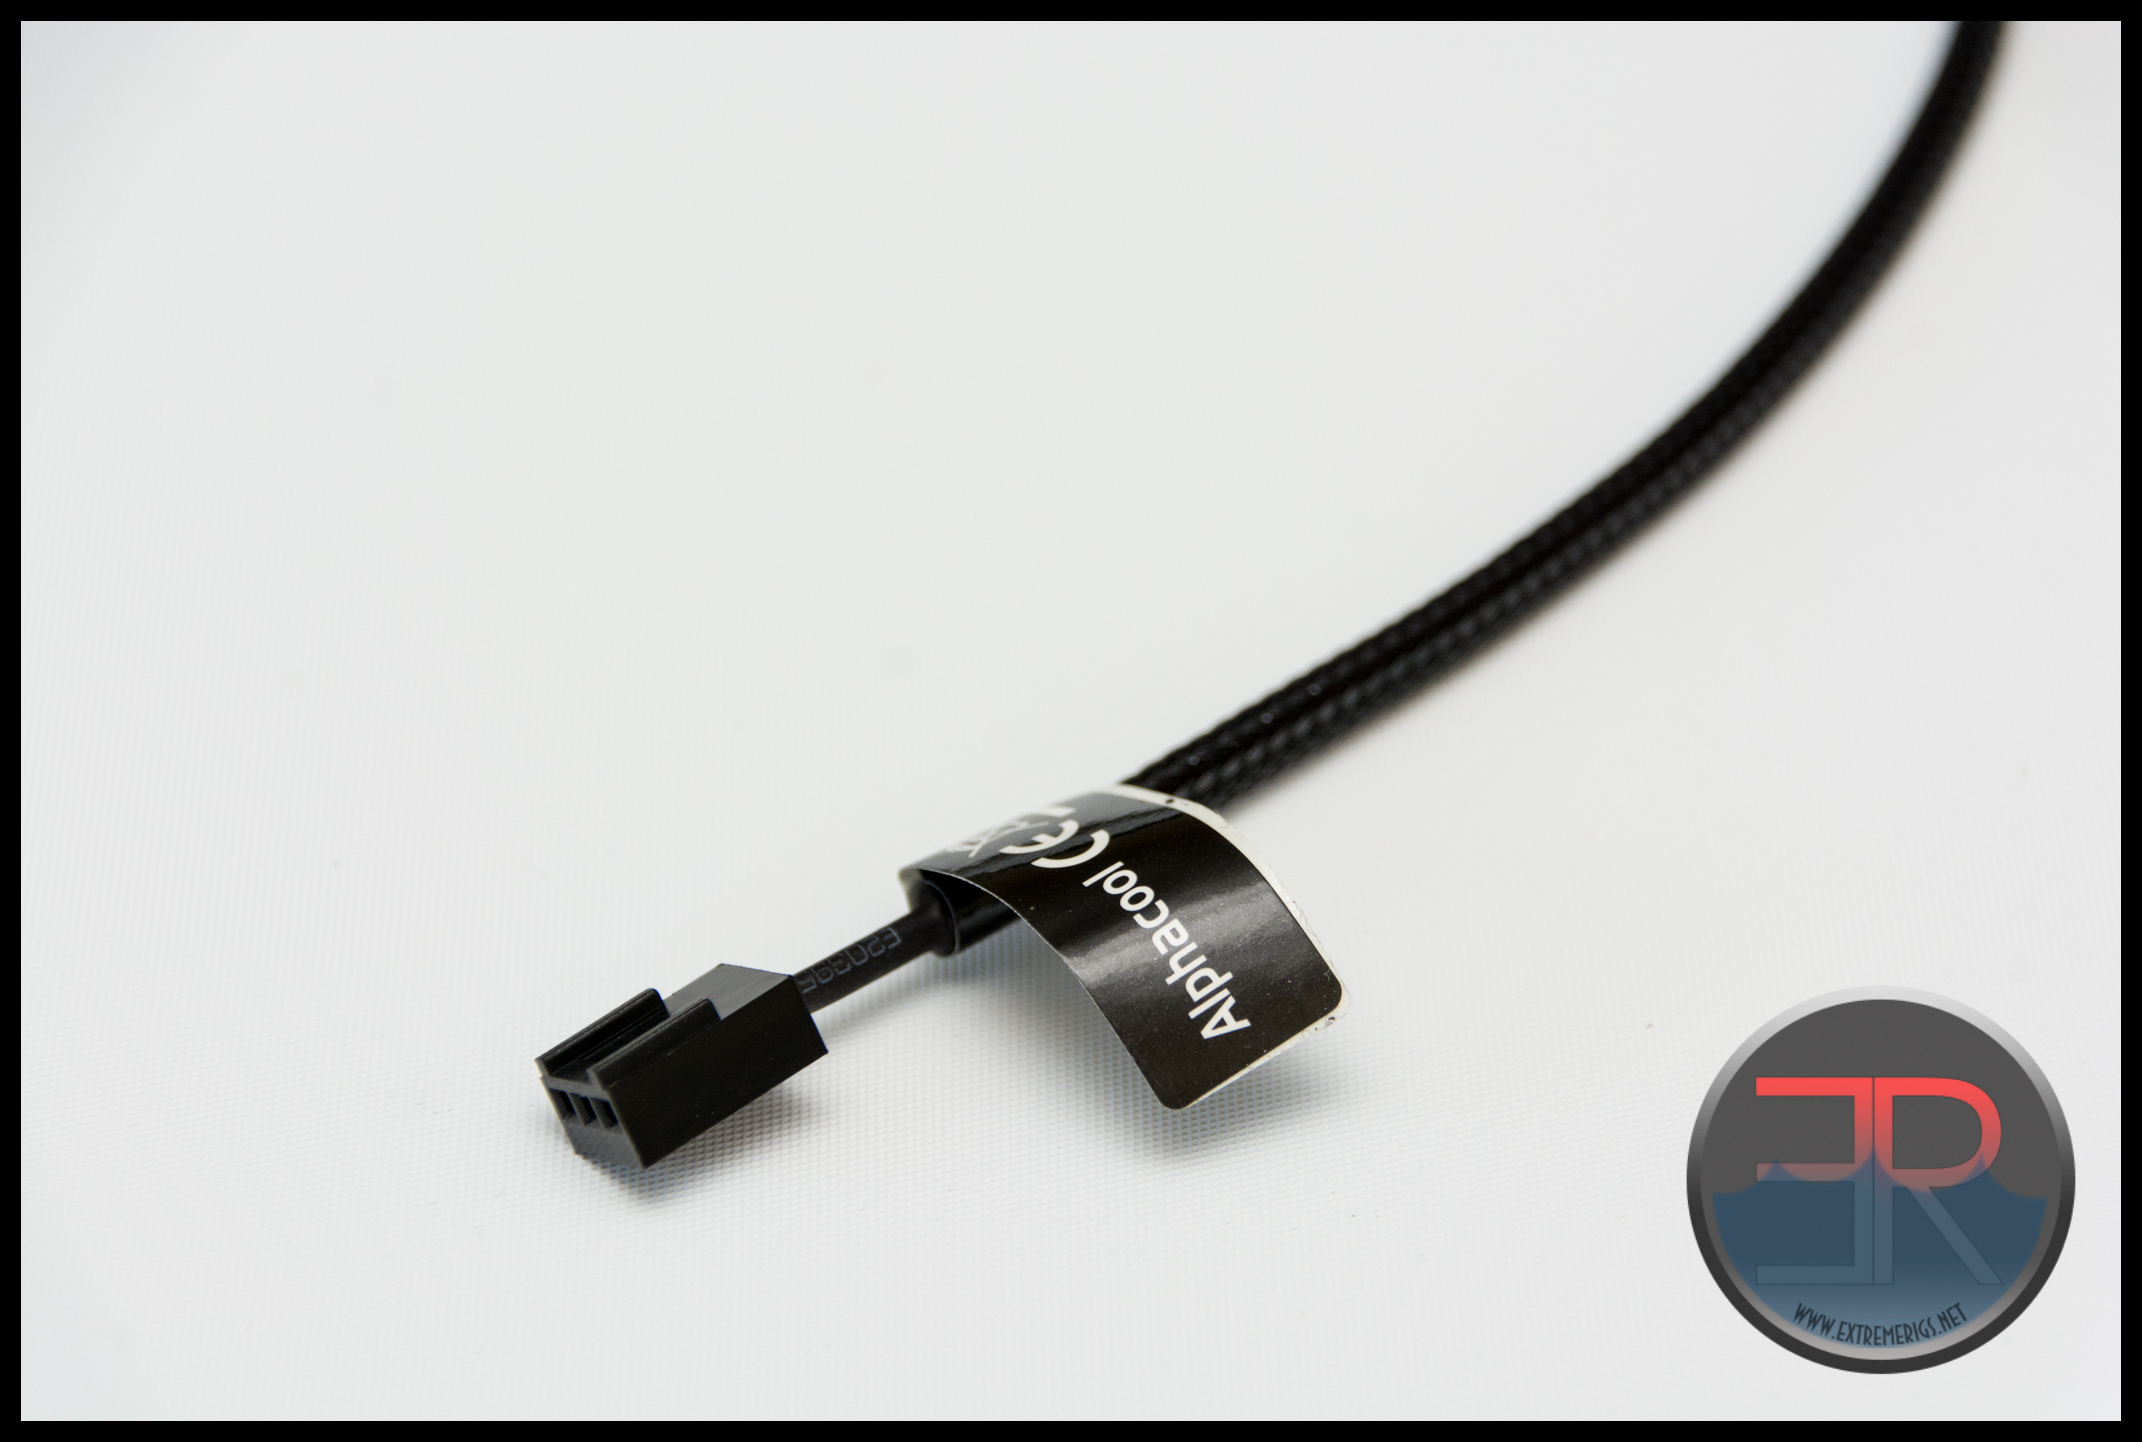
The internal LED for the block is powered by a standard 3 pin fan header. The cable is sleeved in black which is a solid choice. As usual the sleeve doesn’t go all the way to the header, but the wire seems to be covered with black heatshrink so at least there are no bright colors showing. In addition the header itself is black plastic. The OCD among us will still replace the sleeve and remove the sticker but most will not need to bother.
The nickel plating on the base has been polished to a nice mirror finish:
For reference the early instructions that have since been modified are included here for completeness but spoilered seeing as they are out of date.

Features
The feature list here is as described by AquaTuning’s (not Alphacool’s) website and is pretty standard:
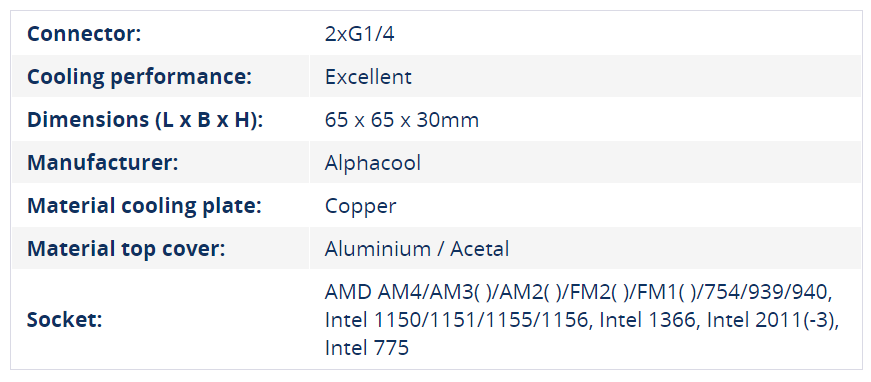
For reference the port to port spacing is measured at a nice and wide 37.3mm (centre to centre)
In addition to the silver version we were sent there is a black version as well:
And in addition there will be versions with different color caps coming soon. These caps are supposed to be upgradable:
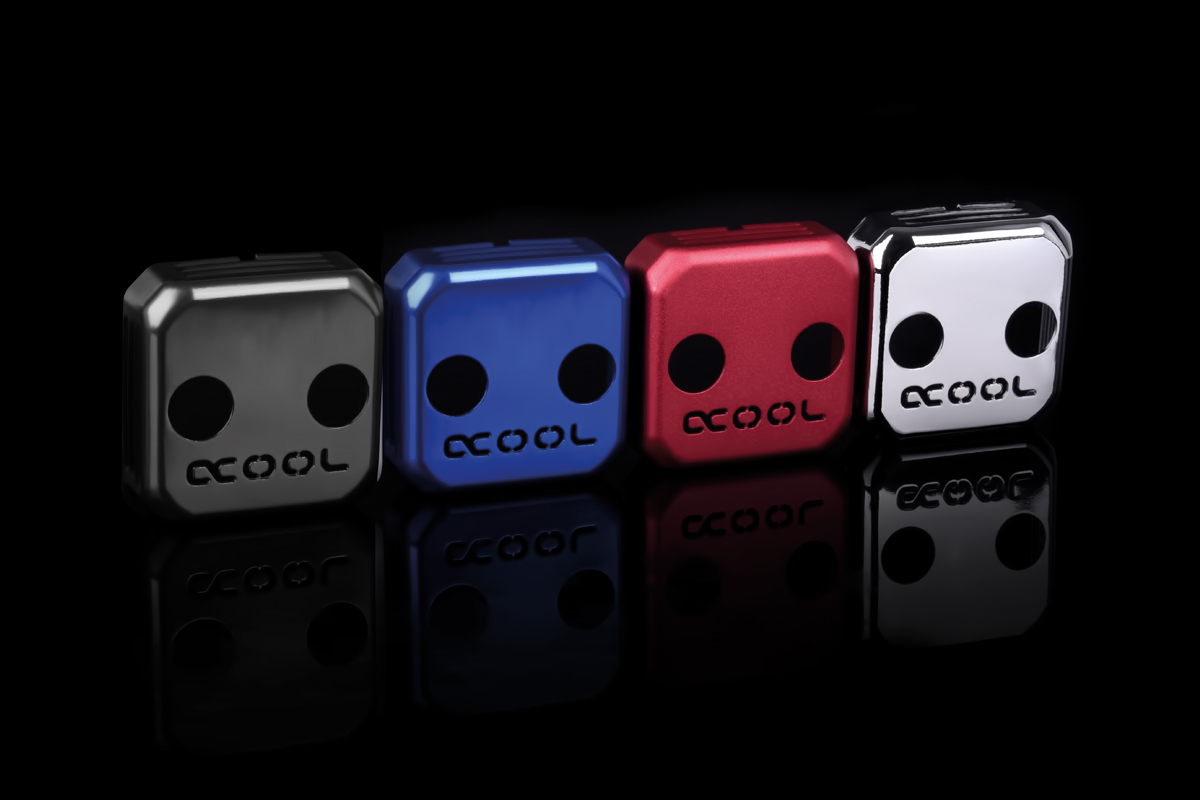
Once you also add in the possible replacement logo colors then there are a wide variety of options for the block even if you will have to pay more to modify them:
We’ve also seen some pictures of a prototype plexi topped version which looks far better than the standard and this one we love:
Enough of the outside – now let’s take a look inside the block.
Internals
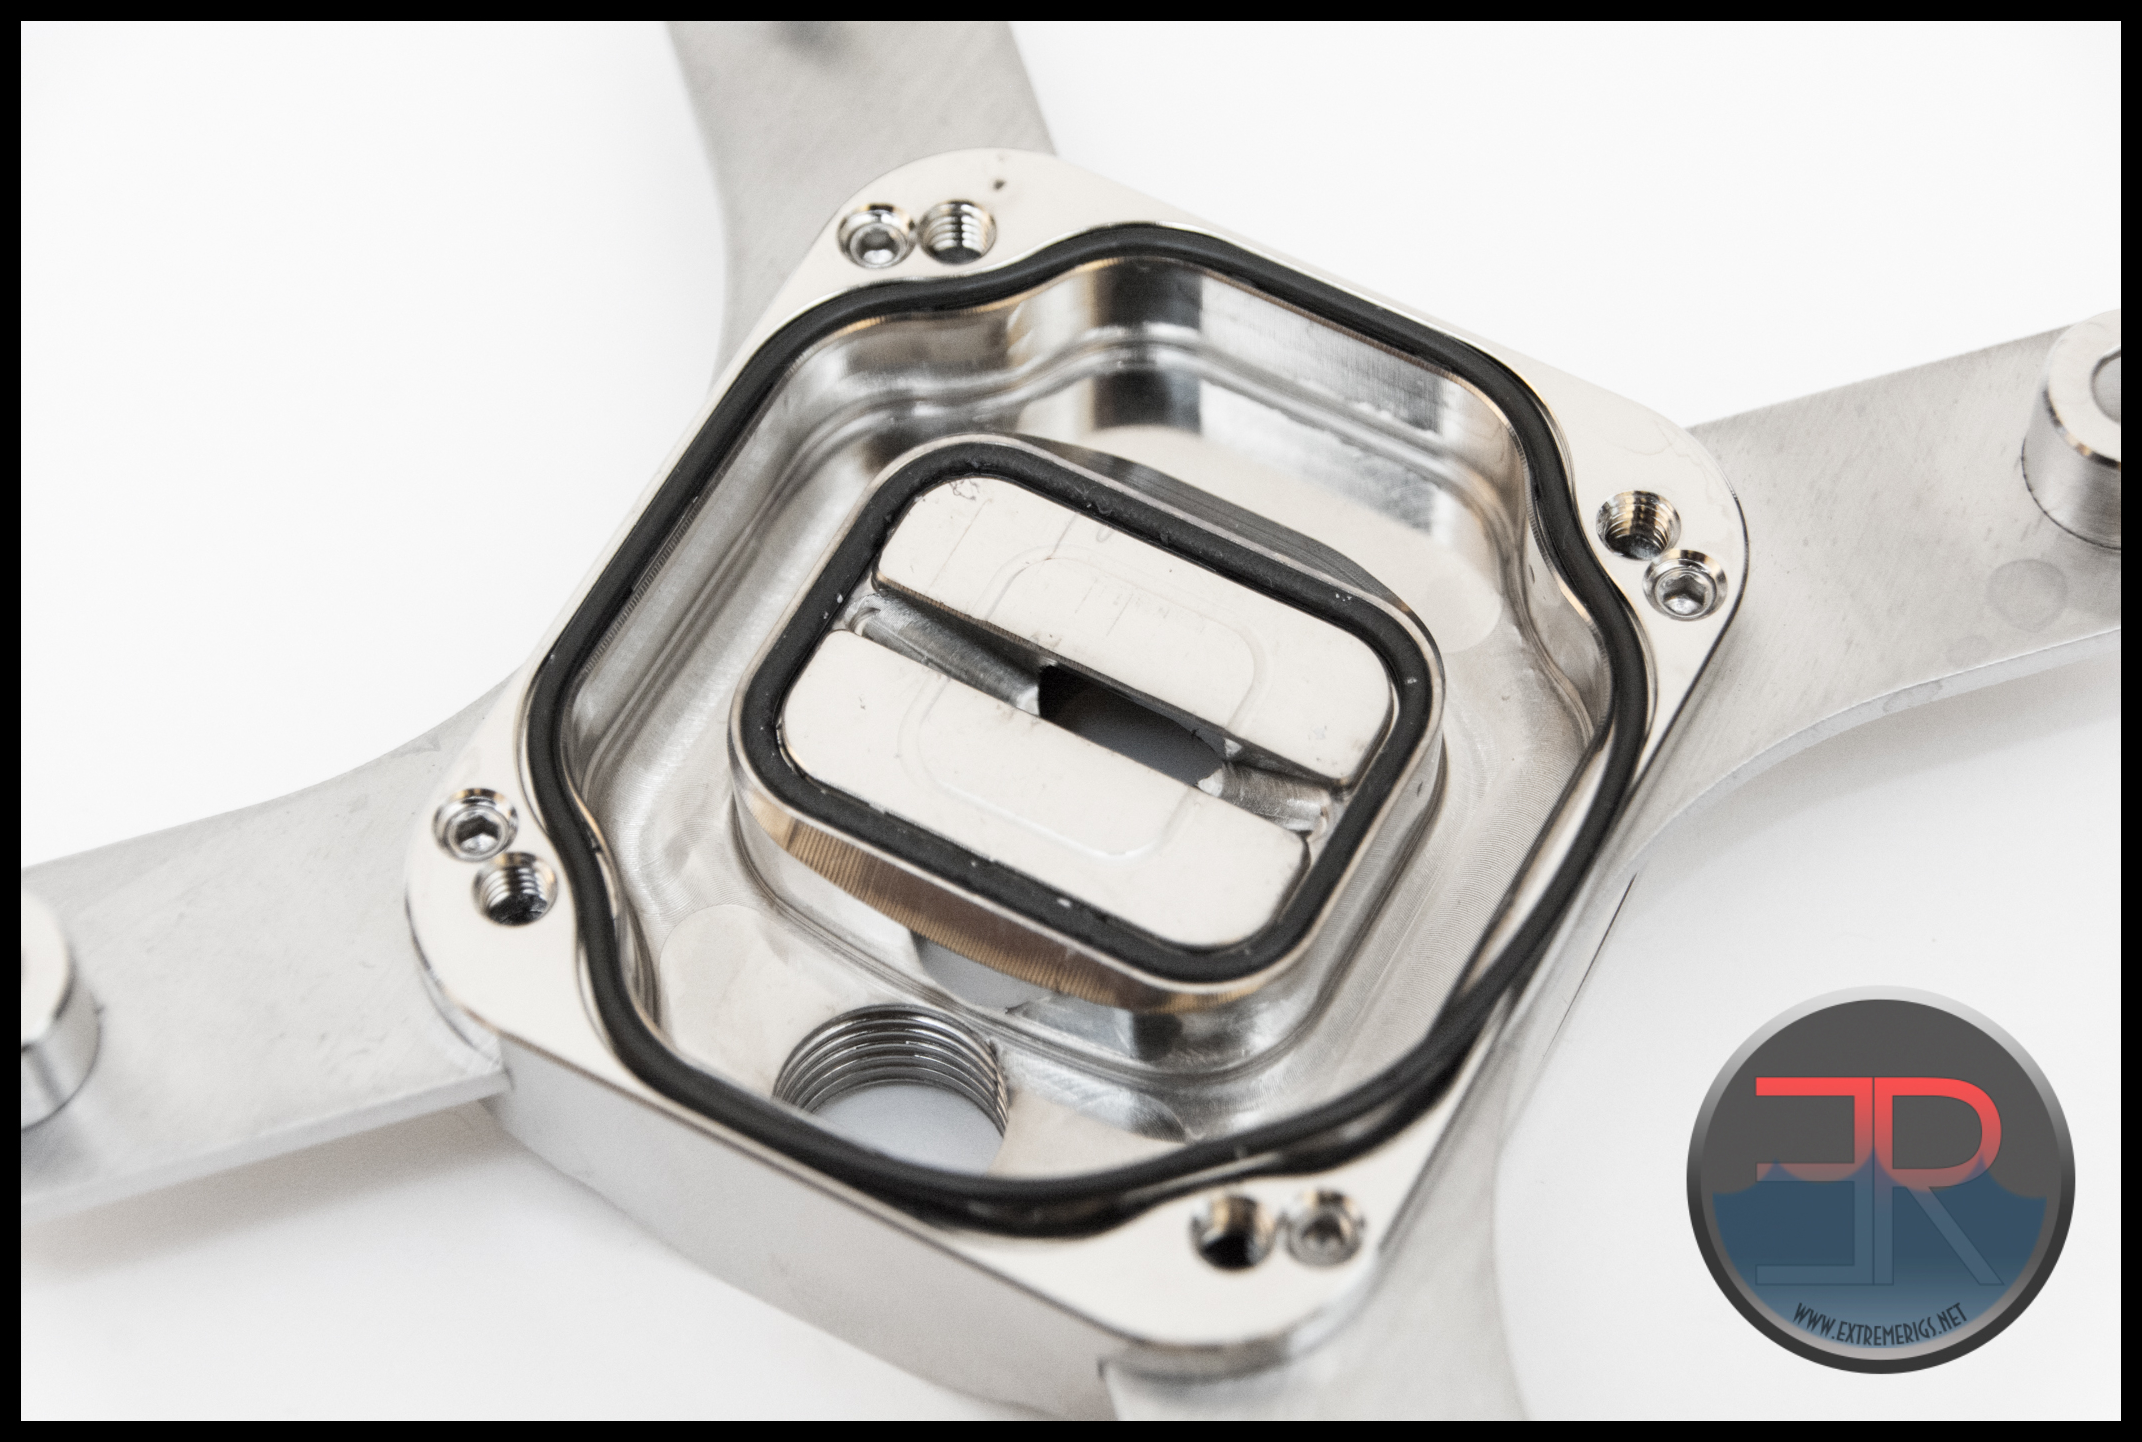
To open the block up simply remove the 4 screws with an appropriately sized Philips head screwdriver. The screw heads are decently large meaning that the screwdriver (if the correct size) won’t easily slip and strip the head when torquing down on it. Once opened up the cooling plate is the first part to be removed:
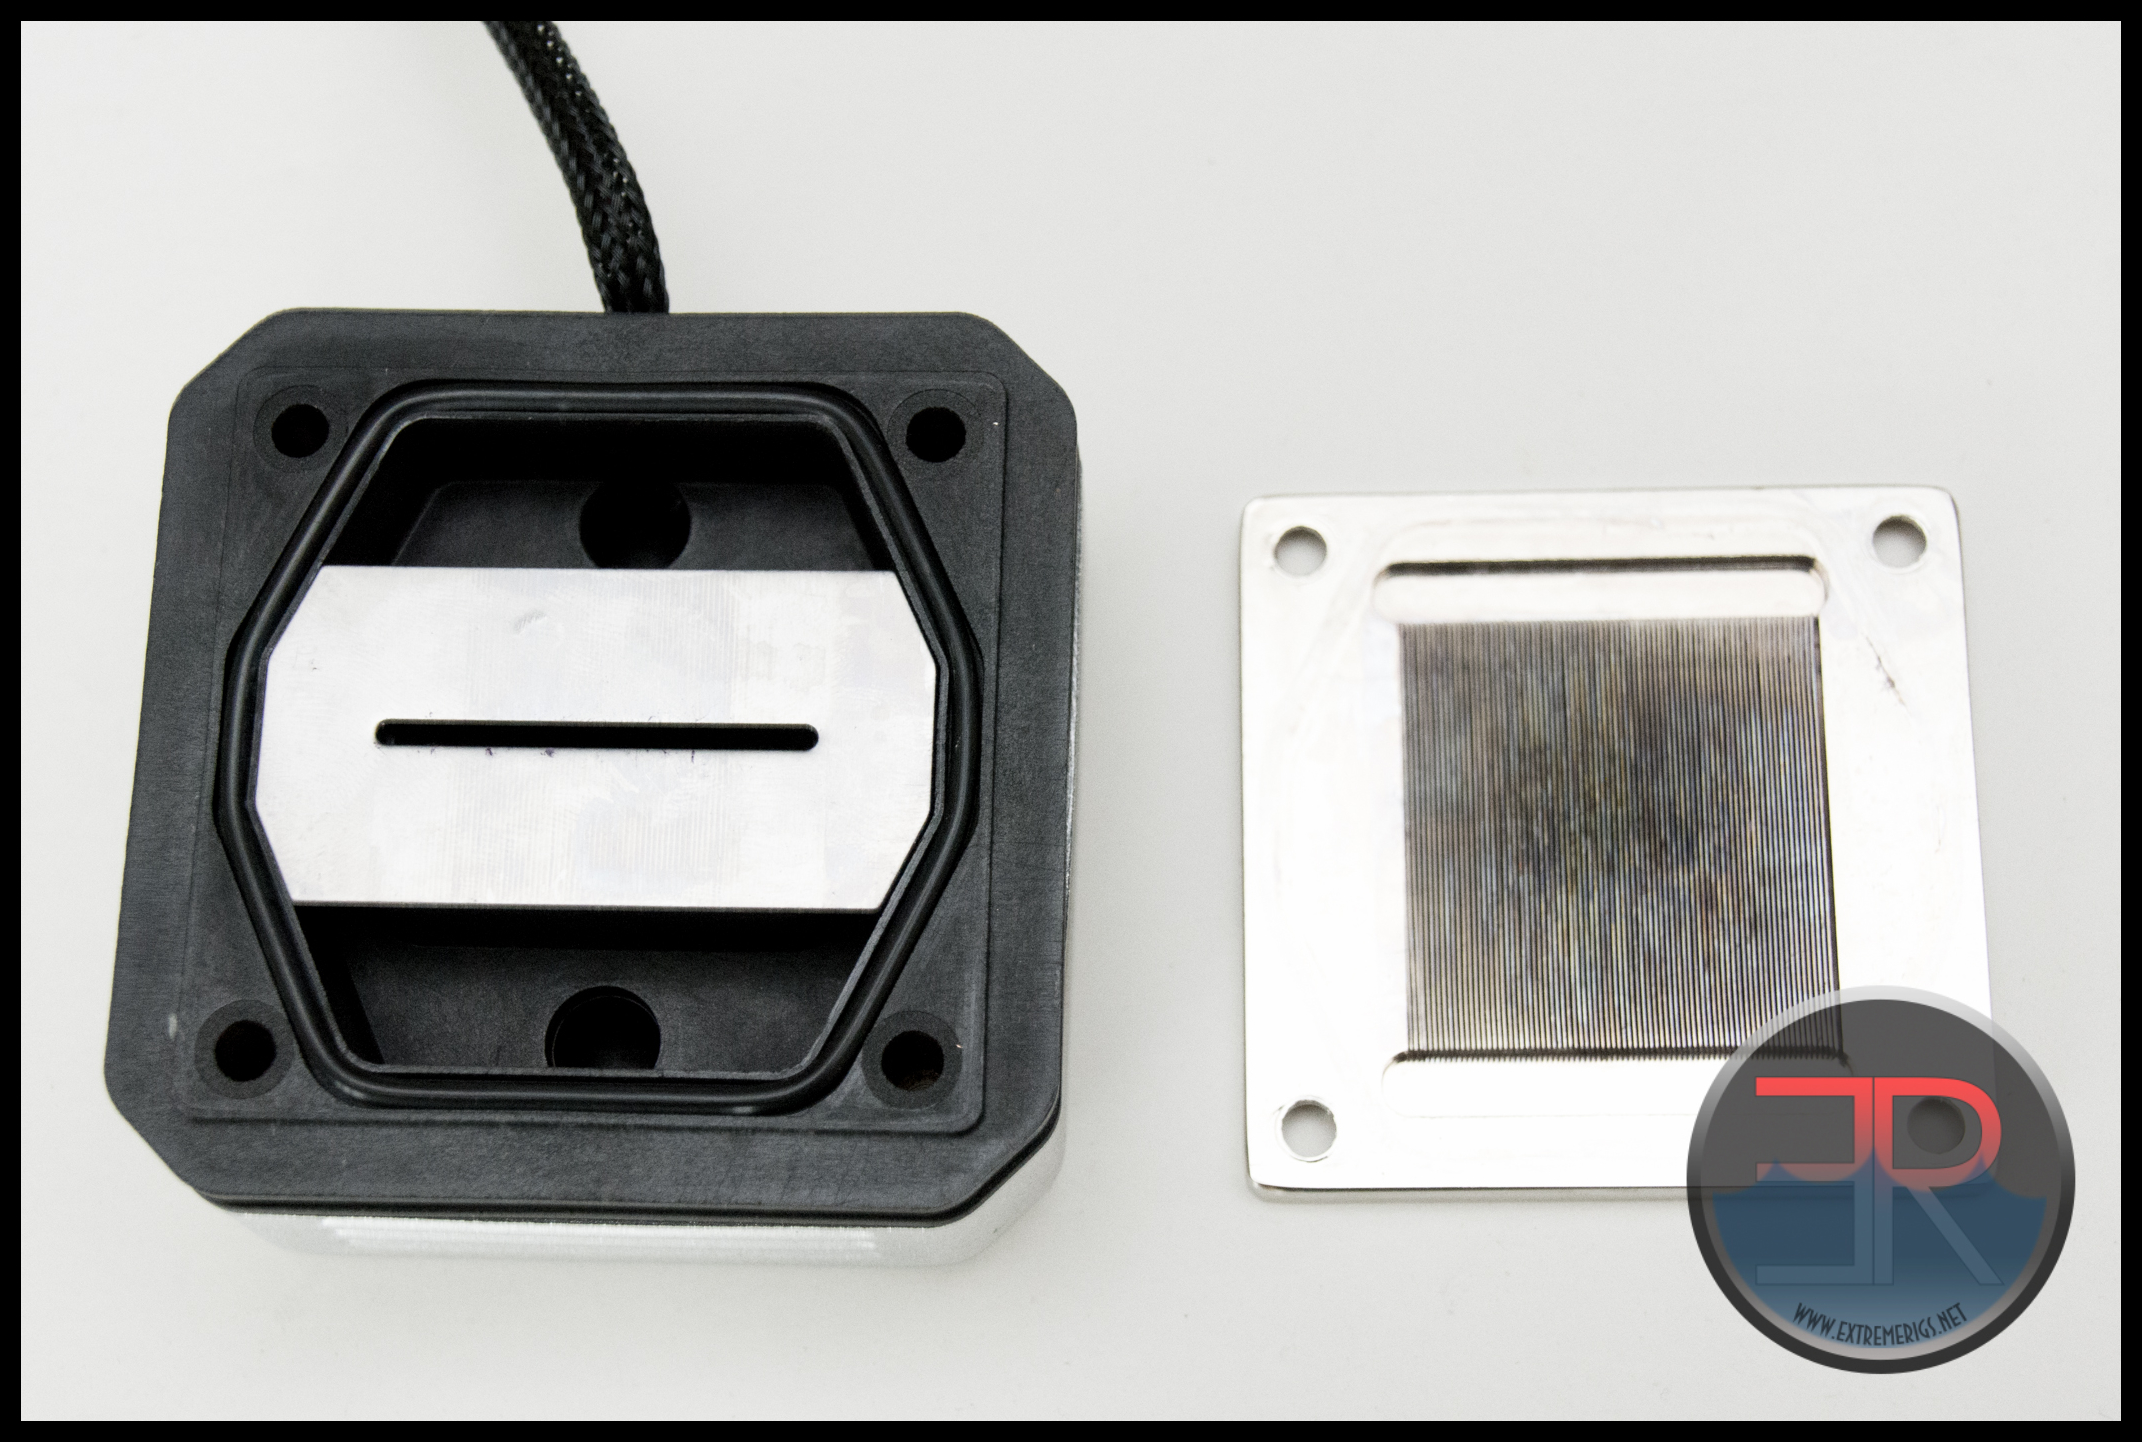
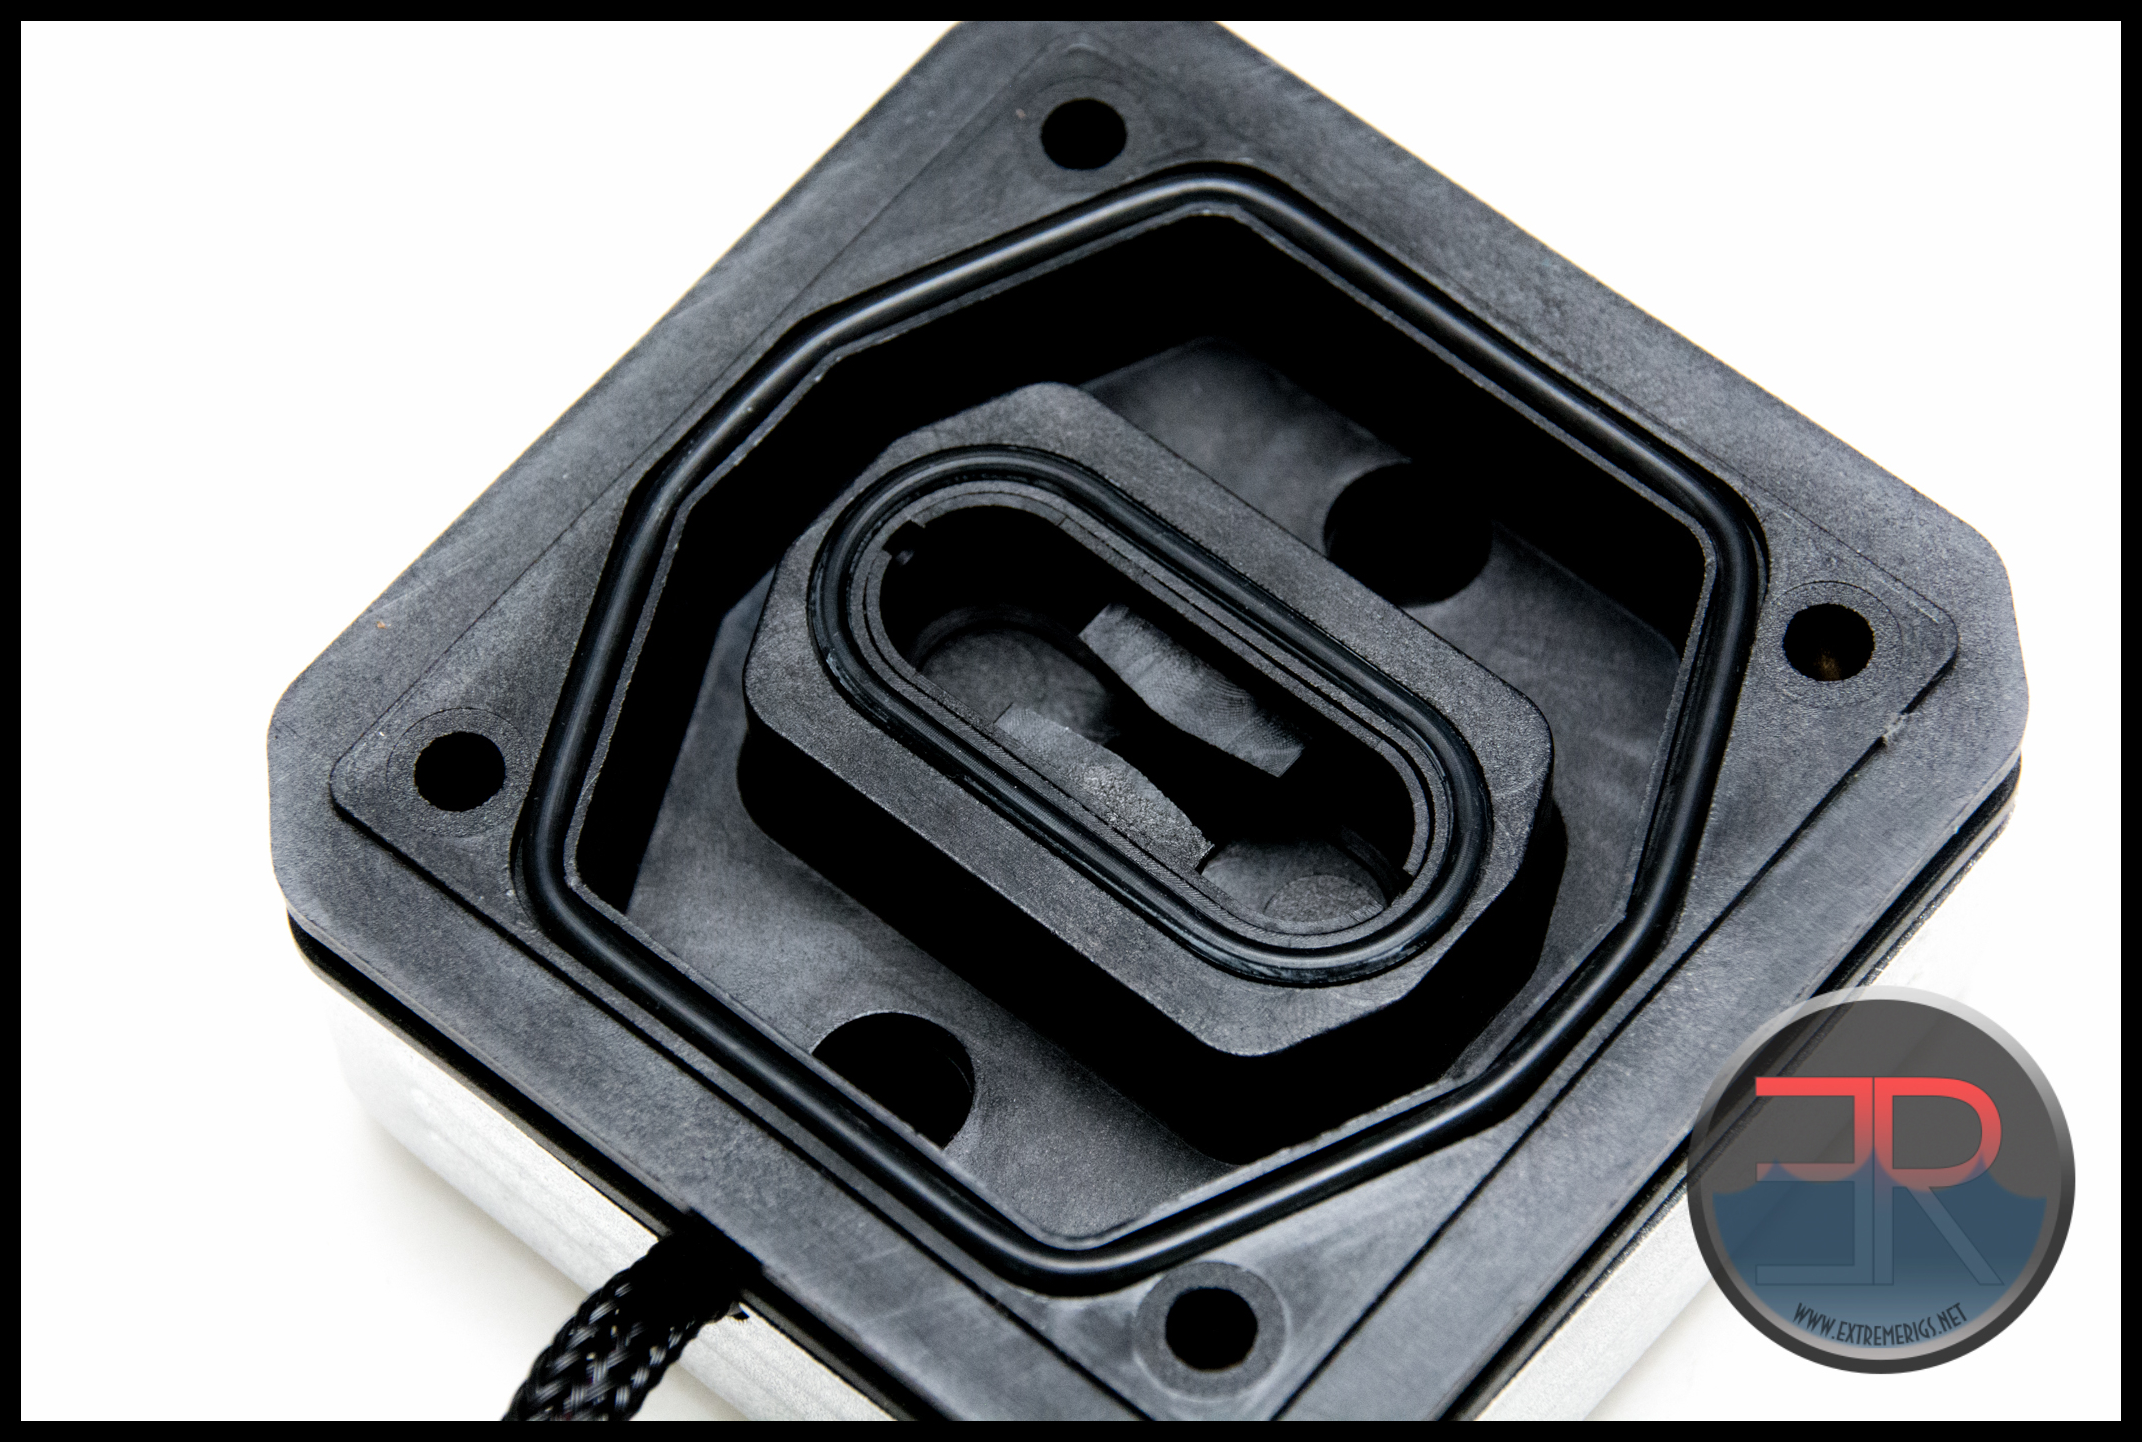
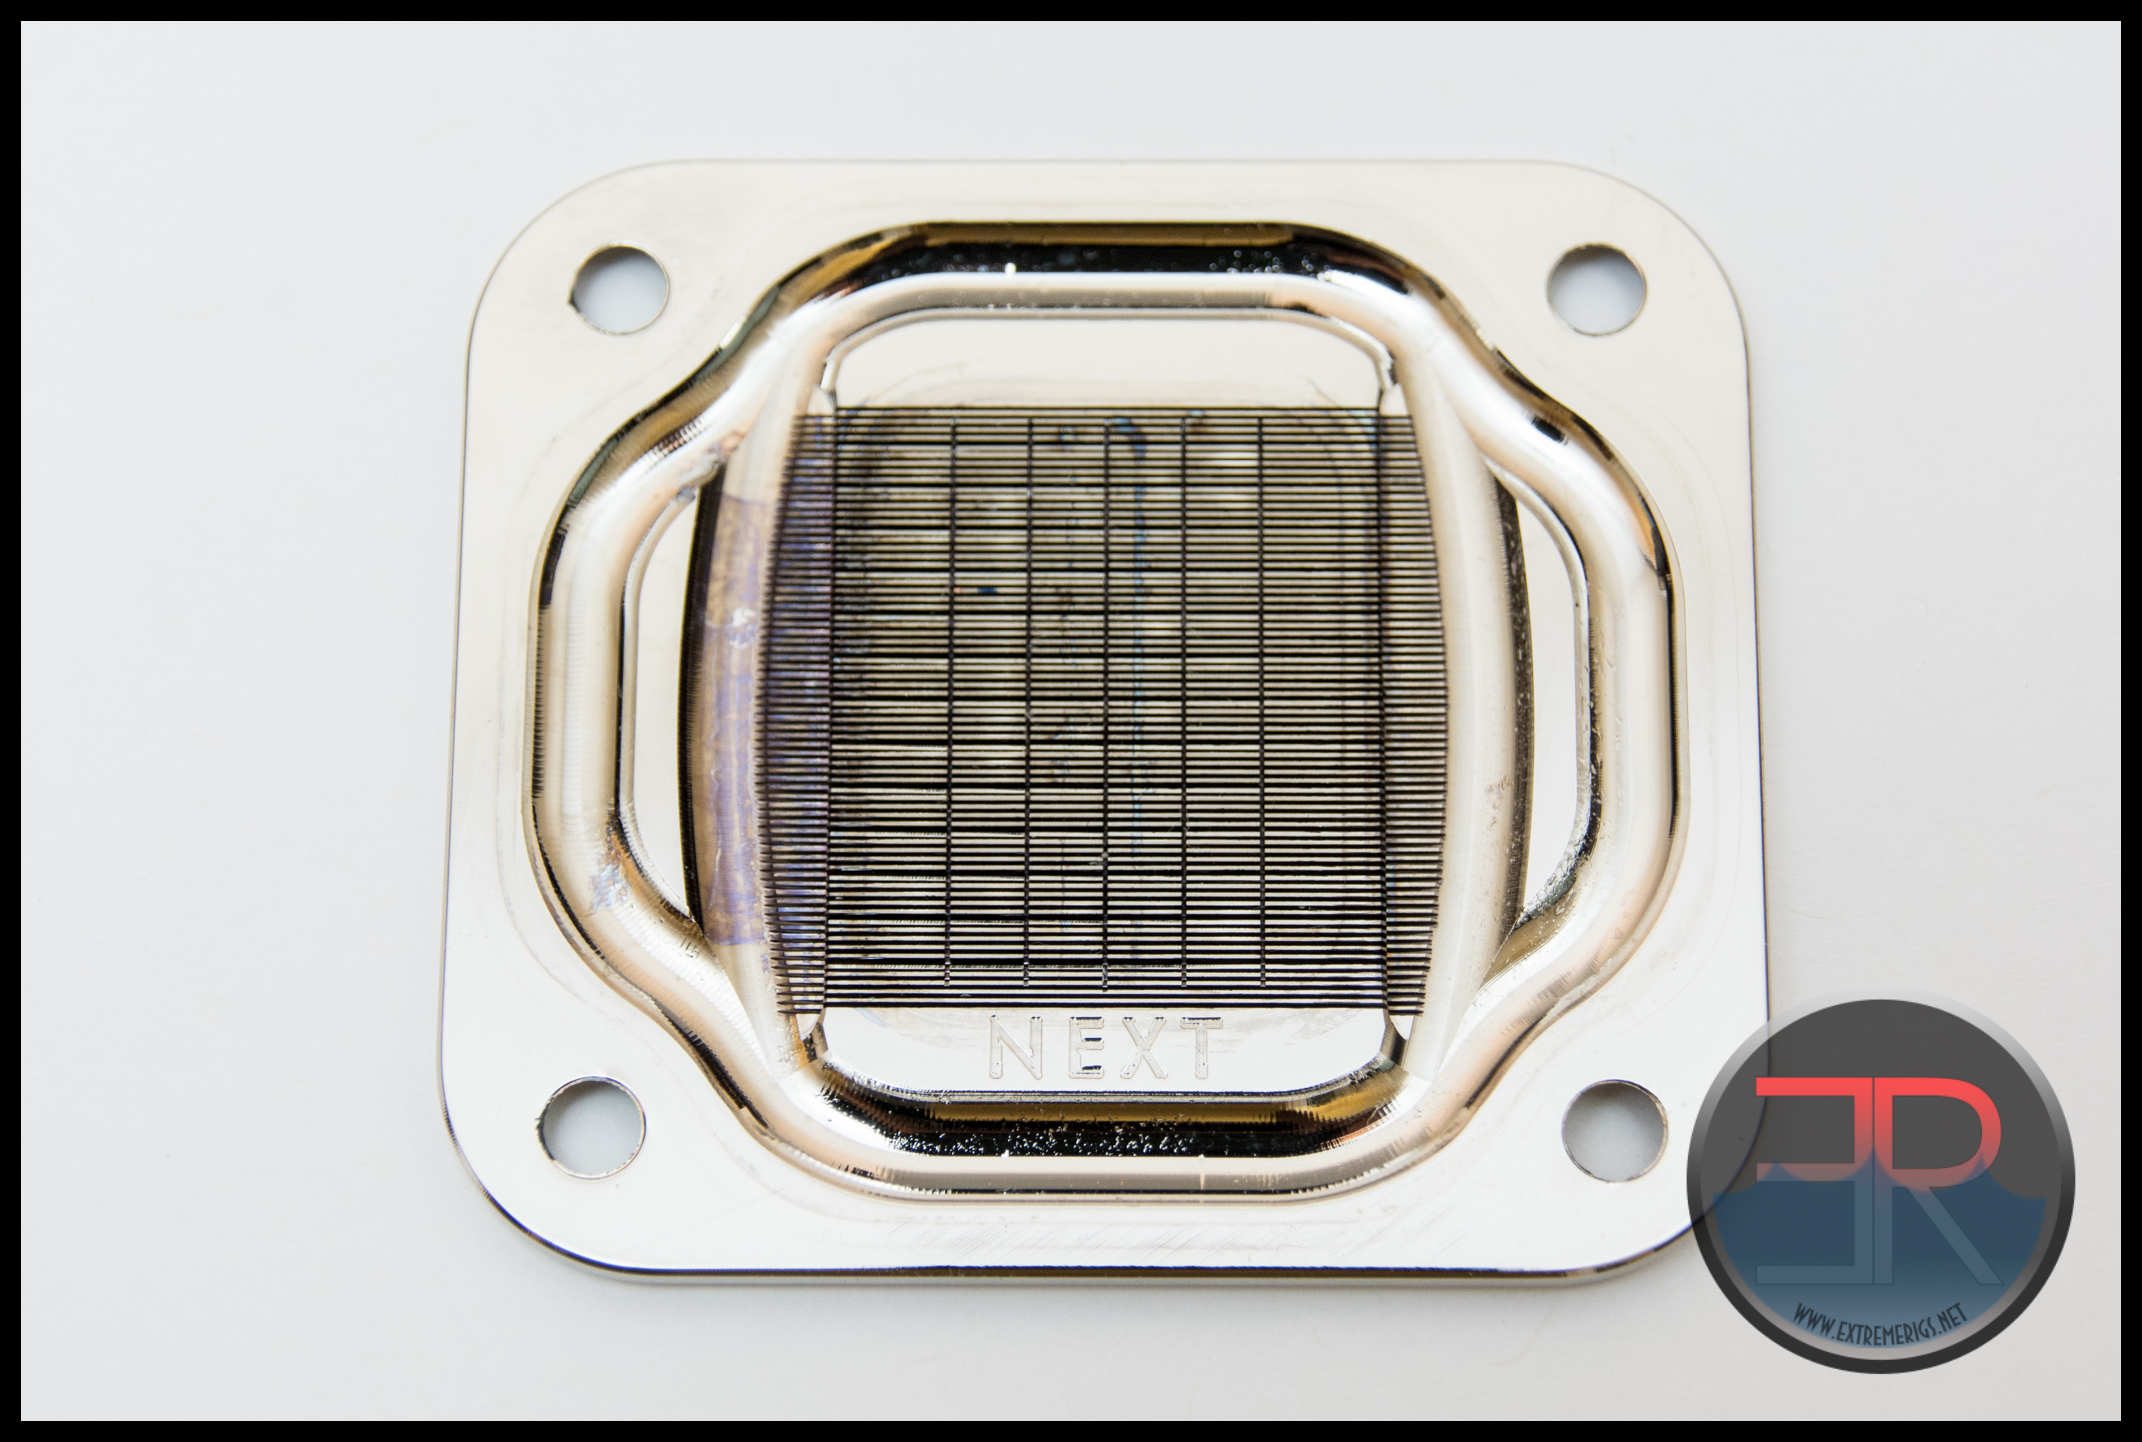
Opening up the block we see the micro channel base that combines with a standard jetplate to centre the cold coolant into a thin strip in the centre of the cooling channels and then flow out two sides:
Such a design will usually favor one orientation more heavily than a design with multiple paths or crosswise cuts. The acetal part at first glance uses two o-rings – one to seal the jetplate and one to seal the block itself. It’s worth noting that the jetplate o-ring is a little on the small side so it did have a tenancy to pop out of the groove. Alphacool have said they will be making the o-ring larger in future to correct this. This isn’t a problem as long as you make sure that it’s in the correct place when reassembling the block. I had no problem, though I’ve heard that others have had a hard time doing so.
While I thought the acetal top would be one piece, it is in fact two pieces that are held together by the same 4 screws as the copper base:
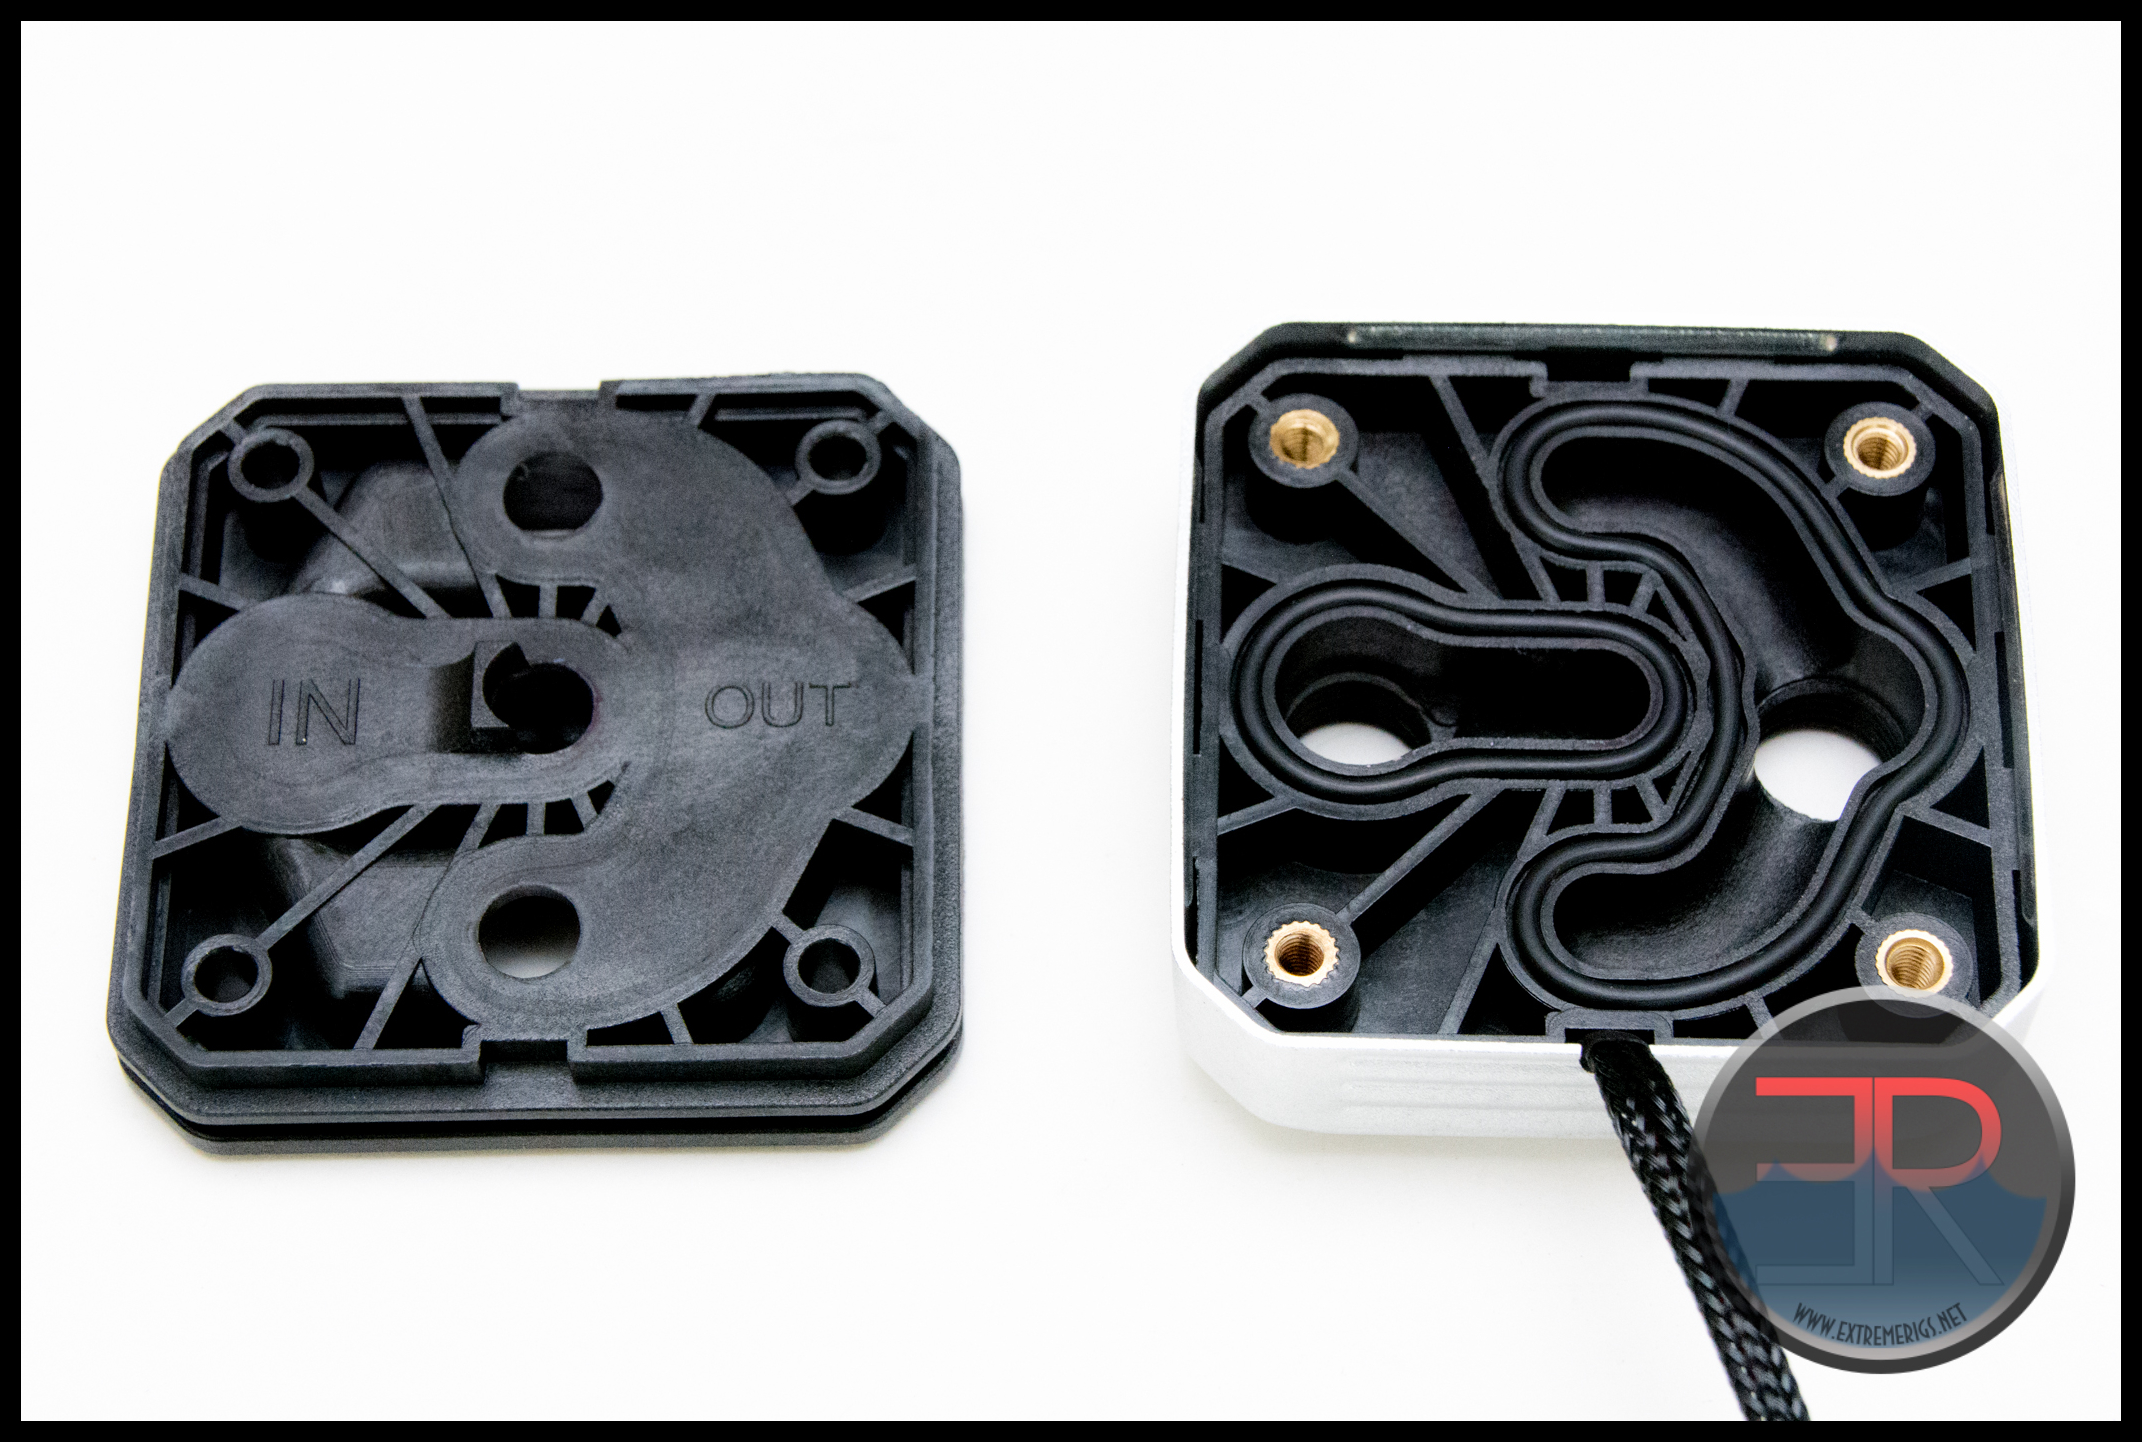
Here we can see that the screws have brass threads which means that they are less likely to strip a thread than a traditional plastic block. This is another nice touch that shows Alphacool is thinking about the details.
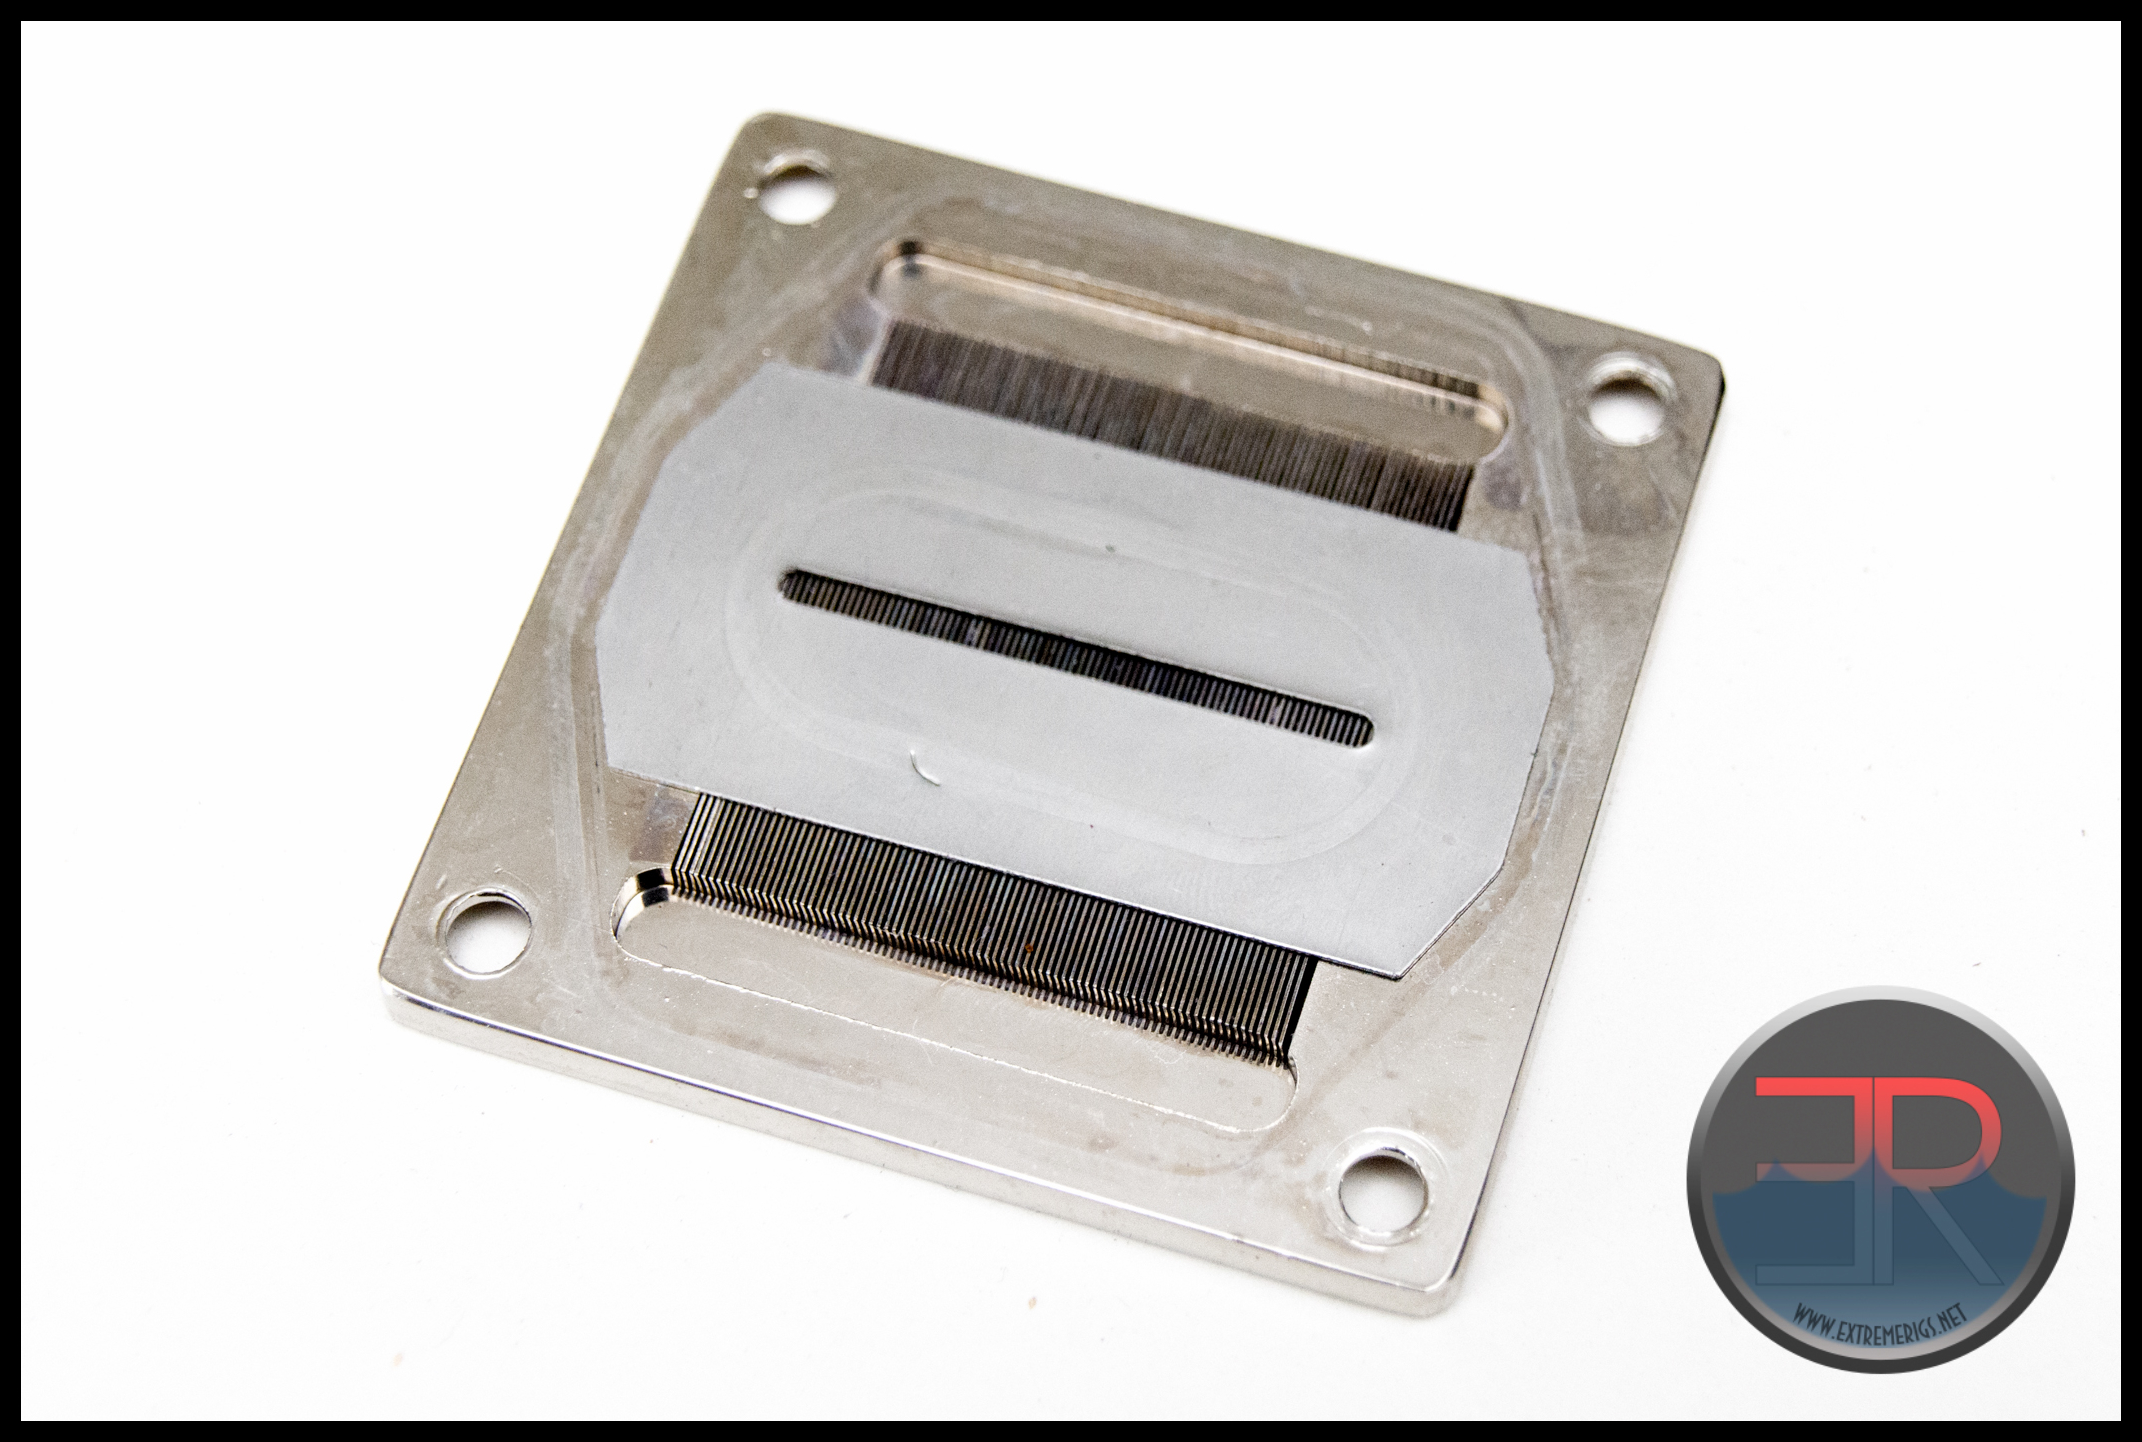
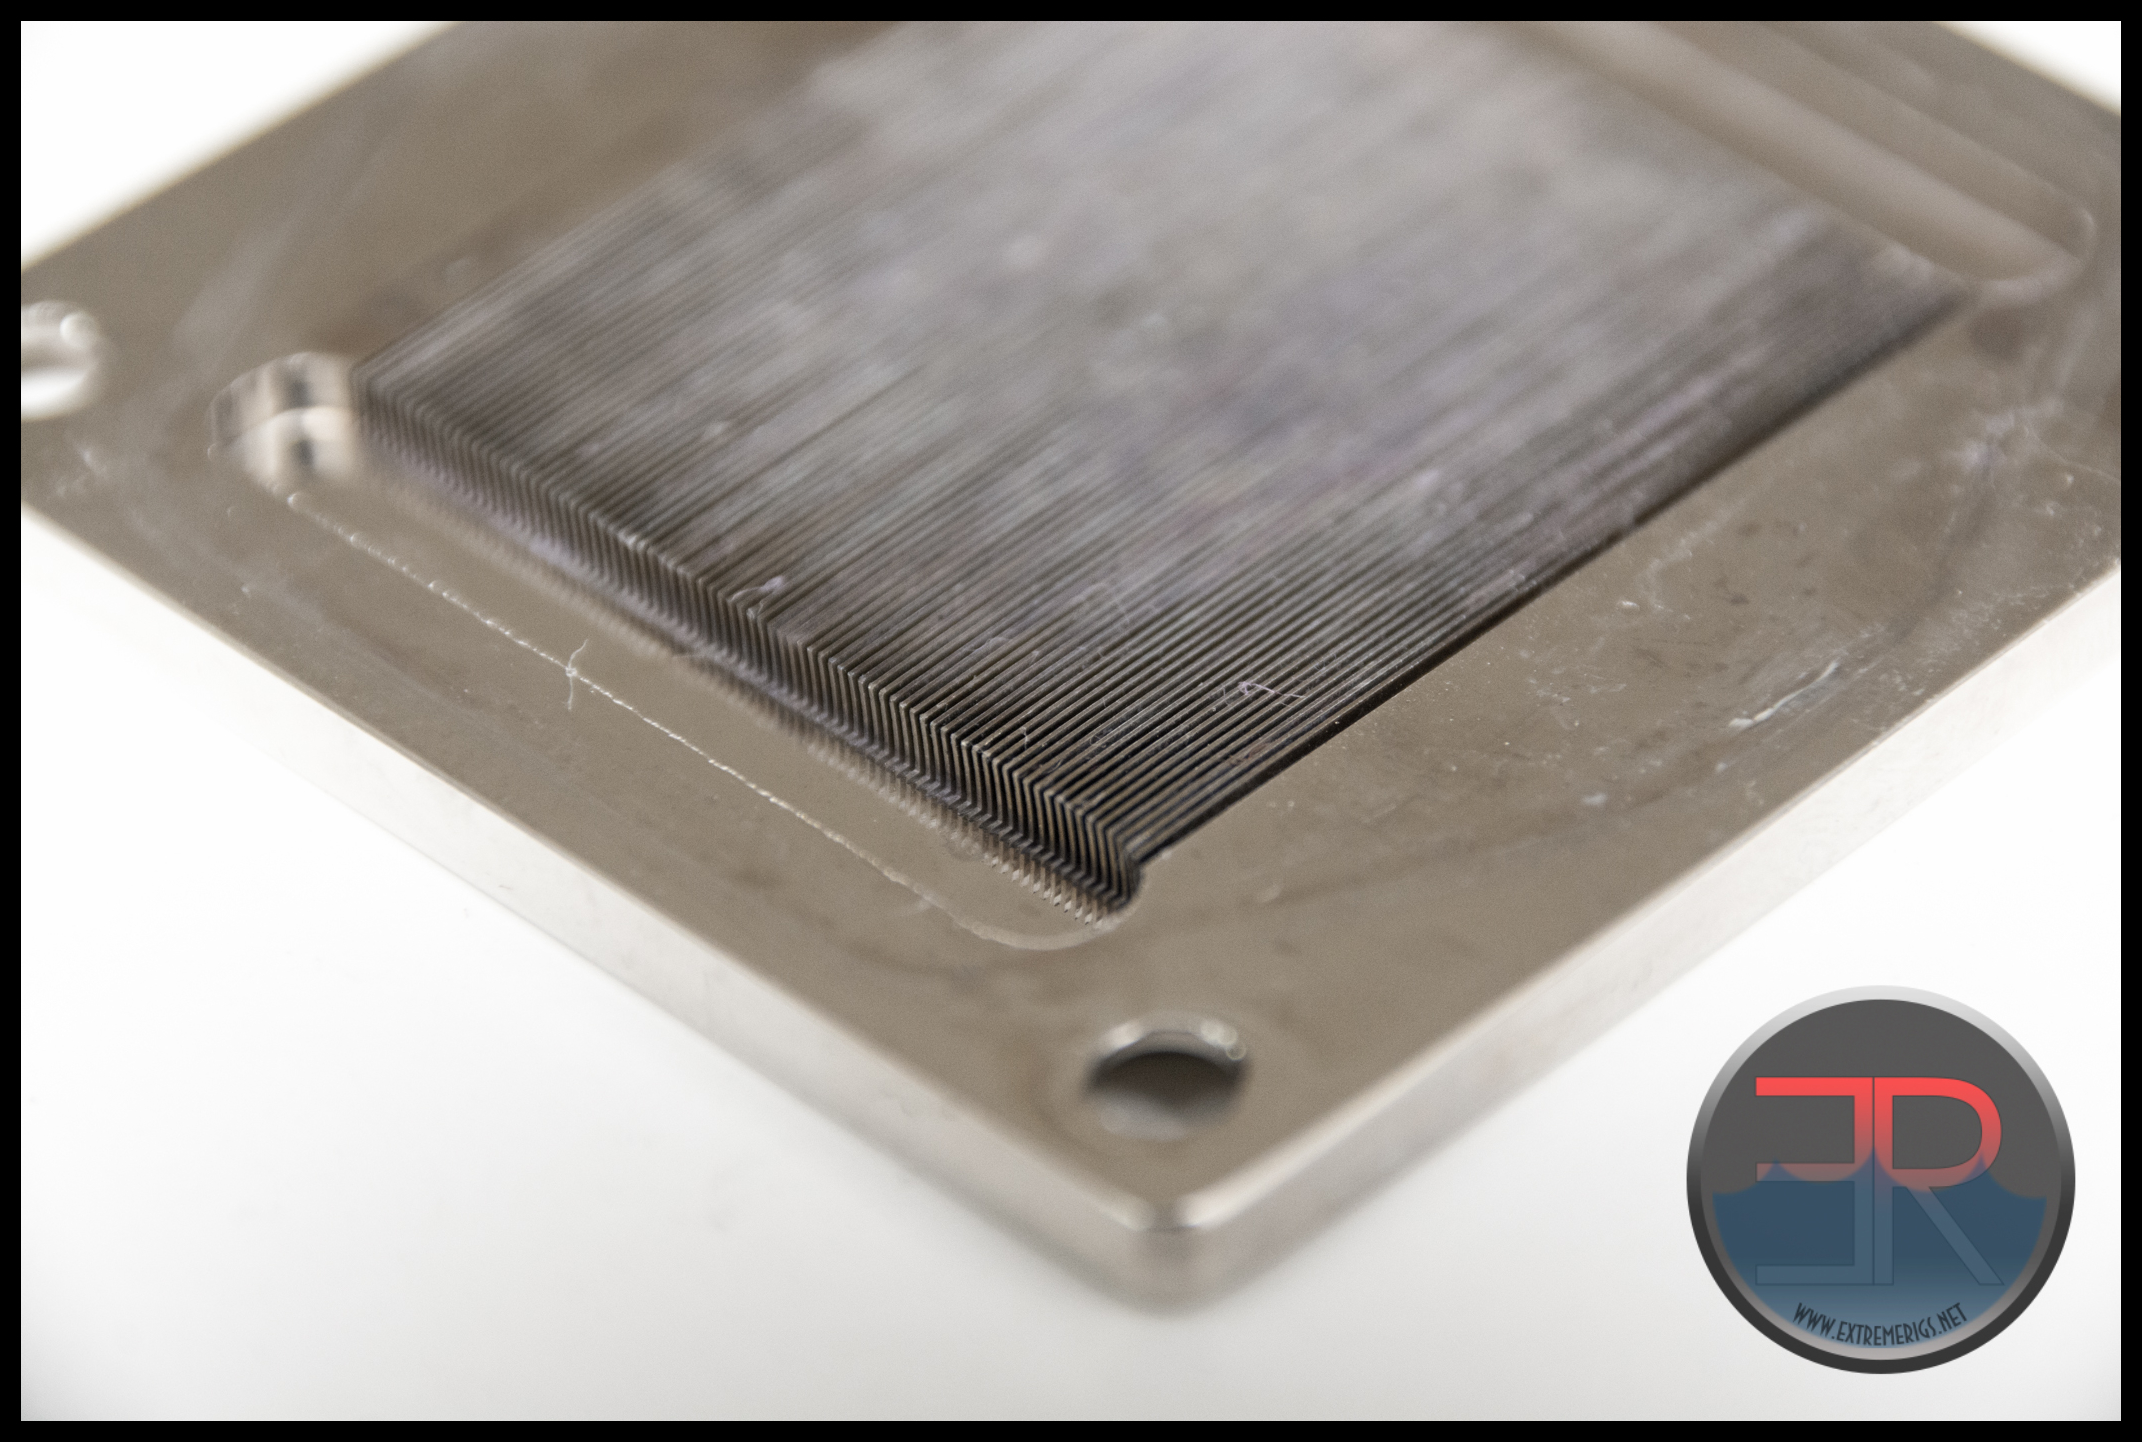 The baseplate channels are really quite fine and unusually deep. This large amount of surface area may provide excellent cooling.


