


Let’s now and go look at the instructions. These are pretty standard, but given that we didn’t receive a socket 115X mount then it’s useful to at least see how the mount would work:
 As usual there is a preferred direction of coolant flow. AMD instructions are also included and are included in the spoiler below.
Let’s now move on to some of the optional features we alluded to earlier.
NEXT Vario
The first of these is the “Vario” version. The Vario version allows you to tweak the bow of the block. Some manufacturers have tweaked the bow of a block for specific chipsets, usually by offering different jetplate thicknesses (EK for example). The last truly variable block we saw was from Danger Den who are now sadly no longer around. With Danger Den’s M6 you could buy additional plastic jetplates of various thicknesses and shapes so as to tweak the bow however you wished. The idea was that you would test the TIM spread with a certain insert, and iterate to see if you could make better contact. Sadly the block itself never showed top performance even after tweaking so it never took off.
Since 2012 though we’ve really started hitting the limit of what can be achieved with a copper base, jetplates and microchannels. So much of the performance that we measure is now about how well the block mounts to CPU and how thin and wide the TIM spread is in critical areas of the CPU. Not only does the bow vary from socket to socket, but even from CPU to CPU of the same type. In an ideal world, not only would I test 10 or so mounts of a cpu block in both rotations and both flow directions, but I’d test it across multiple samples of multiple CPU products. As it is I simply test 6 of each rotation, one flow direction and only on one CPU sample. This means that the manufacturer is really getting lucky (or unlucky) depending on how my test CPU is shaped. AquaComputer therefore have decided to let us tweak the bow of the block and have done so in a more useful way than anyone else has done before. Let’s look at the marketing info on the Vario product now:
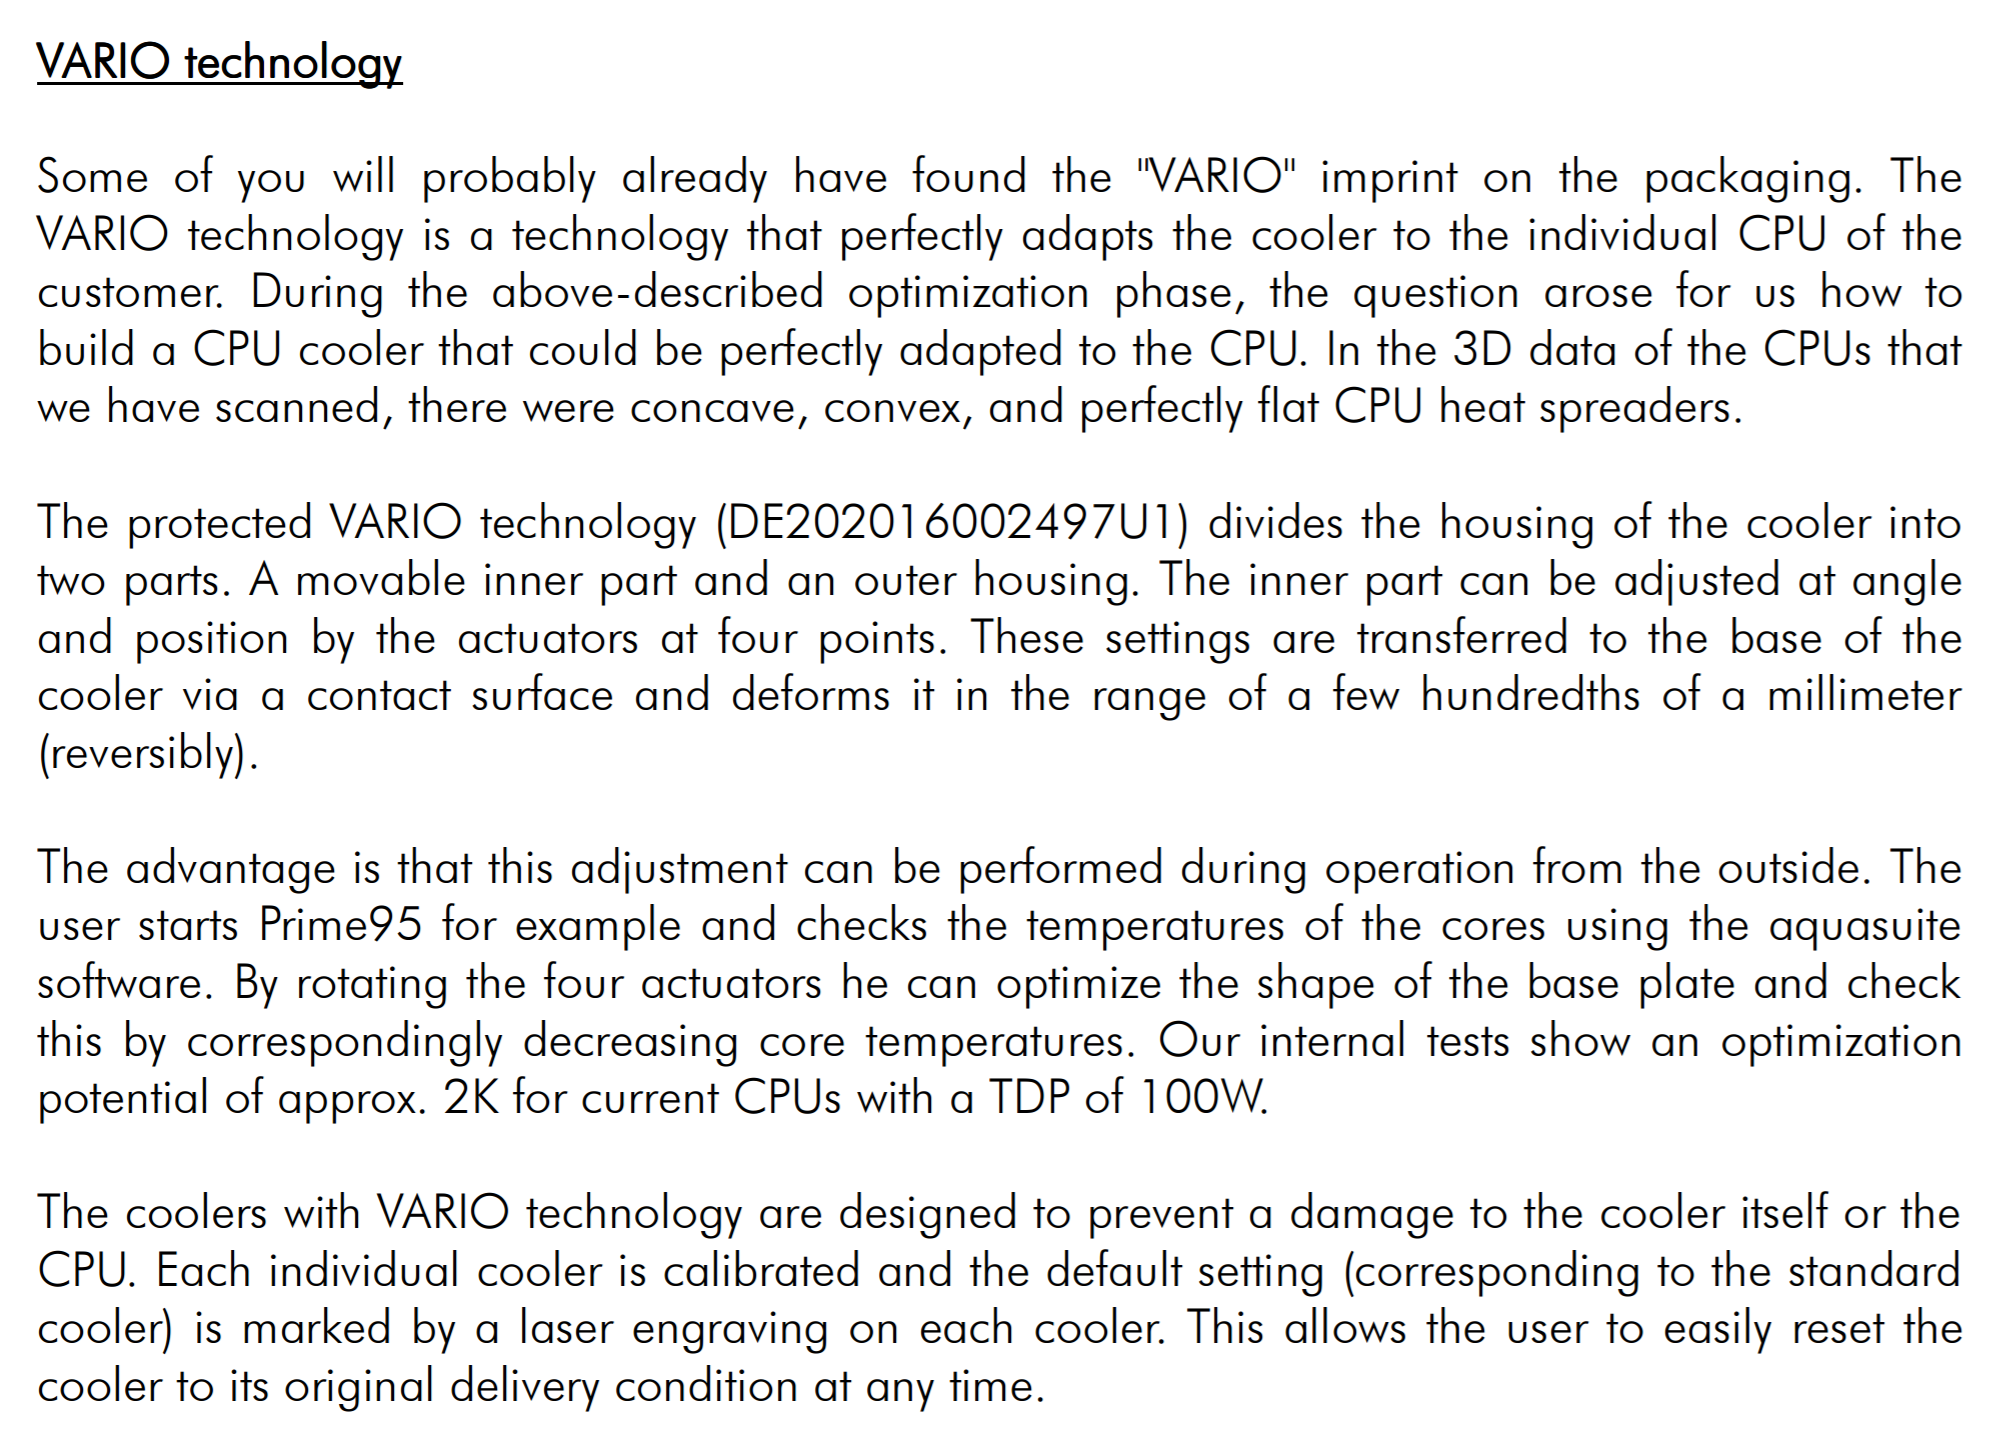
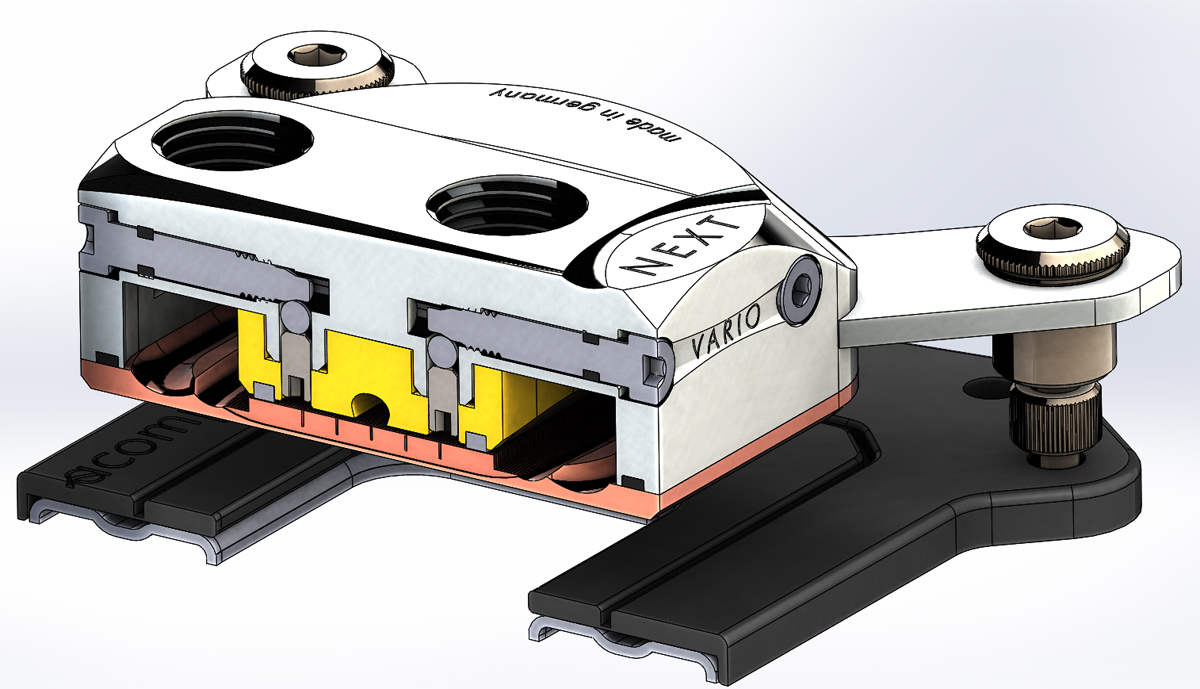
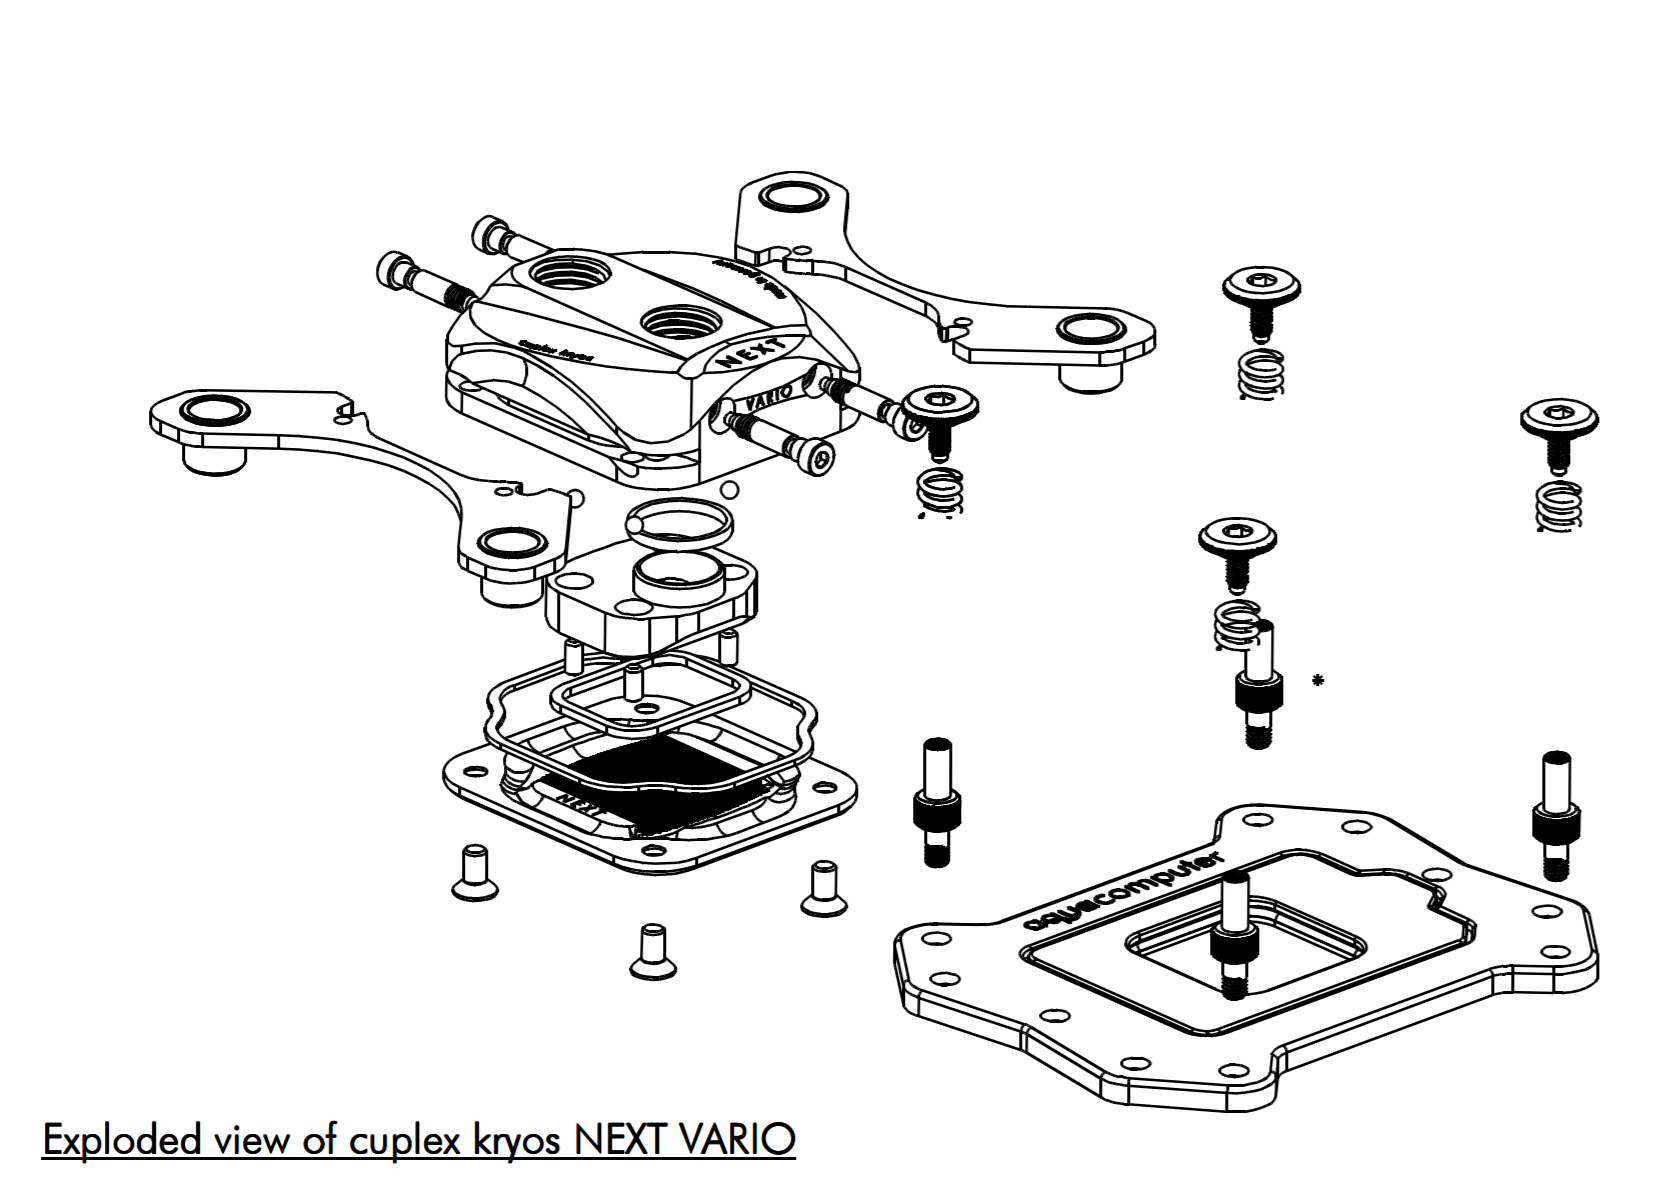
So the Vario allows us to mount the CPU block and then vary the bow which is the first time we’ve been able to do this. This makes it far easier to optimize because you don’t have to worry about the mounting variation each time. These instructions make it sound simple – just start loading the CPU with prime and play with the bow while logging the temperature. However as we know from our testing in order to get accurate enough data you’re really going to have to let the coolant come to equilibrium and then average over a suitably long period of time. So the calibration of the bow might take some time to get right, but once there you should be guaranteed top notch performance. Hopefully AquaComputer will also send us a Vario unit to test to see whether the system really works. Here is the Vario in the flesh from an AquaComputer photo:
NEXT Vision
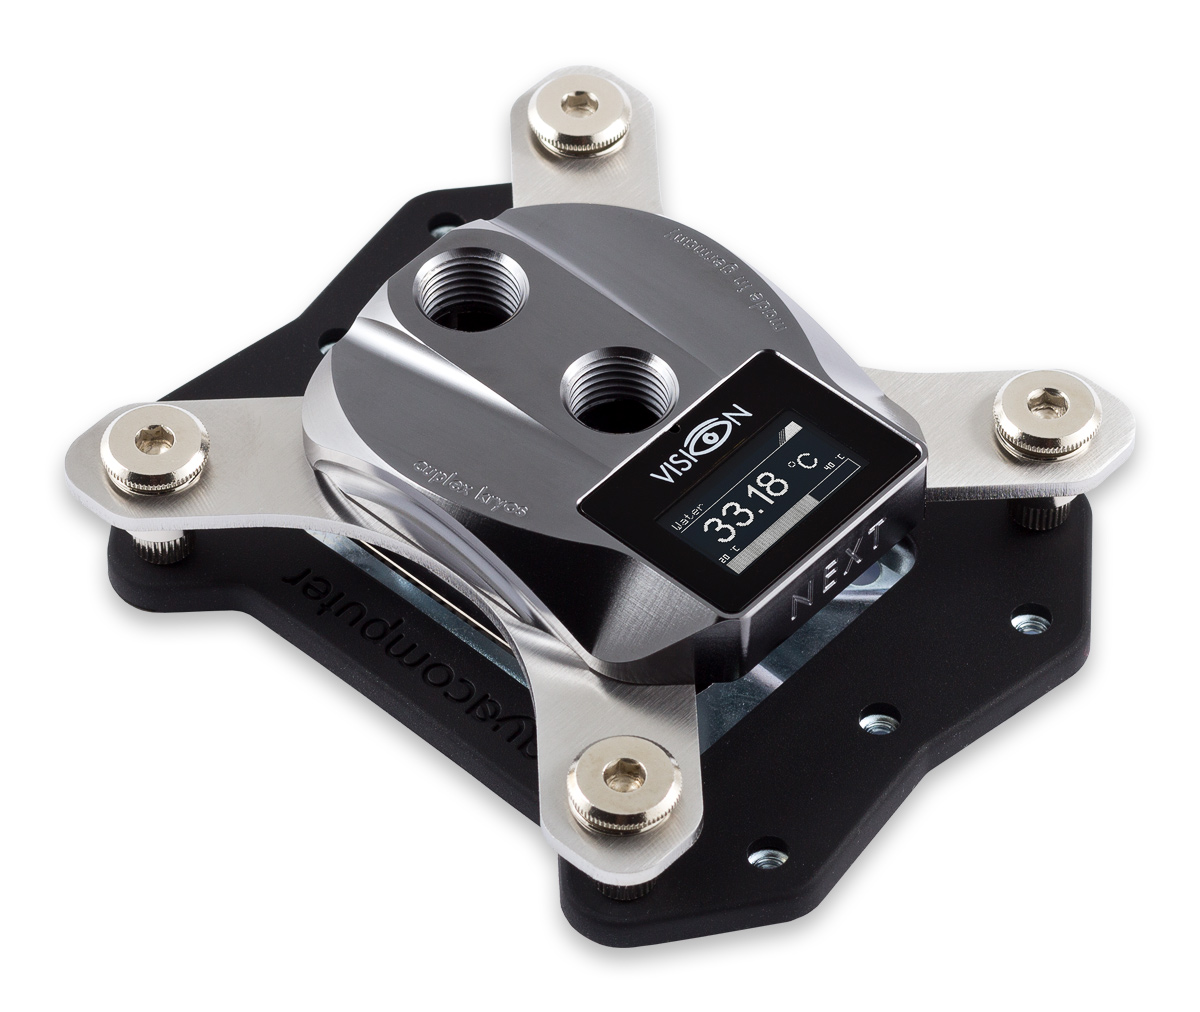
The NEXT also has the “Vision” option – this is almost a mini Aquaero built into the CPU block along with an OLED display. It connects optionally via USB or AquaBus and can process and display data. The Vision system also has a built in temperature probe for the coolant temperature. This is pretty useful, particularly if you don’t have an Aquaero and are wanting to calibrate the Vario bow tweak. Here’s how the block looks:
There is also a video:
PVD
AquaComputer also have the option to adding a PVD coating on top of the nickel plating. This titanium coating “creates a visually very appealing and extremely scratch-resistant surface”. Indeed Wikipedia confirms that this is superior to electroplating:
- “PVD coatings are sometimes harder and more corrosion resistant than coatings applied by the electroplating process. Most coatings have high temperature and good impact strength, excellent abrasion resistance and are so durable that protective topcoats are almost never necessary.”
This is the first time we’ve seen titanium used in water cooling blocks, but it’s likely to not be pure Titanium, but instead Titanium Nitride which is technically a ceramic. This would mean that we wouldn’t have to worry about galvanic corrosion which will always slowly effect nickel plating unless corrosion inhibitors are present.
RGB Lighting
For the plexiglass version of the NEXT, some extra features are included. RGB LED illumination is obviously the main feature, but it’s more advanced than simply some LEDs. Like the vision system this also features the integrated temperature sensor and a USB/Aquabus connection. It is unclear at this time whether the system is exactly the Vision system and whether all Plexiglass blocks have to have RGB lighting and the Vision system.
Other Varieties
Material Options:
Top: Delrin, Plexiglas GS, Copper
Coating options: Nickel Plating and PVD Titanium on top of Nickel Plating
Base Plate: Copper, Nickel Plated Copper, .925 sterling silver
Price
Naturally with so many feature options we can expect the price to vary considerably. Example prices are:
60 euro for the basic Delrin, Copper version.
85 euro for the full copper nickel plated version we have shown in the photos here
290 euro for the most expensive version (Vario, Vision, PVD, Silver base)
Yes that’s right, 290 euros for a CPU block. Luckily the USD exchange rate is pretty good right now but that is a lot of money. However if it stops you from buying a $200 Aquaero then maybe it’s not so bad. 85 euro on the other hand isn’t crazy money for a full metal nickel plated block – in fact that price is identical to Watercool’s excellent Heatkiller IV which doesn’t include any TIM.
Let’s split out the cost adders on the different versions as best we can:
Top: Delrin, Plexiglas GS (+7 EU), Copper (+20 EU), Nickel Plated Copper (+20 EU)
Base Plate: Copper, Nickel Plated Copper (+5 EU), .925 sterling silver (+120 EU)
PVD Coating for Nickel: +20 EU
Vision Module: +35-40 EU
Vario Module: +30 EU
Our suggestion would be most likely to get the Vision module, because it’s cool, but skip the VARIO because it will be hard to calibrate. We’d also skip the Silver because it’s pricey and maybe splurge on the PVD Full metal block if the aesthetics work. That version adds up to ~135 EU.
Now let’s take a look inside the block.


hmmm… I can see alphacool eisblock xfx in the test, but where is review of it?
It is now up 🙂 https://goo.gl/DJ2Cp8
Comments are closed.