


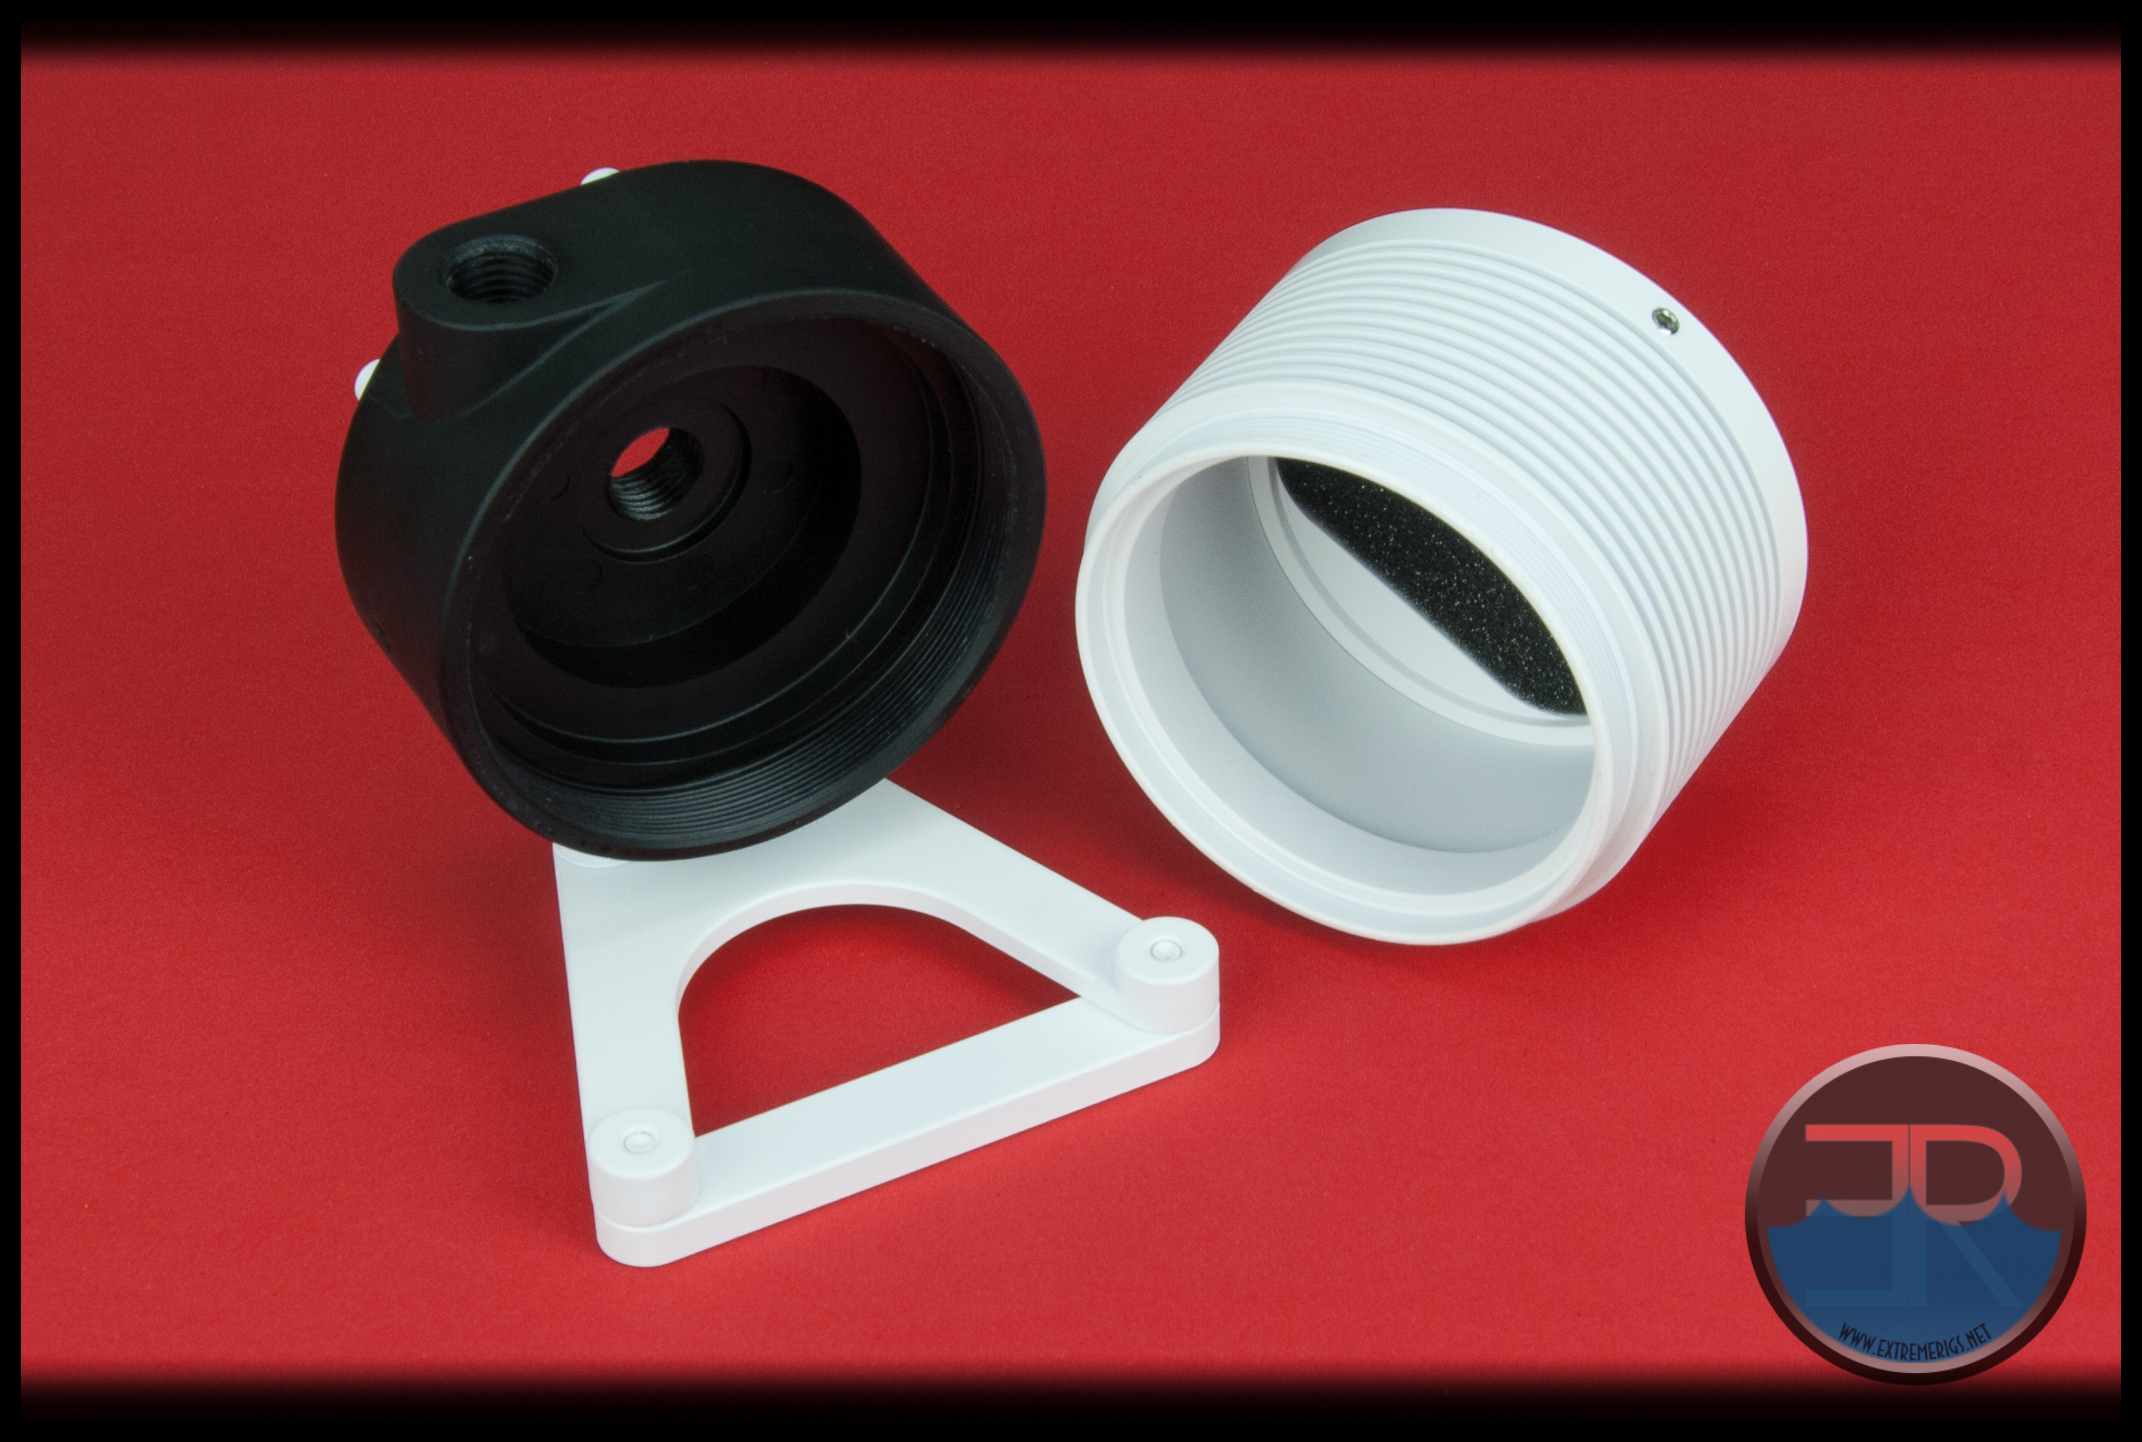
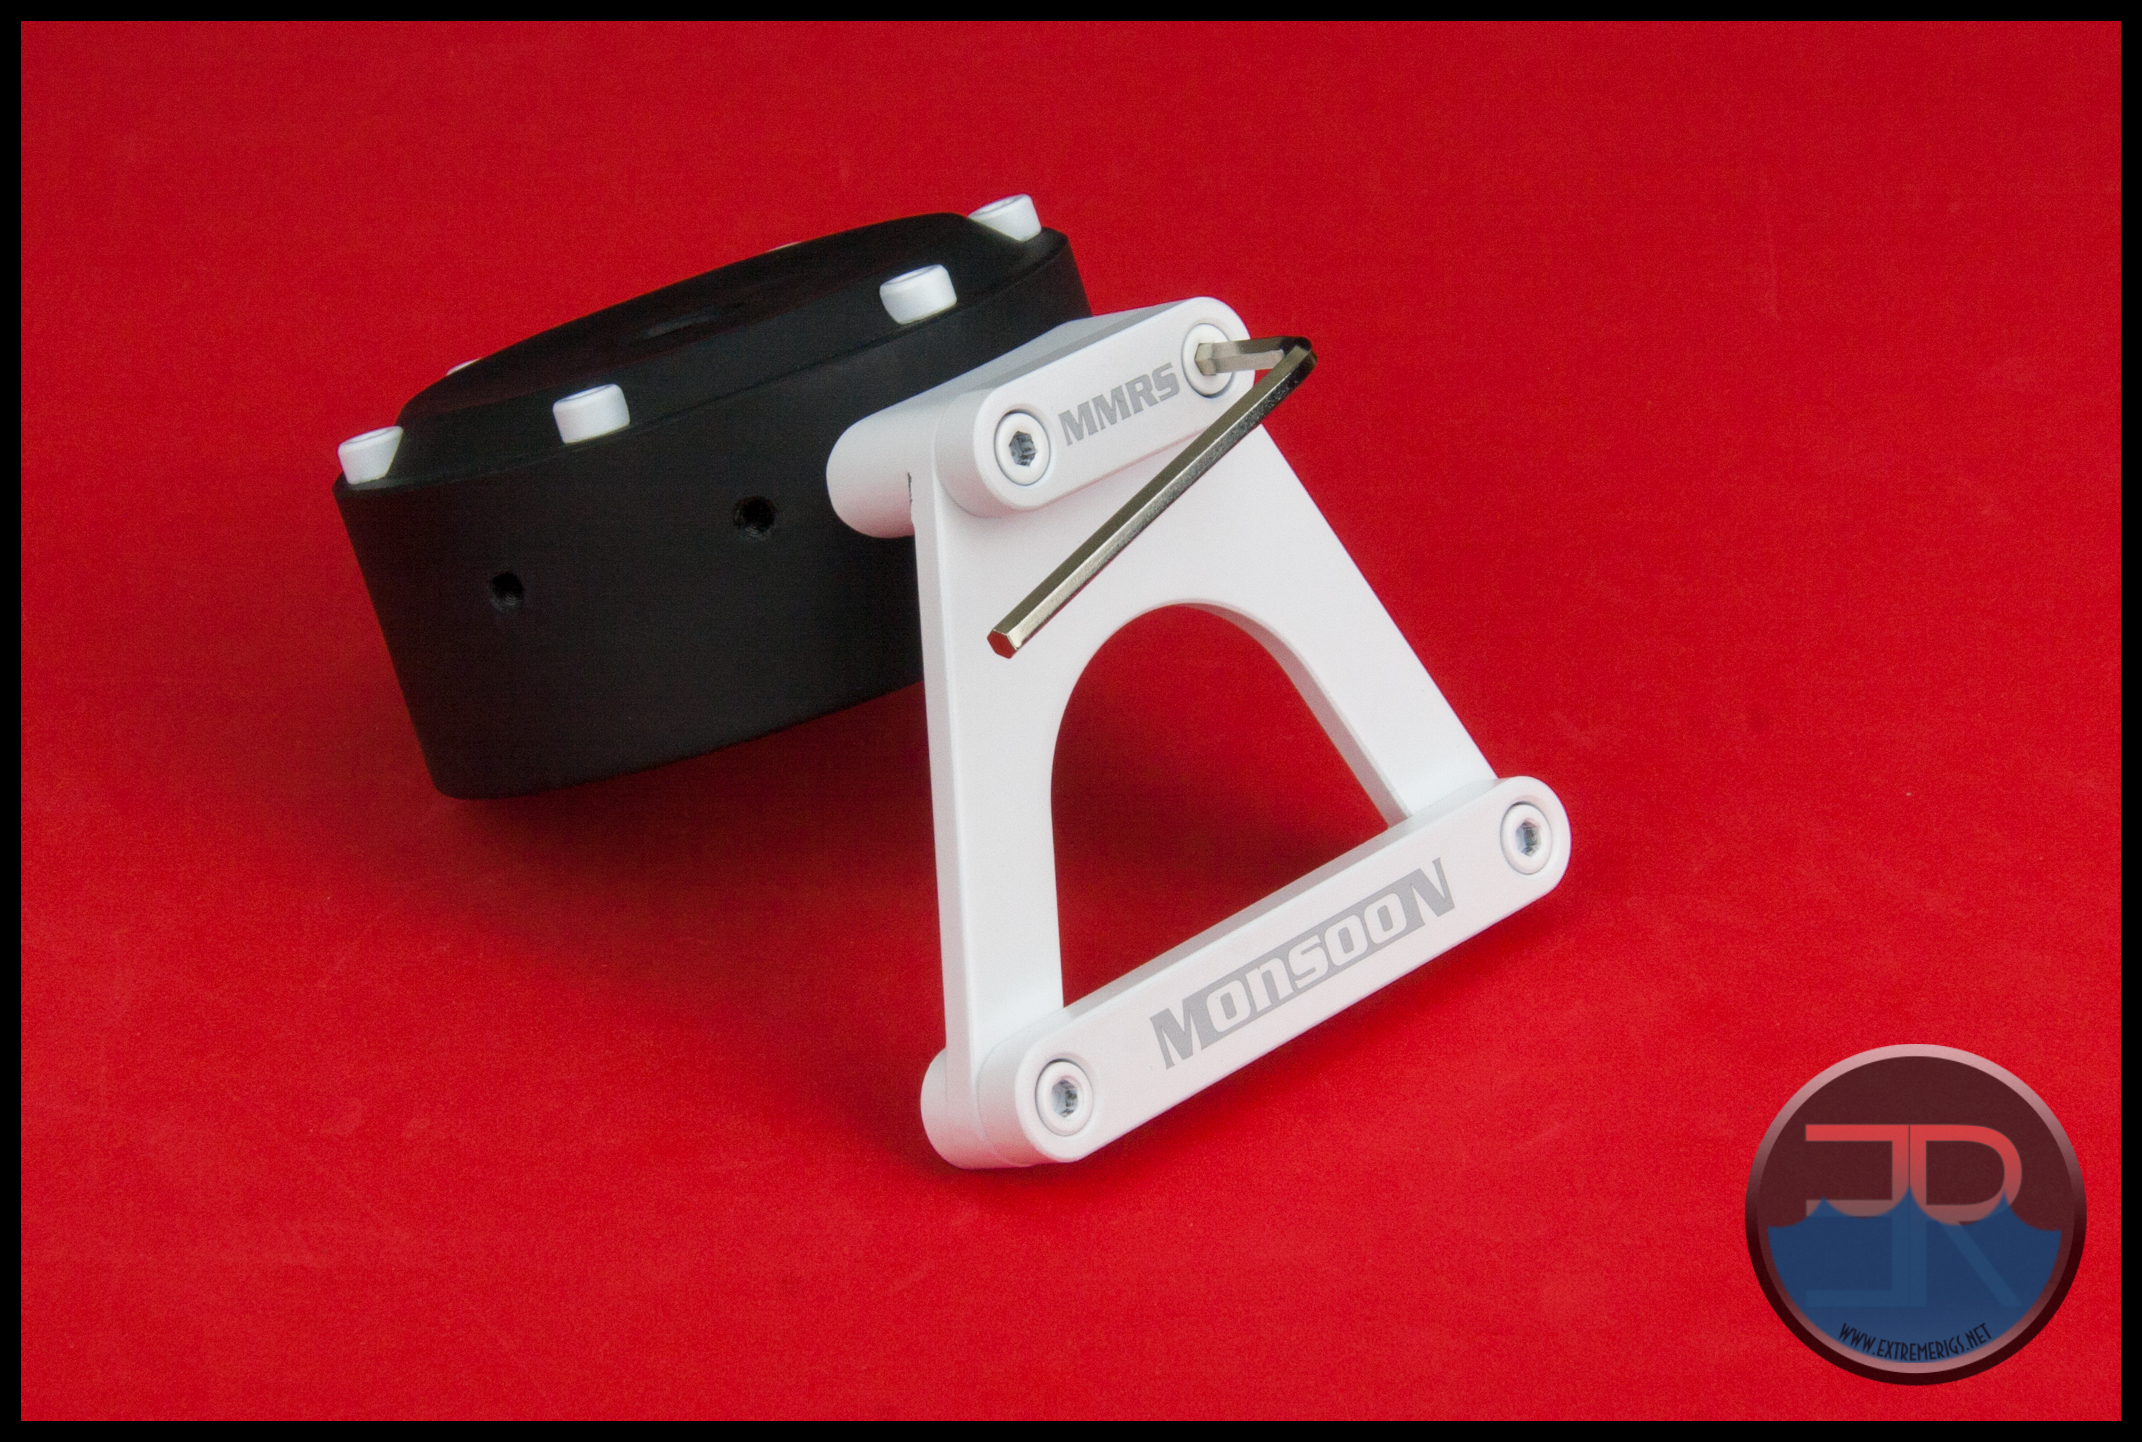
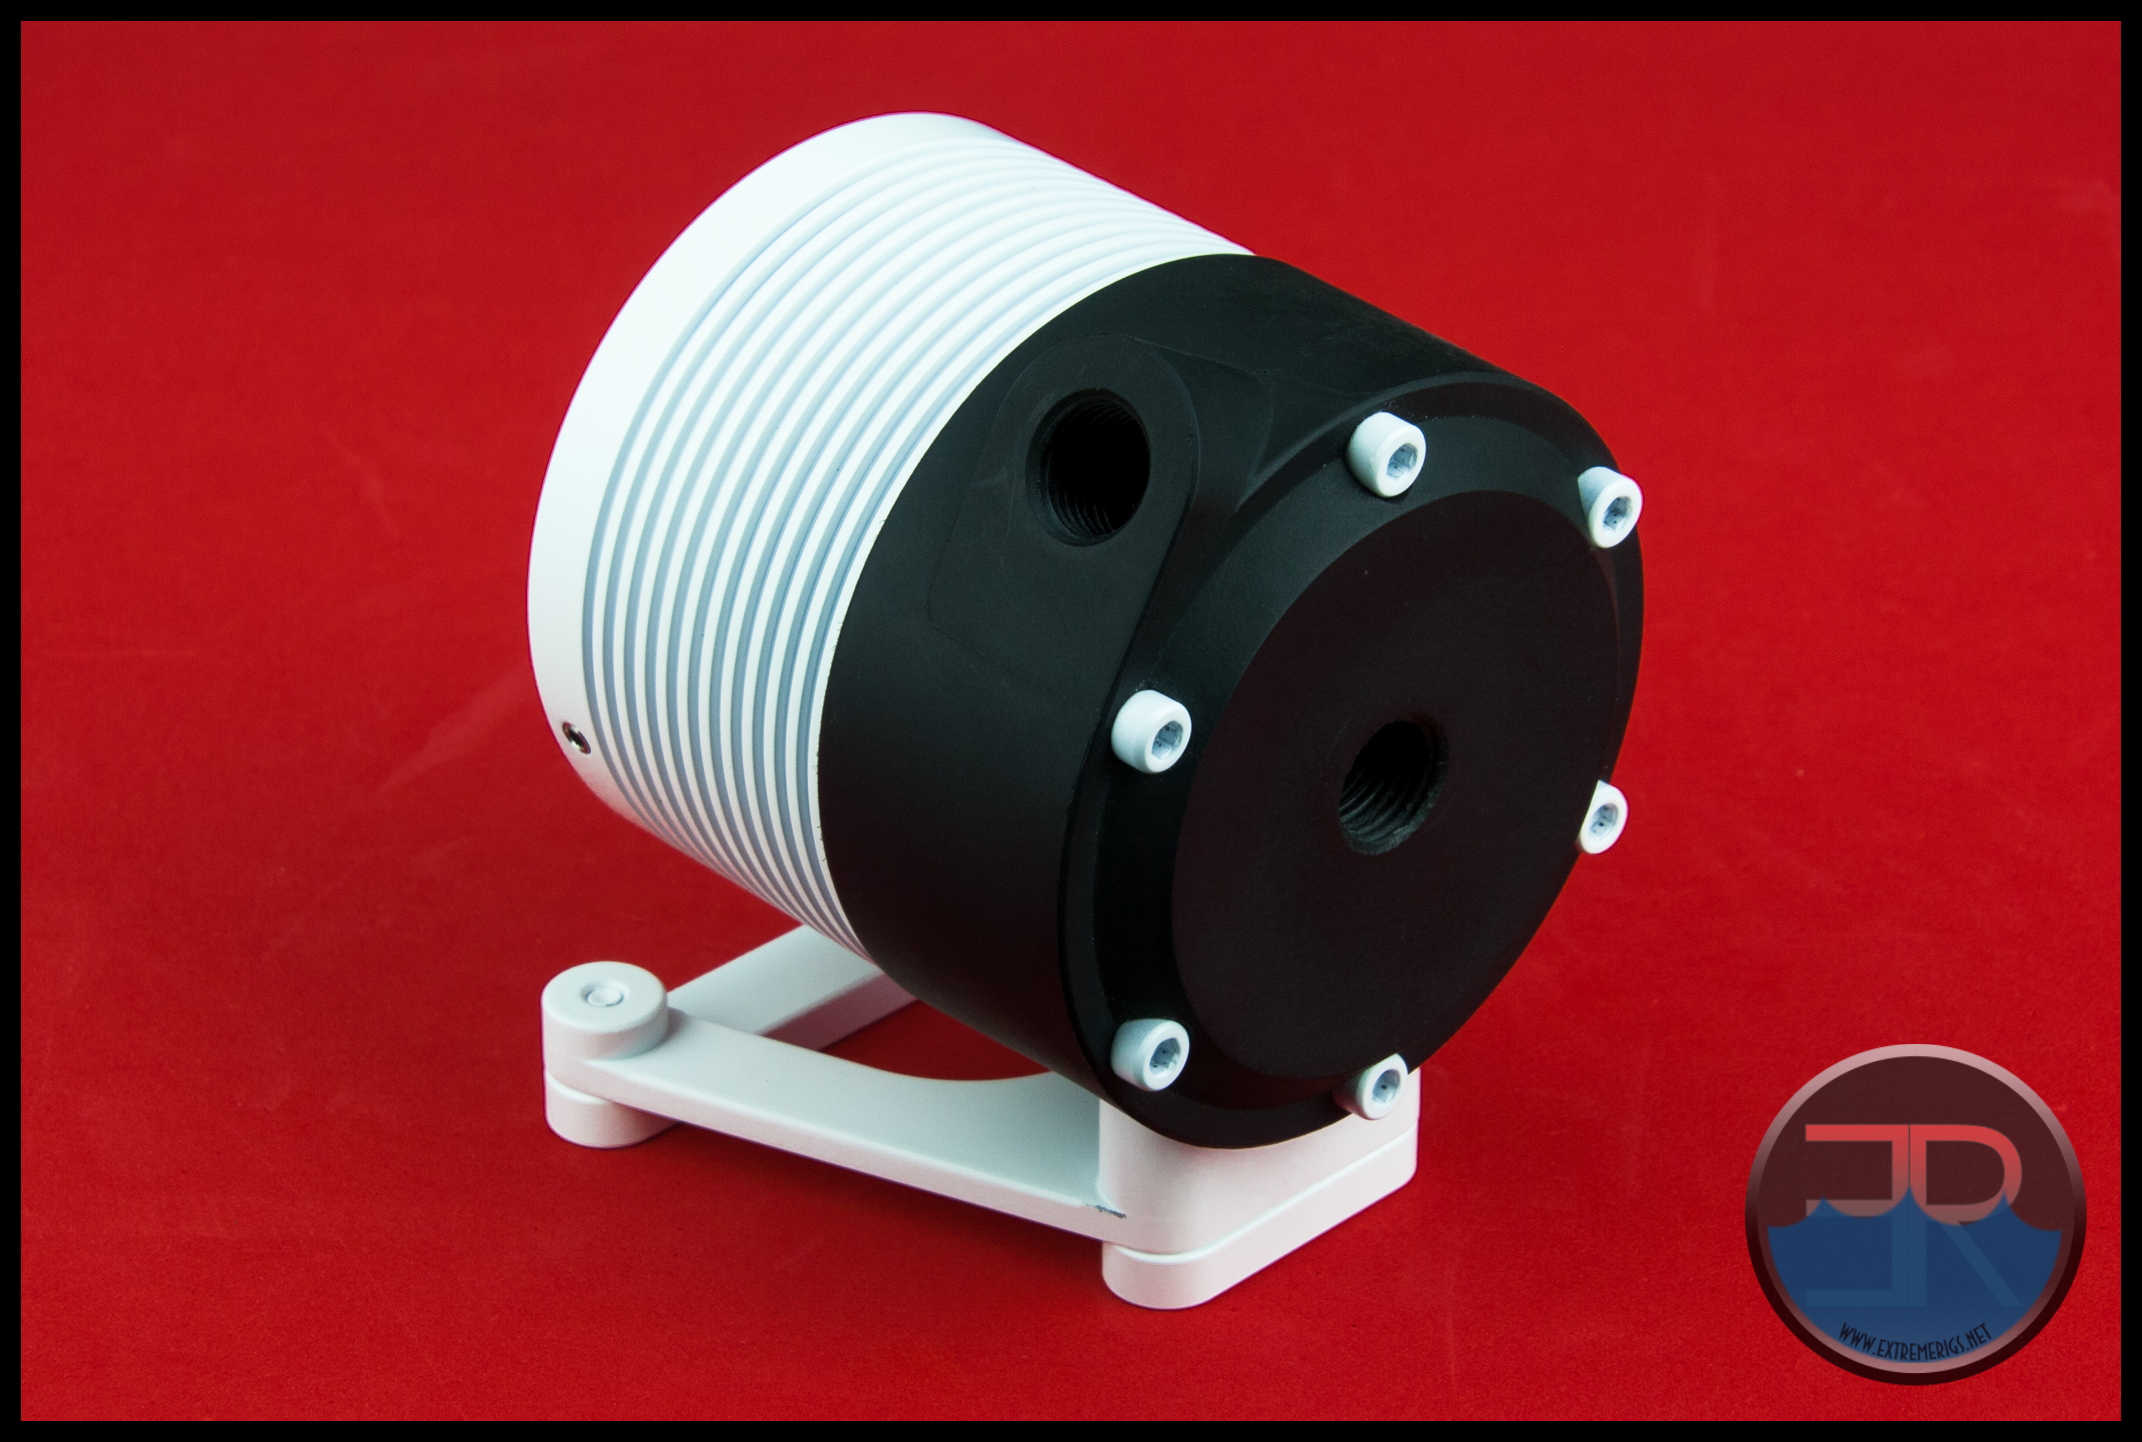
Breaking the pump top assembly down is essential for pump installation and mounting into the chassis.
There are three main pieces to the MMRS-SAP:
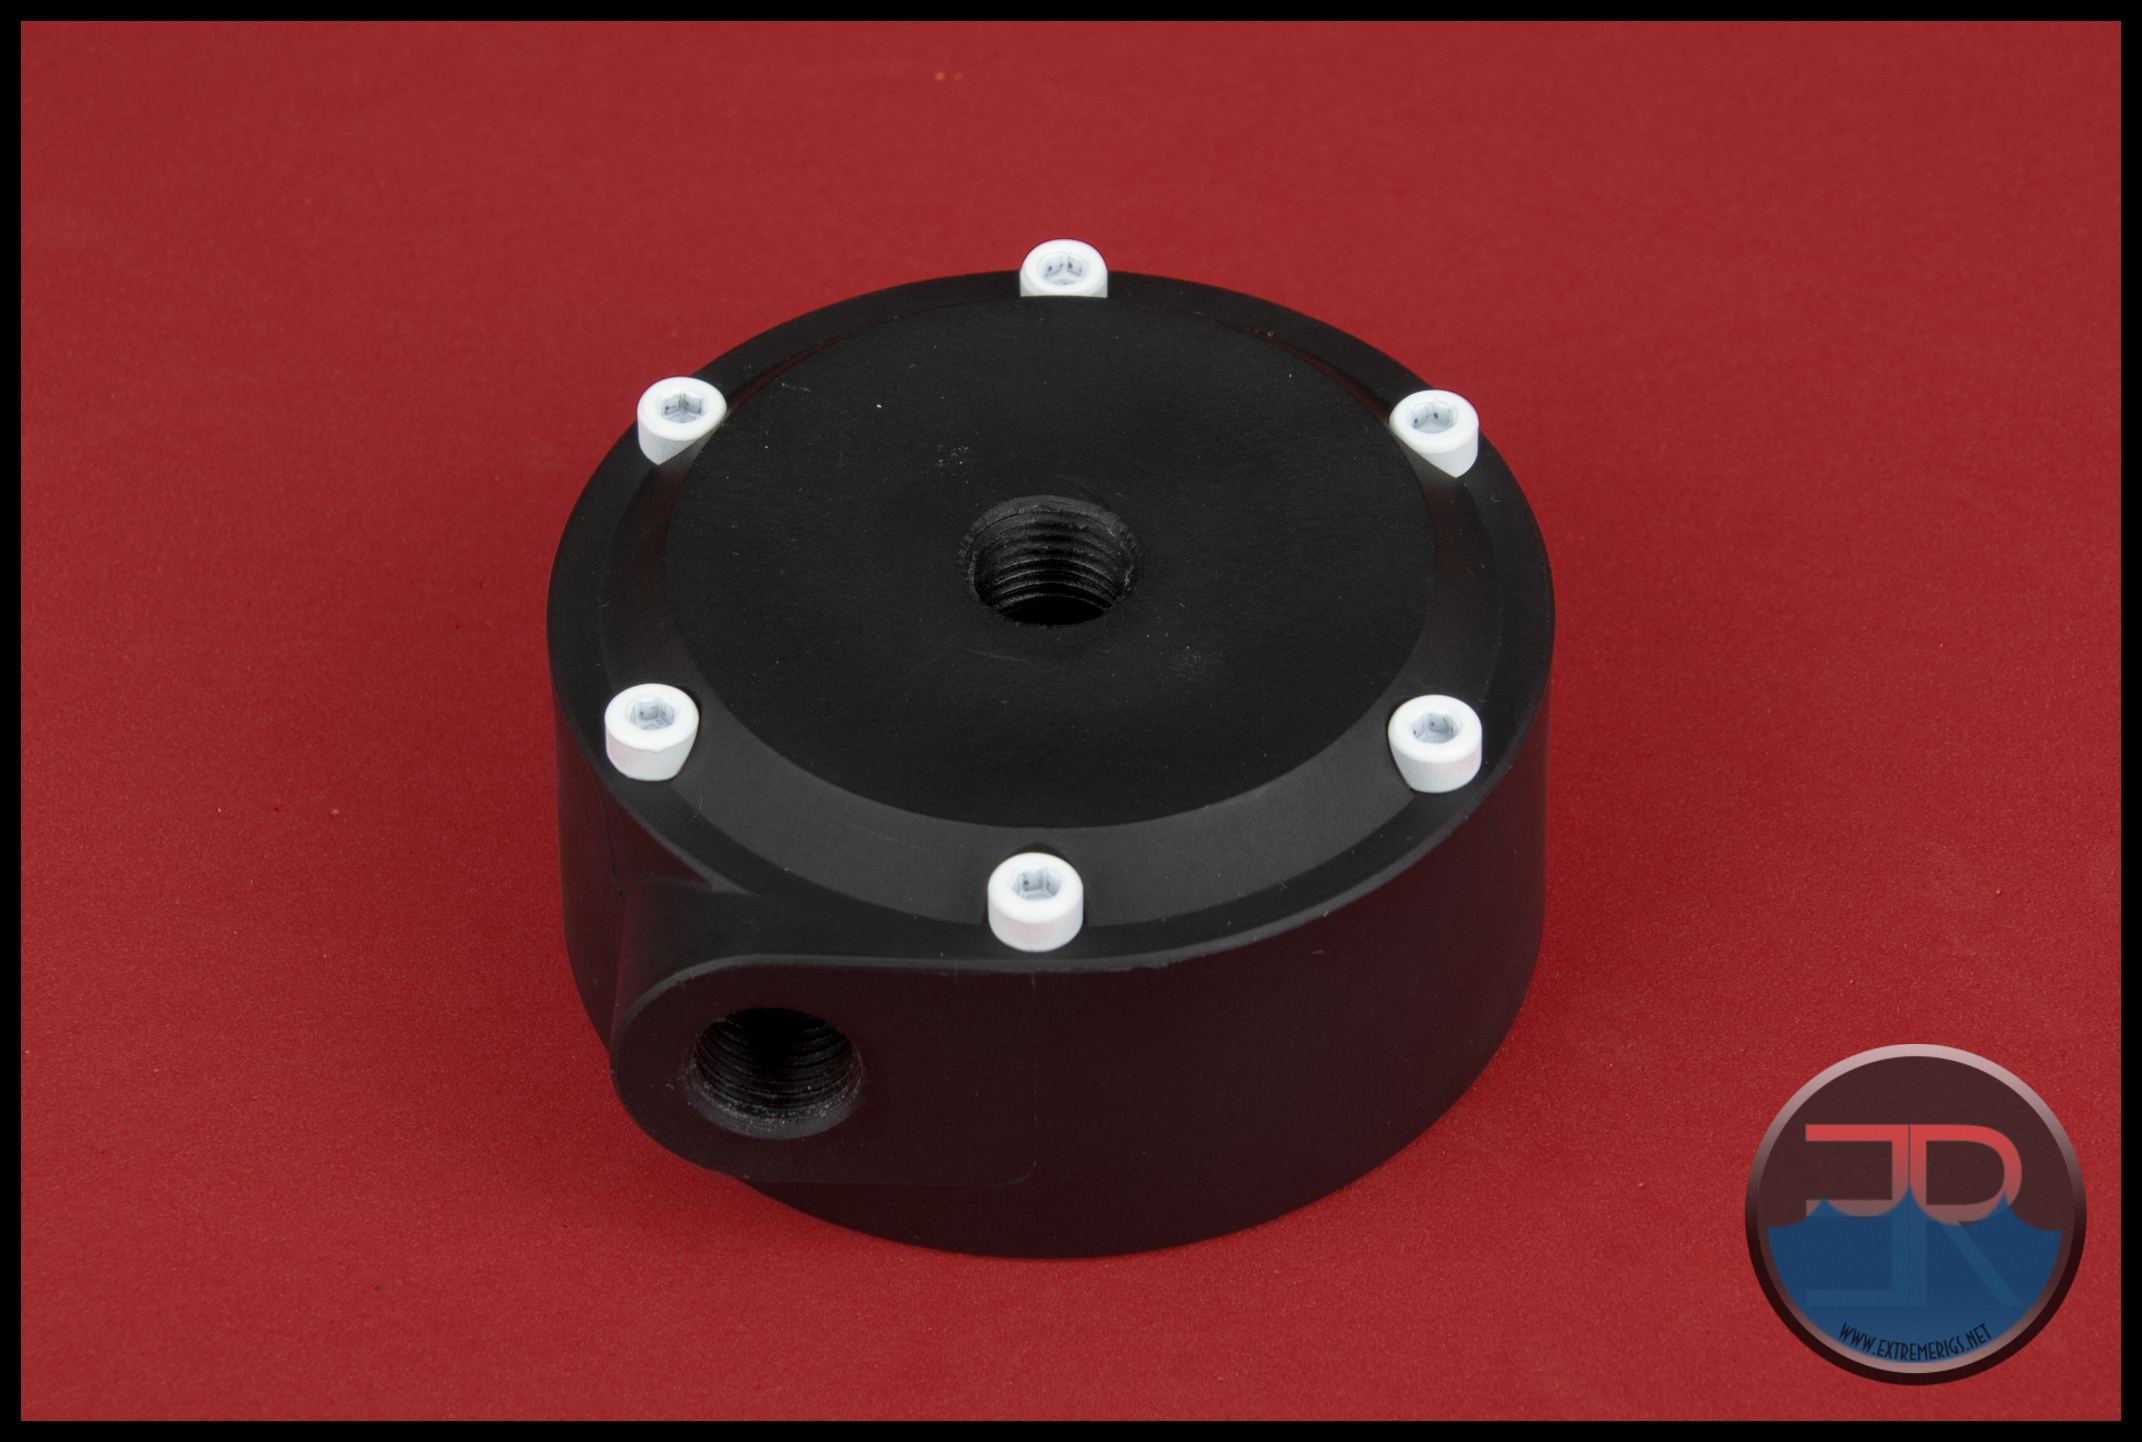
- Pump Top (black nylon part with the 6 white bolts)
- Pump Clamp & Cover (white round part)
- Mounting Bracket (white pieces with 4 bolts)
Breaking down the assembly into these 3 parts very simple and basically only requires removing 2 bolts and unscrewing the clamp/cover which is only hand tight.
2 of 3 main parts need to be further disassembled so we’ll cover that as we go.
 You can choose to either unscrew the clamp/cover from the top OR remove the mounting bracket first, it doesn’t matter which you choose. For no particular reason I unscrewed the clamp/cover from the top first.
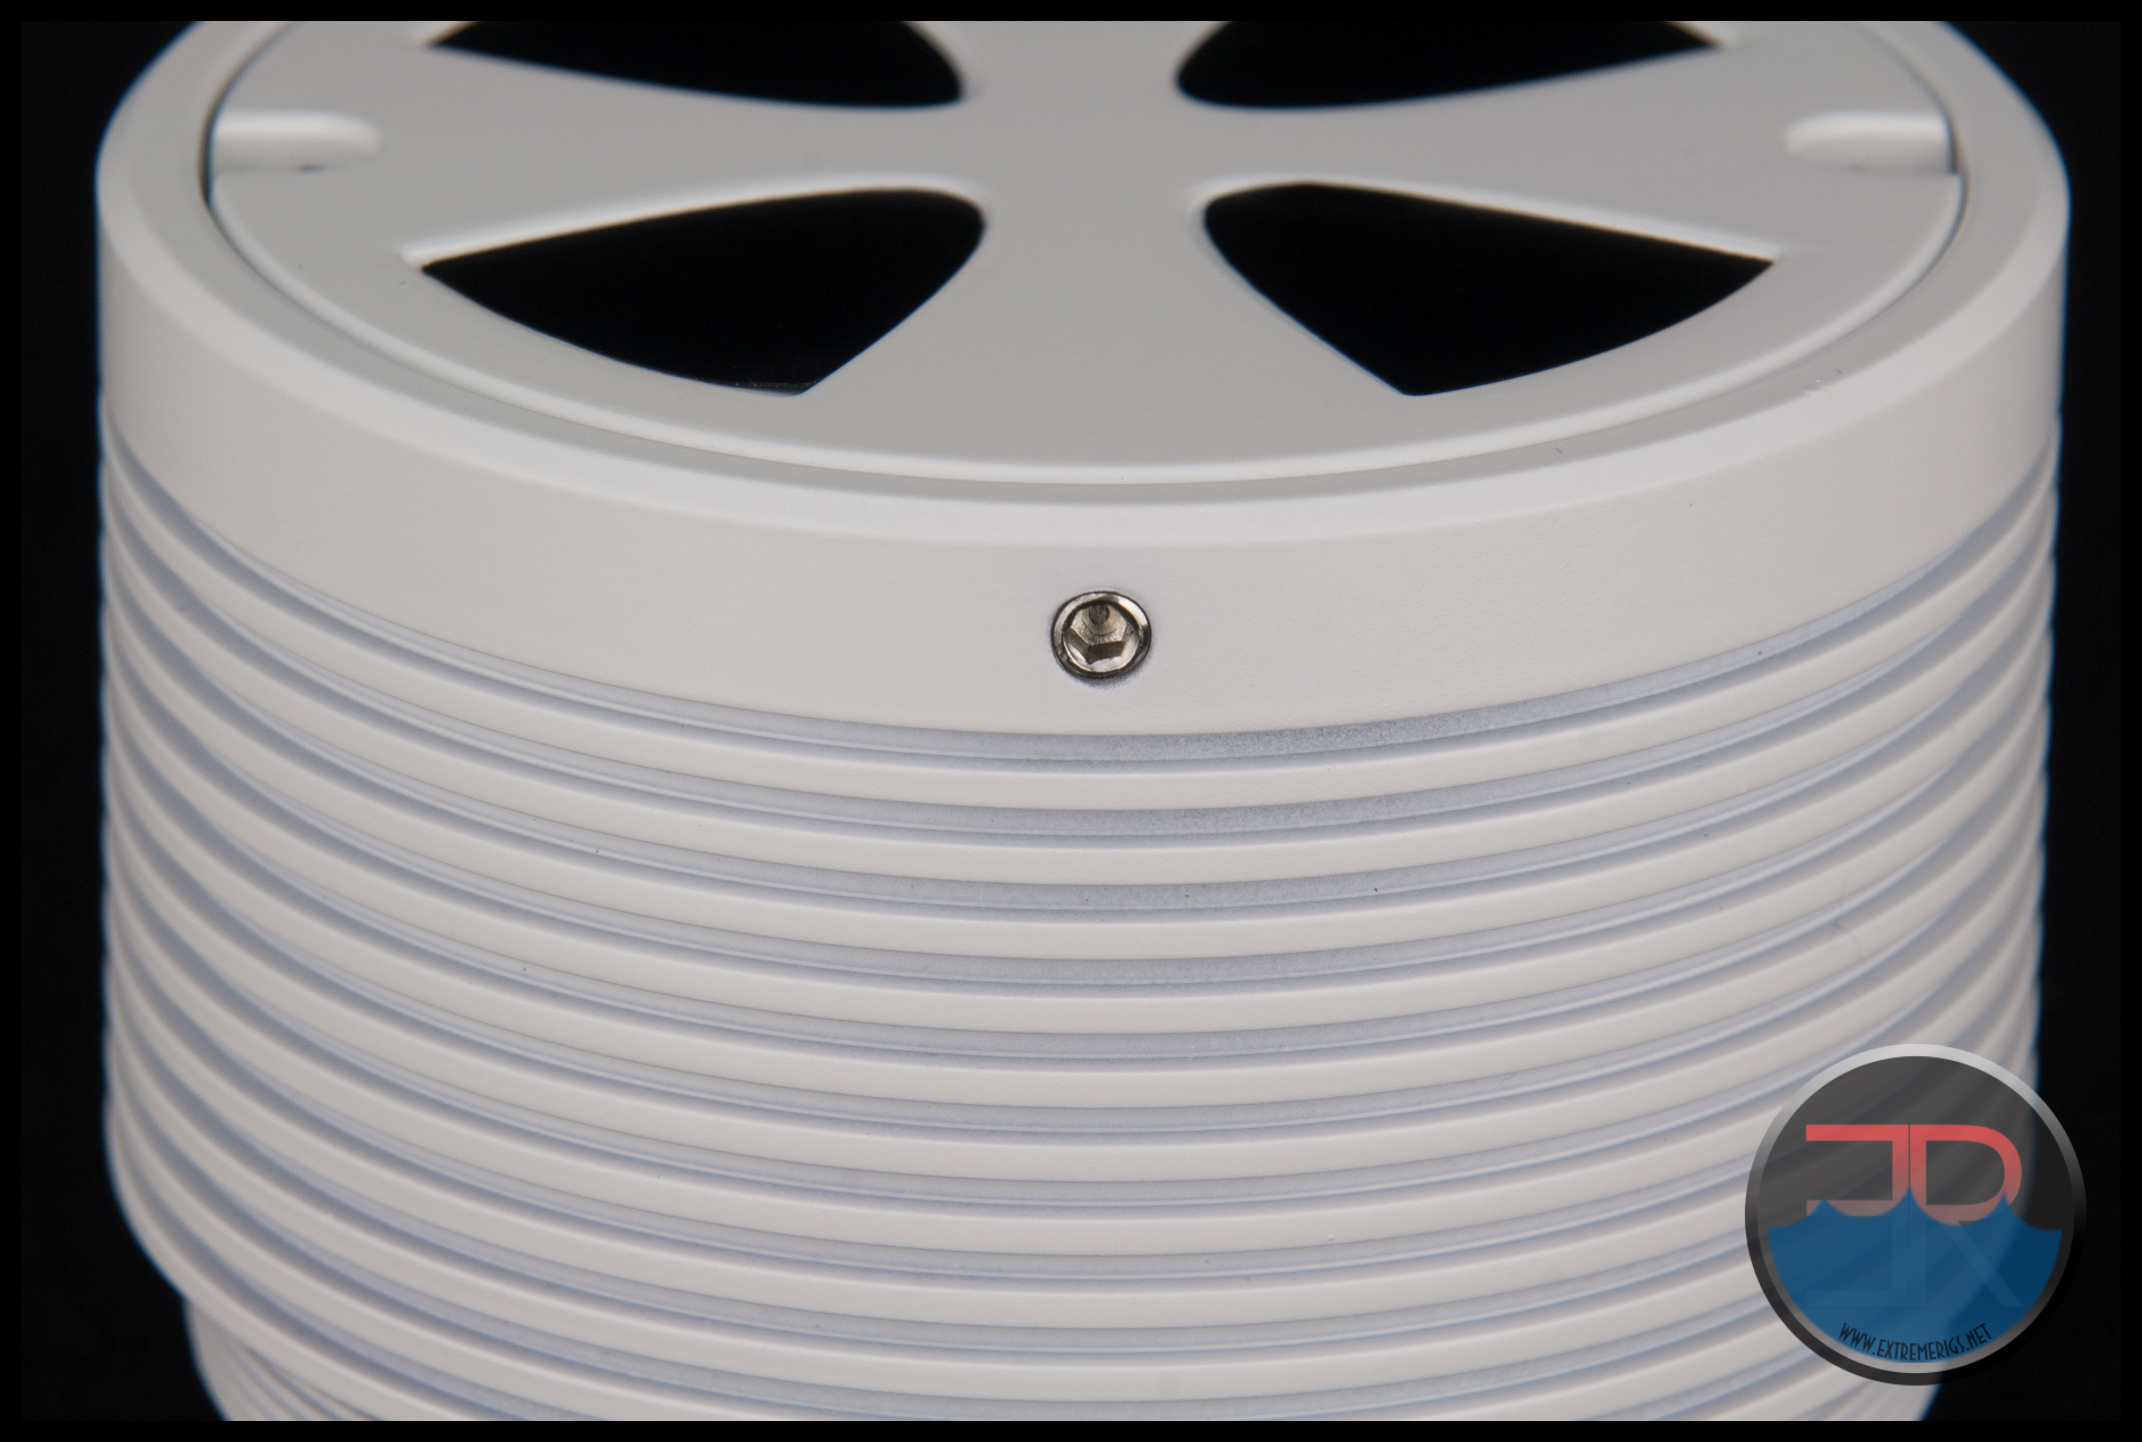
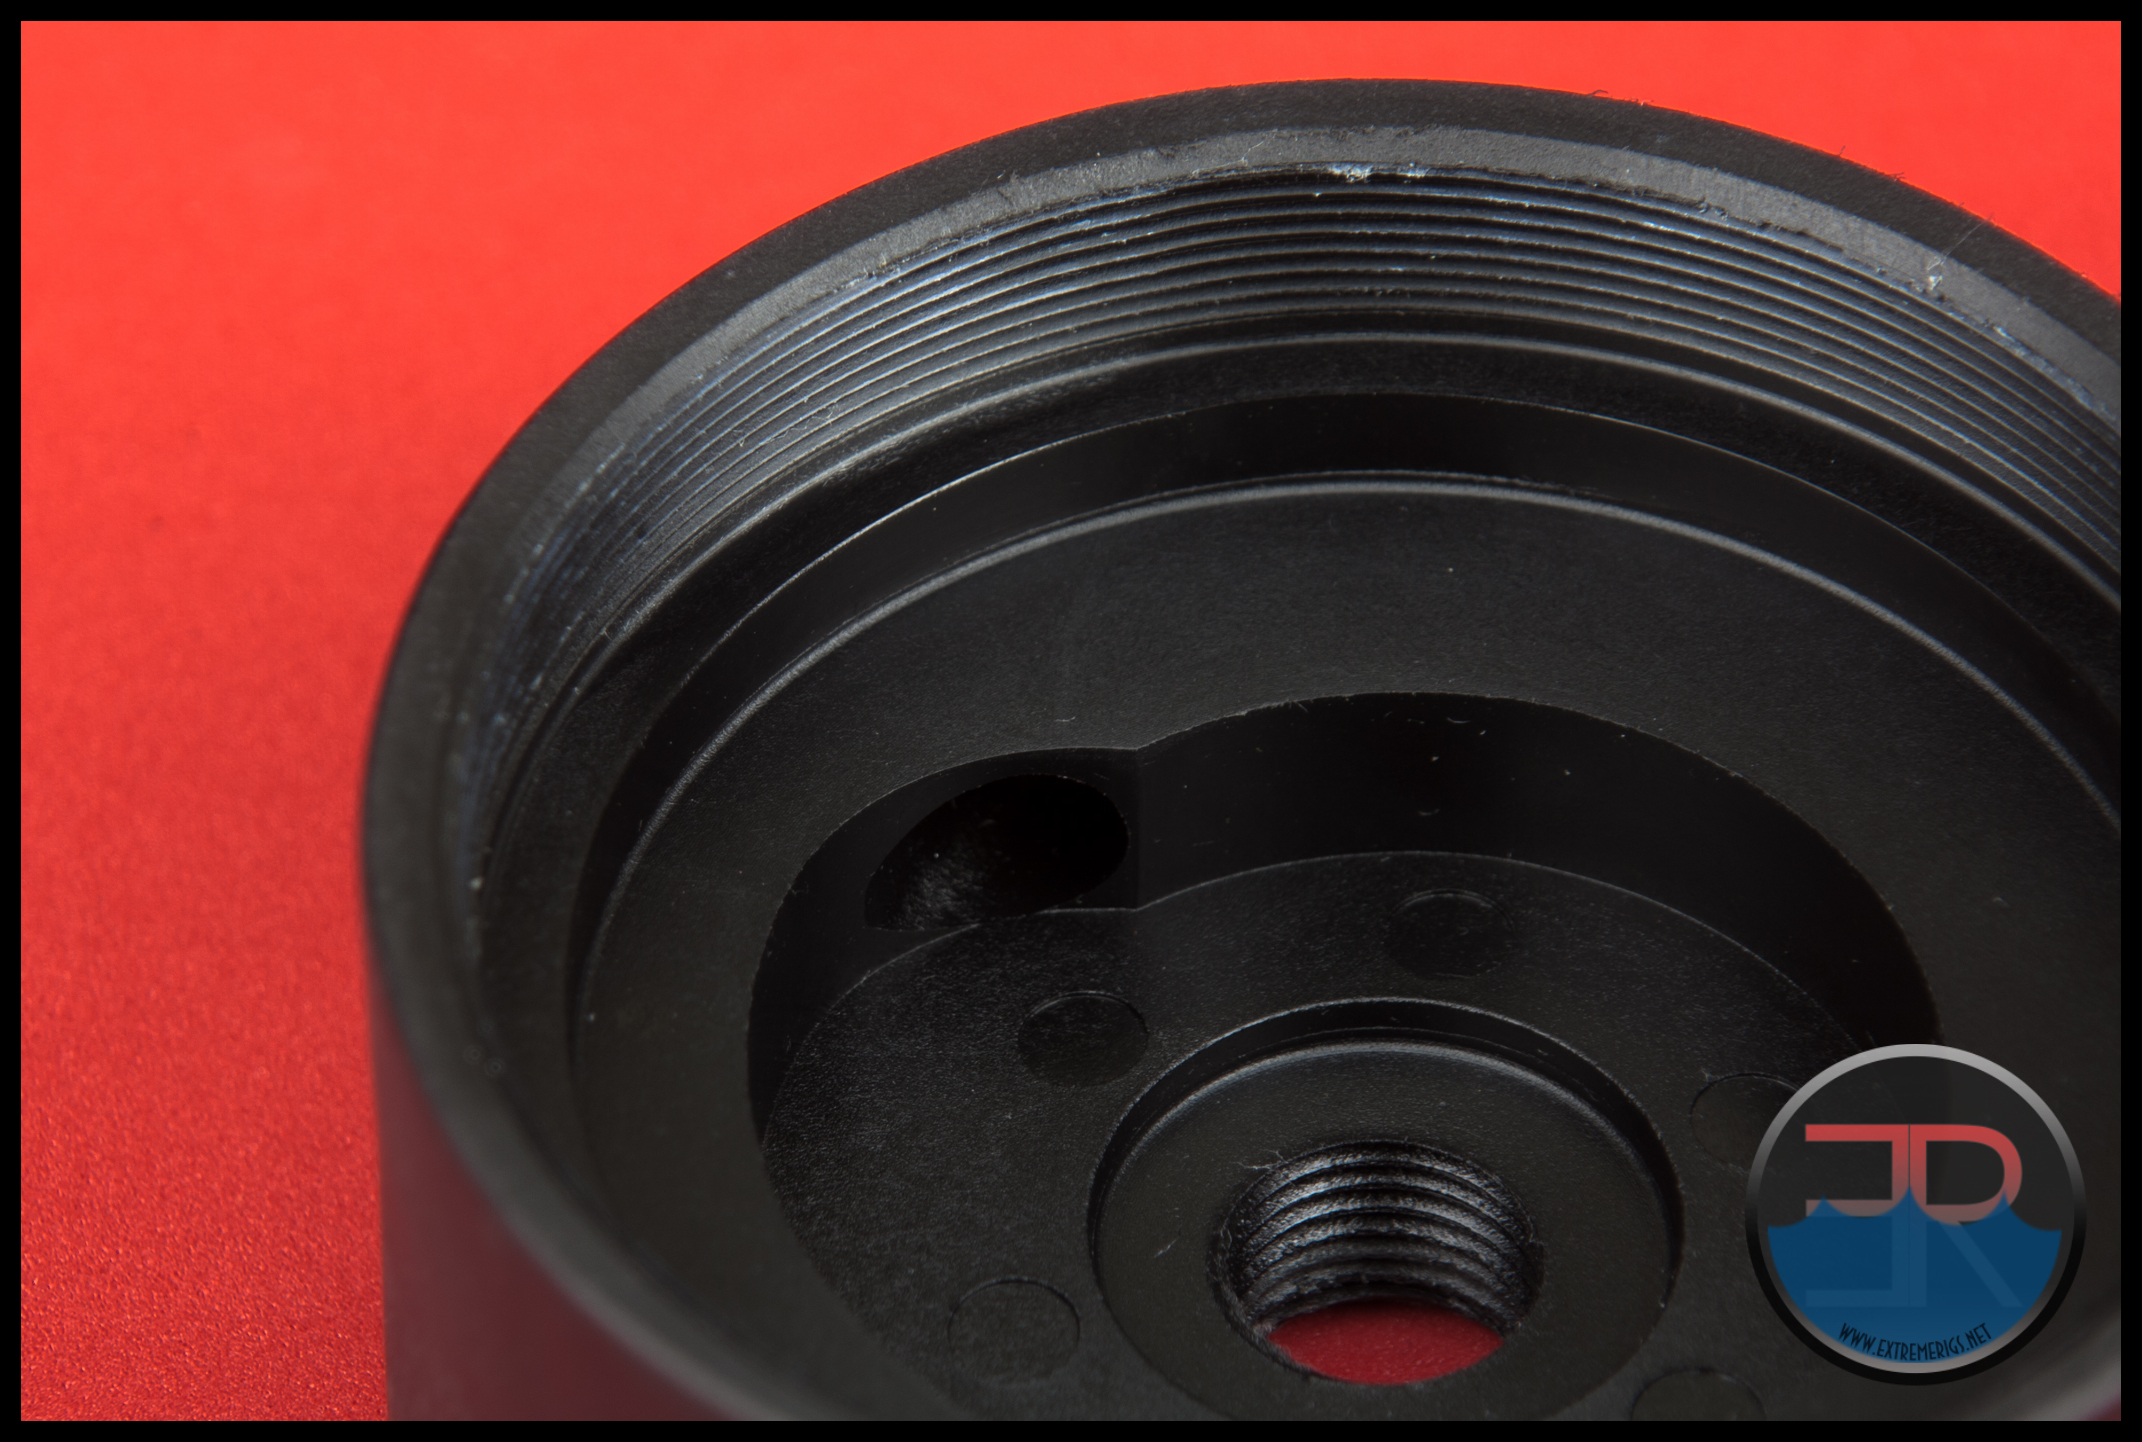
Firmly grasp the nylon top in one hand and unscrew (anti-clockwise) the clamp/cover with the other hand.
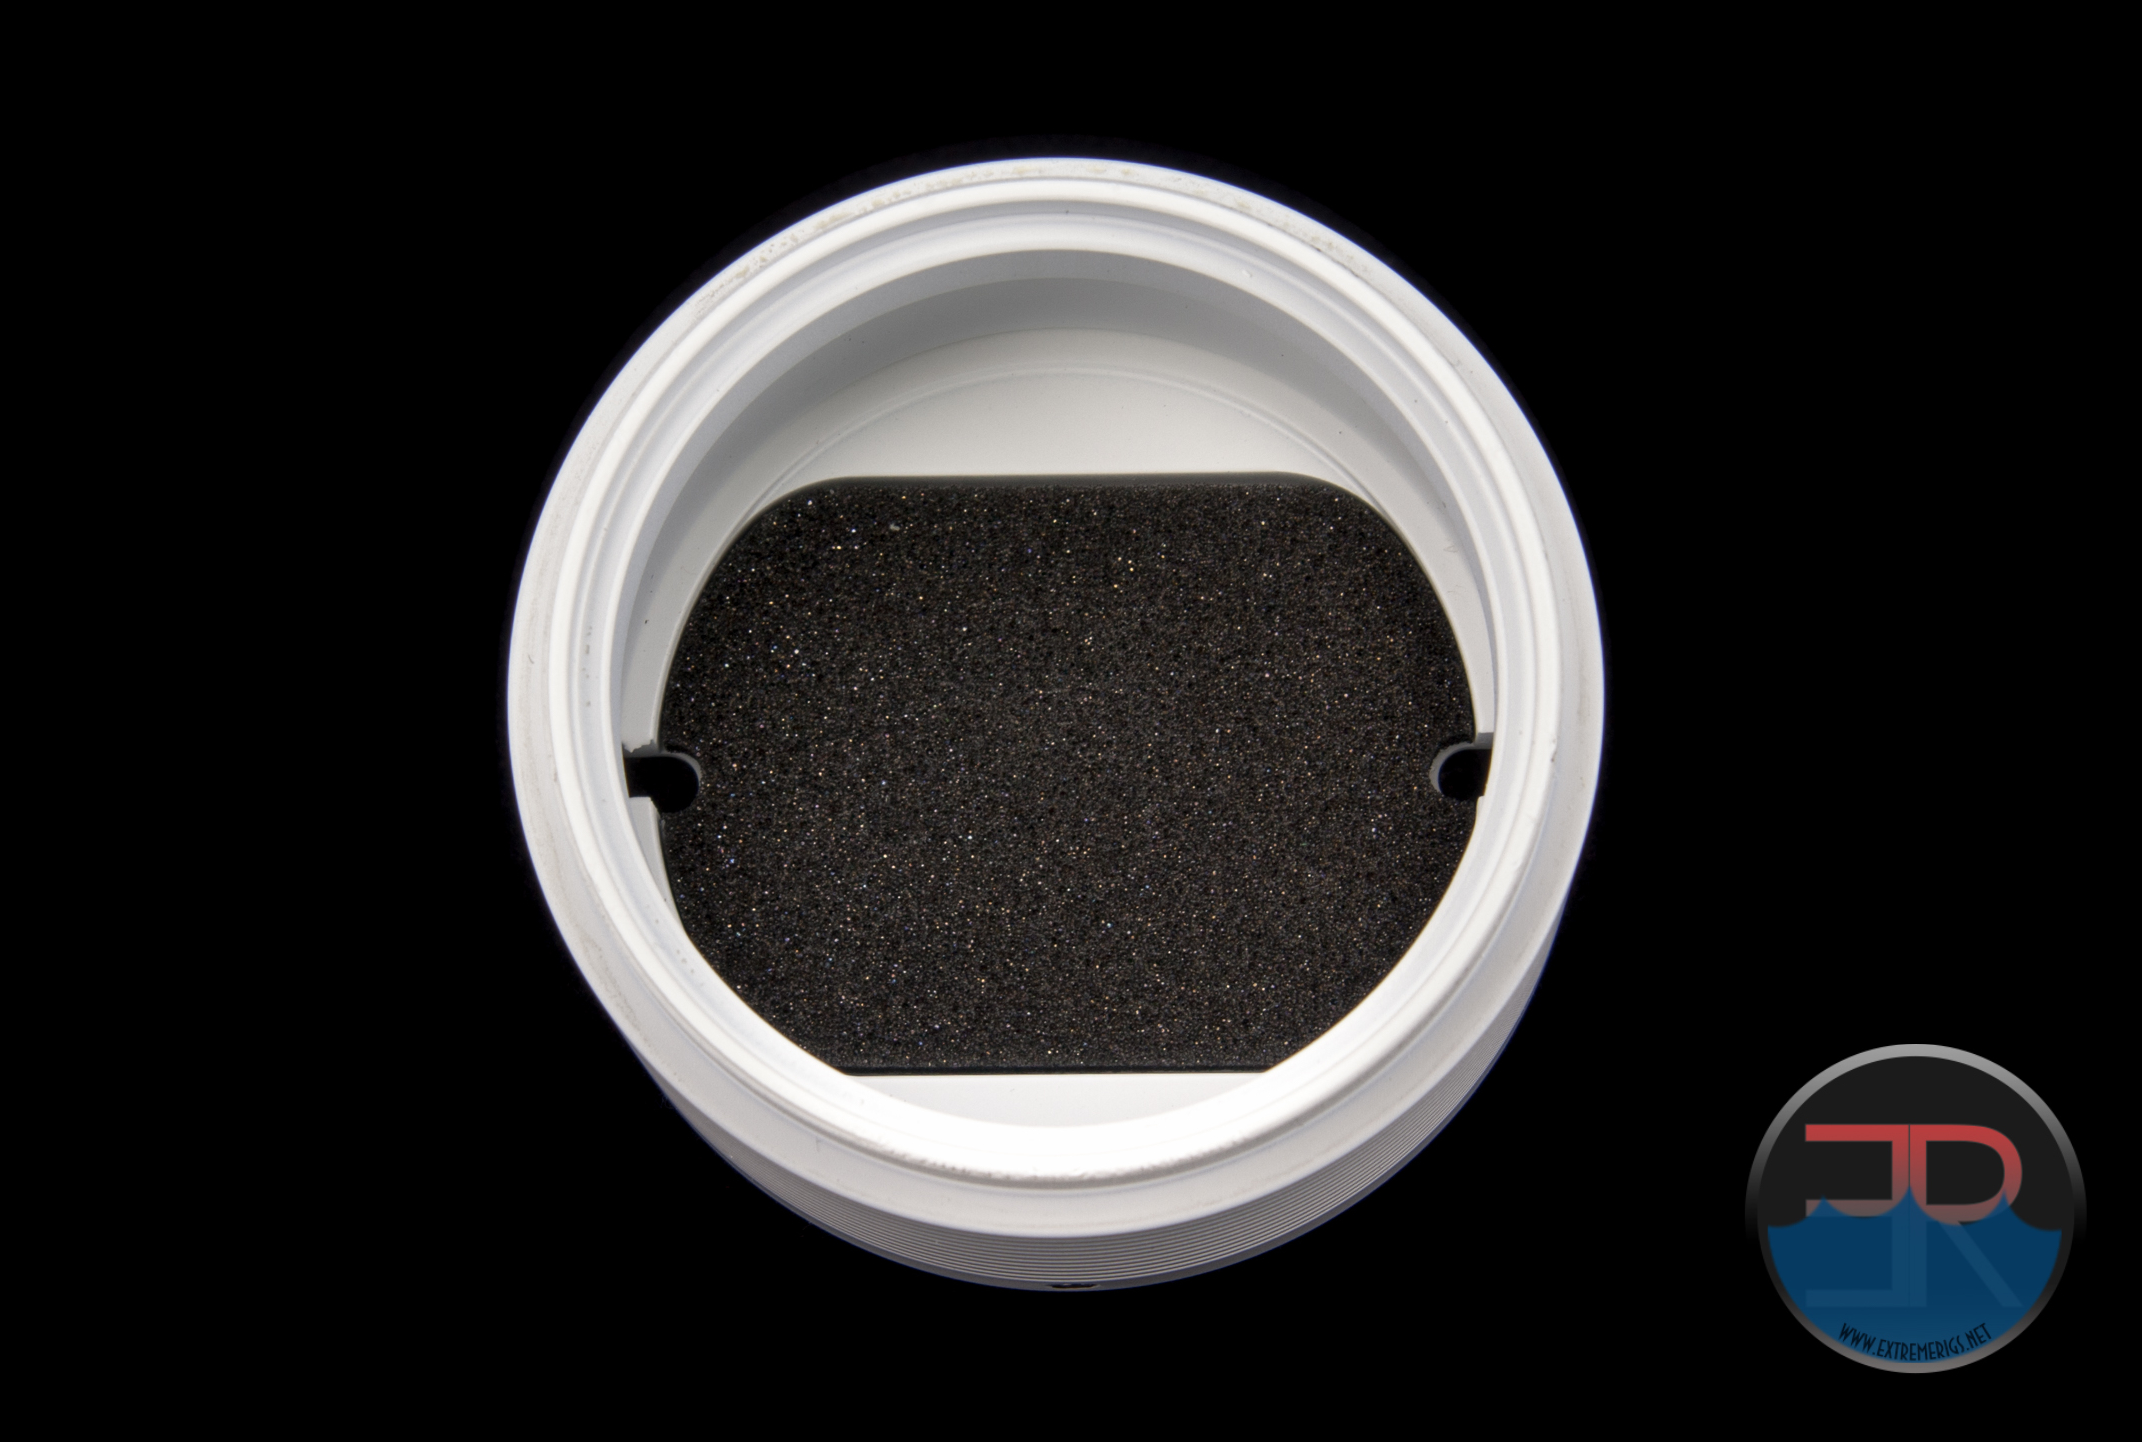
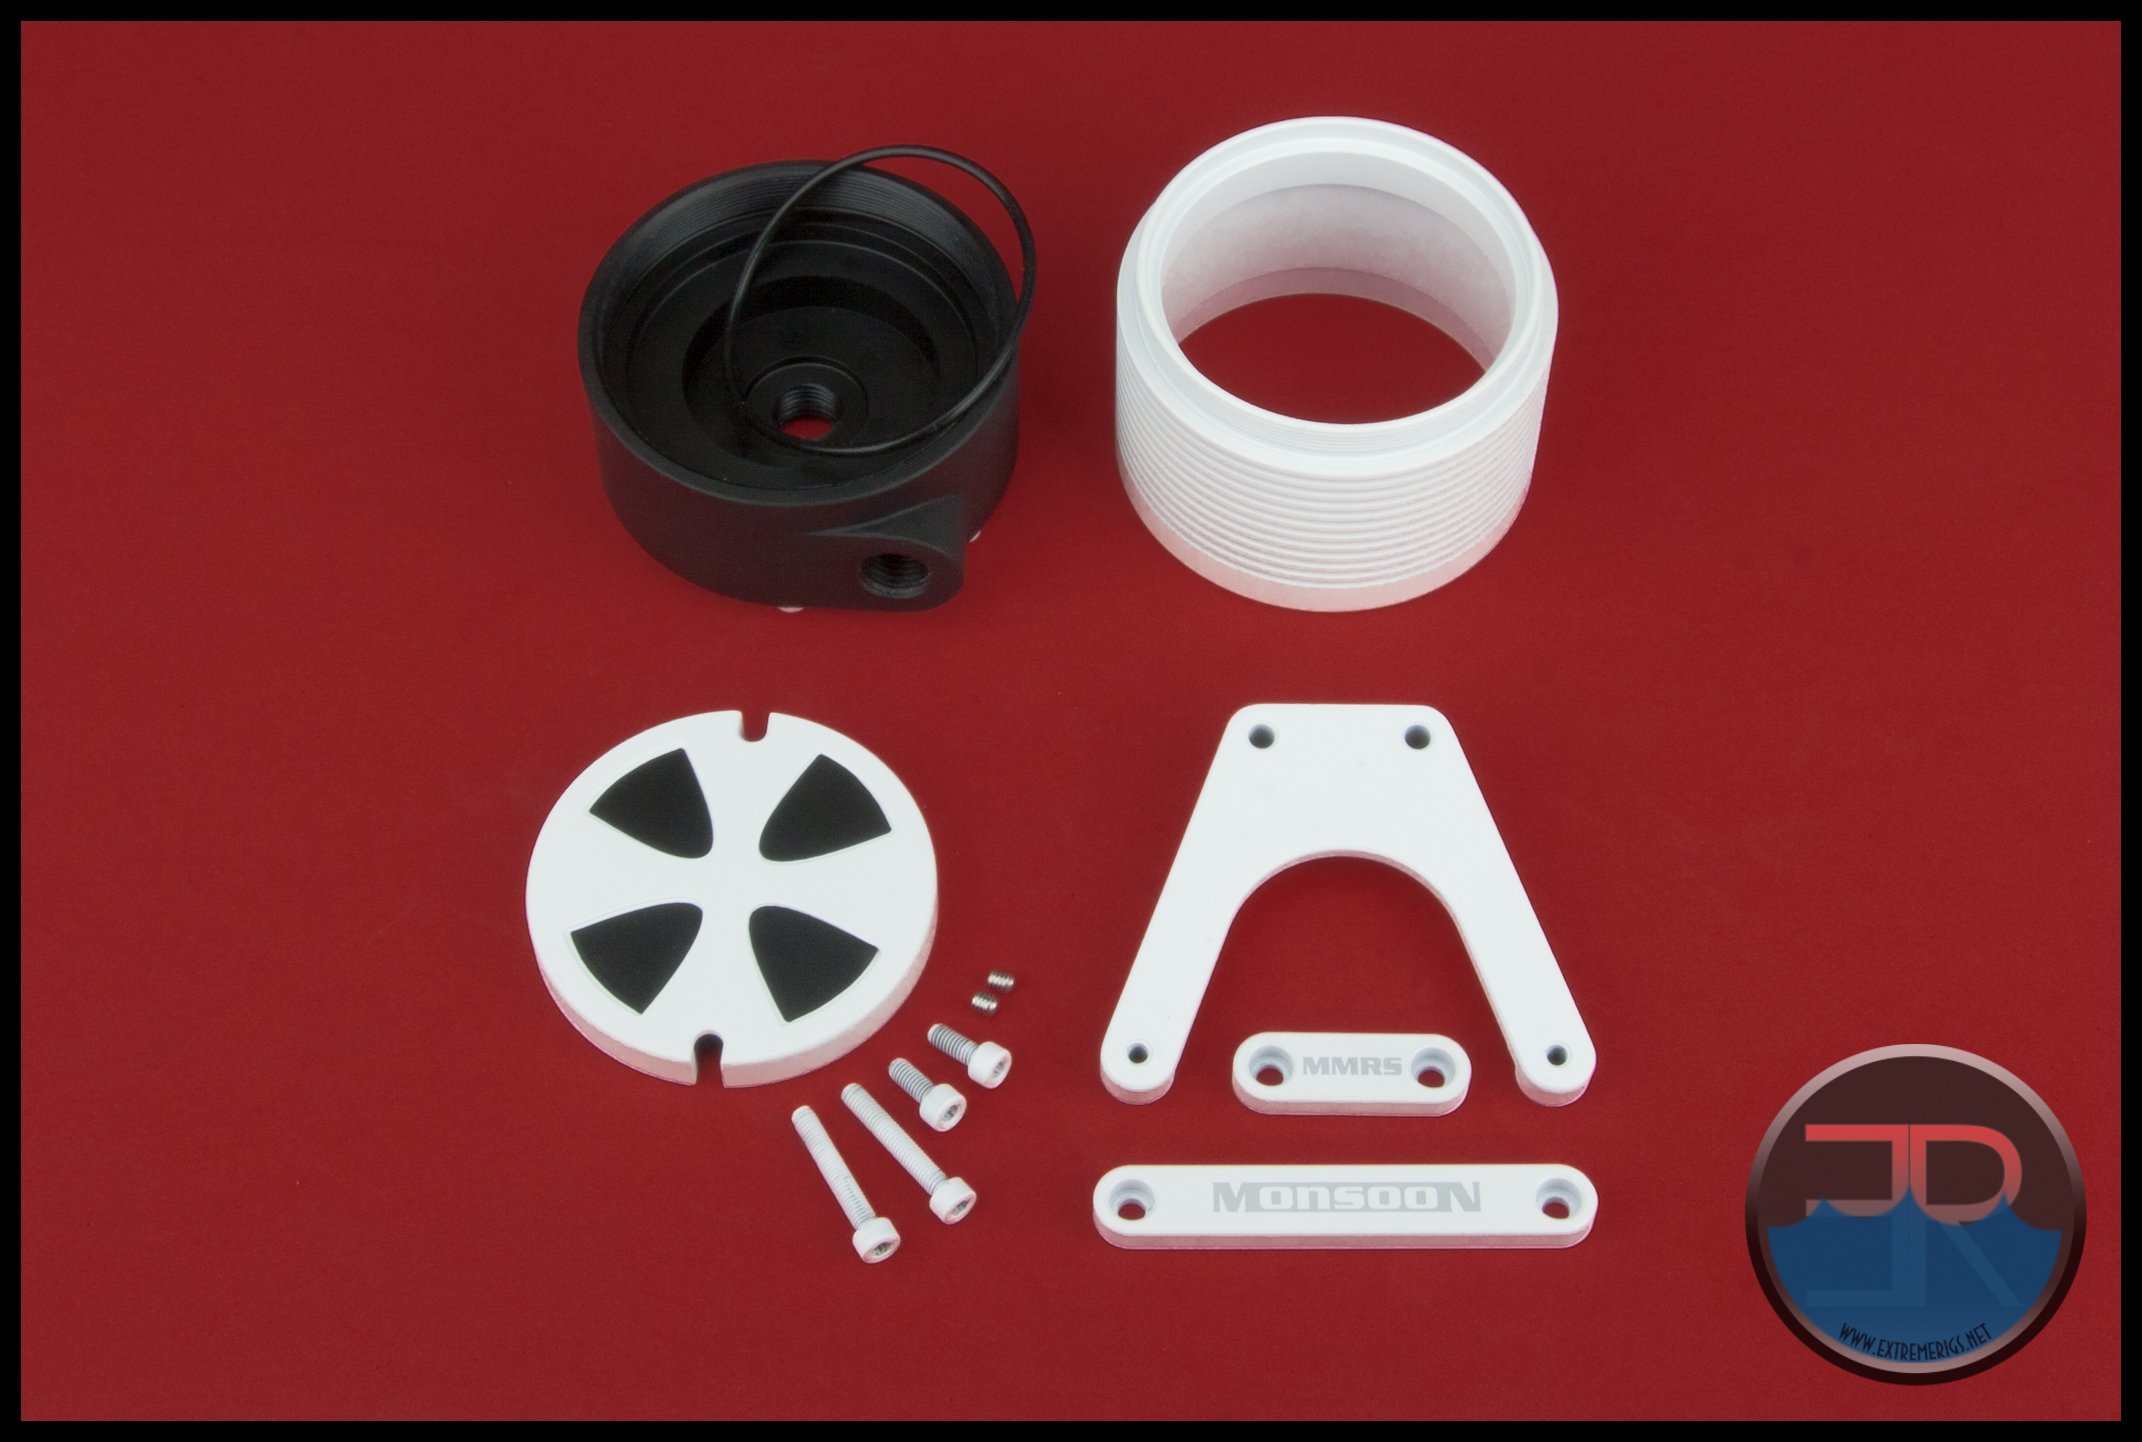
Inside the cover is fully painted (anodized or chromed on other finishes) and some vibration/sound absorbing foam at the bottom. The foam is stuck to the end cap which we’ll look at next.
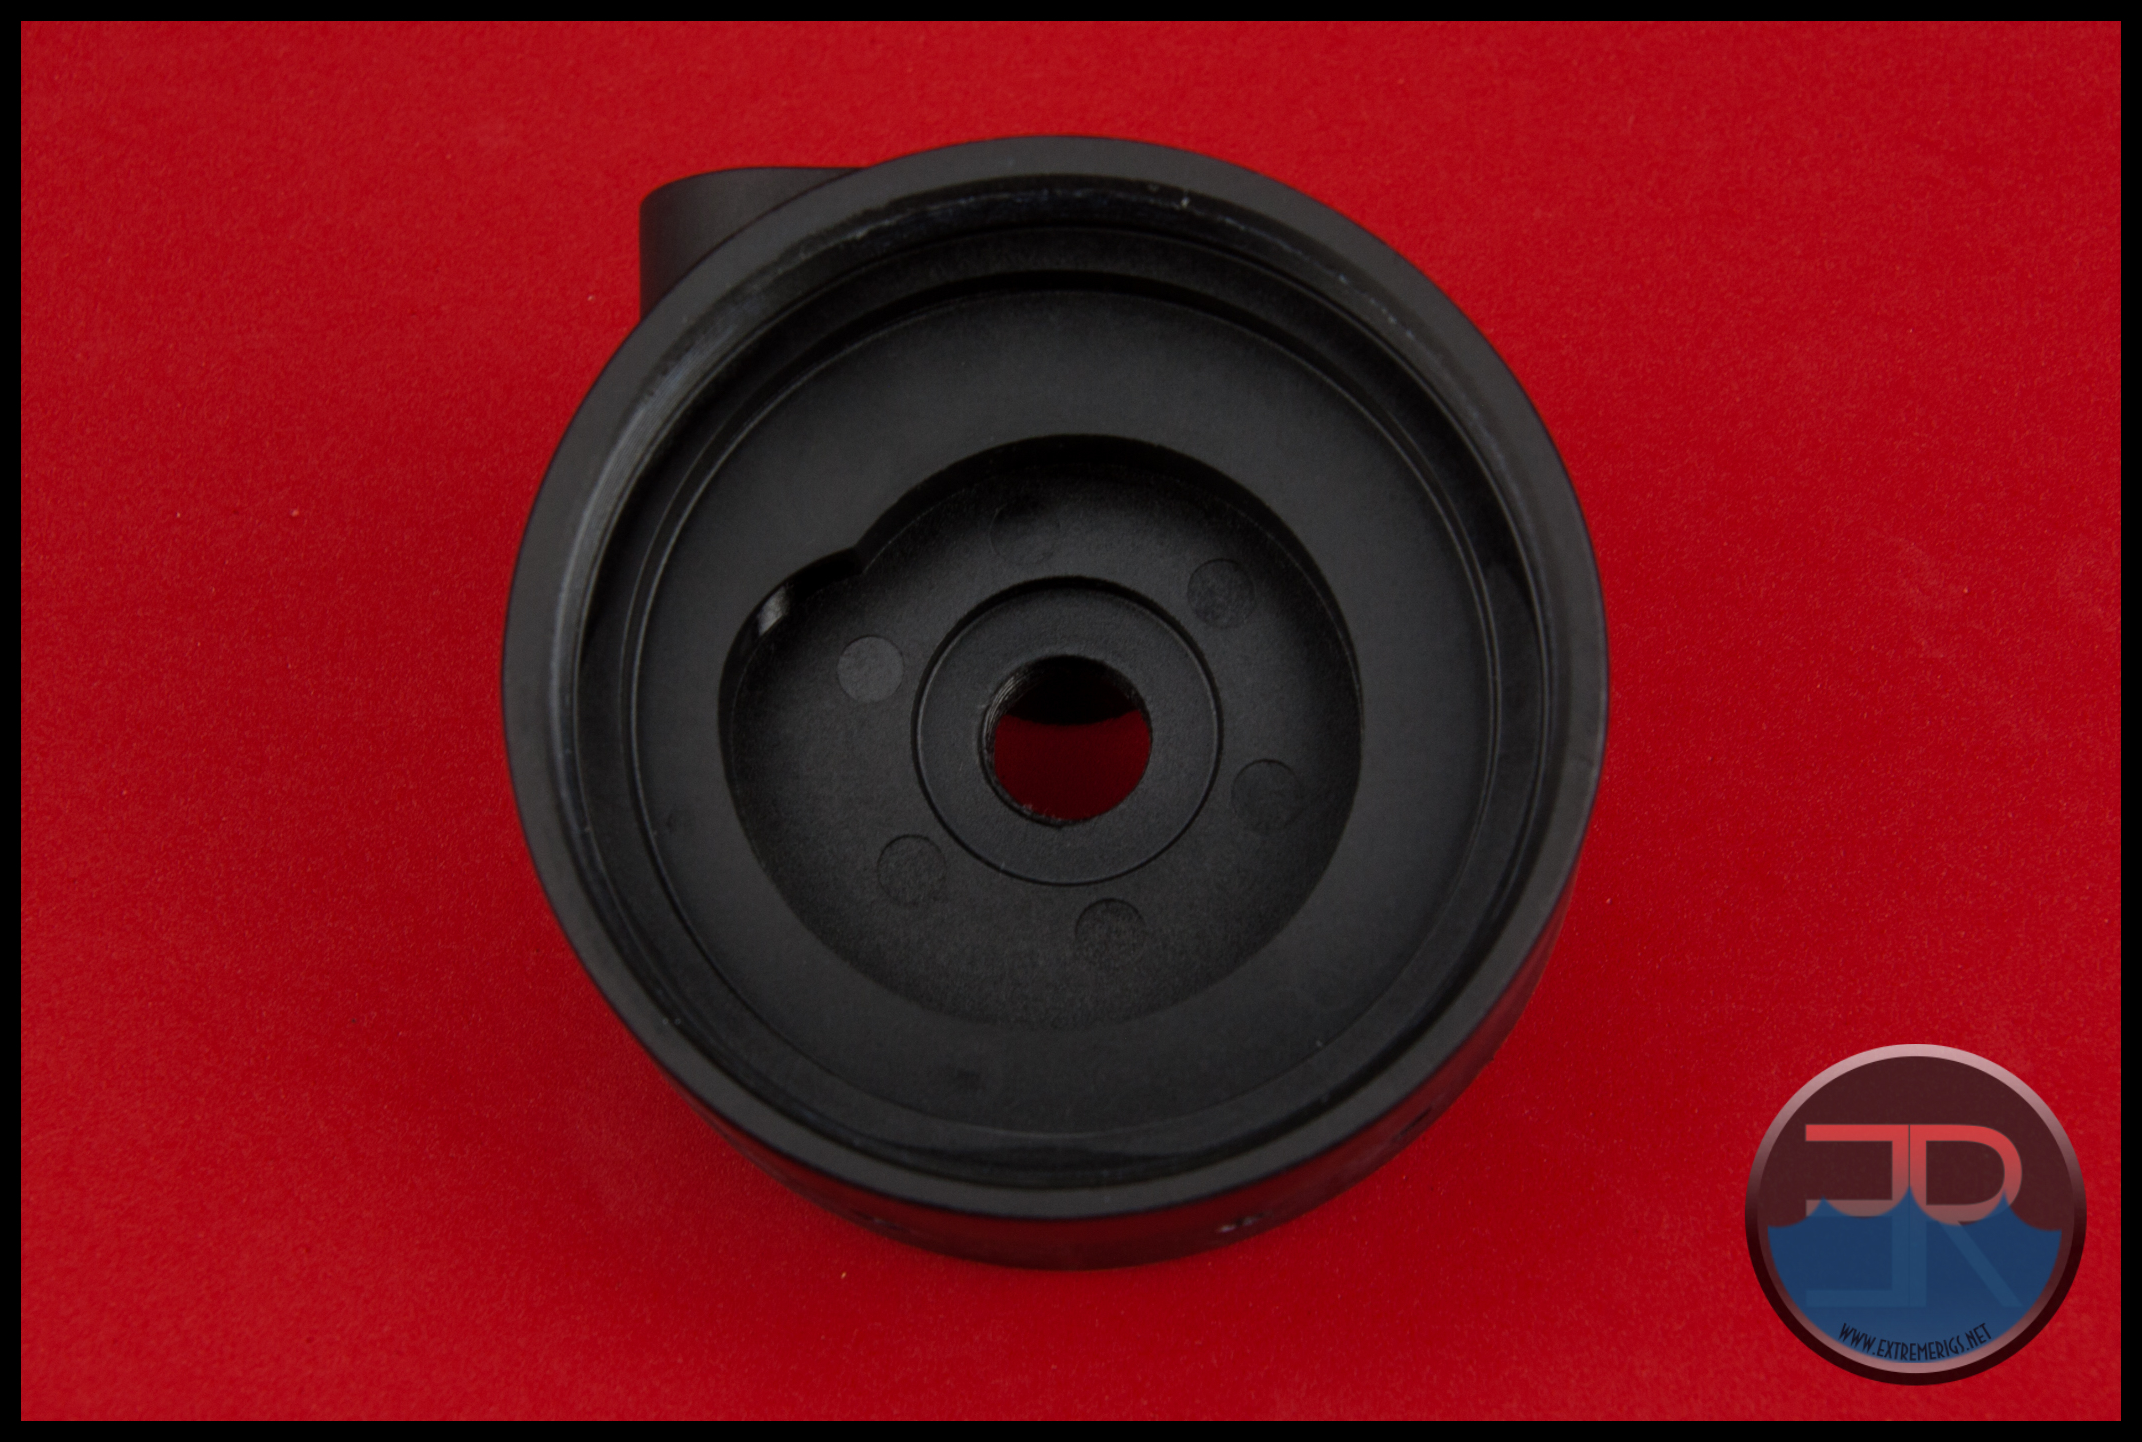
Looking at the bottom of the clamp/cover we see the end cap which sits perfectly flush with the cover and has minimal gaps around the edge.
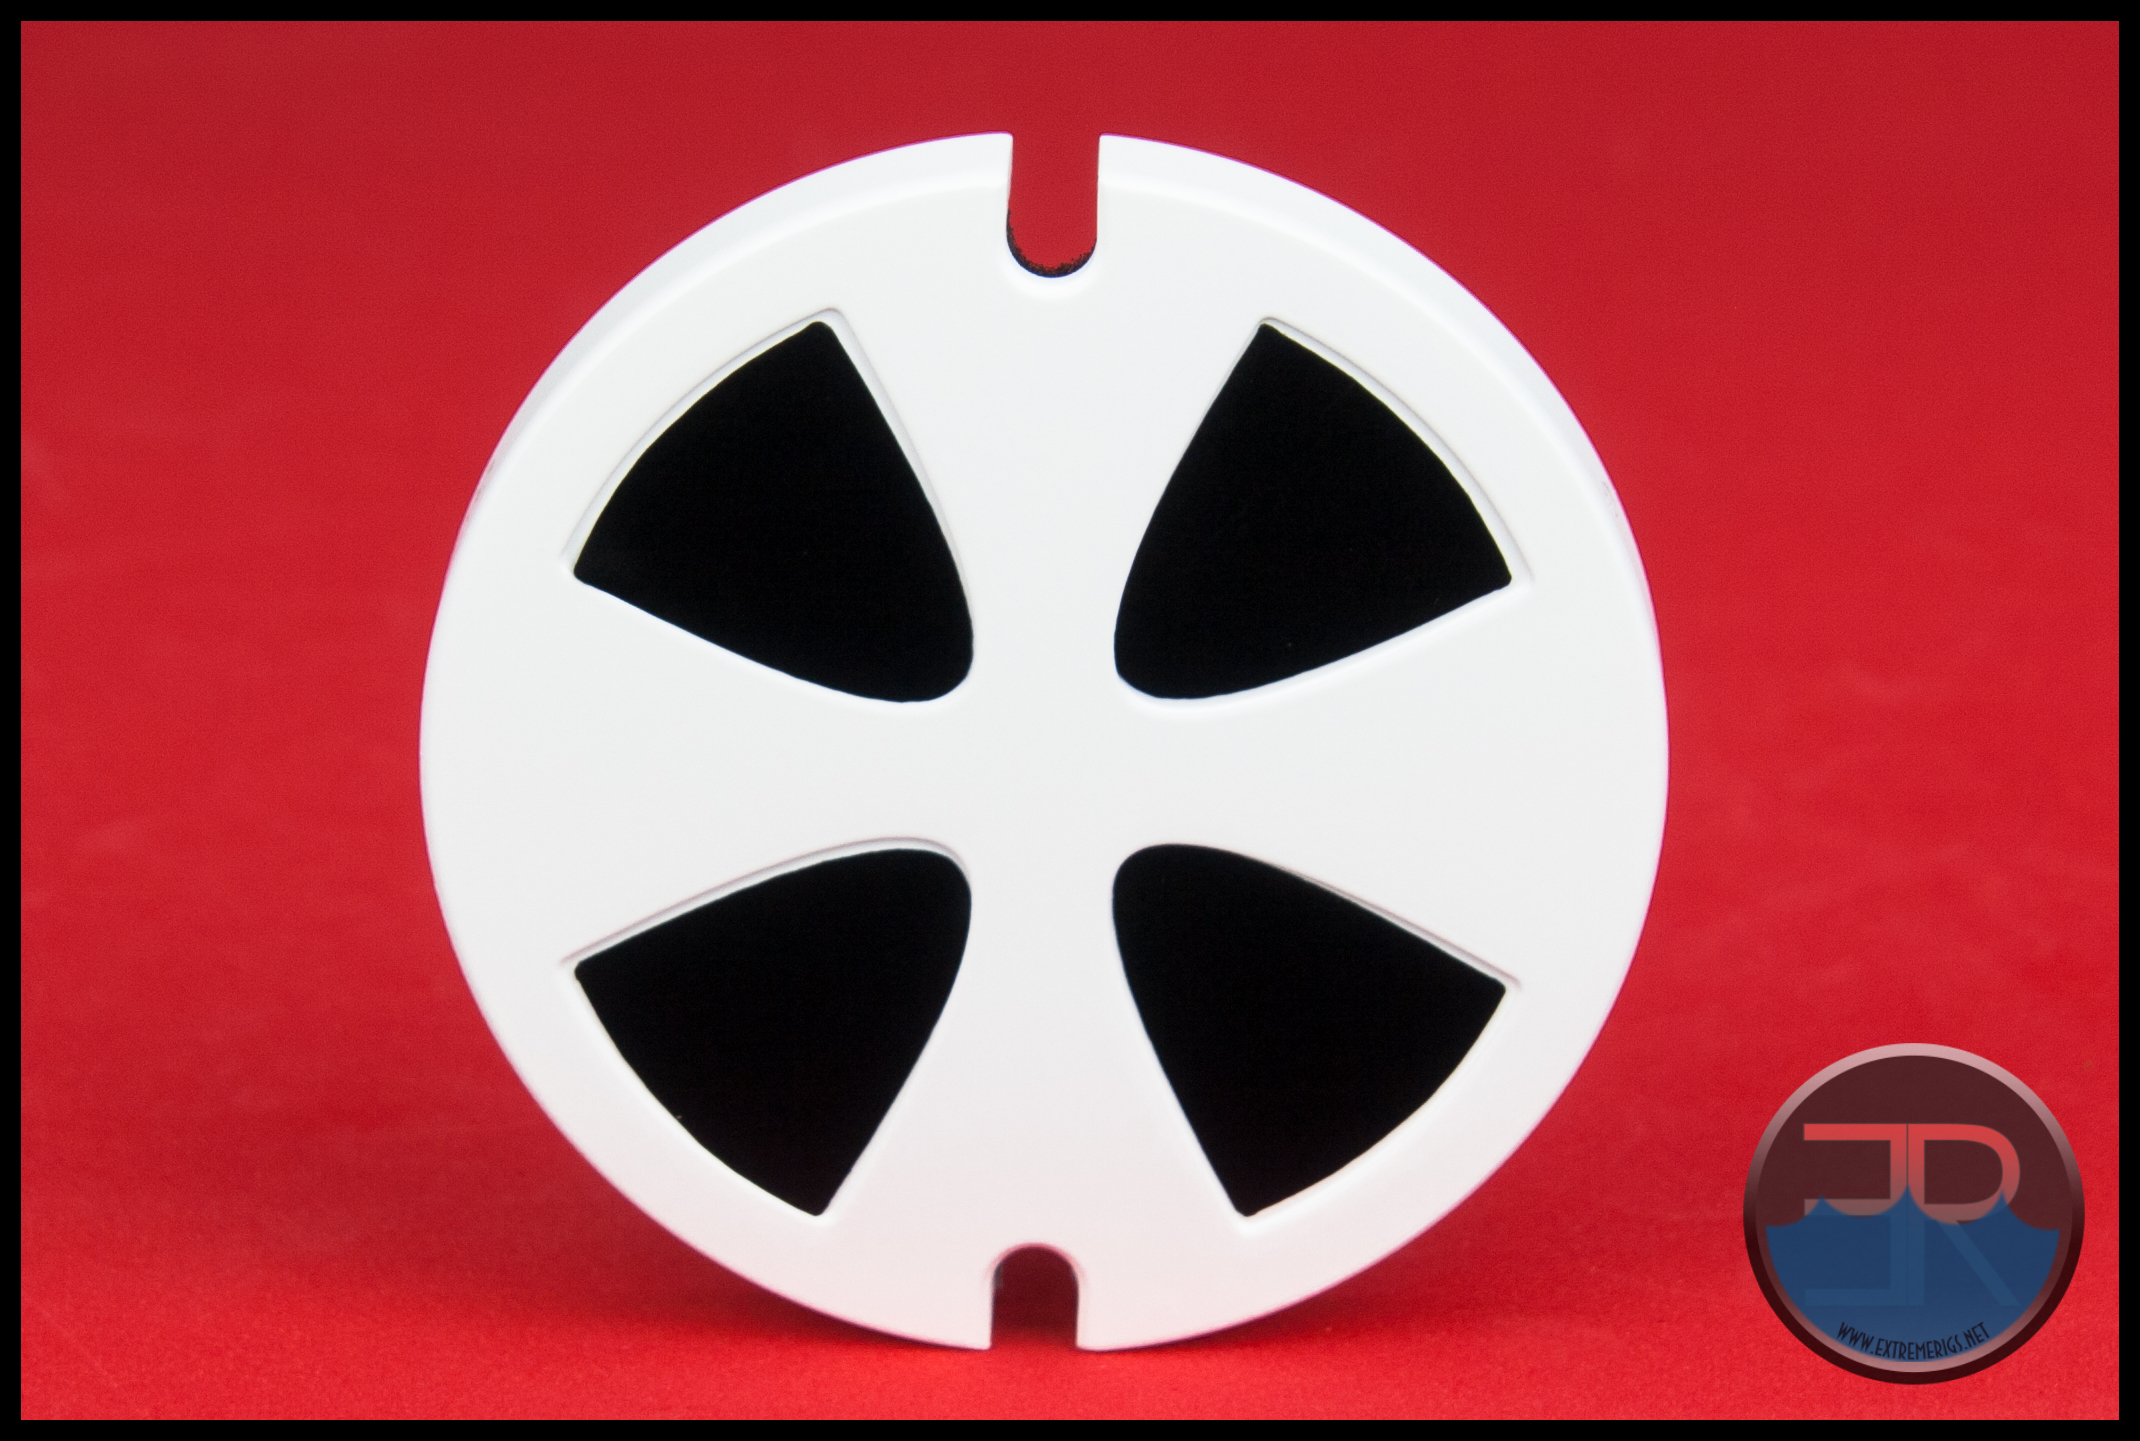
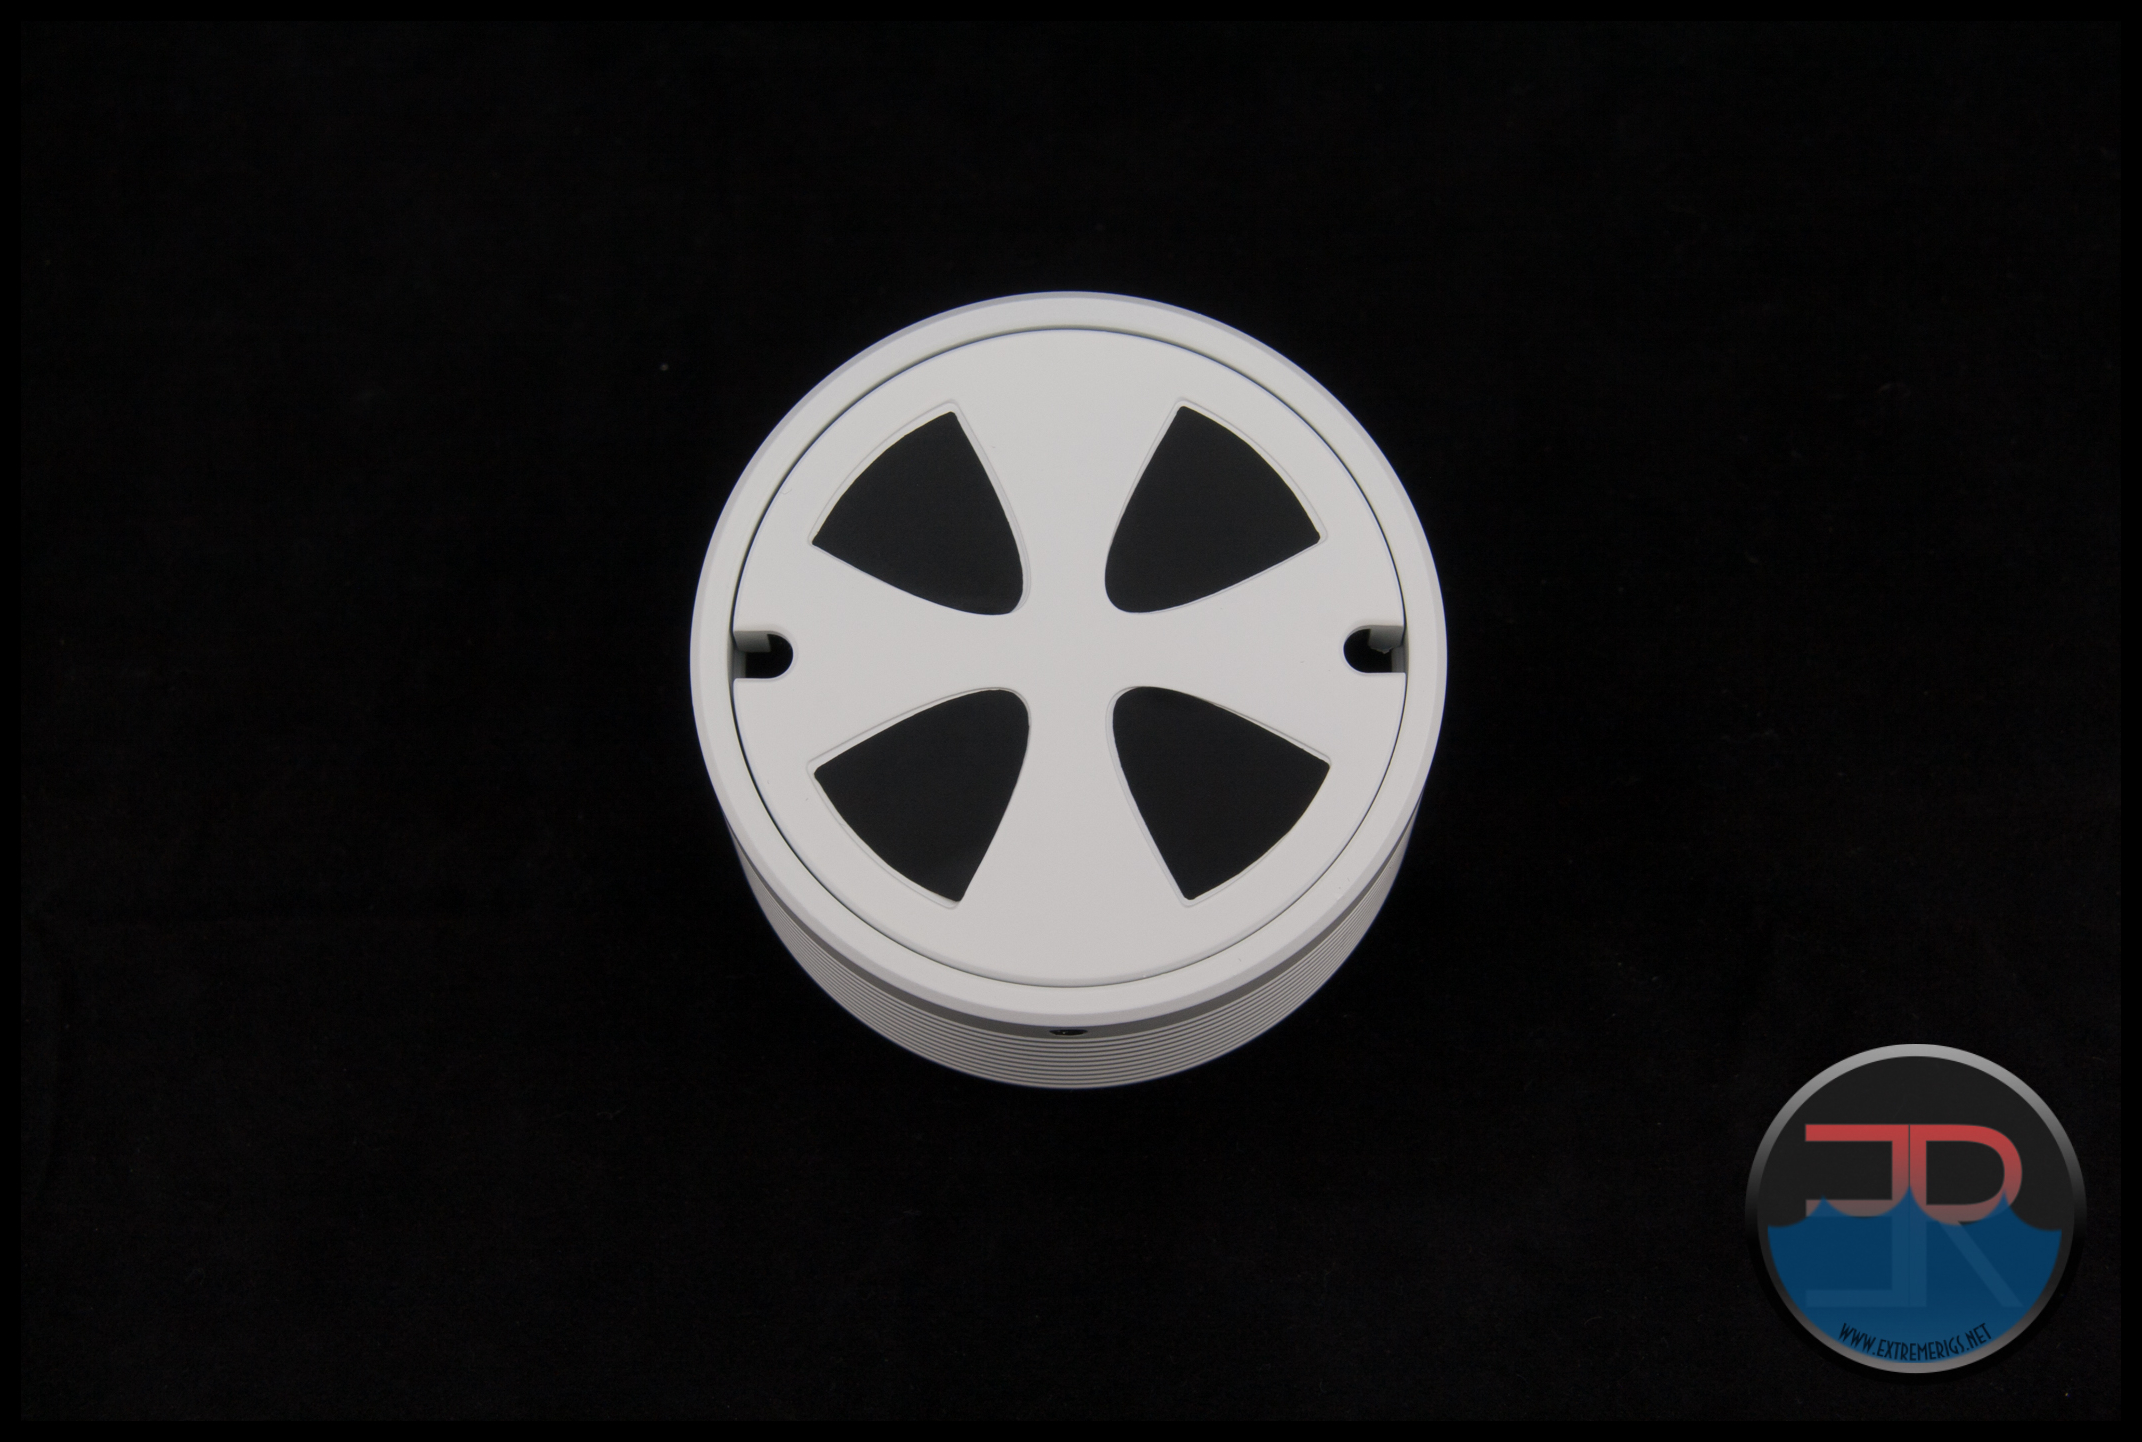 The Maltese Cross is another detail which adds visual interest and adds contrast to the assembly. The aluminum end cap has been machined with the design and black PVC inlays stuck into the 4 recesses to achieve the finished look.
 The end cap is held in place with 2 “VERY” small grub screws. Use the smaller of the supplied allen keys to undo these grub screws a turn or two at the most and the end cap will fall right out. If you are going to remove the screws completely (as in the picture below) have a bag or container handy to put the screws in, as I can see these getting misplaced very easily.
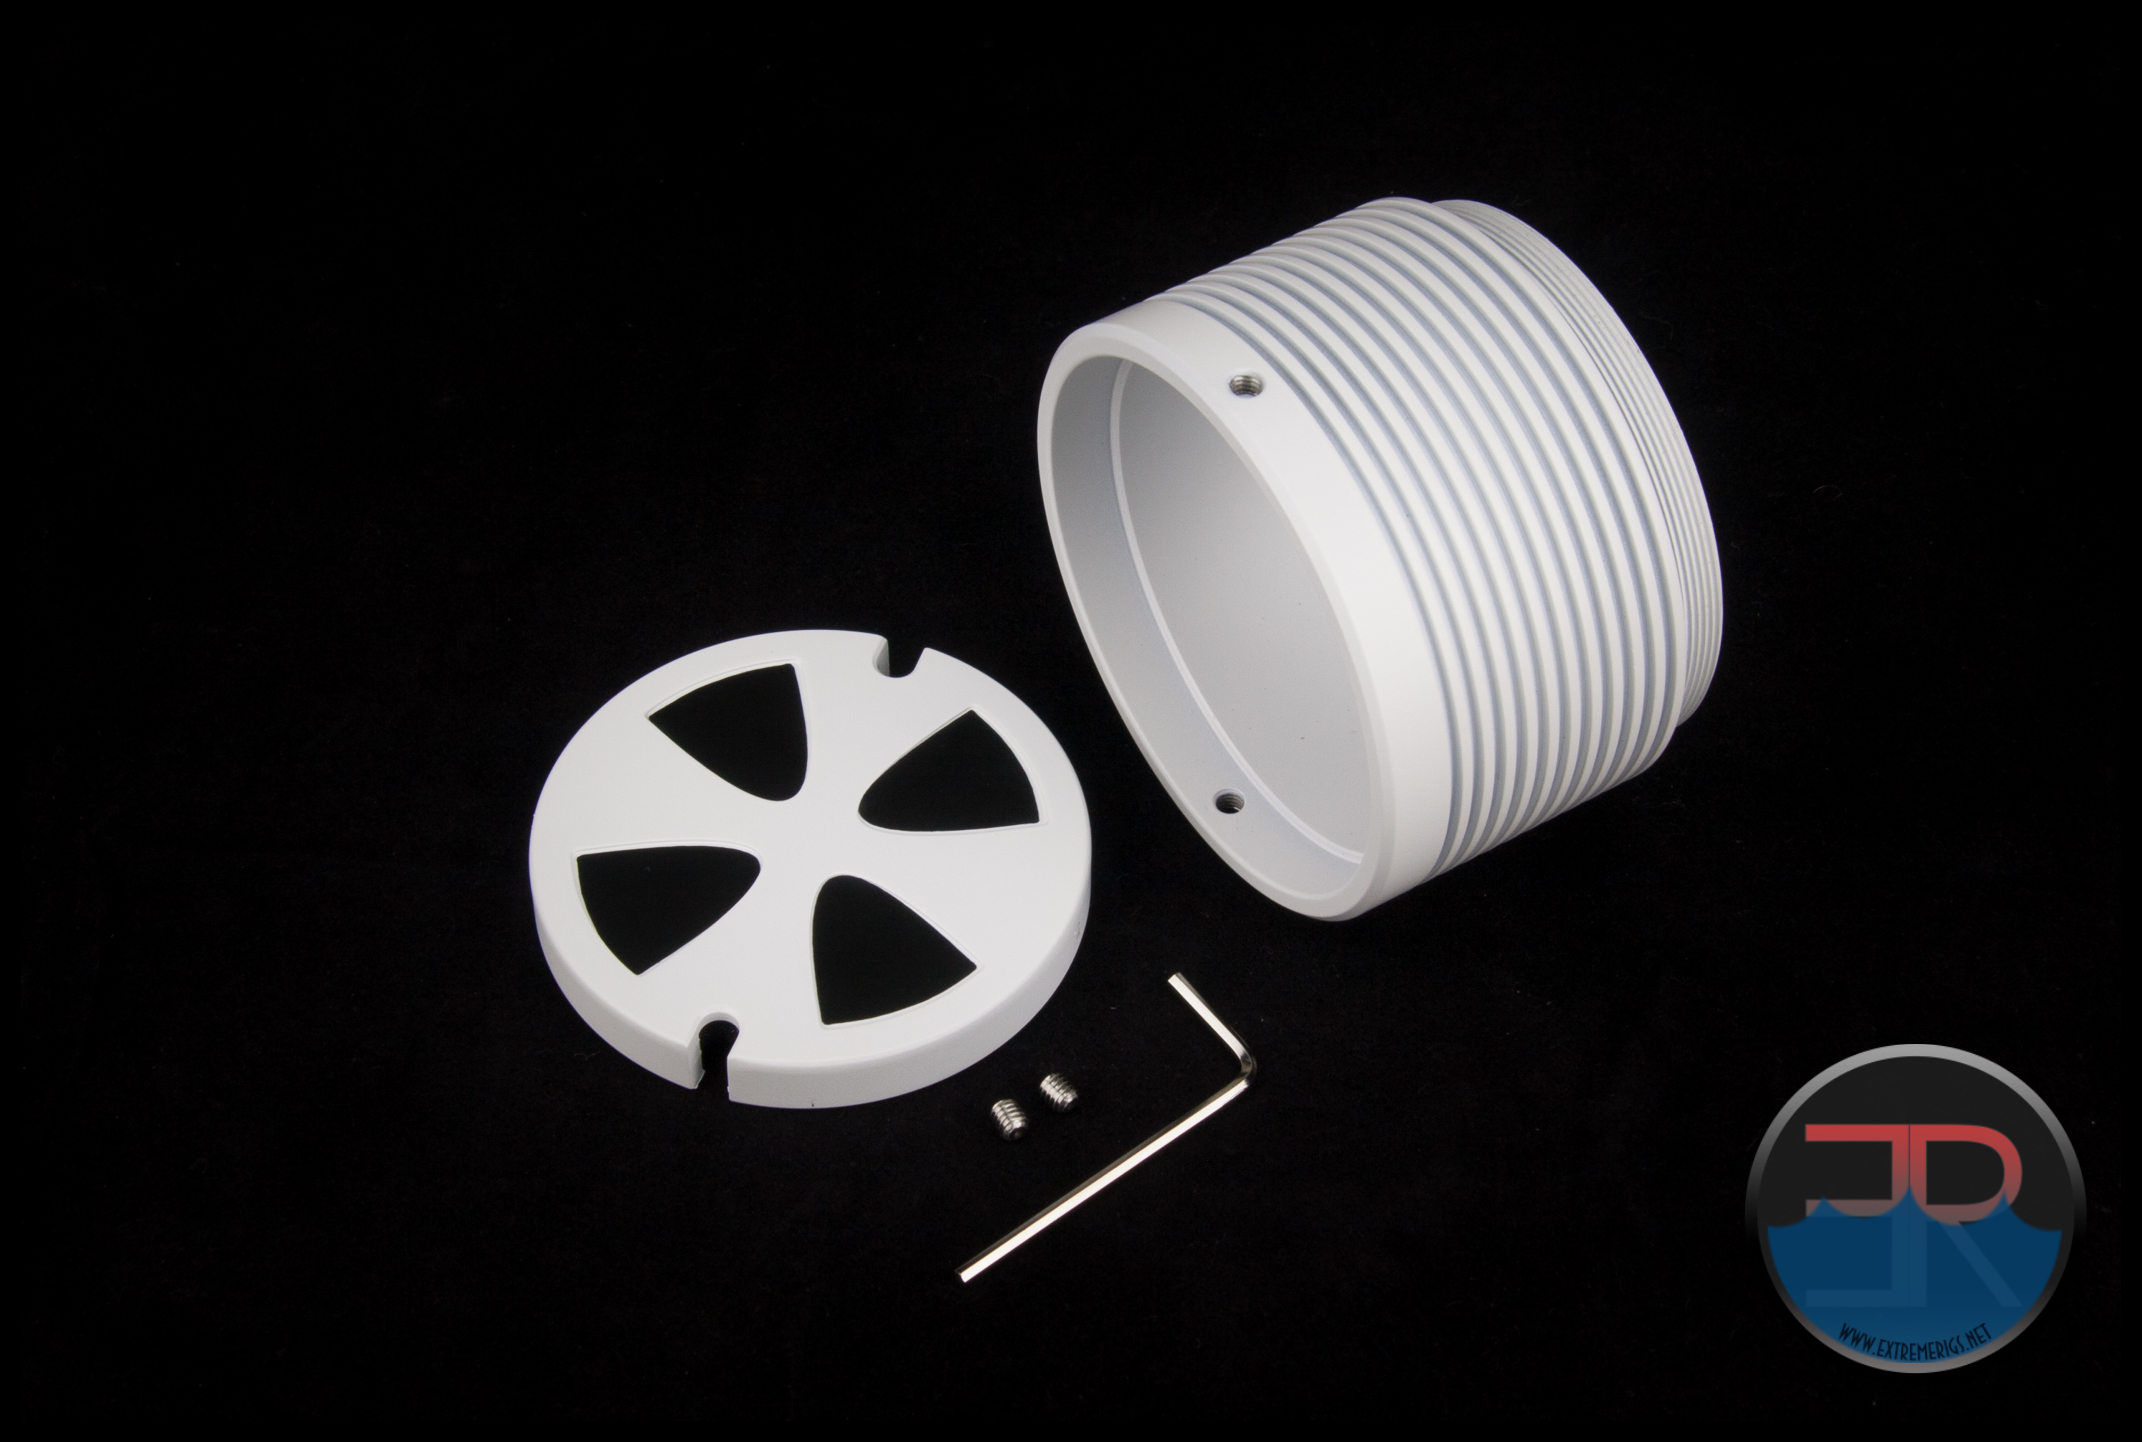 In the above photo you can see the lip inside the clamp/cover the end cap sits on, the two small grub screws simply press into the side of the end cap which holds it in position. This allows the end cap to be rotated in any direction so the pump wires exit through either of the cut-outs mentioned below the assembly discreetly.
The end cap has two cut outs opposite each other for the wires of the pump to pass through. We were hopeful that one of these cut outs would leave the adjustment screw on a D5 Vario exposed to fine tune the pump speed when setting up your system – however as we’ll see this won’t be the case.
 Again, the foam piece that is stuck up the inside of the end cap.
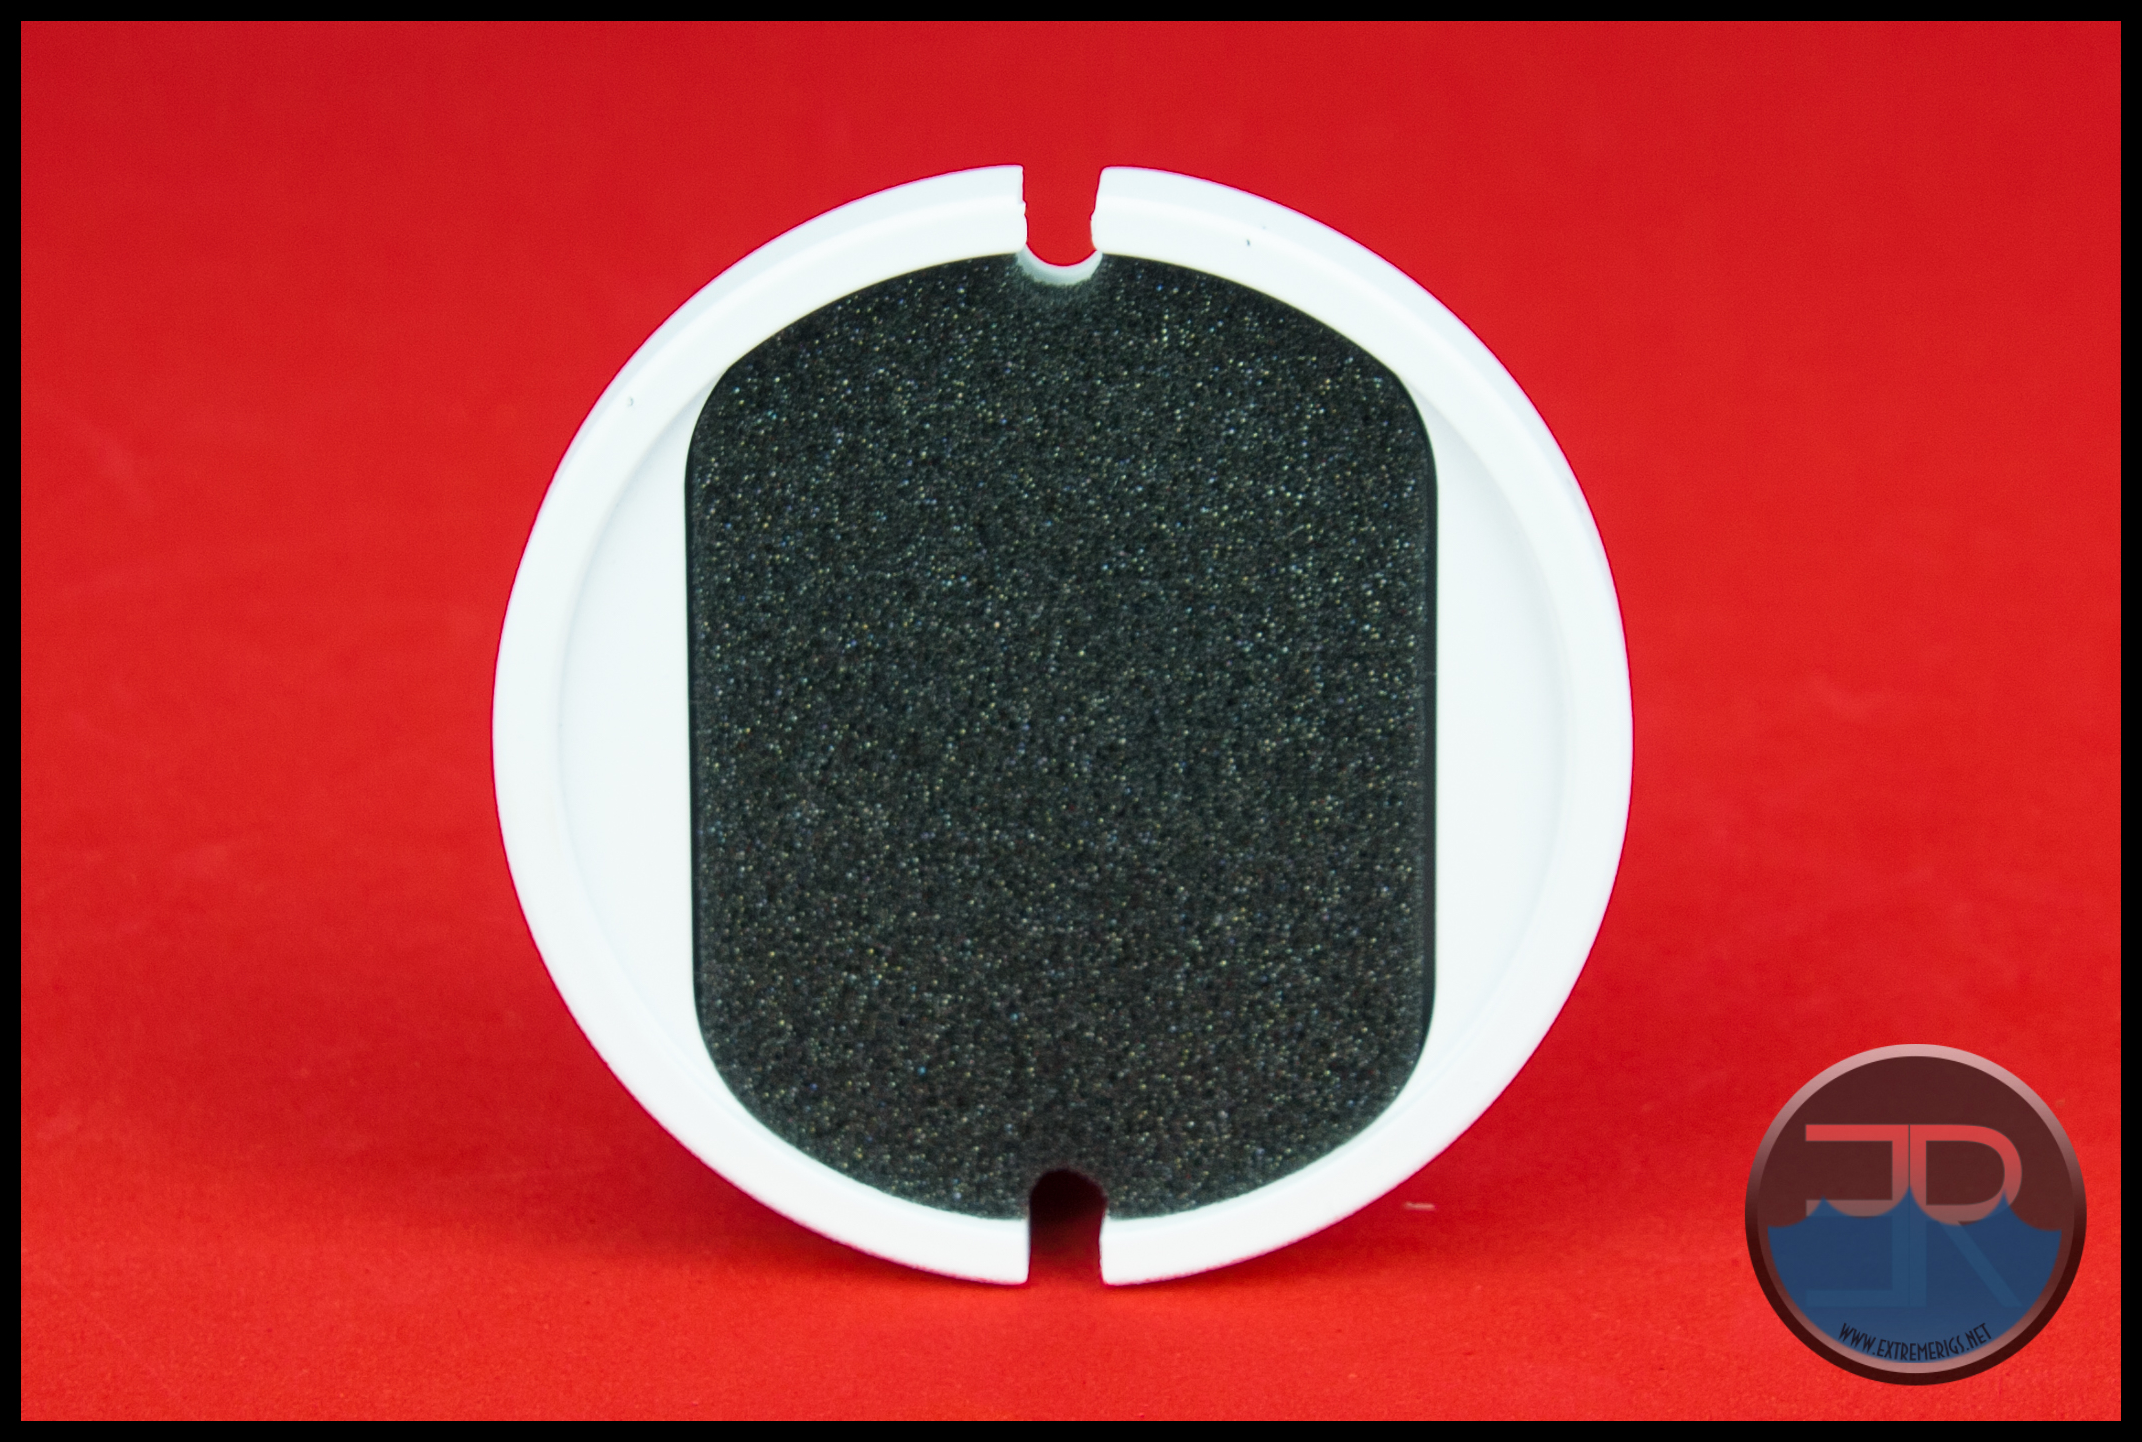 This foam has no contact with the pump at all when assembled, so it is assumed that placing the foam on the end cap is an attempt to adsorb some noise. Monsoon confirmed this for us and are confident that the pump cover and foam sound baffle absorb a fair bit of noise which means the pump could be run at higher RPM and produce less noise. At the time of publishing we were unable to have the noise test completed BUT we may do this testing in the future.
So we have the pump clamp/cover off, which leaves the bracket still attached to the pump top.

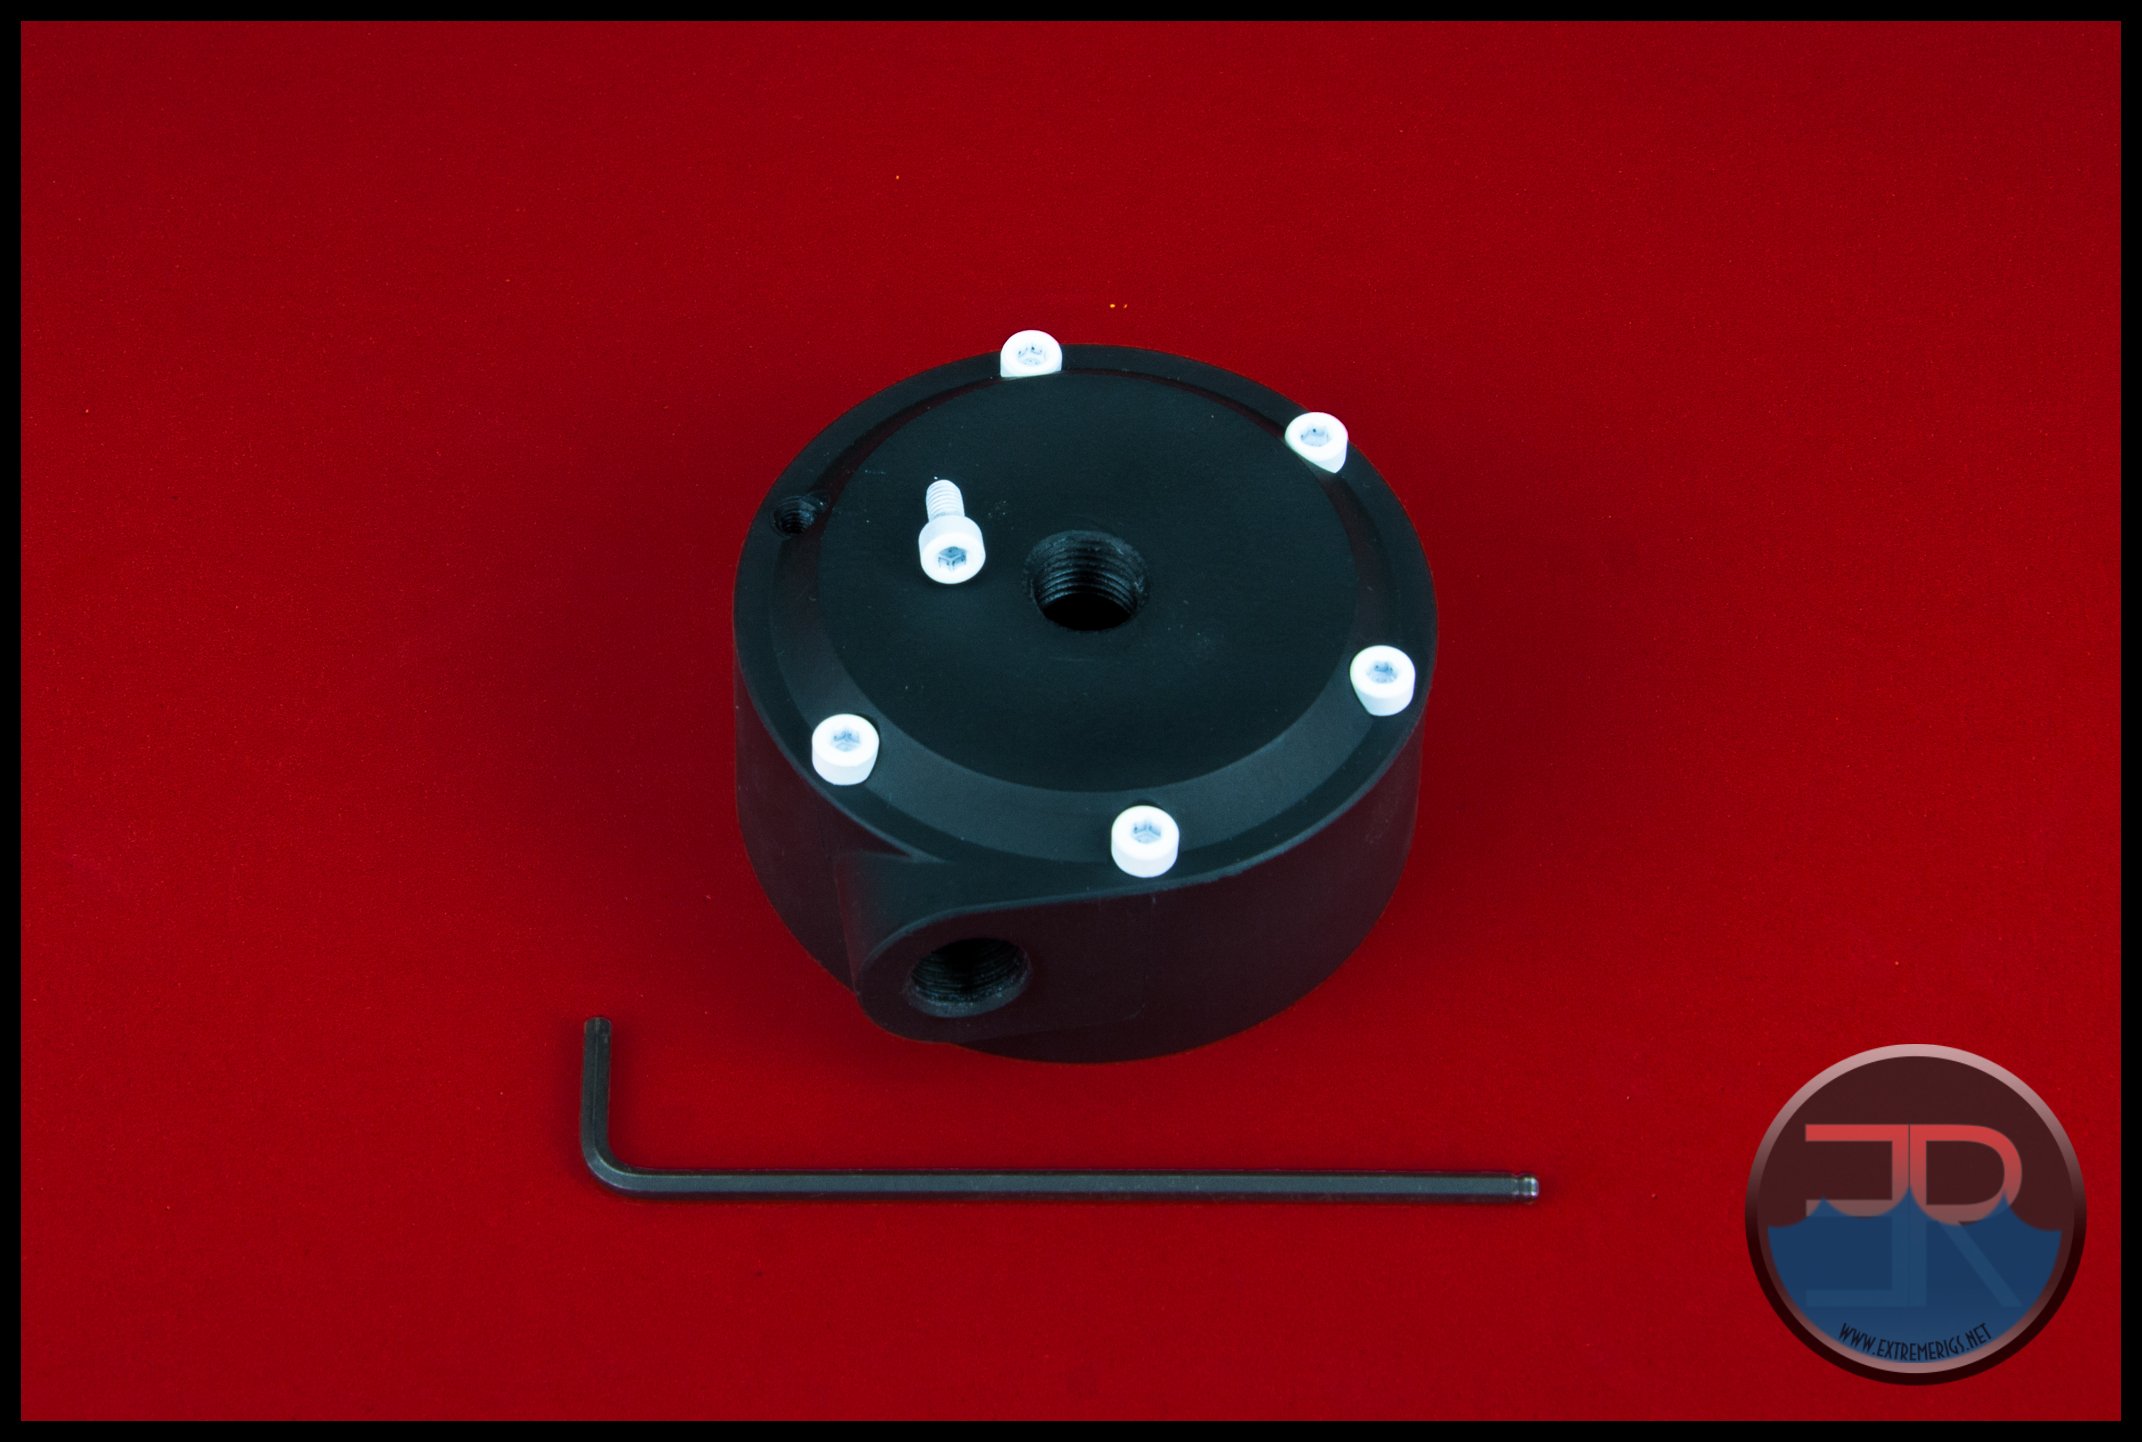
Looking at the back of the clamp we see there are 4 bolts. To remove the bracket from the top, use the larger of the supplied allen keys (3mm) to unscrew the top 2 bolts (between the MMRS clamp bar).
 With the bracket off, now remove the remaining two bolts from the mounting bracket.
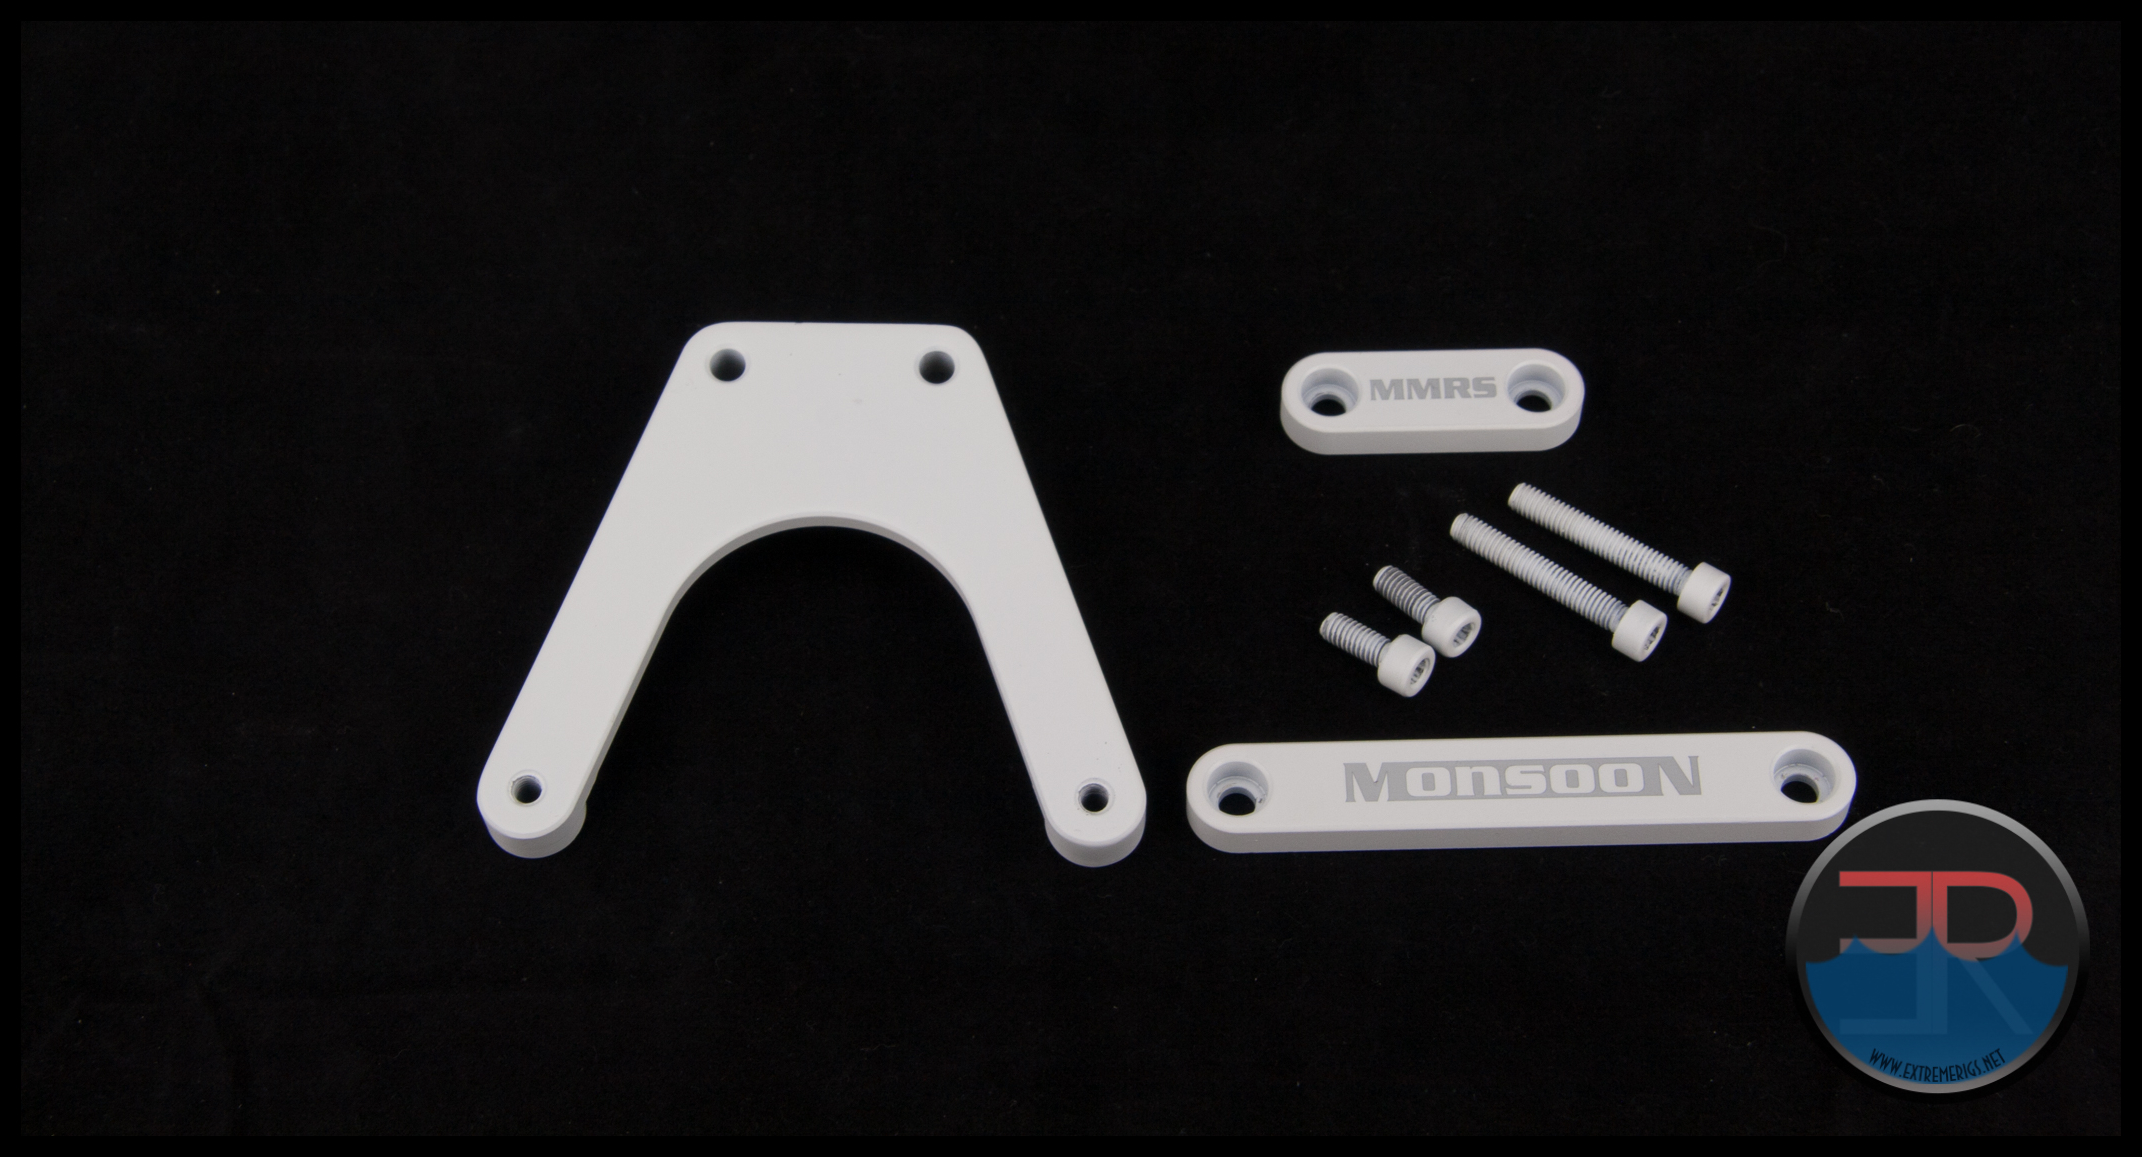
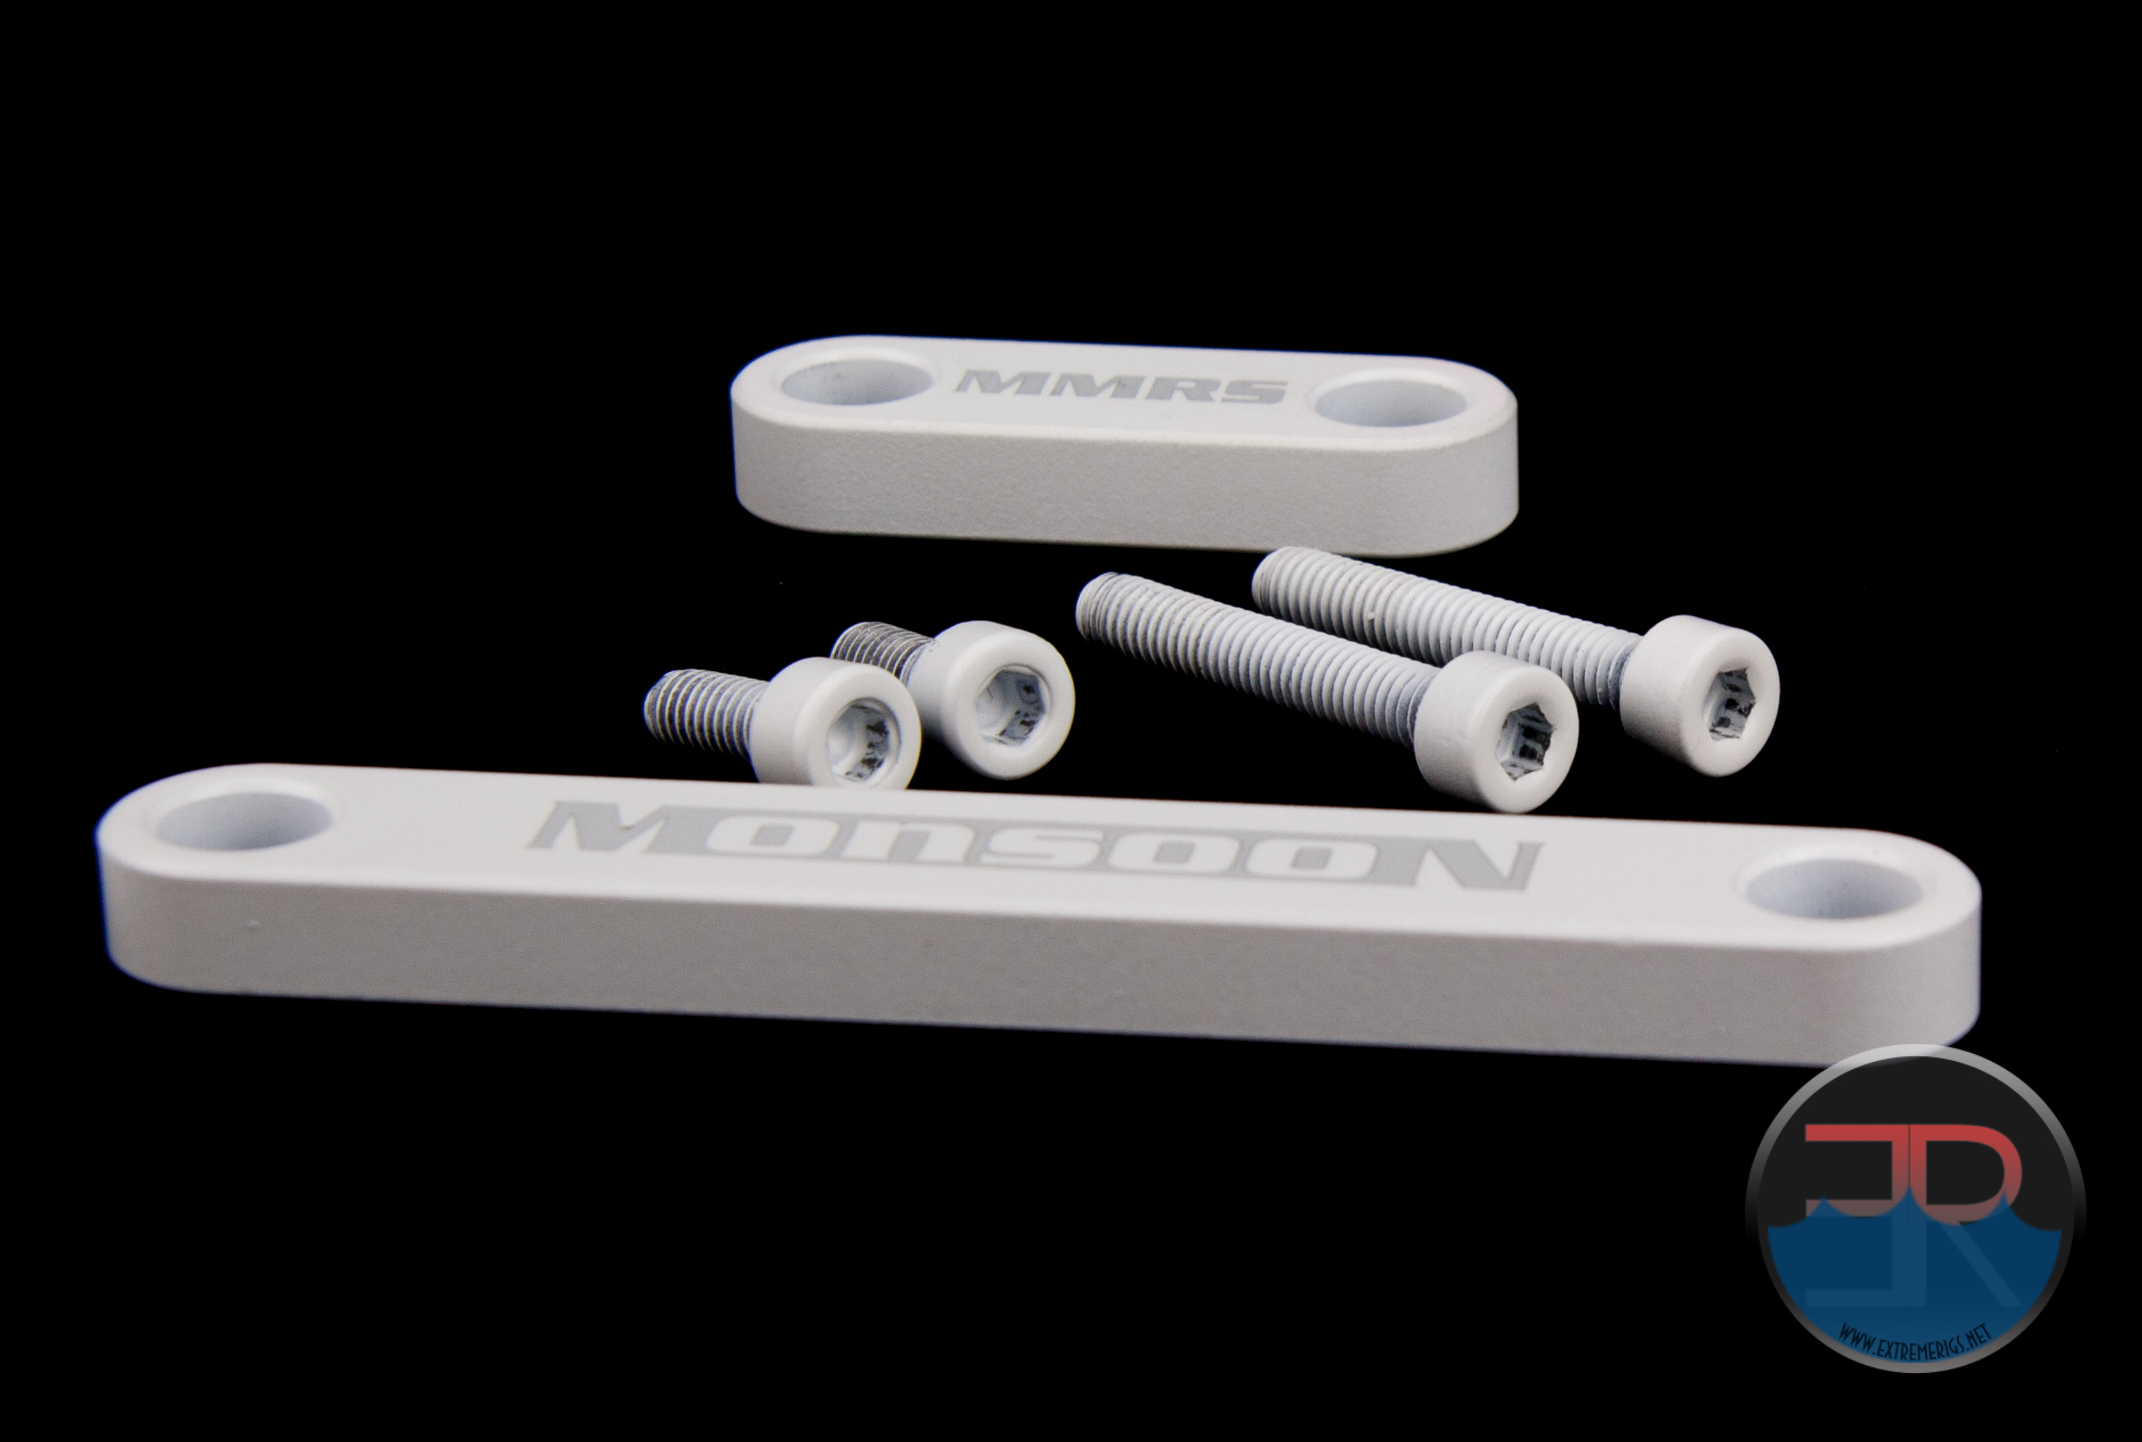
 Having removed the large clamp bar from the bracket, you should have the 3 pieces and 4 bolts.
 The white version of the MMRS-SAP has it’s machined parts painted white. Even with care the white paint in the hex heads of the cap screws does get scratched off. I think that the anodized colors and chrome finish would be much more resilient to this “wear and tear” than the painted white version has suffered. It is unlikely that the bolt heads will be seen in most installations, but it is something to keep in mind for those of you anal enough (like us) to be concerned about such things.
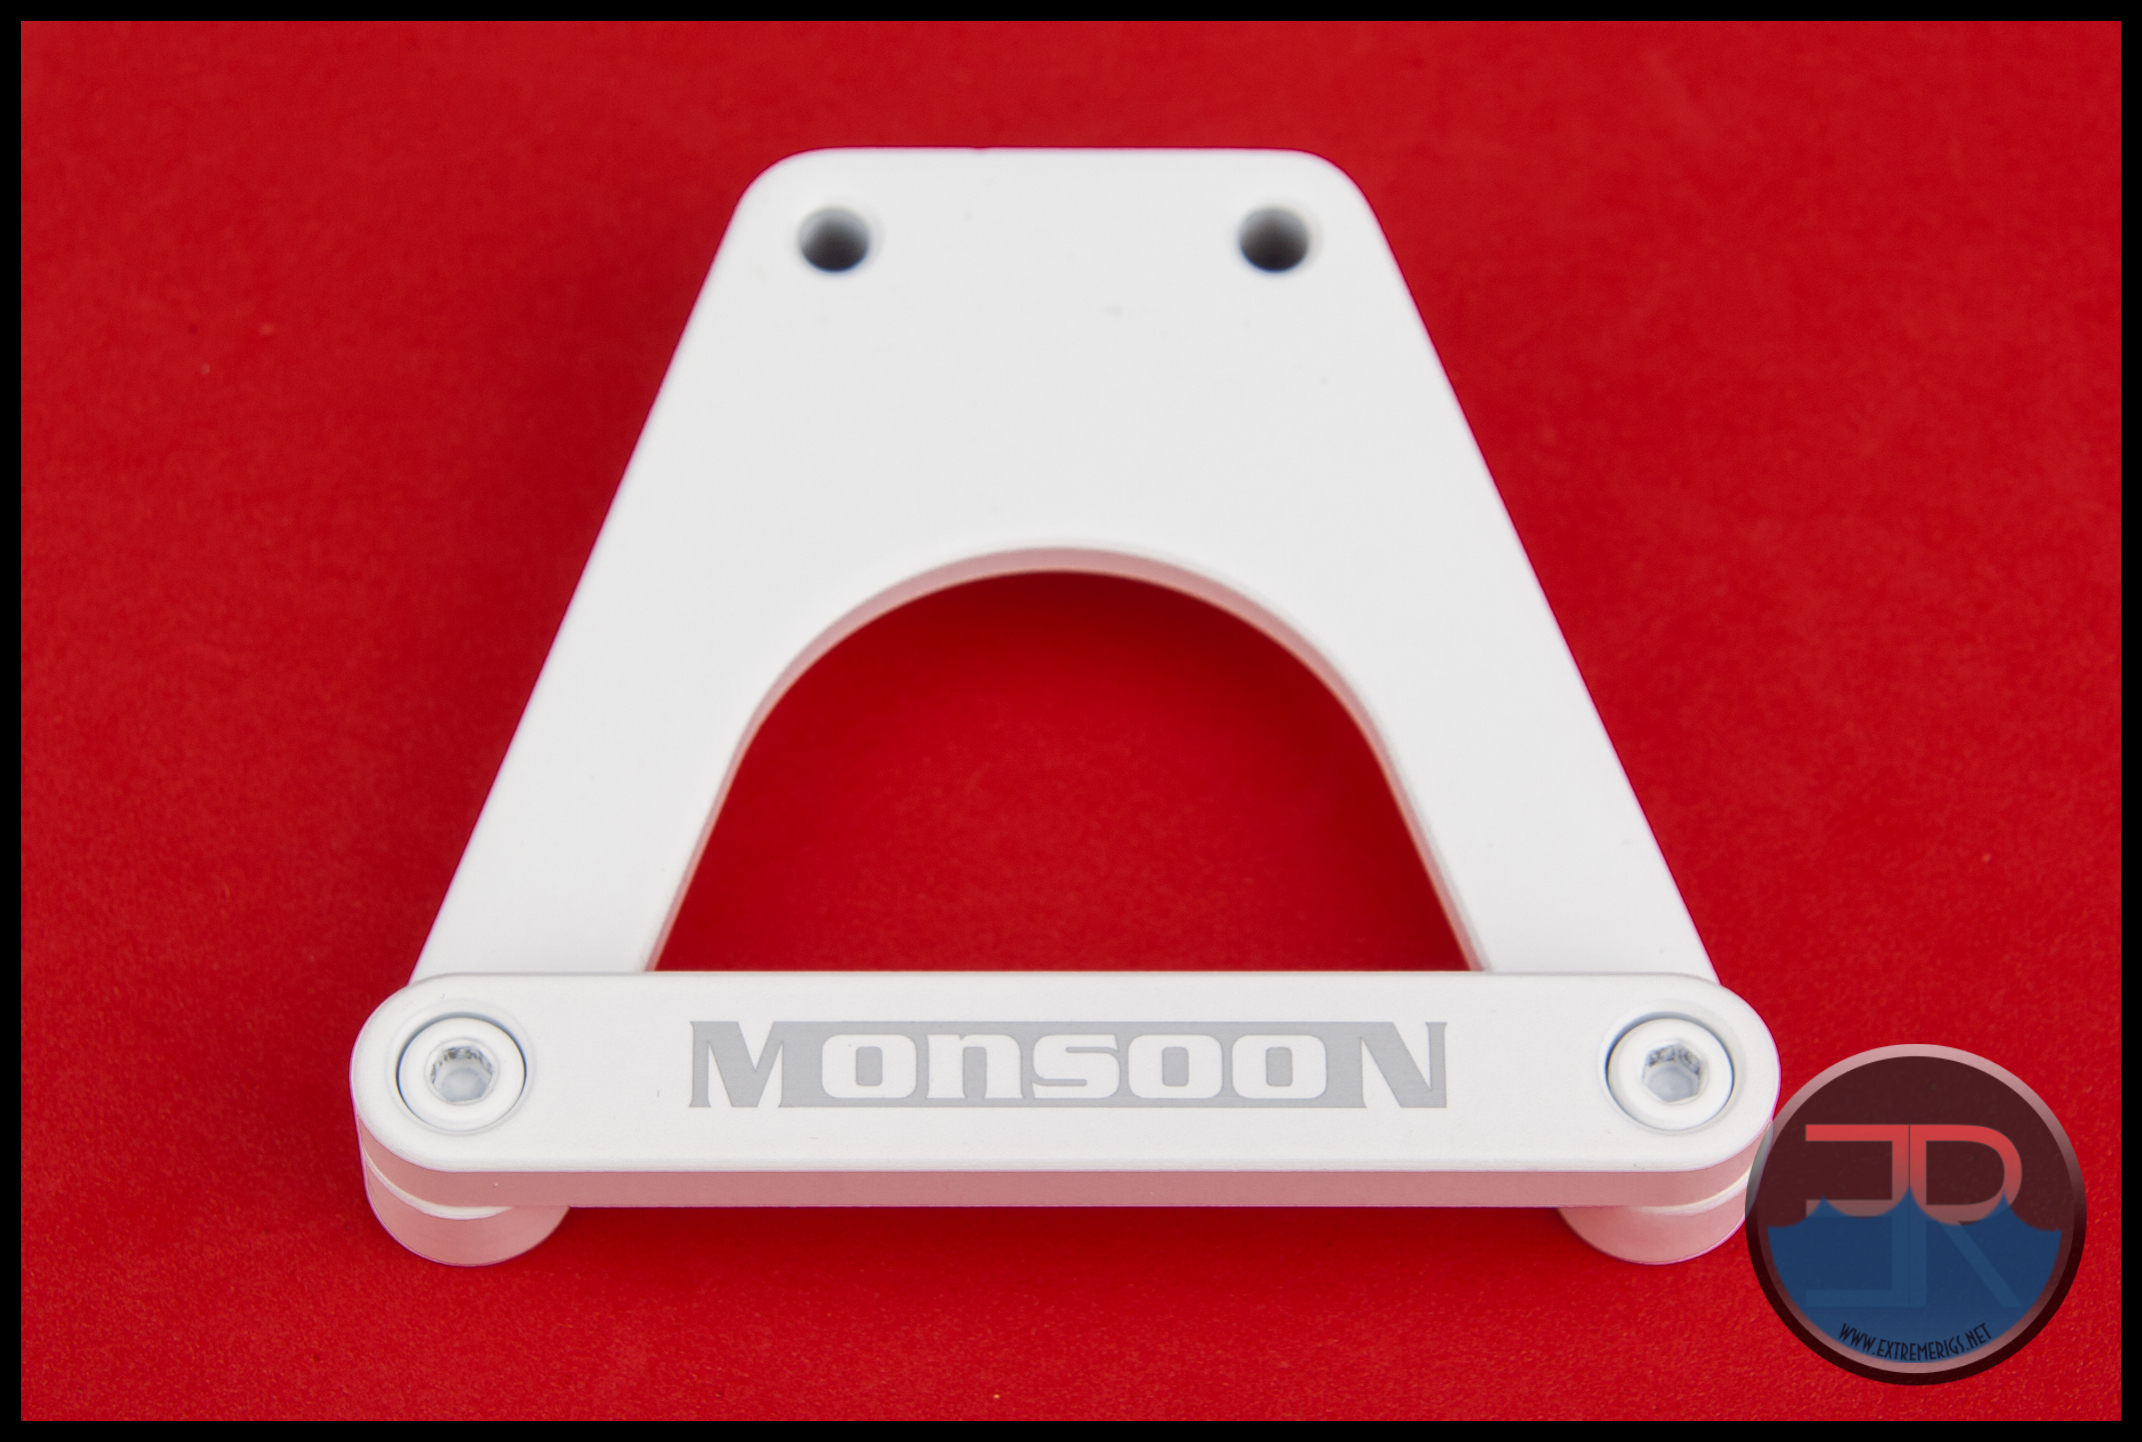
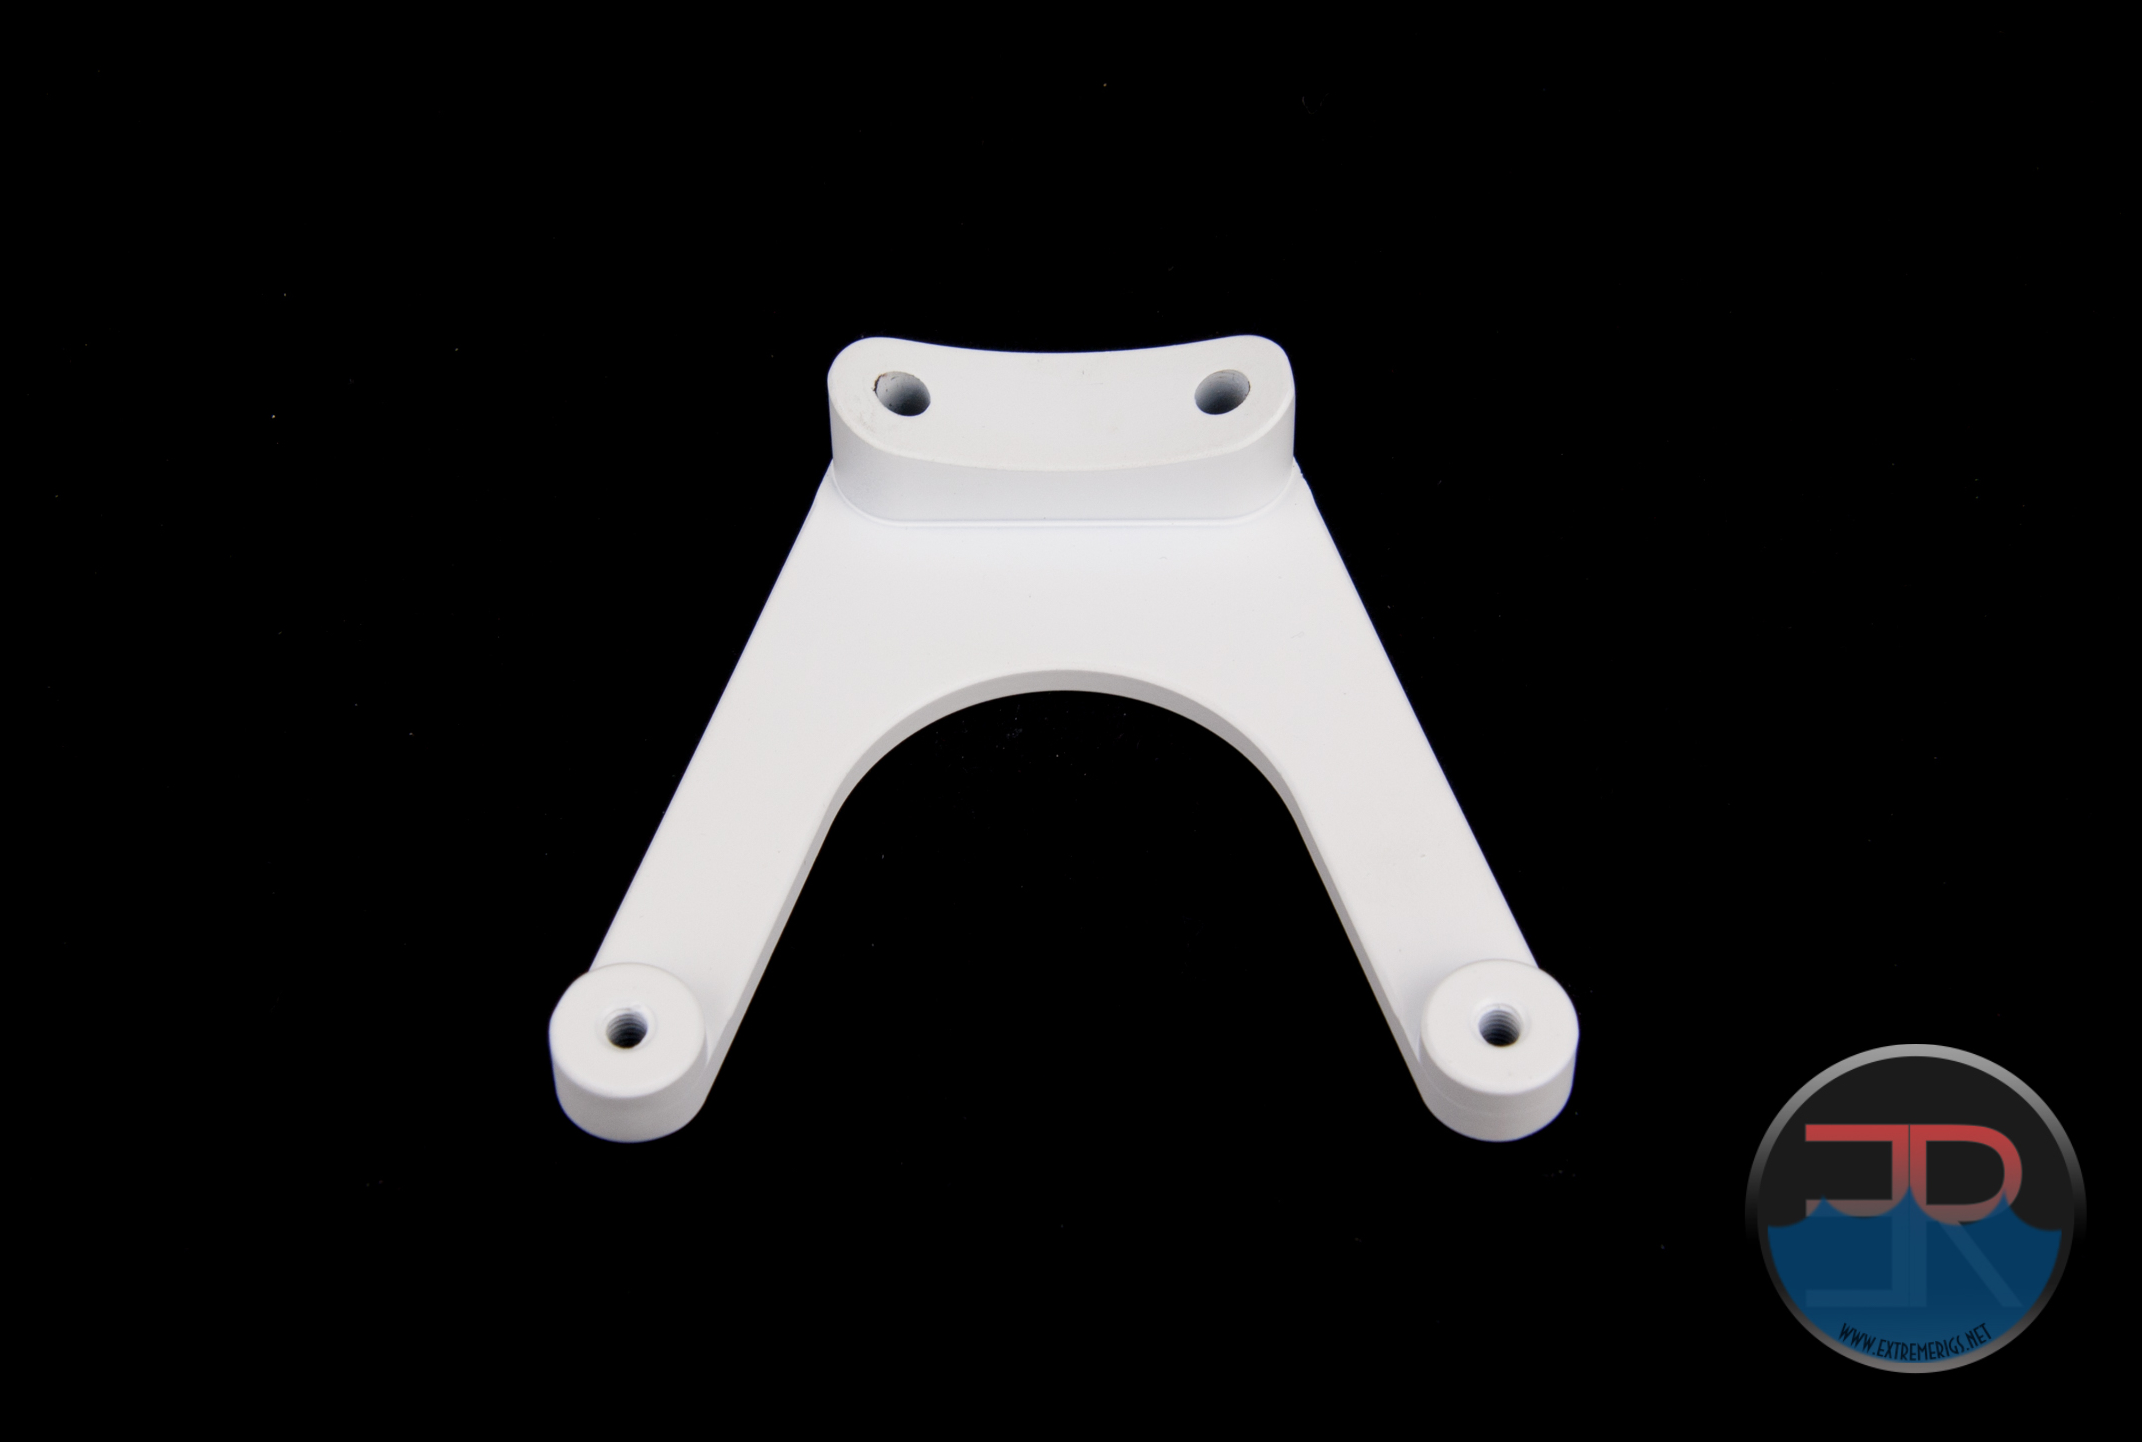
 The curved side of the mounting bracket which attaches to the pump top.
 and the flat side which goes against the chassis panel which it is mounted to.
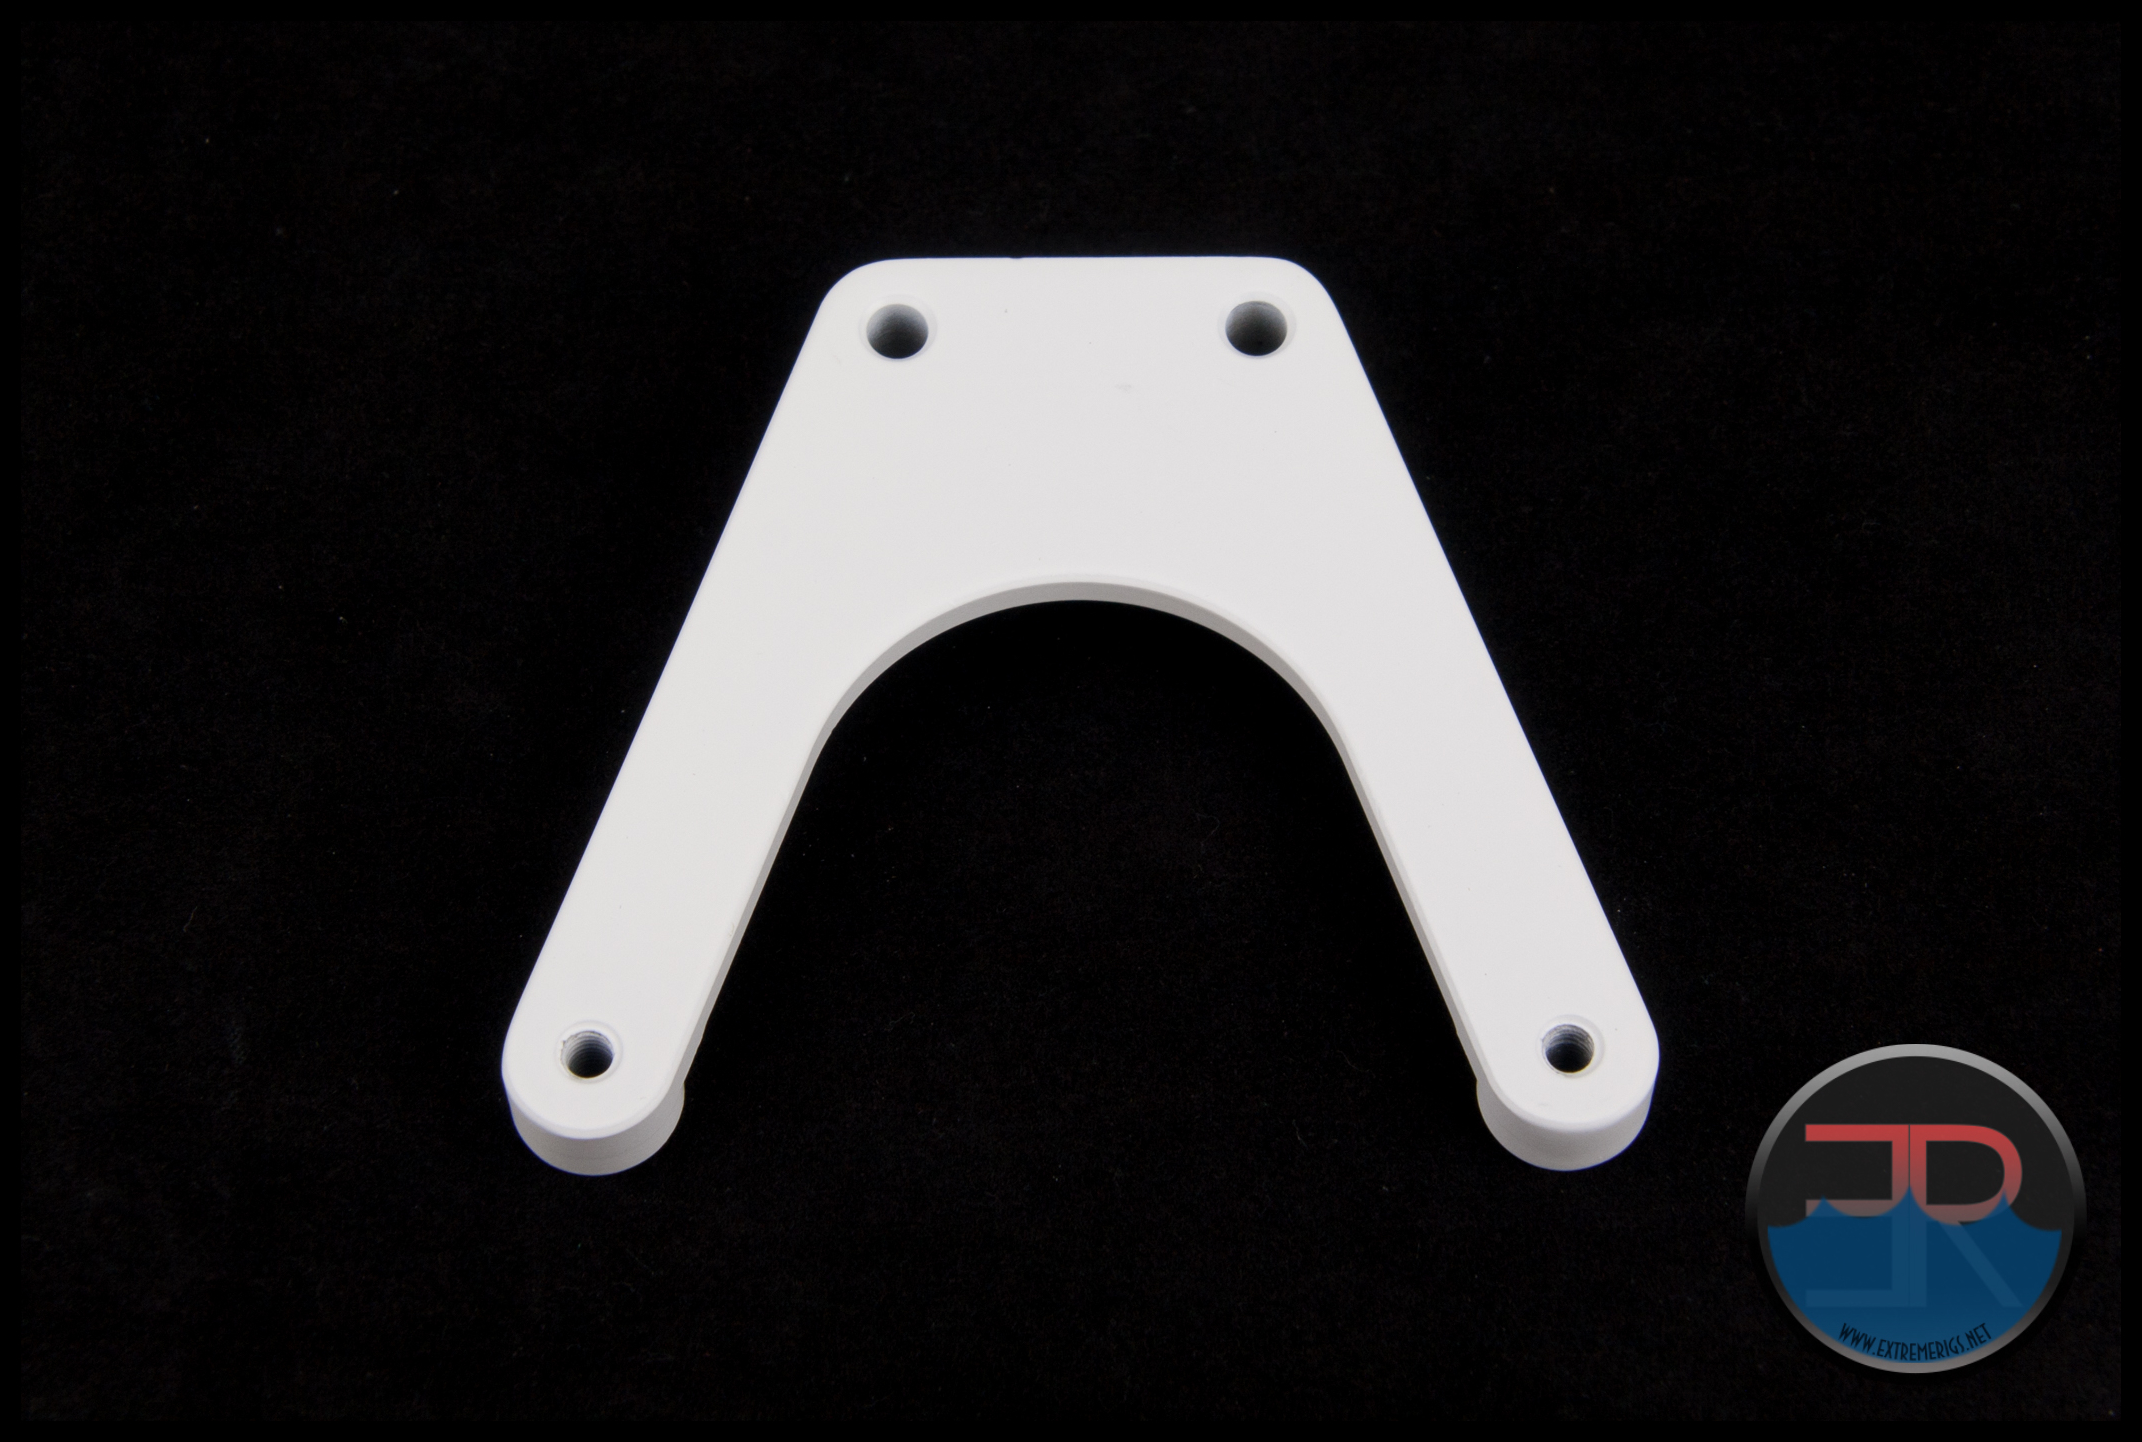 The mounting bracket assembly is also described as a load spreader so when installed the bracket more evenly distributes the weight of the assembled pump top on the panel to which it is mounted.
This system should assist in reducing noise “associated” with D5 pumps which are actually very quiet running pumps. Associated noise is almost always the transfer of energy (vibration) from the pump to the chassis, so this mounting system should help reduce vibration transfer because it is so solid.
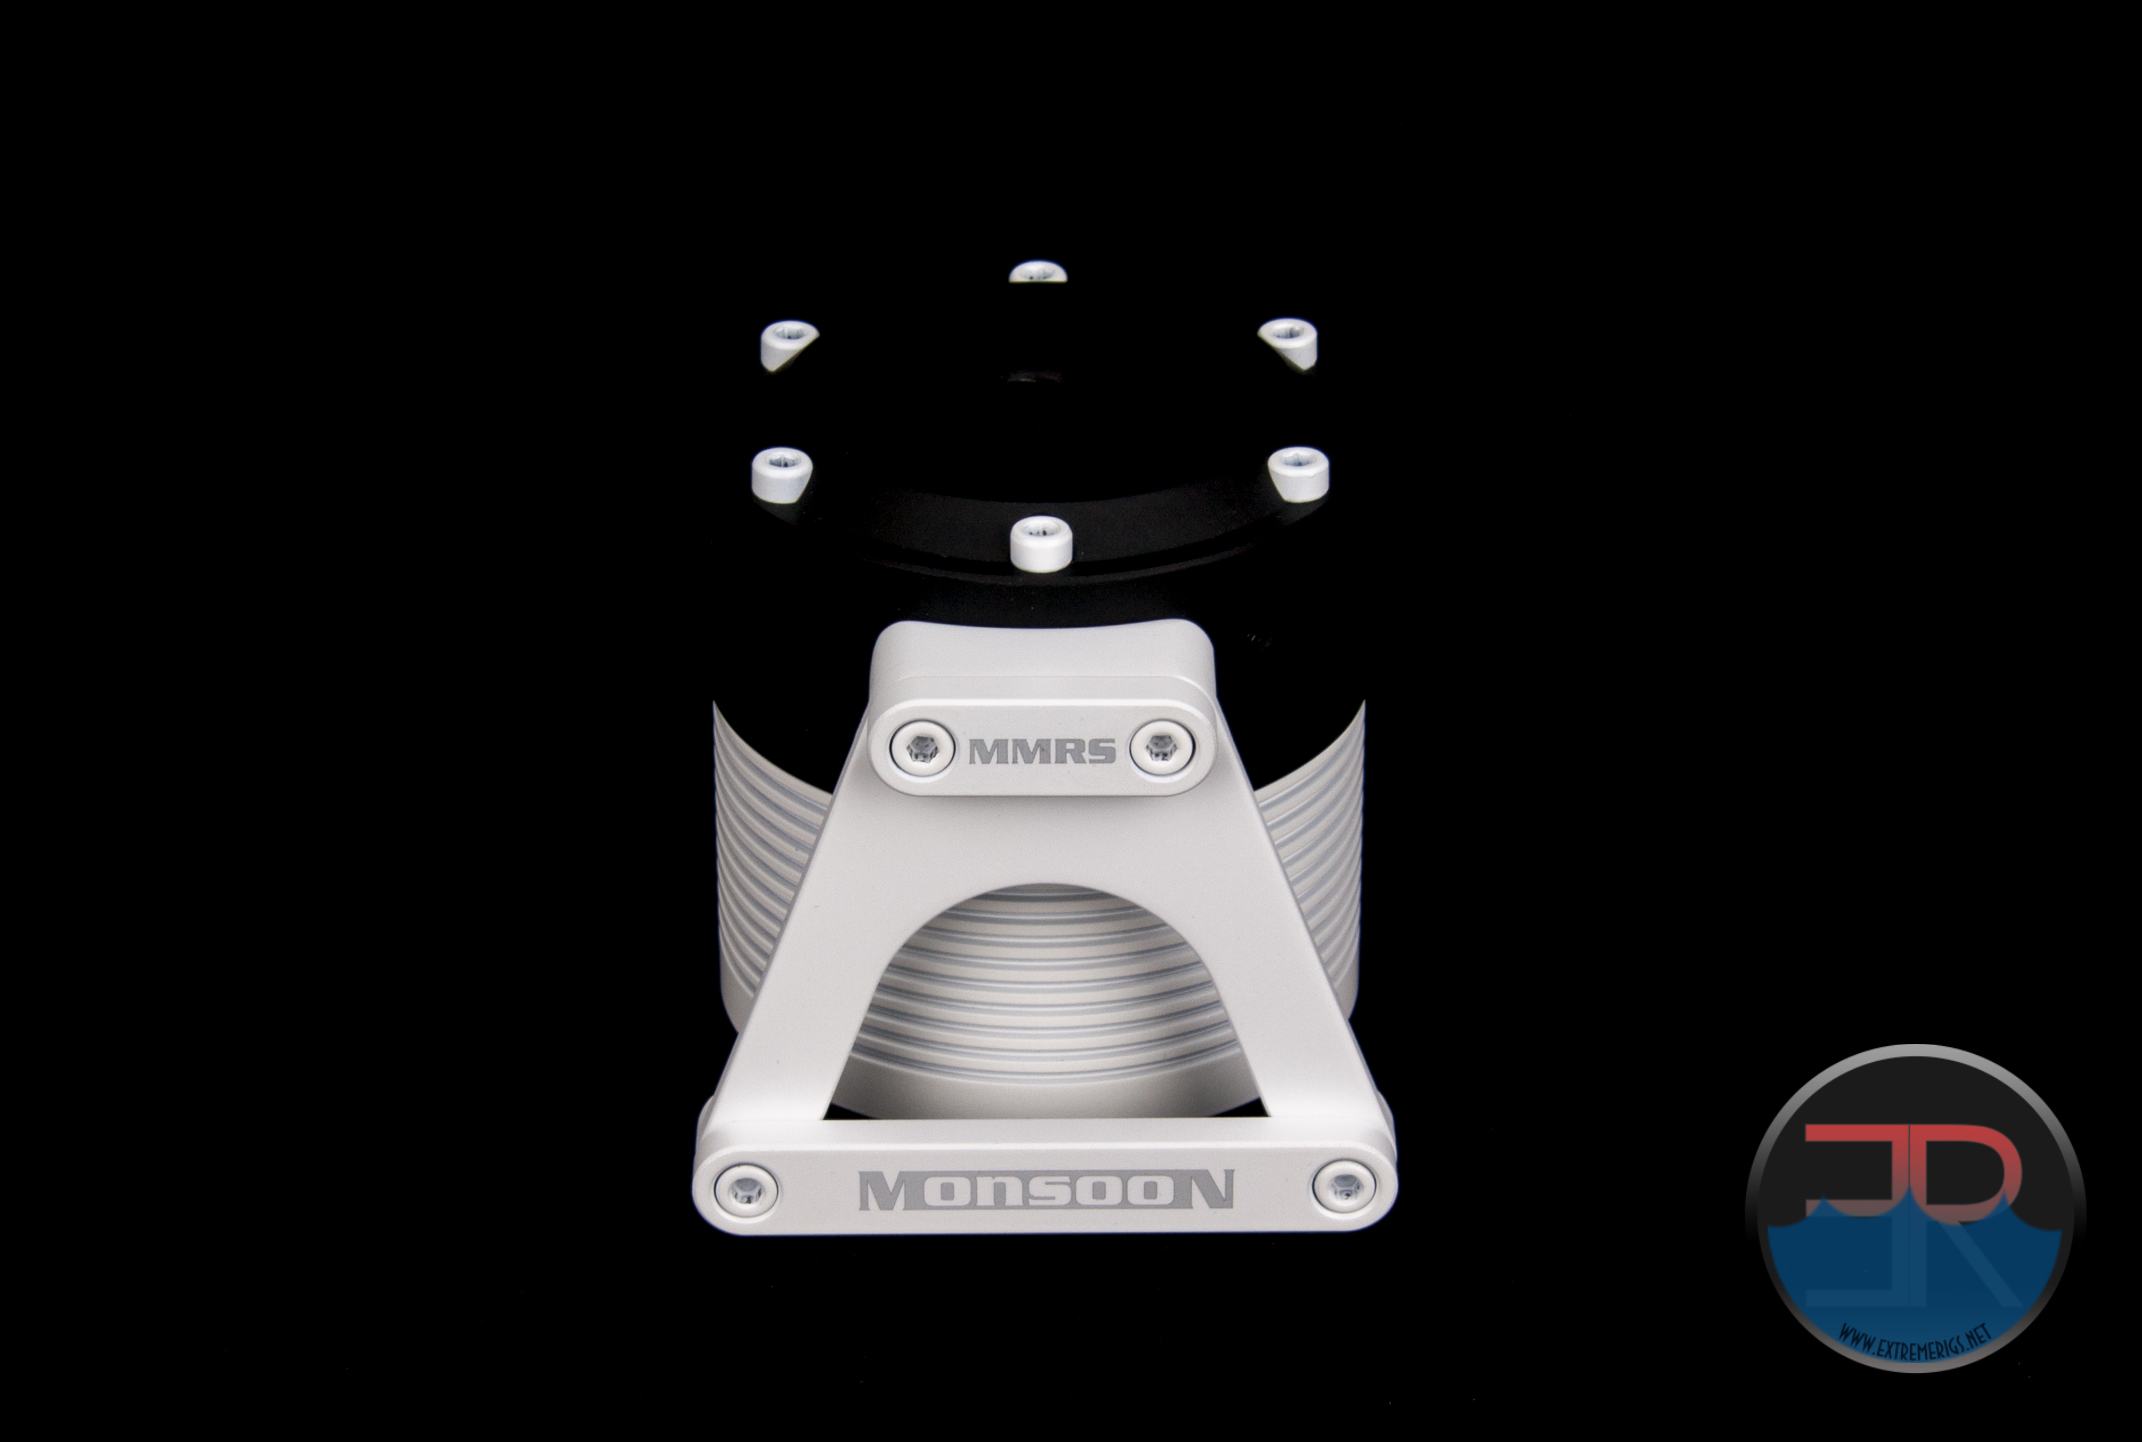
The final component is the actual pump top itself. Last month I wrote I could not recall another round D5 pump top when I reviewed the Revo D5 top from EK. Now here is another and I have to admit that I do like the aesthetics of these round tops over the traditional square ones.
The MMRS-SAP top is made of a nylon compound, which differs from the traditional Delrin or Acrylic. The nylon material is similar to what ice hockey pucks are made from, so you can be assured that these tops are virtually unbreakable.
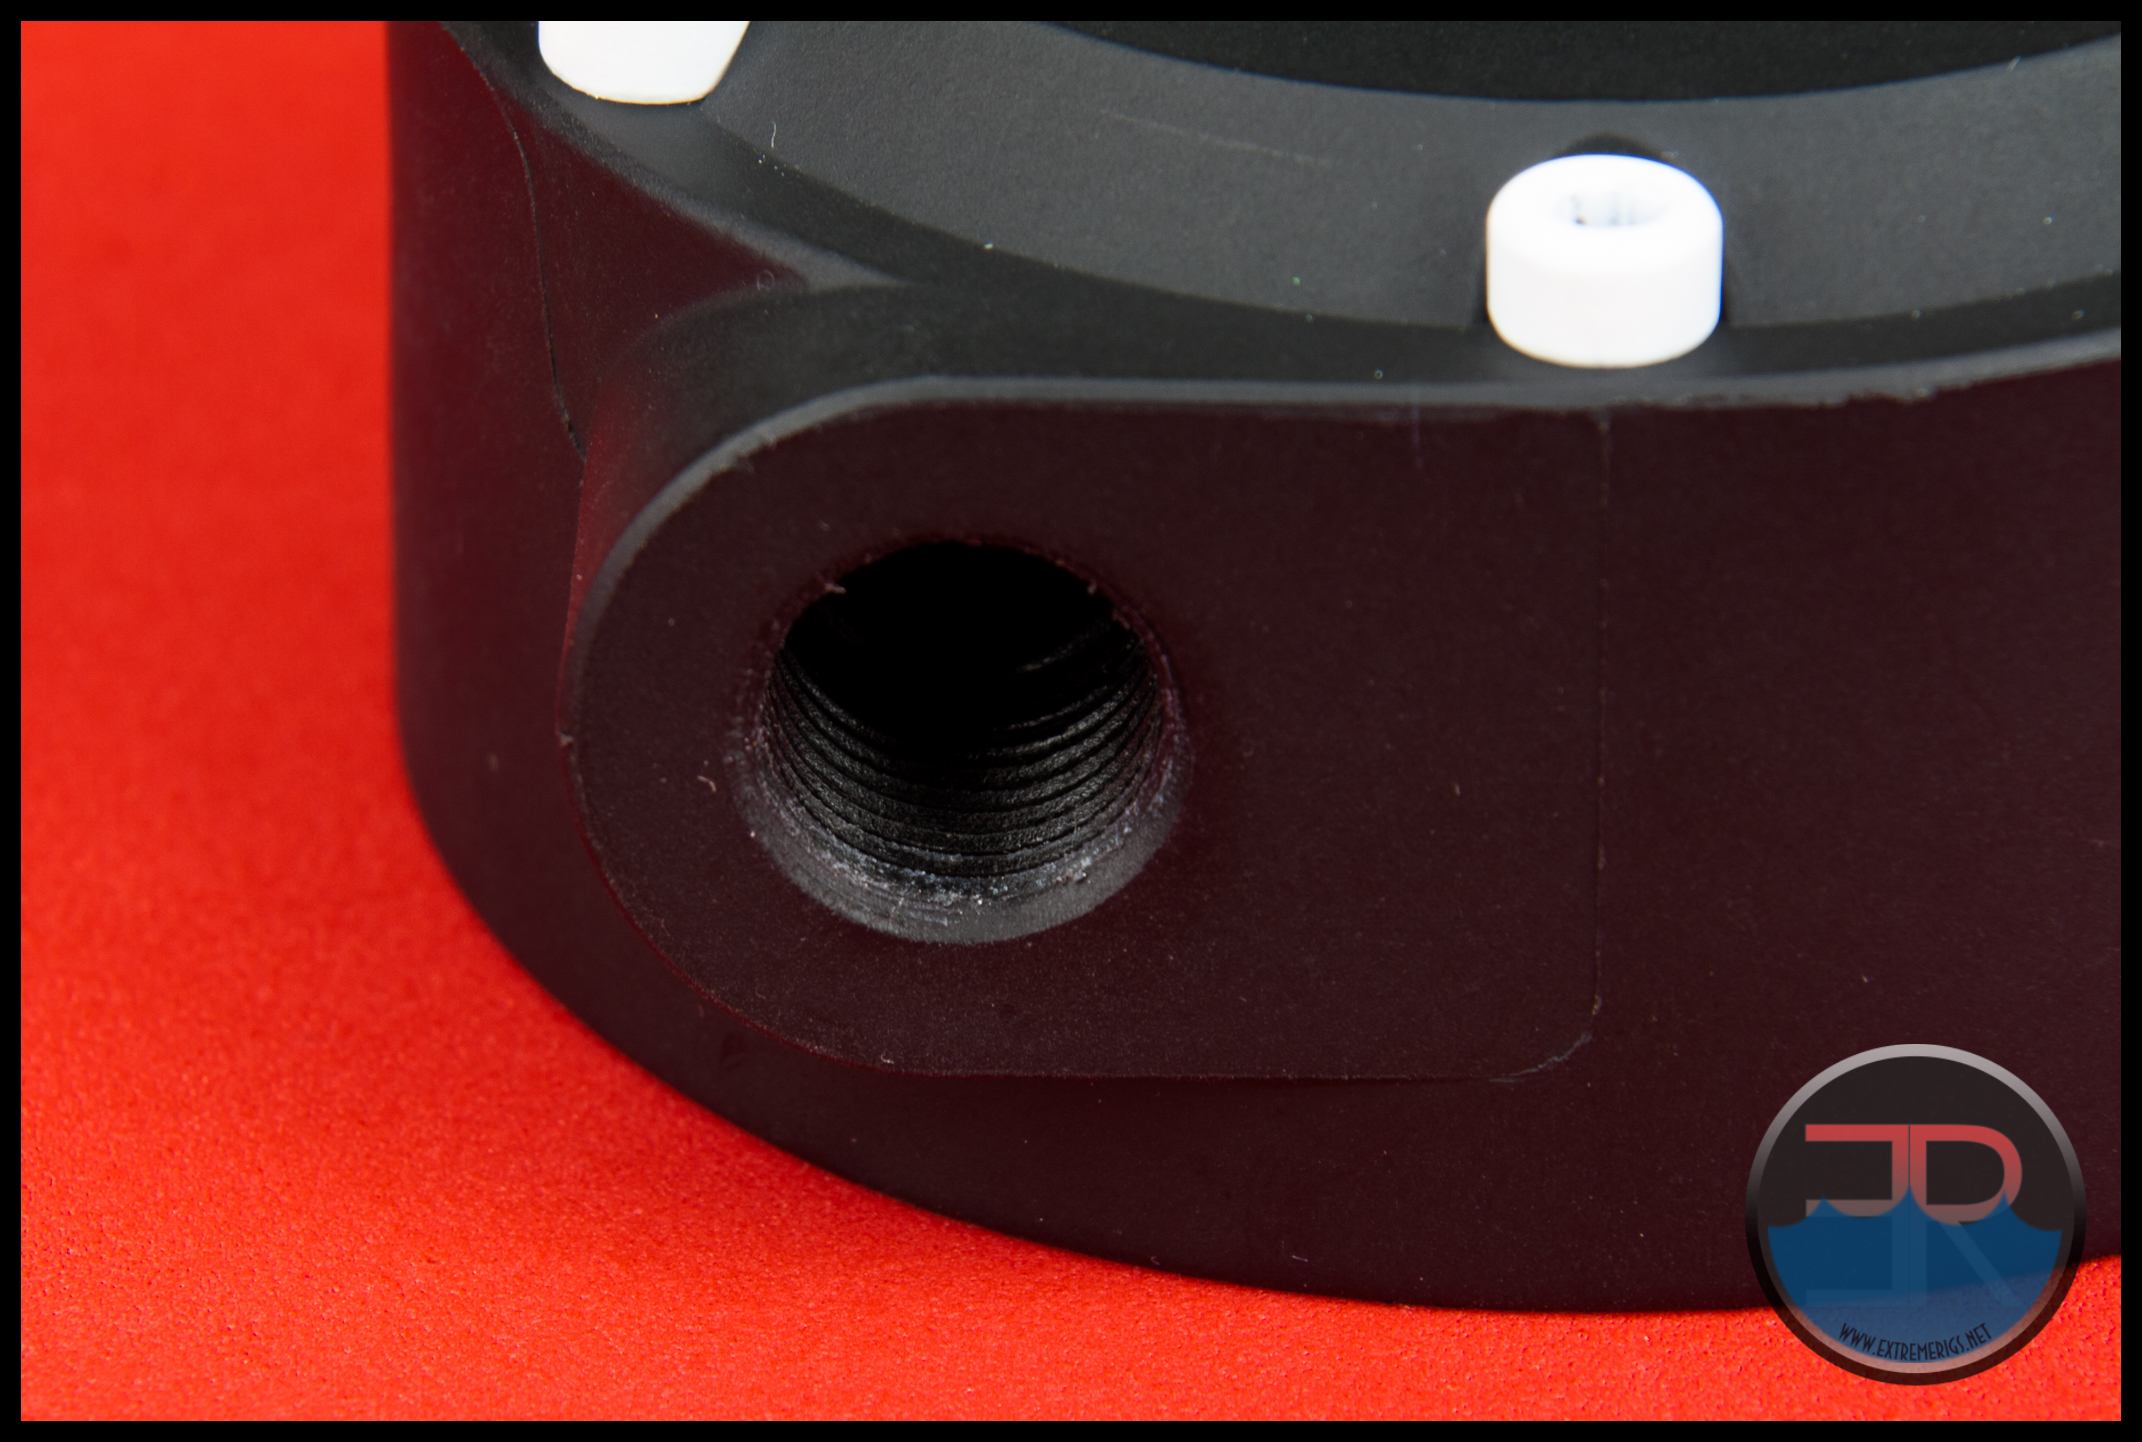
 While the material may be strong and tough, it is not immune to abuse and evidence of that can be seen on the port threads.
The machining on both the G 1/4 ports looks rough and the tooling appears as if it could do with a tweak to improve the finish on these.
On the inside we see the recess for the pump and examining the volute we see a fairly plain flat style design. From previous testing, coned volutes invariably have better performance than the flat ones, so the MMRS-SAP tests will be interesting to see if Monsoon have managed to squeeze any more performance out of this design.
 We think it unlikely that it’s performance will be outstanding as the volute design is almost identical to the design used on the Monsoon D5 Dual Bay-Res which our tests showed had average performance.

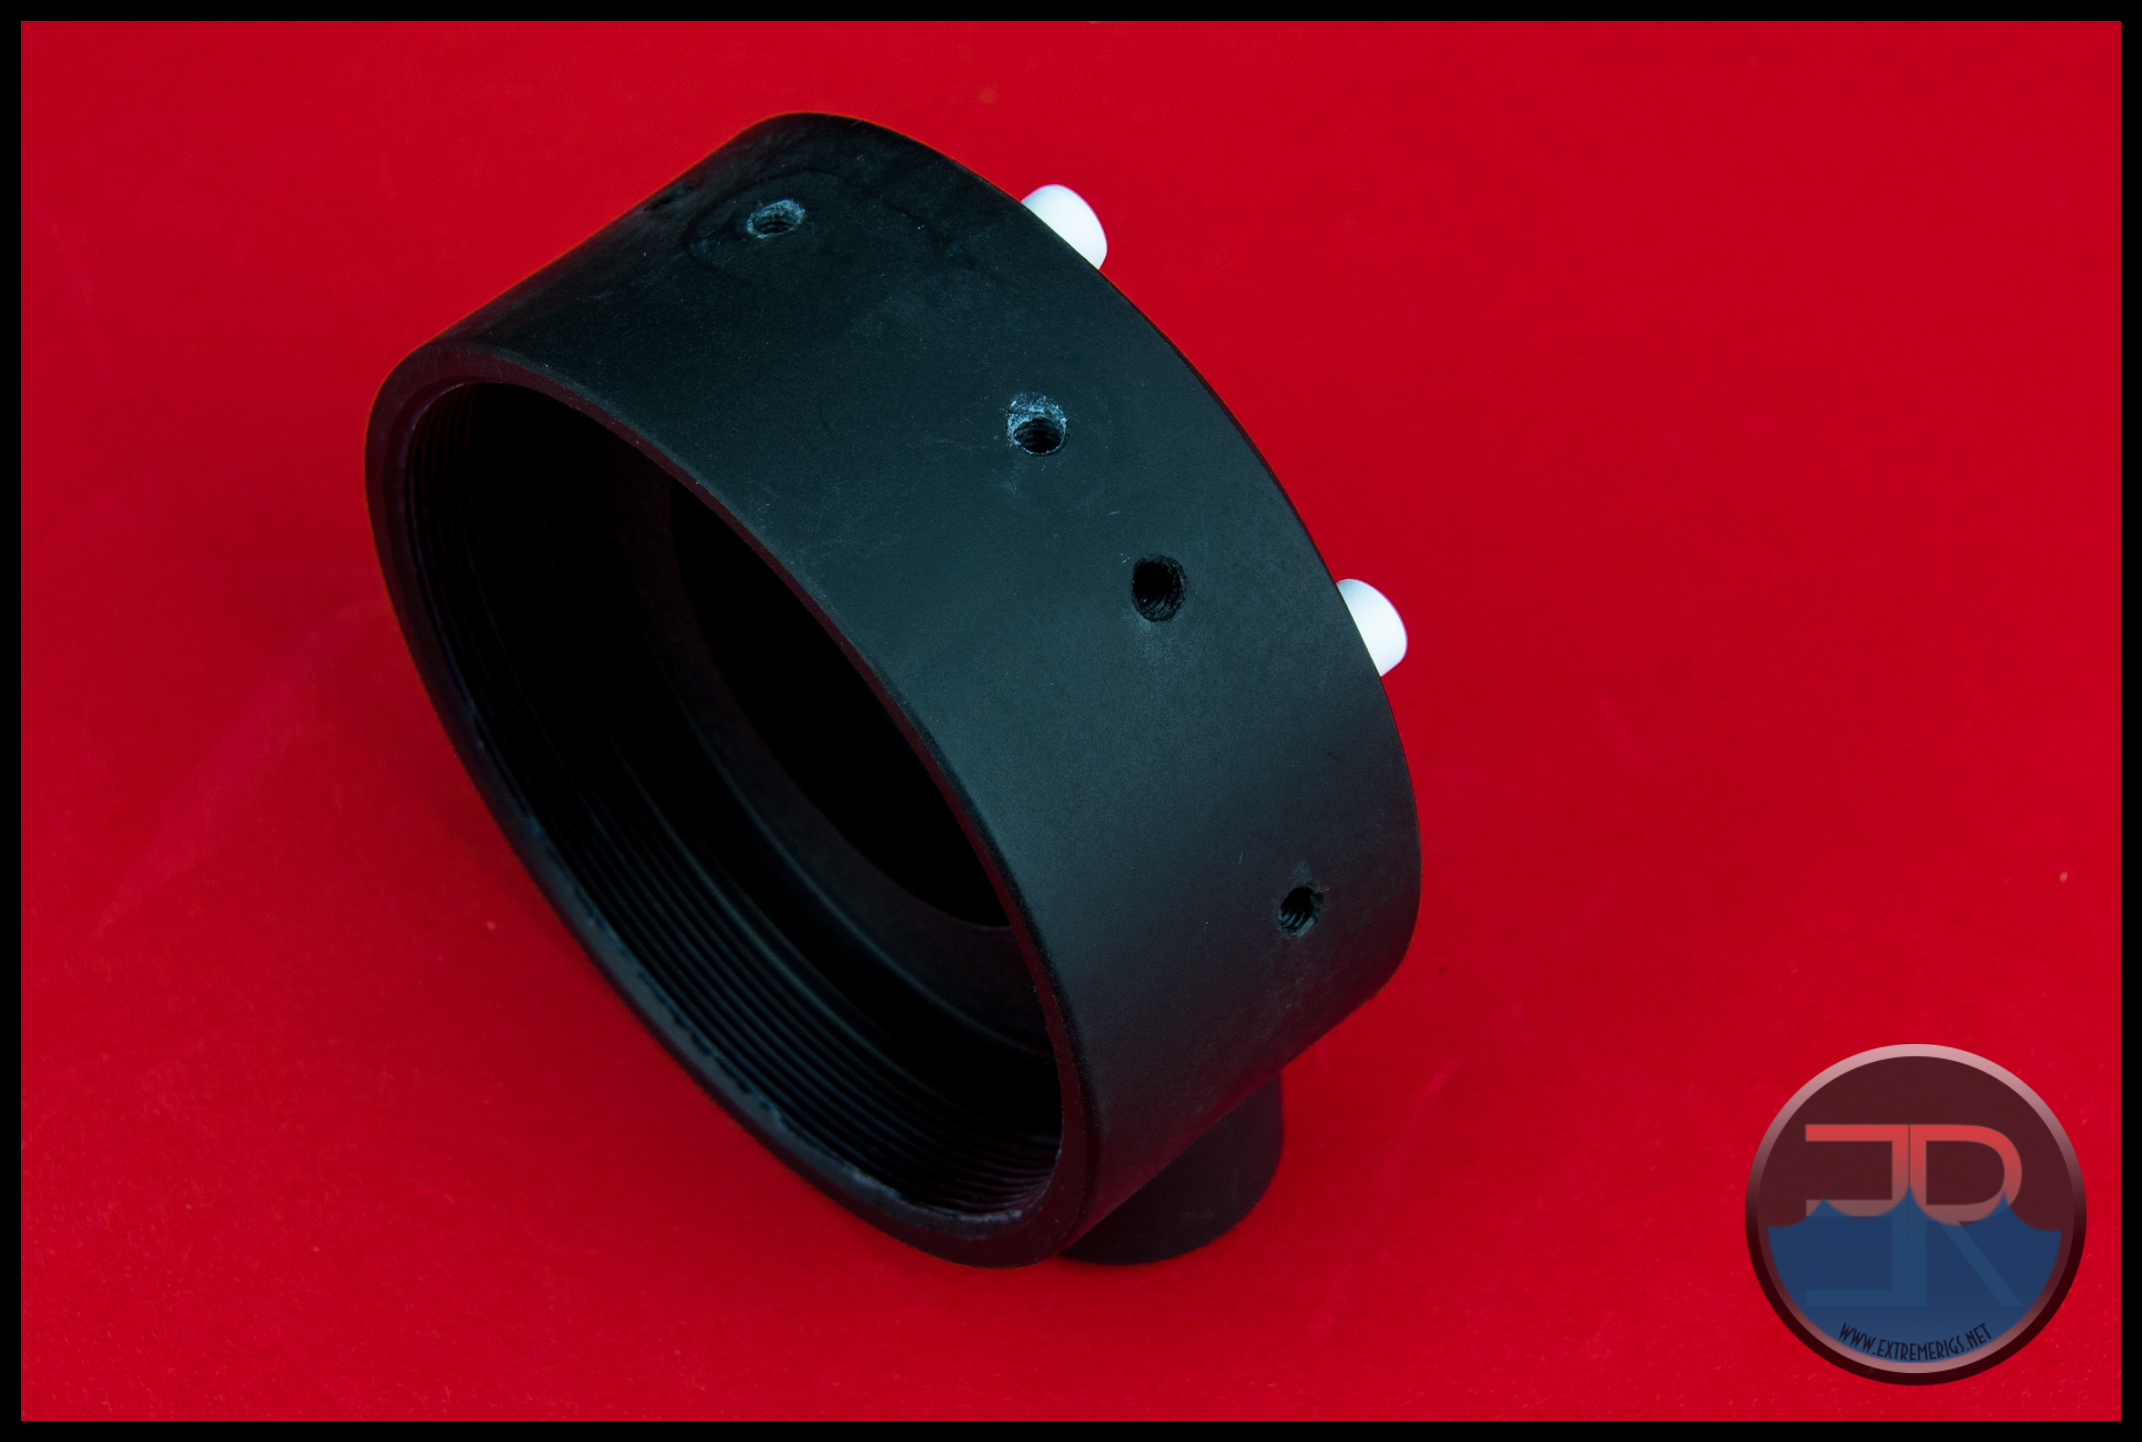
The very fine threads of the clamp/cover seem a bit on the fragile side, and extra care should be taken to avoid cross-threading when starting to thread the clamp/cover to the top.
The 6 cap screw bolts on the inlet port face of the top are purely for aesthetic purposes. I like the contrast that the colored bolt heads give and would match perfectly if a MMRS tube reservoir with white tension rods was mounted above or nearby in the rig.
The pump top has 3 sets of holes which the mounting bracket can be fitting to. Which set is used will define which way the outlet port will end up facing. When using the middle set of holes (which have the white paint marks below) the outlet port will be facing facing straight out. The other 2 sets of bracket mounting holes are offset 60° either side.
 If thinking about the angle the outlet port is facing from the chassis panel being mounted to, the angles would be 30°, 90° and 150°. I think the two offset port mounting holes are primarily for soft tube users, however 30° fittings are available for hard-line users who want “sideways” facing ports.
Here the 30° bracket mounting holes have been used.
 It would have been nice to see mounting options for 0° and 180°, but I guess we can’t have everything.
With the O-Ring added in, here we have all the parts from the stripped down MMRS-SAP unit.
So now we have all the pieces, let’s reverse the process and and assembly the unit with a couple of different D5 pumps and get the assembly ready for it’s performance testing.


Comments are closed.