


Introduction
In Win 909 ATX Case Review
Welcome back to another Extreme Rigs review. Today we will be taking a look at In Win’s 909 case. First off a big thank you to In Win for sending this case out to review!
![]()
In Win have been pursuing a contemporary design aesthetic where the “look” of the case and the use of high end materials really trumps all other considerations. The 909 is part of this line up of beautiful designs.

Let’s get this baby unboxed:
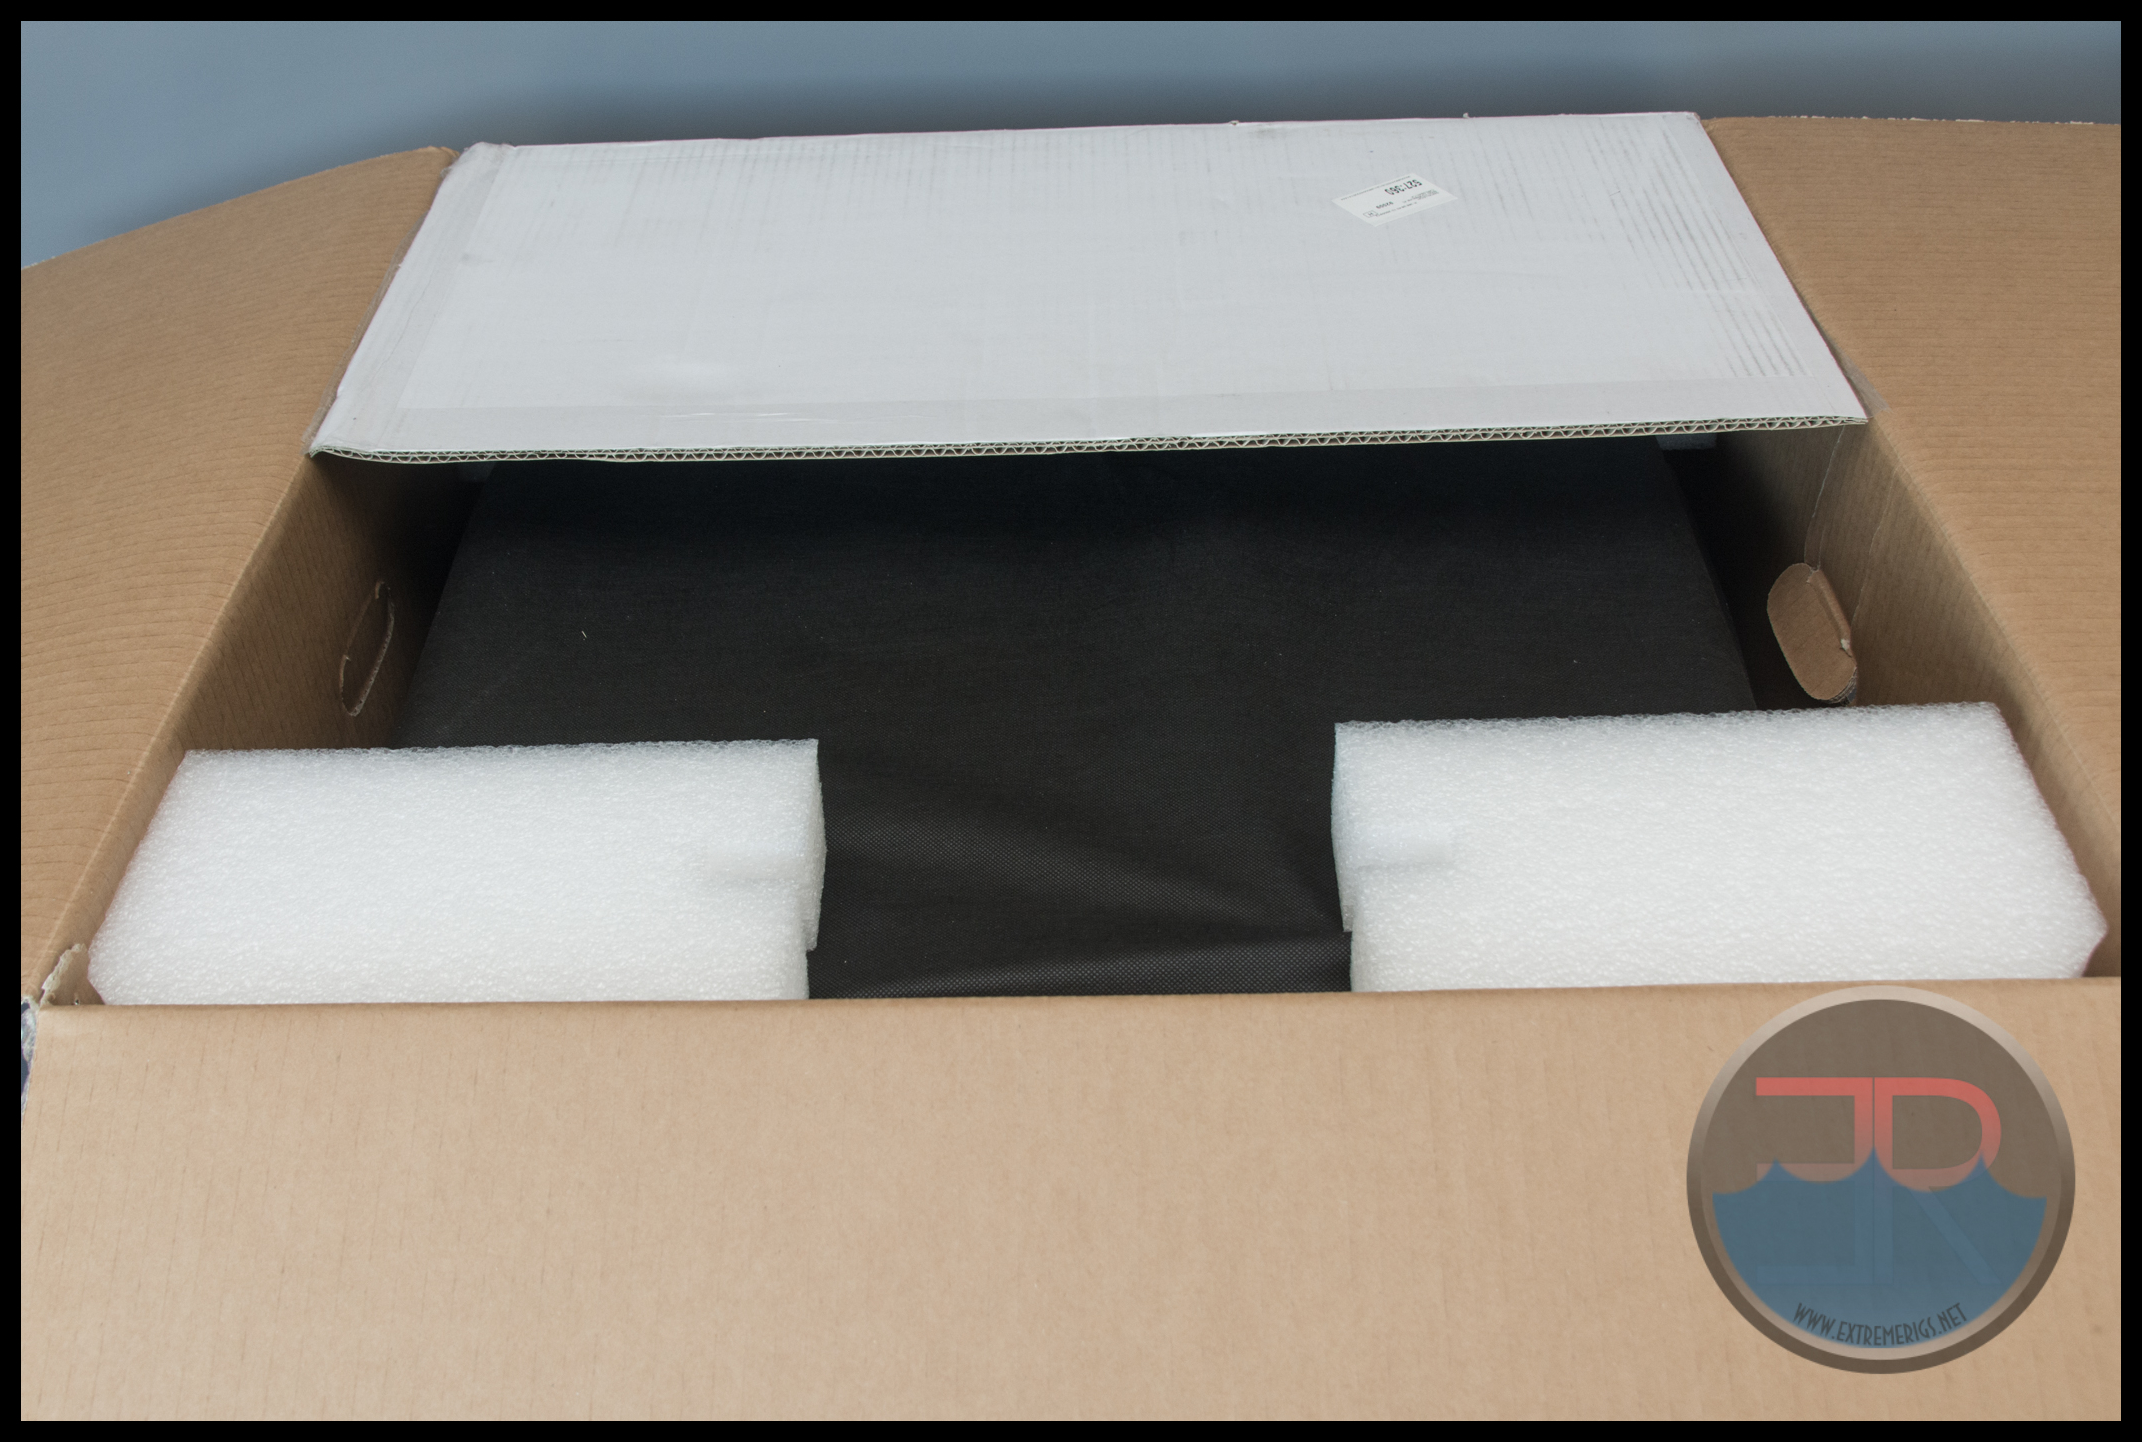
Like the 805 case which we also reviewed here – the case is protected by foam blocks on the corners and a premium fabric “bag”. The worry here of course is that the box could be damaged in the middle and there is little protection for the glass should anything poke through a hole. Luckily the gap between the box and the case is quite large.
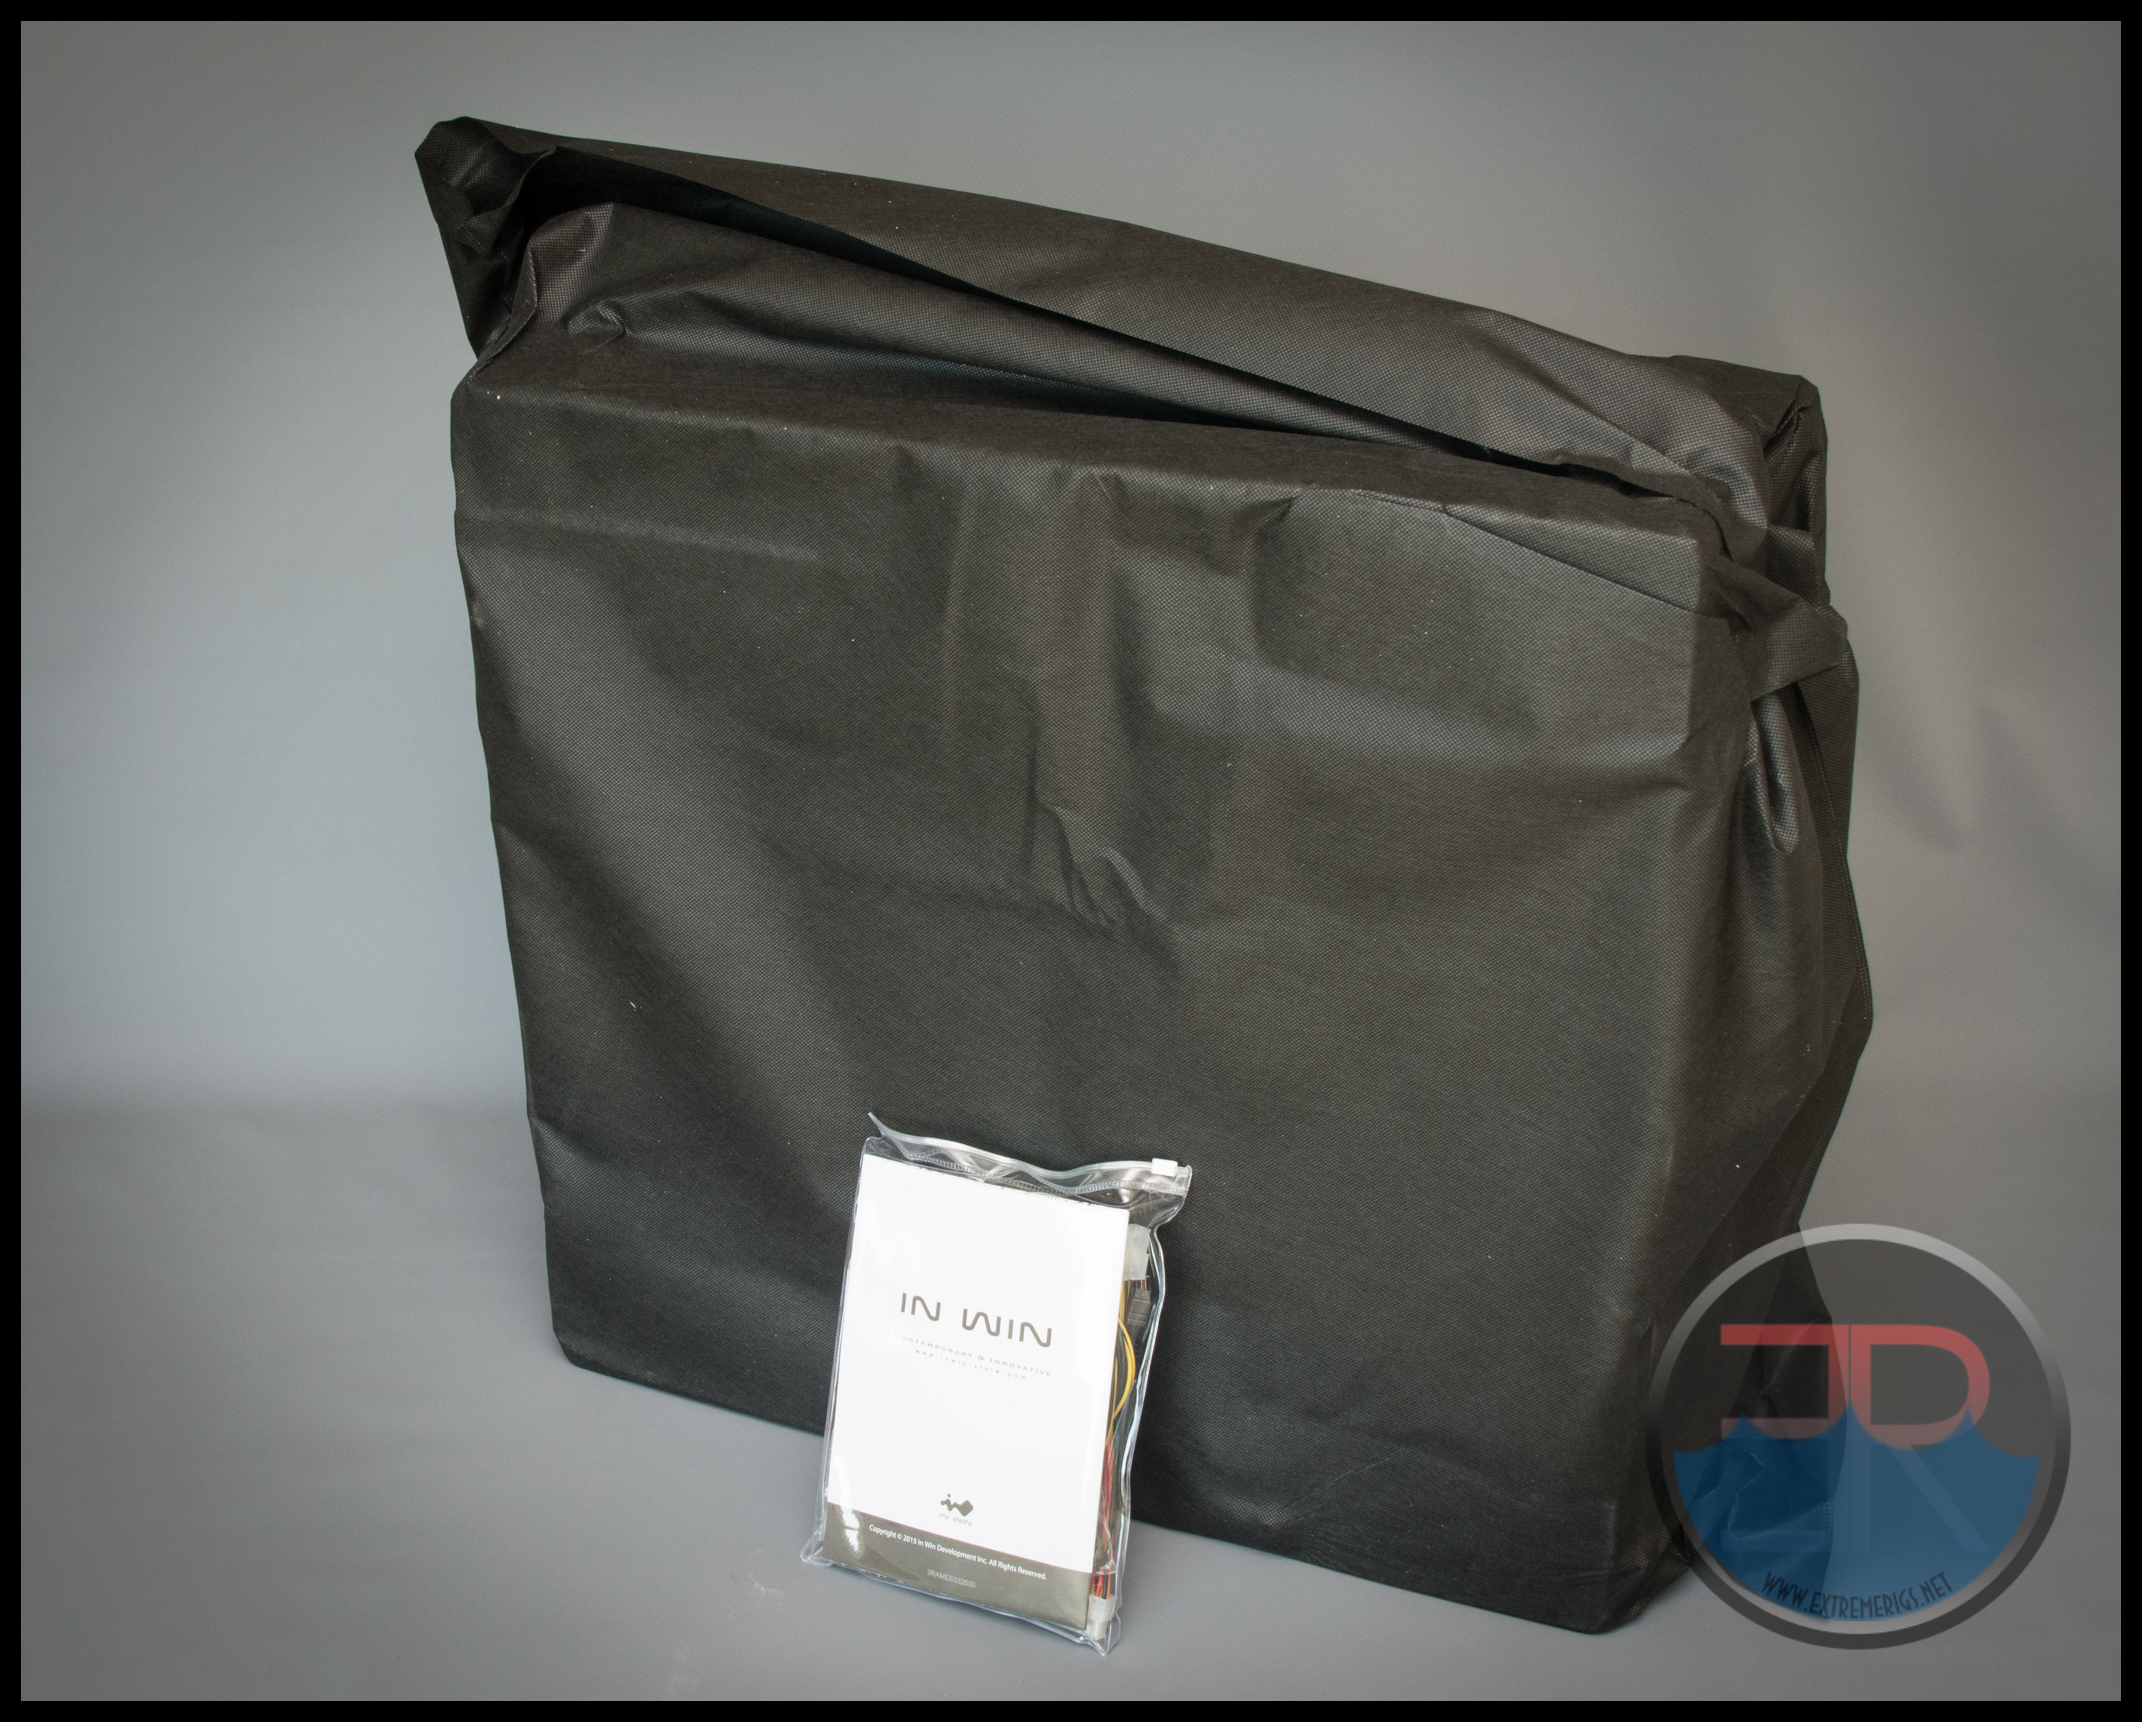
The only other item in the box apart from the packaging and the case is a small bag of accessories. Lifting the case out of the box you realize just how heavy it is. In Win claim it’s 17KG or 37.5lbs, but it feels heavier than that. Part of that maybe however maybe the size. Although this is an ATX case, it is certainly not compact.
This case comes in two different versions. This is the other version, picture courtesy of In Win:

Before getting stuck into the case itself though let’s take a look at the accessories:
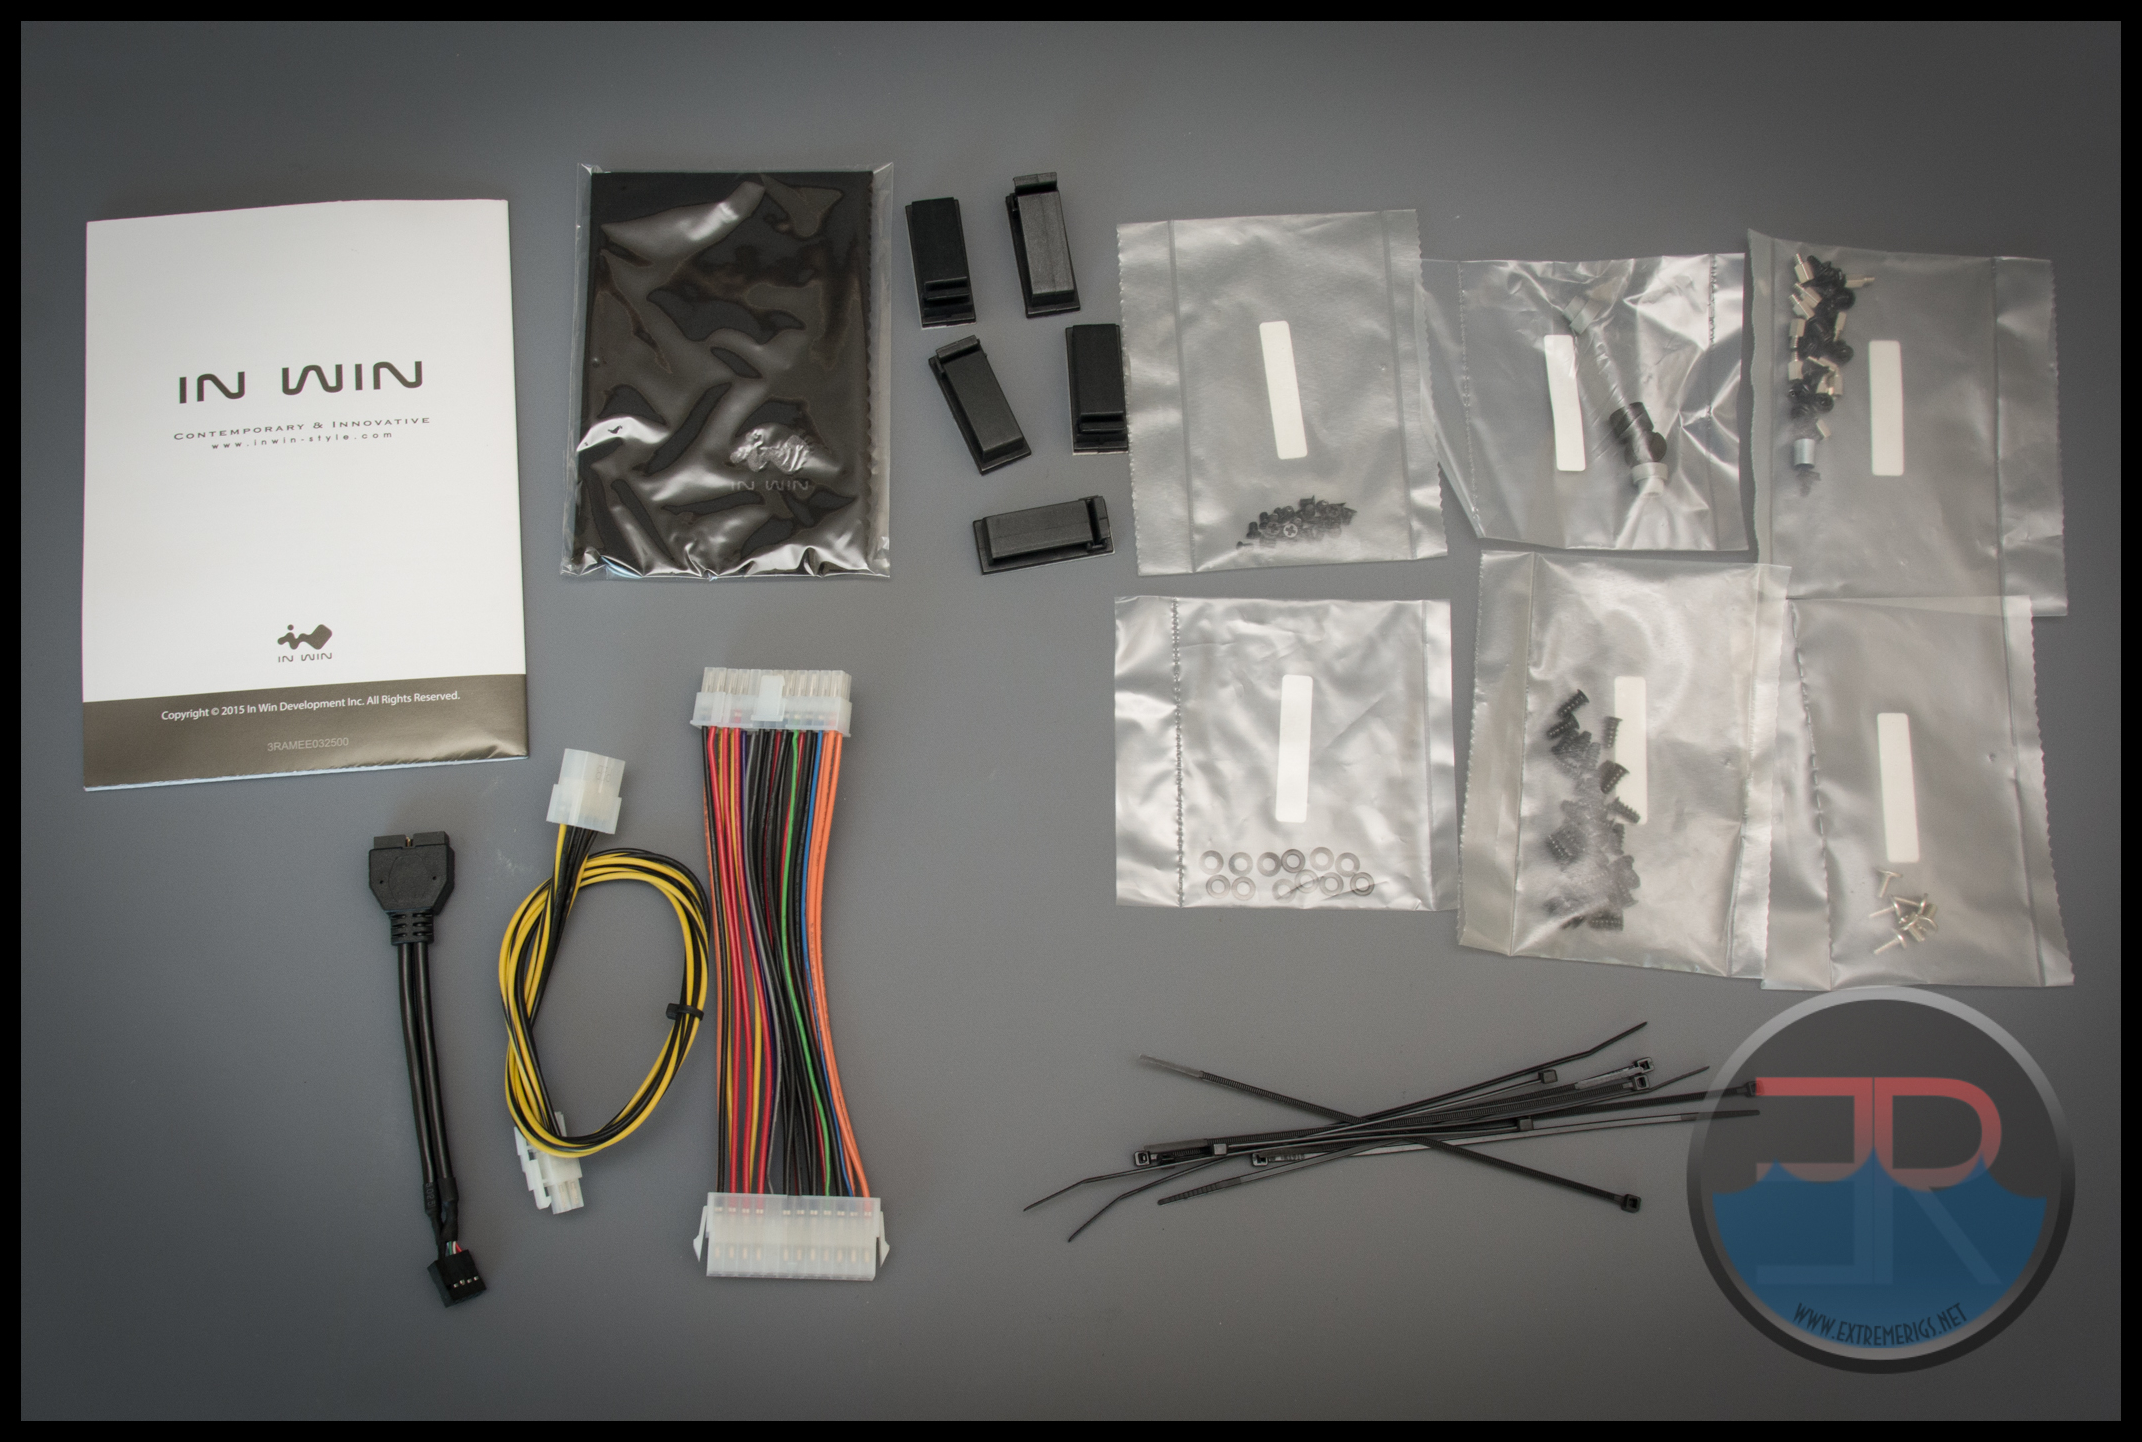
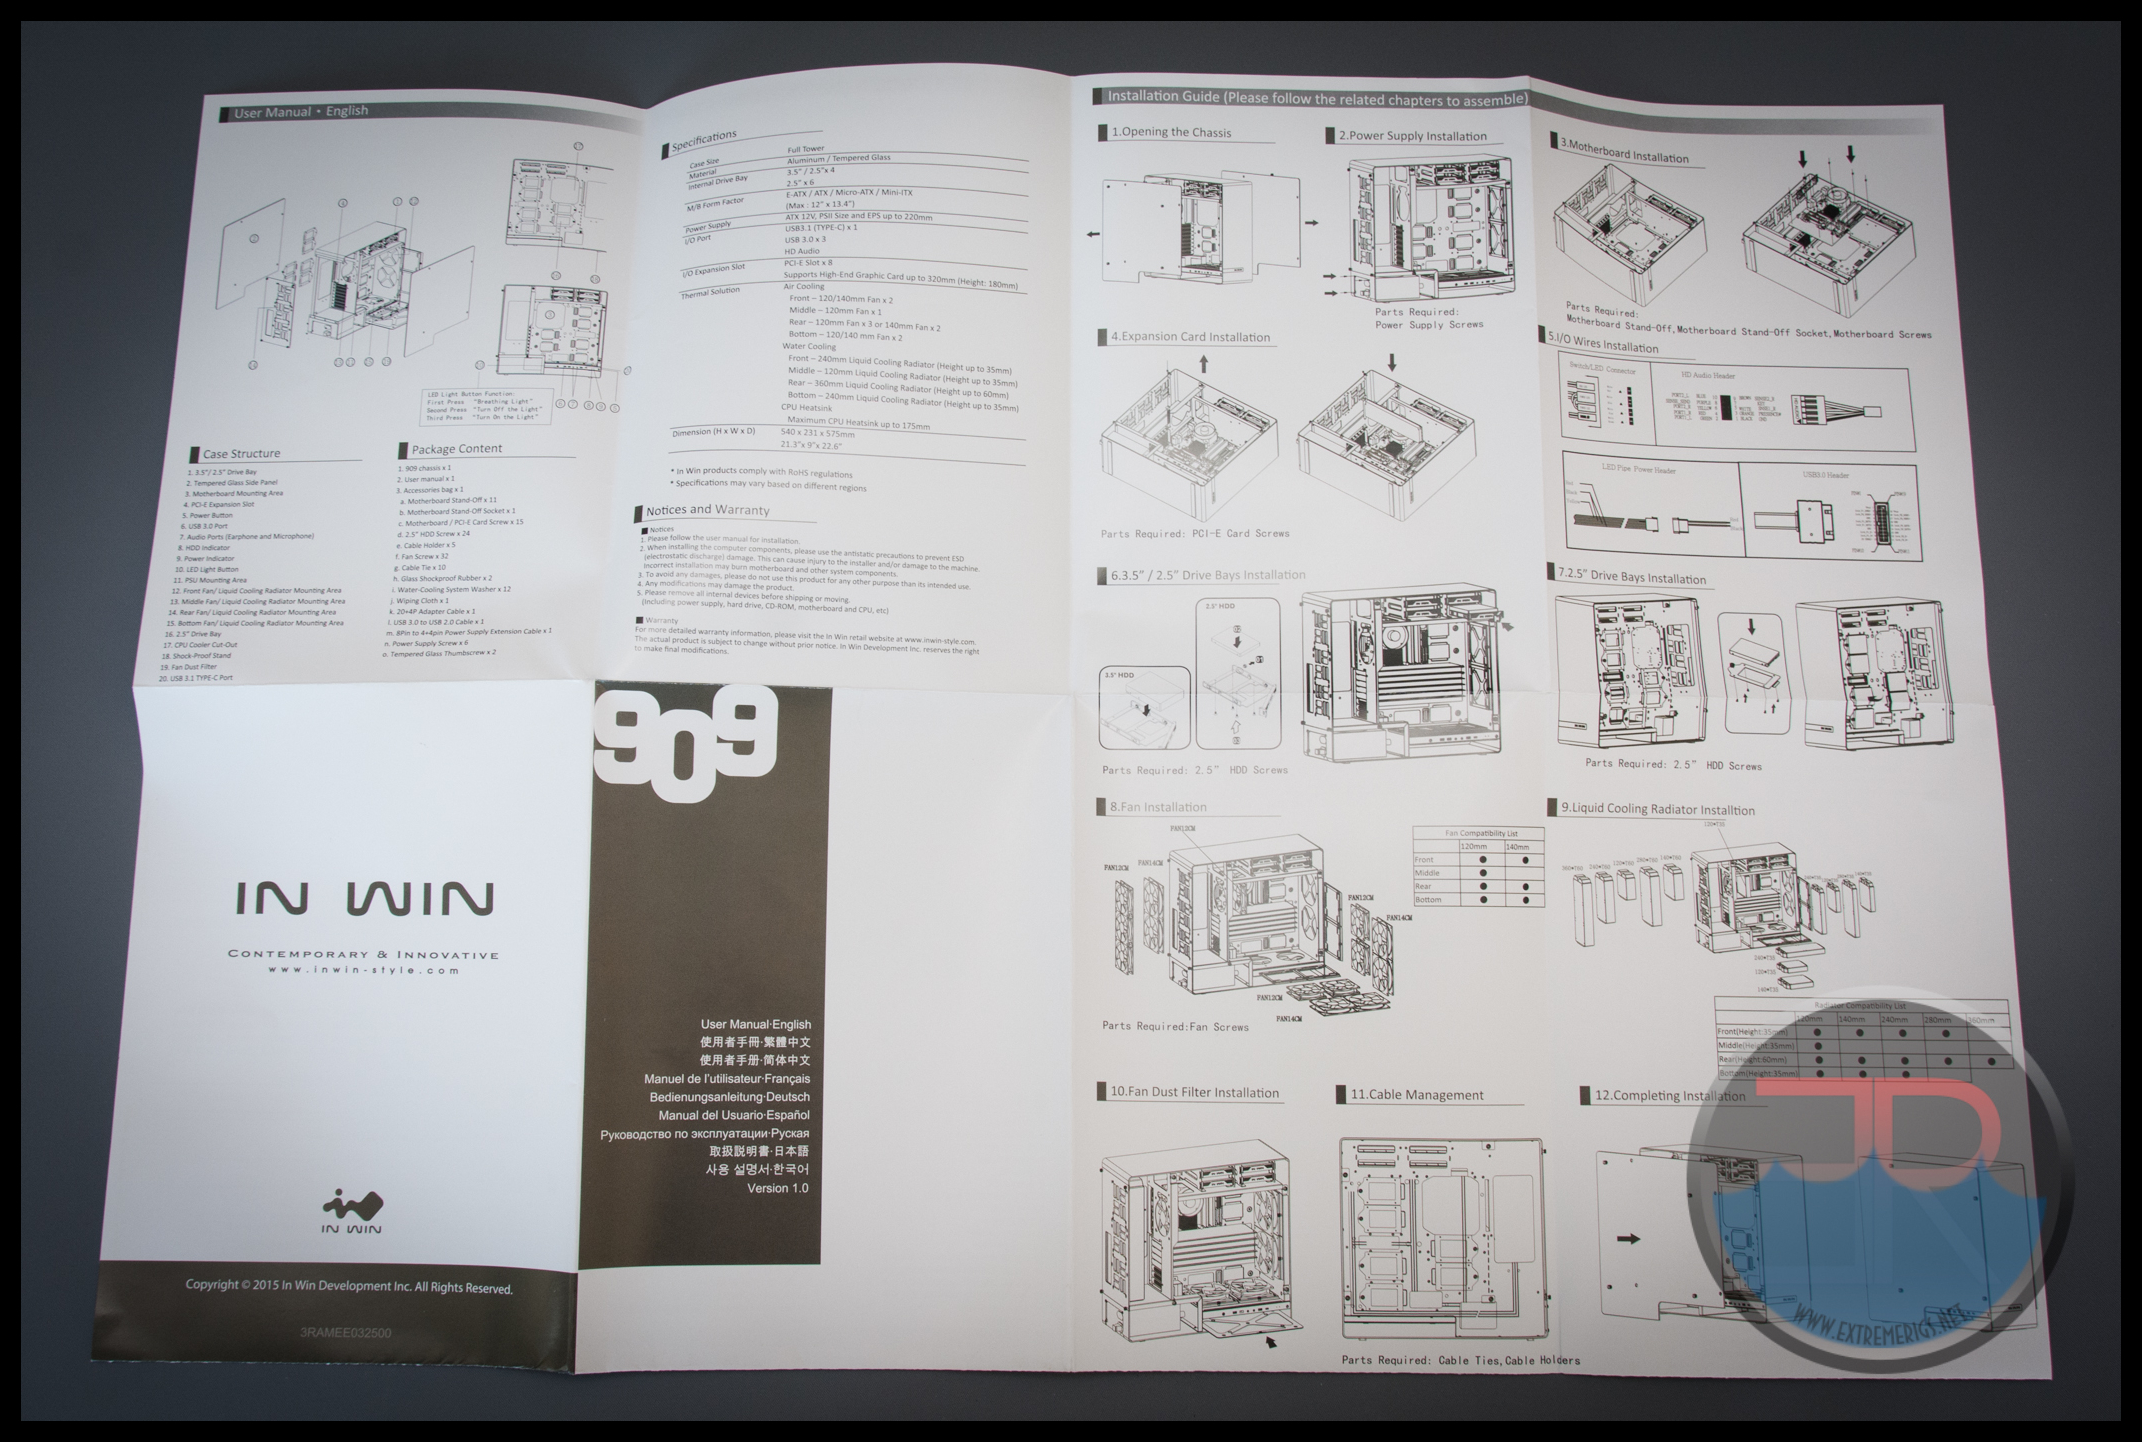
Included in the bag of accessories are various screws, washers and spares. There is also a manual, a lint free cleaning cloth, cable ties and sticky backed clips and some cable extensions. The manual comes in a bunch of languages and has lots of drawings:
The cable extensions on the other hand are not sleeved and this is very disappointing for a case that is quite pricey:
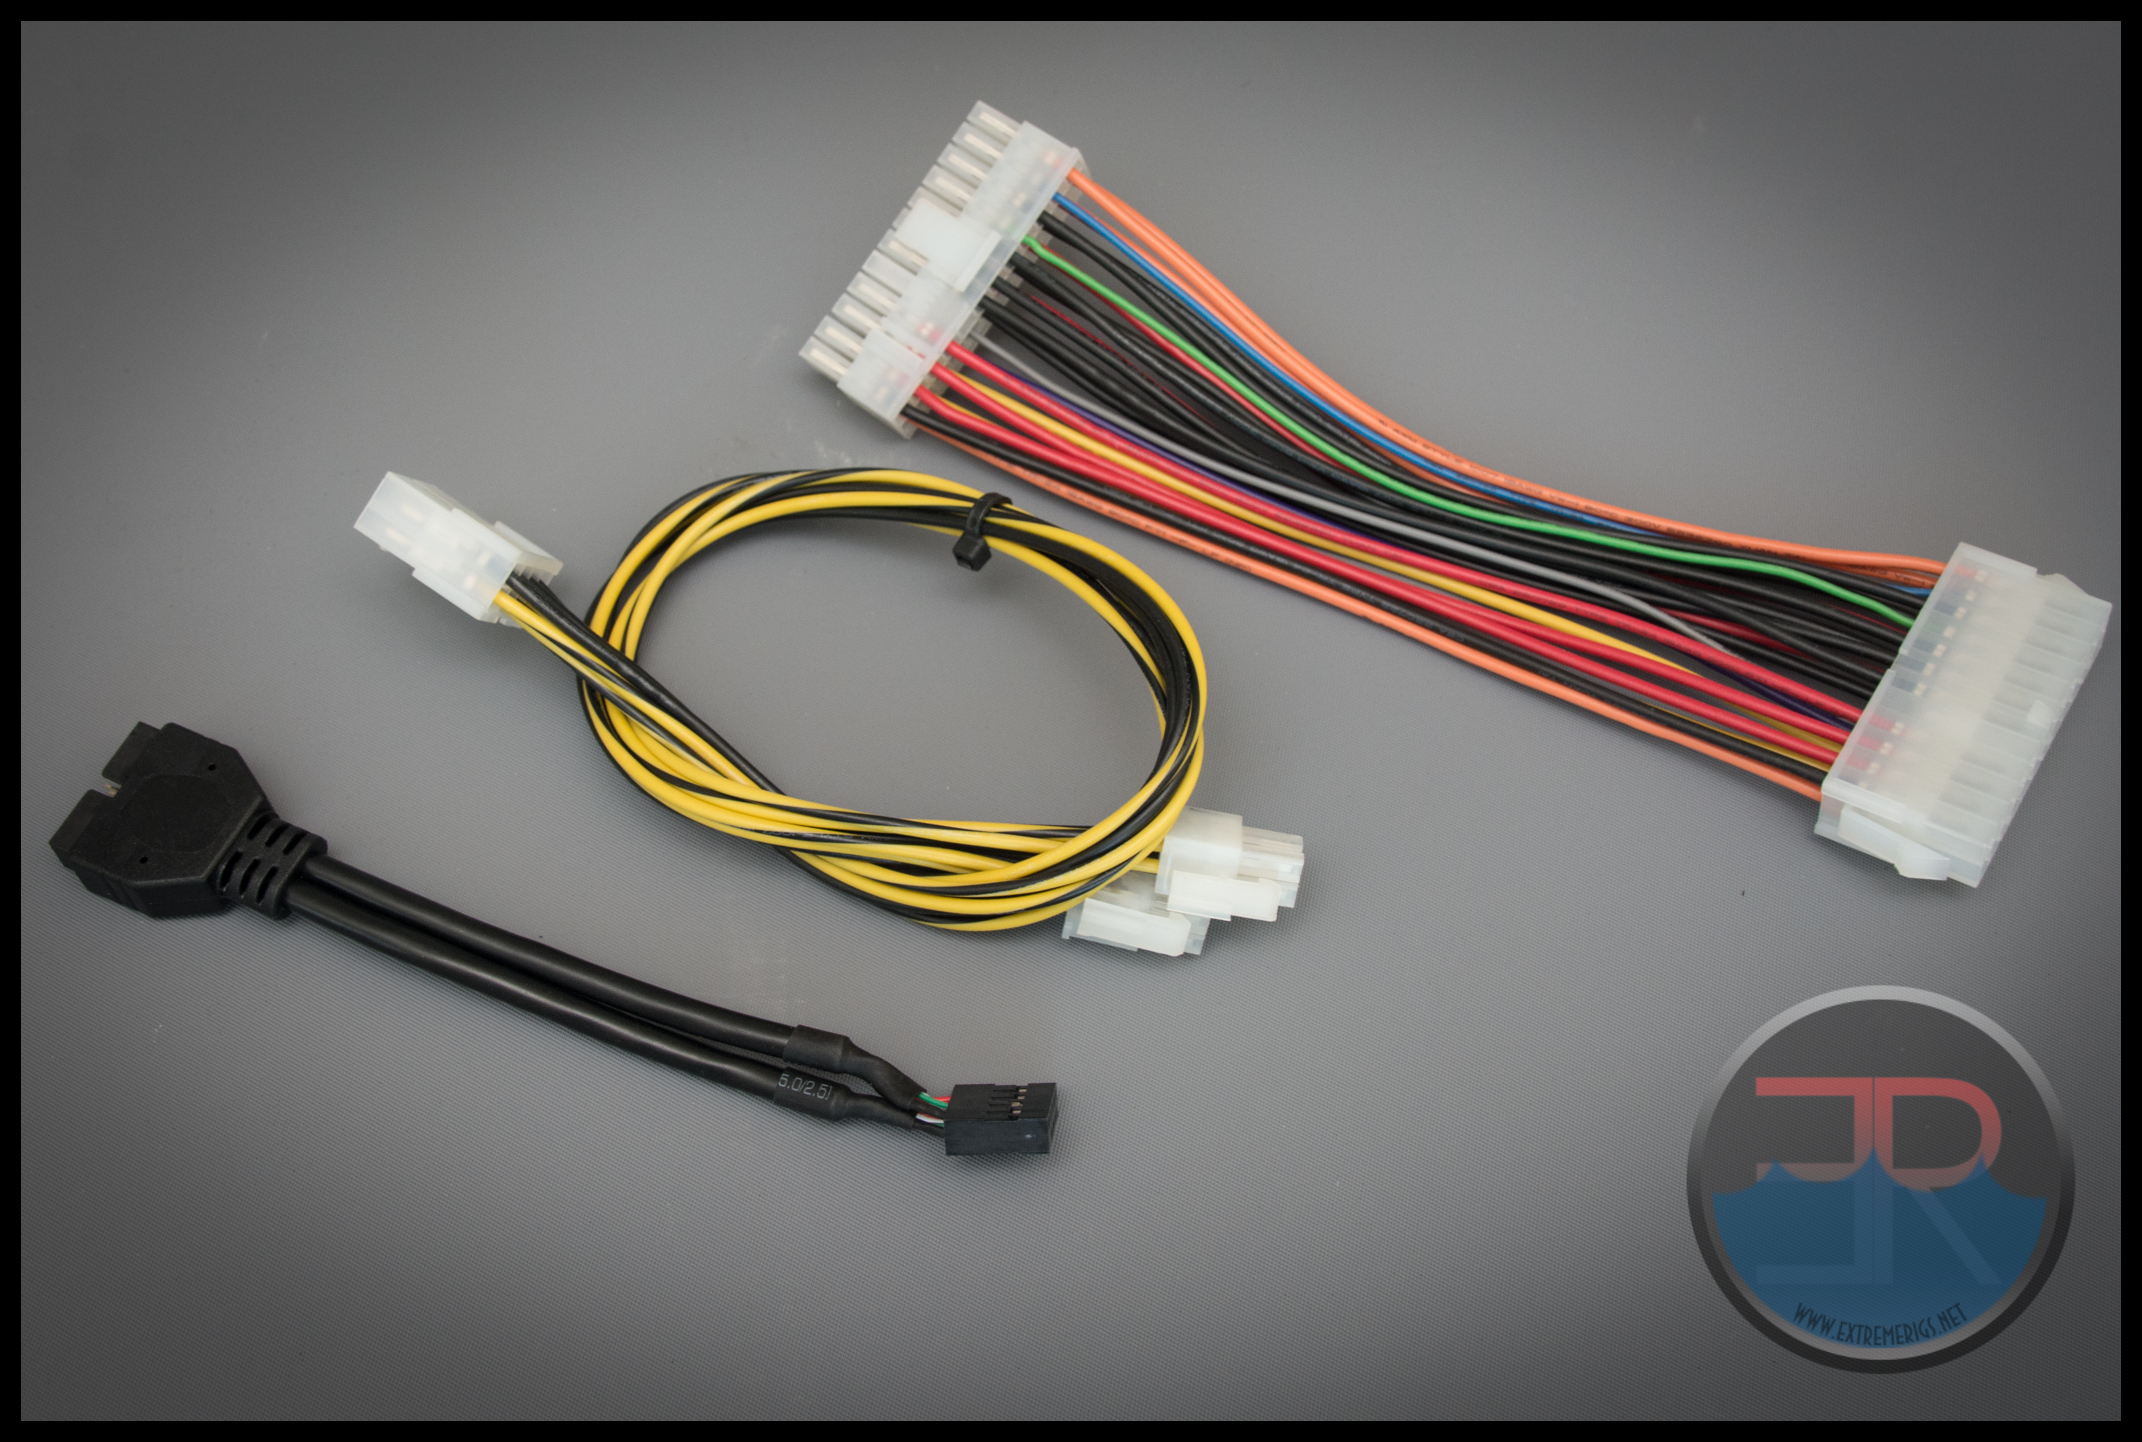
In this day and age only the cheapest power supplies have cables that are multicolored like this. I truly did not expect his from In Win. The cables are a USB2 to USB 3 header adapter which is a least black. Then a CPU 8 pin extension and a 24 pin extension. Hopefully you won’t need to use these.
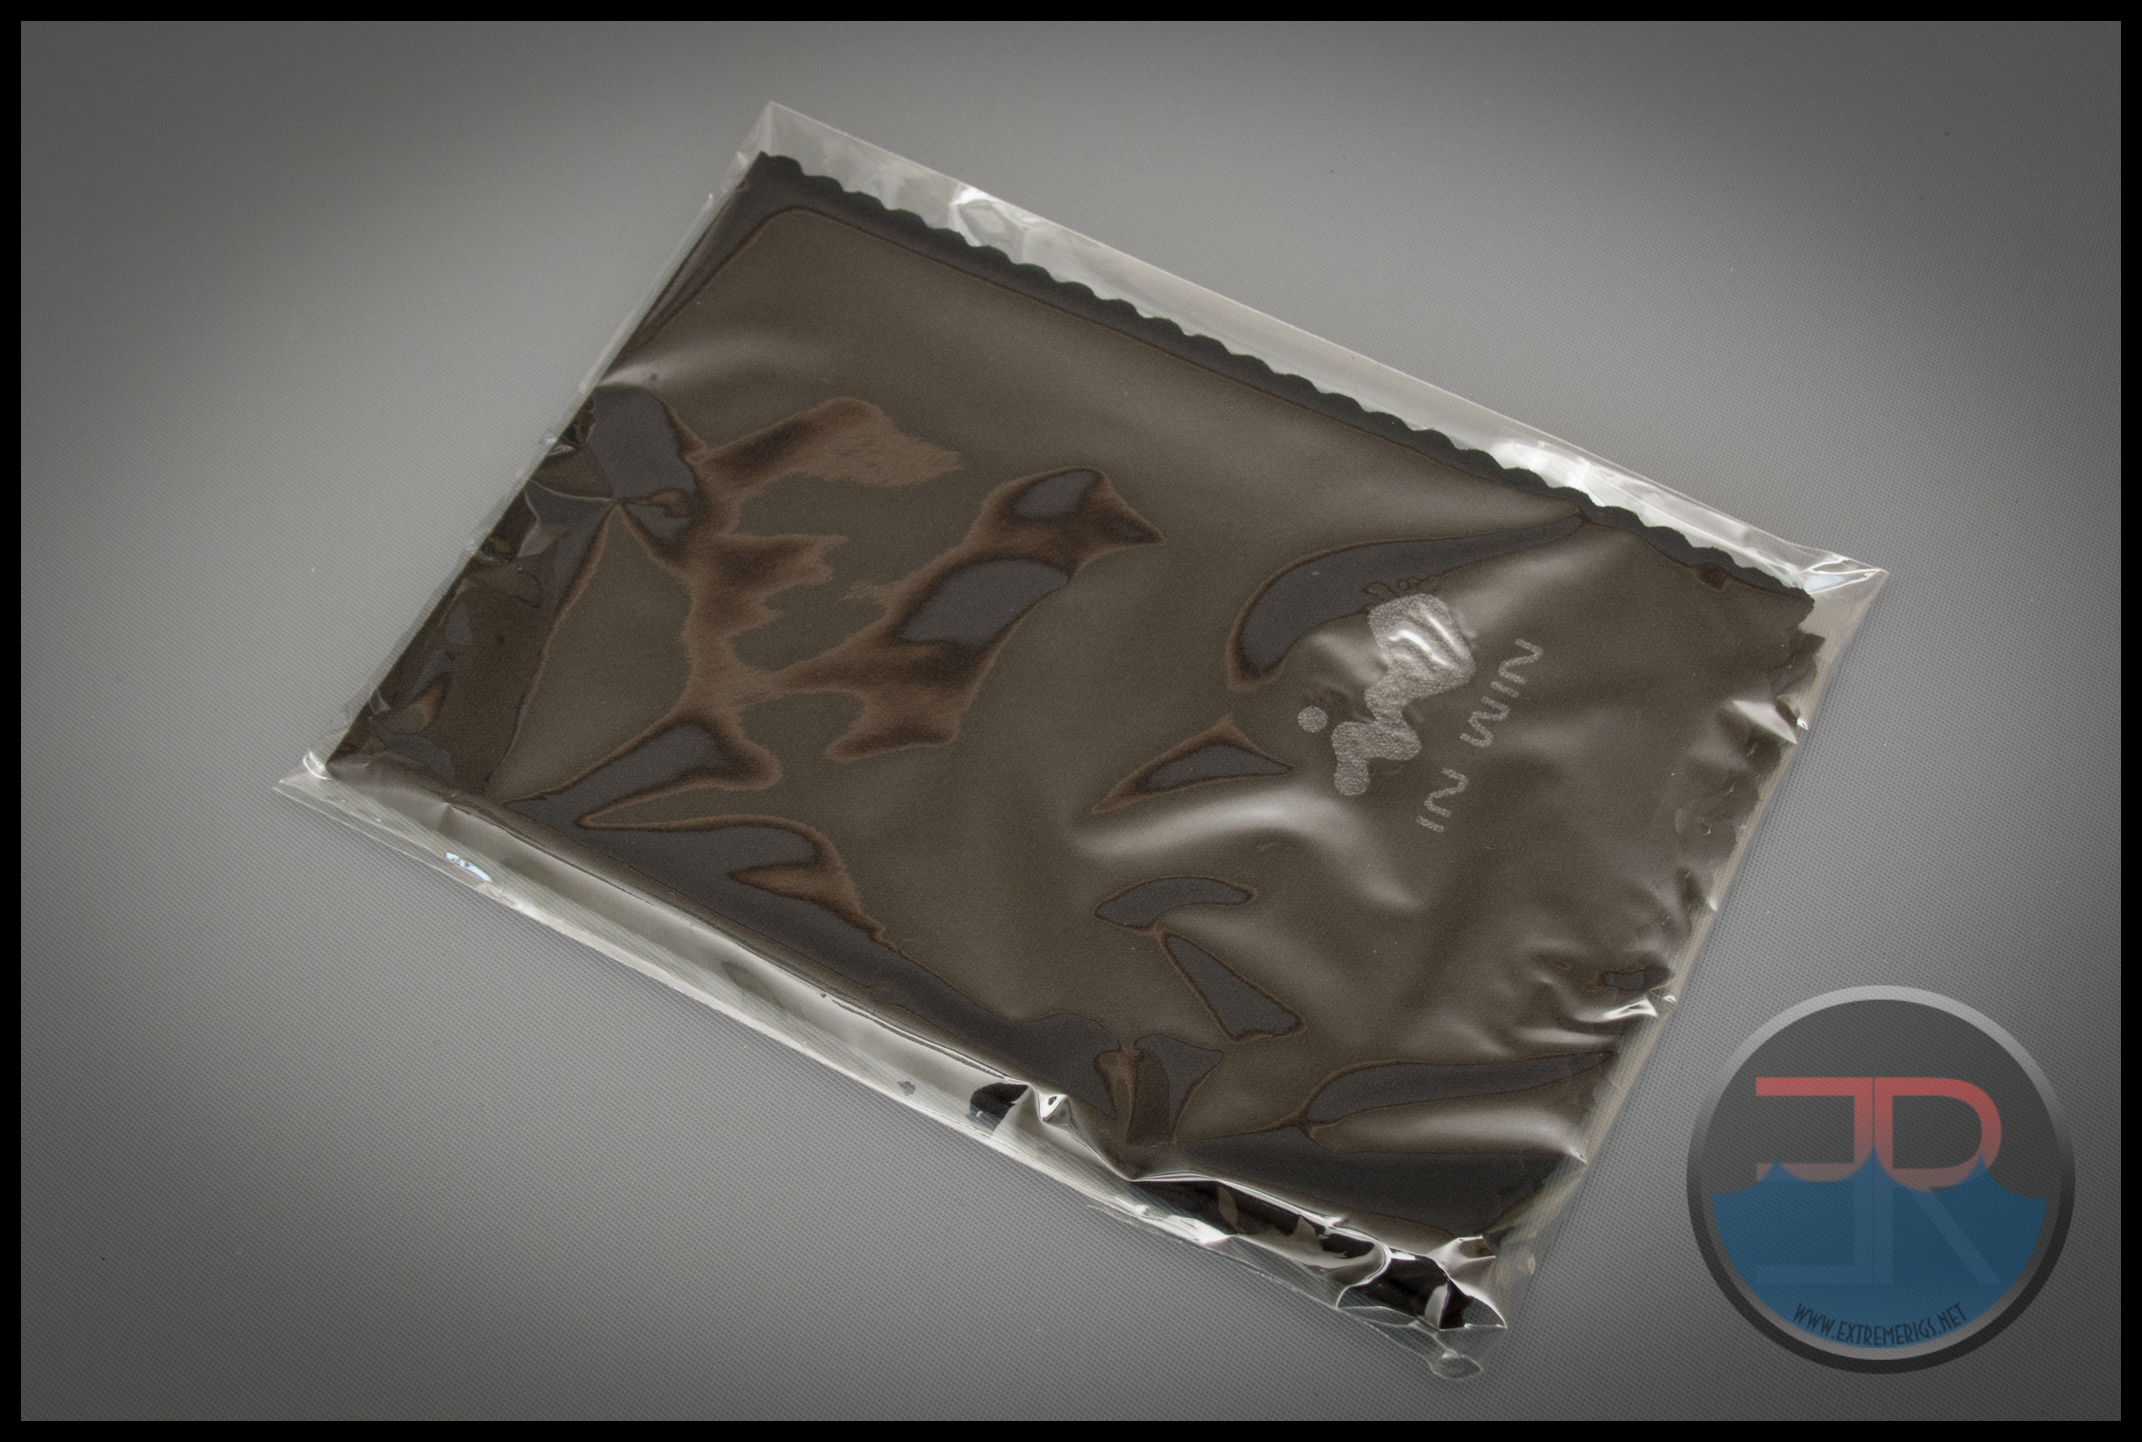
The lint free cloth is black with an In Win logo and feels great – no skimping here:
Let’s now take a closer look at the case…
The Details
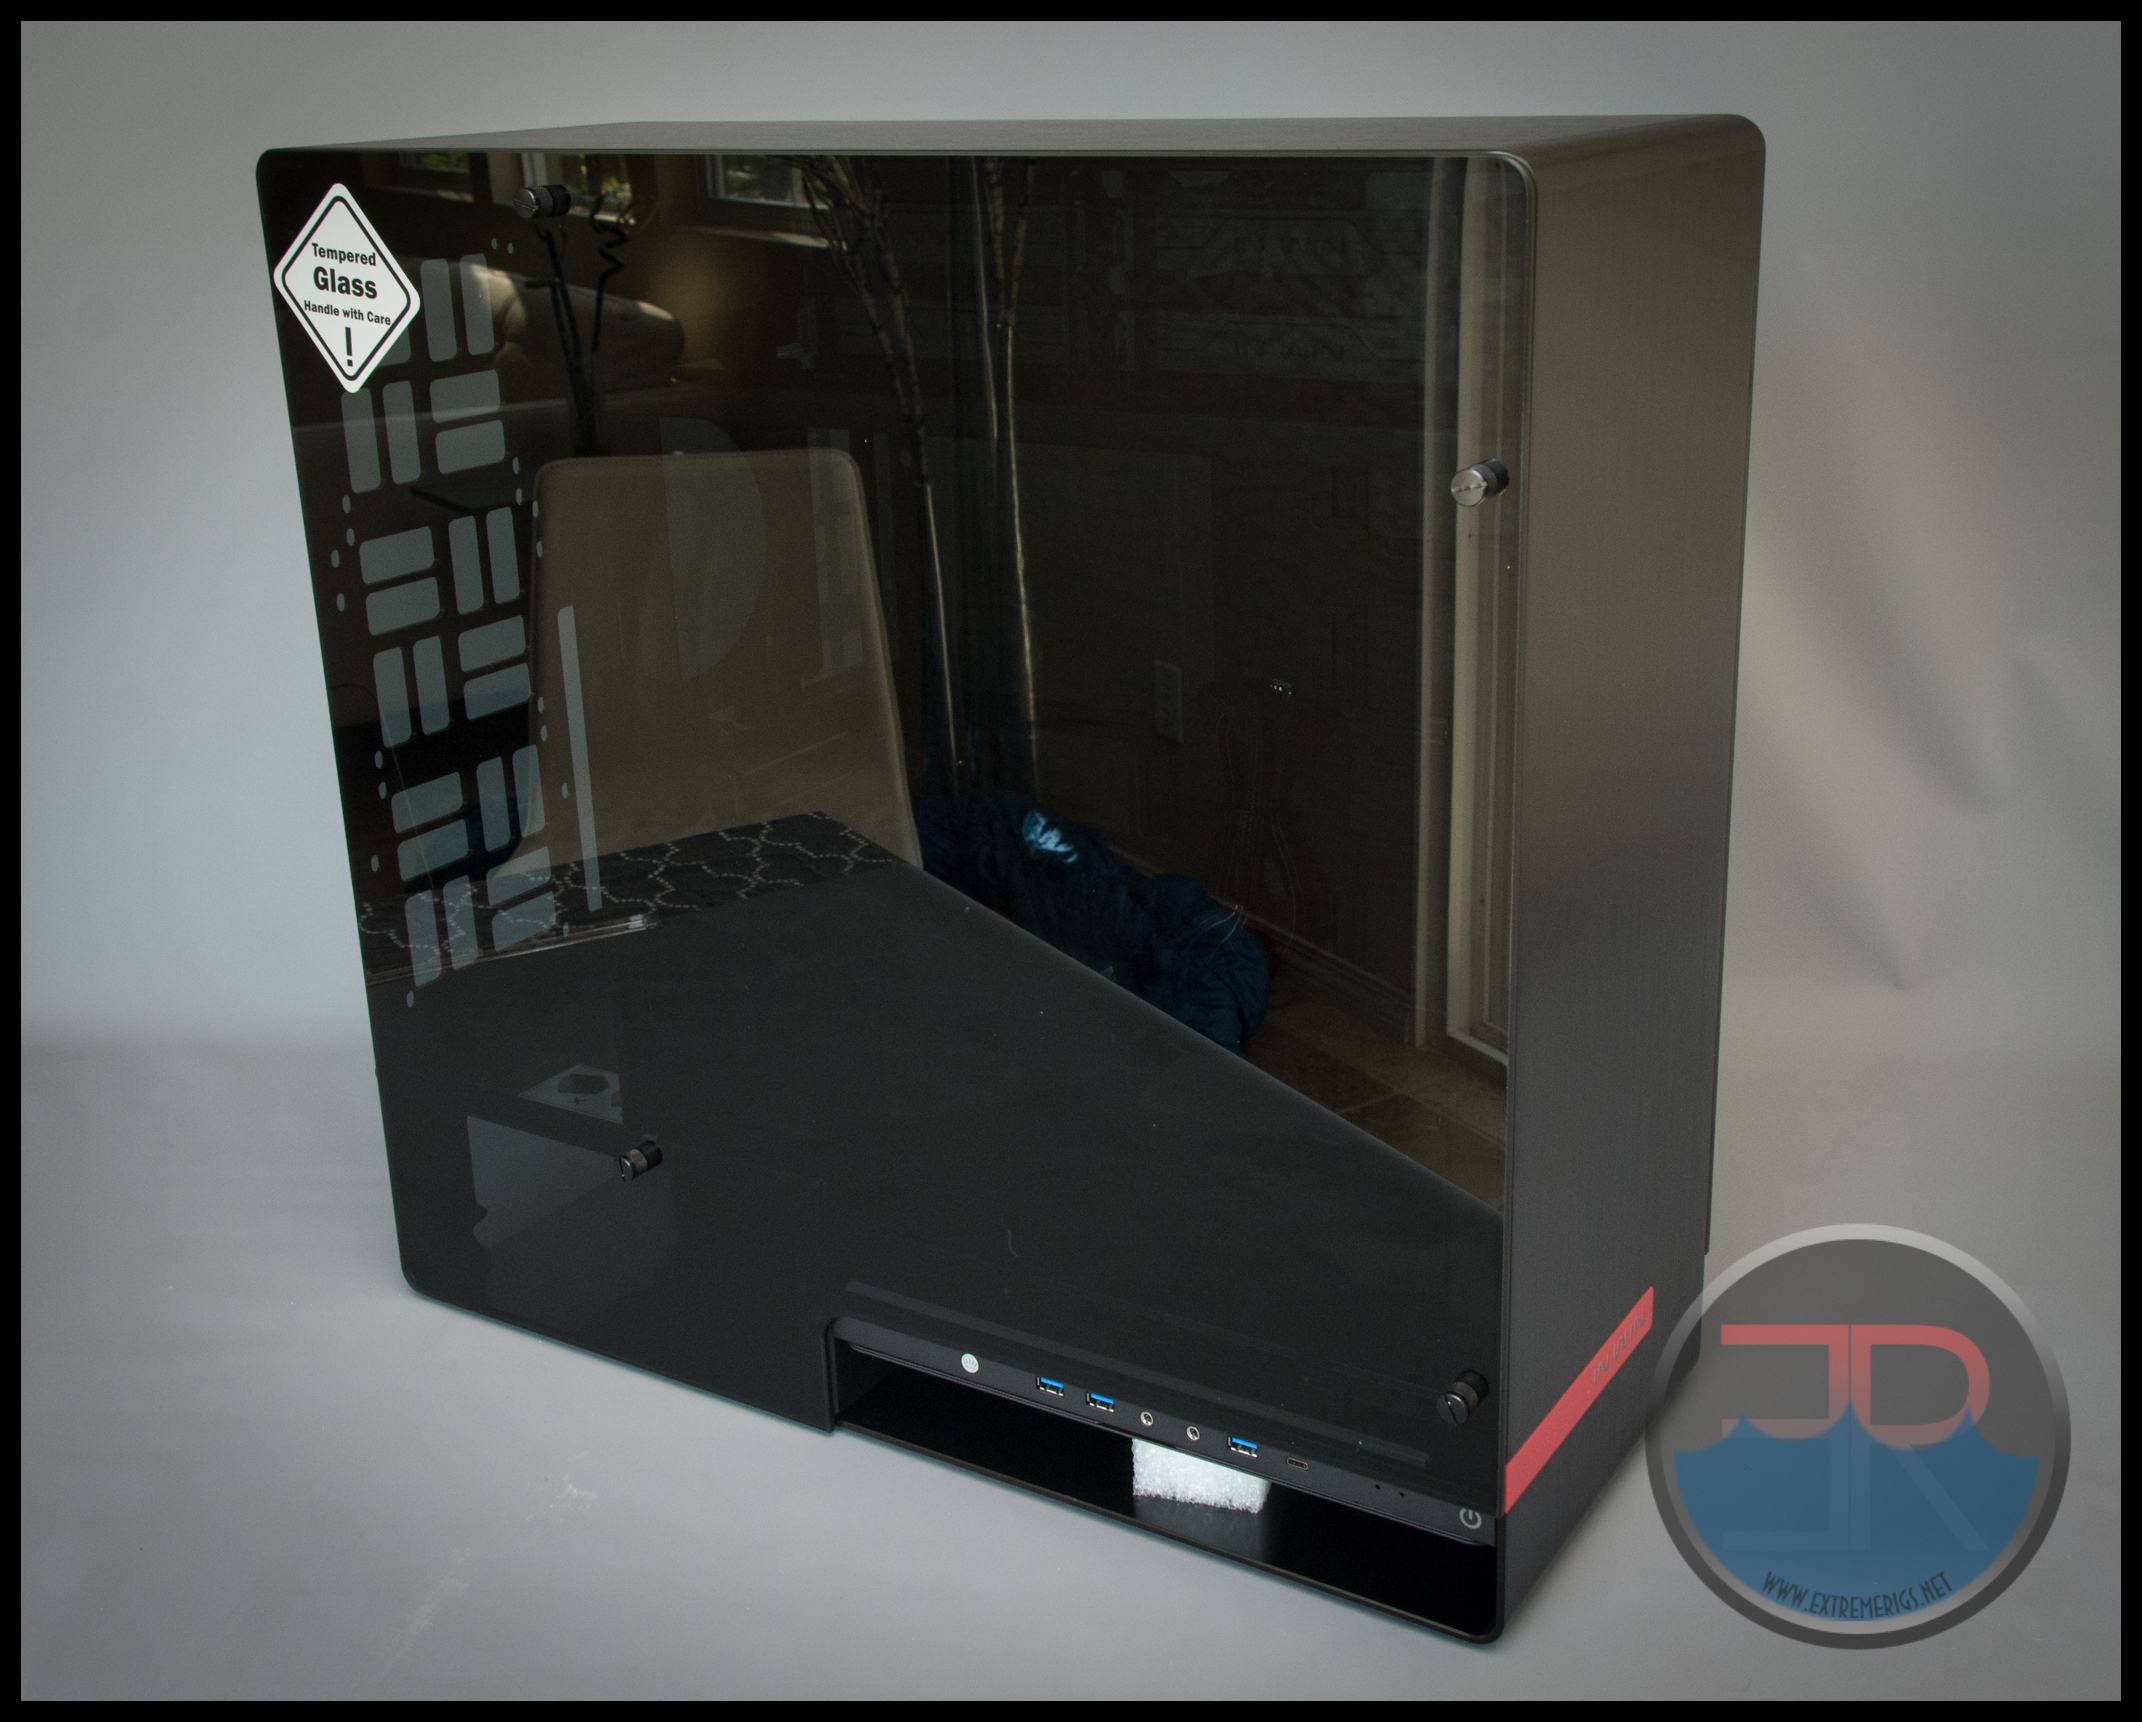
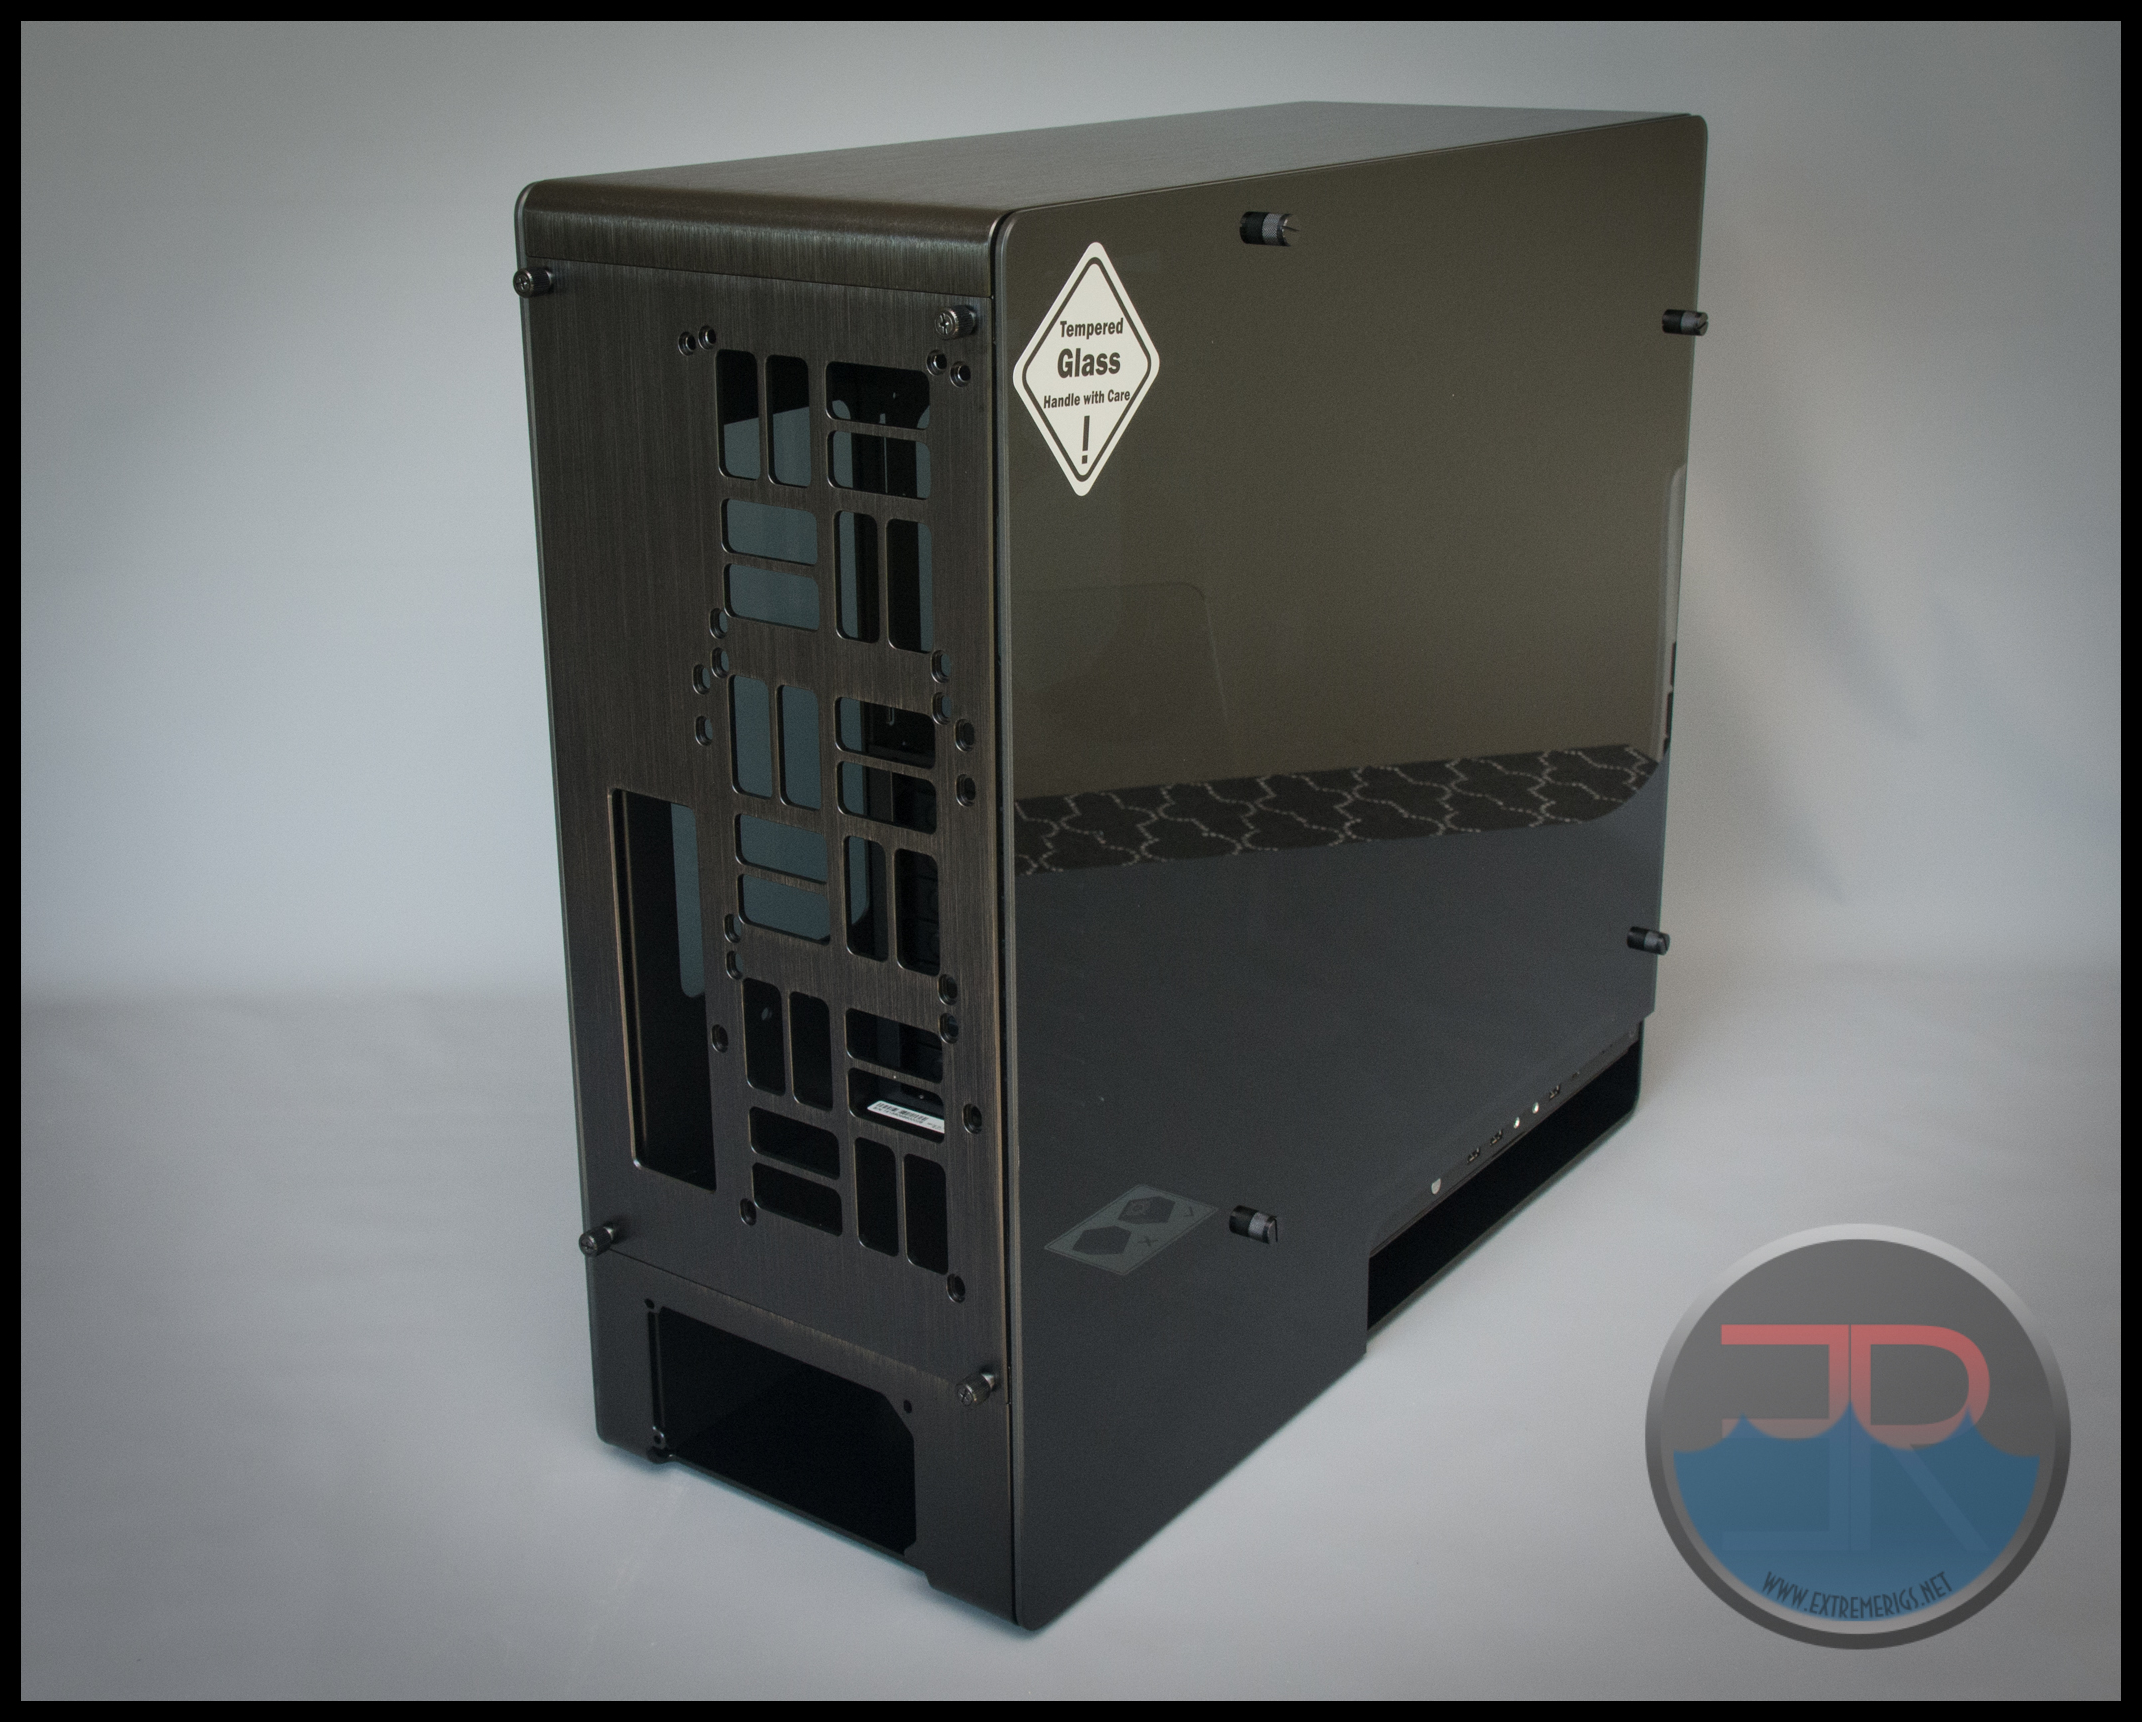
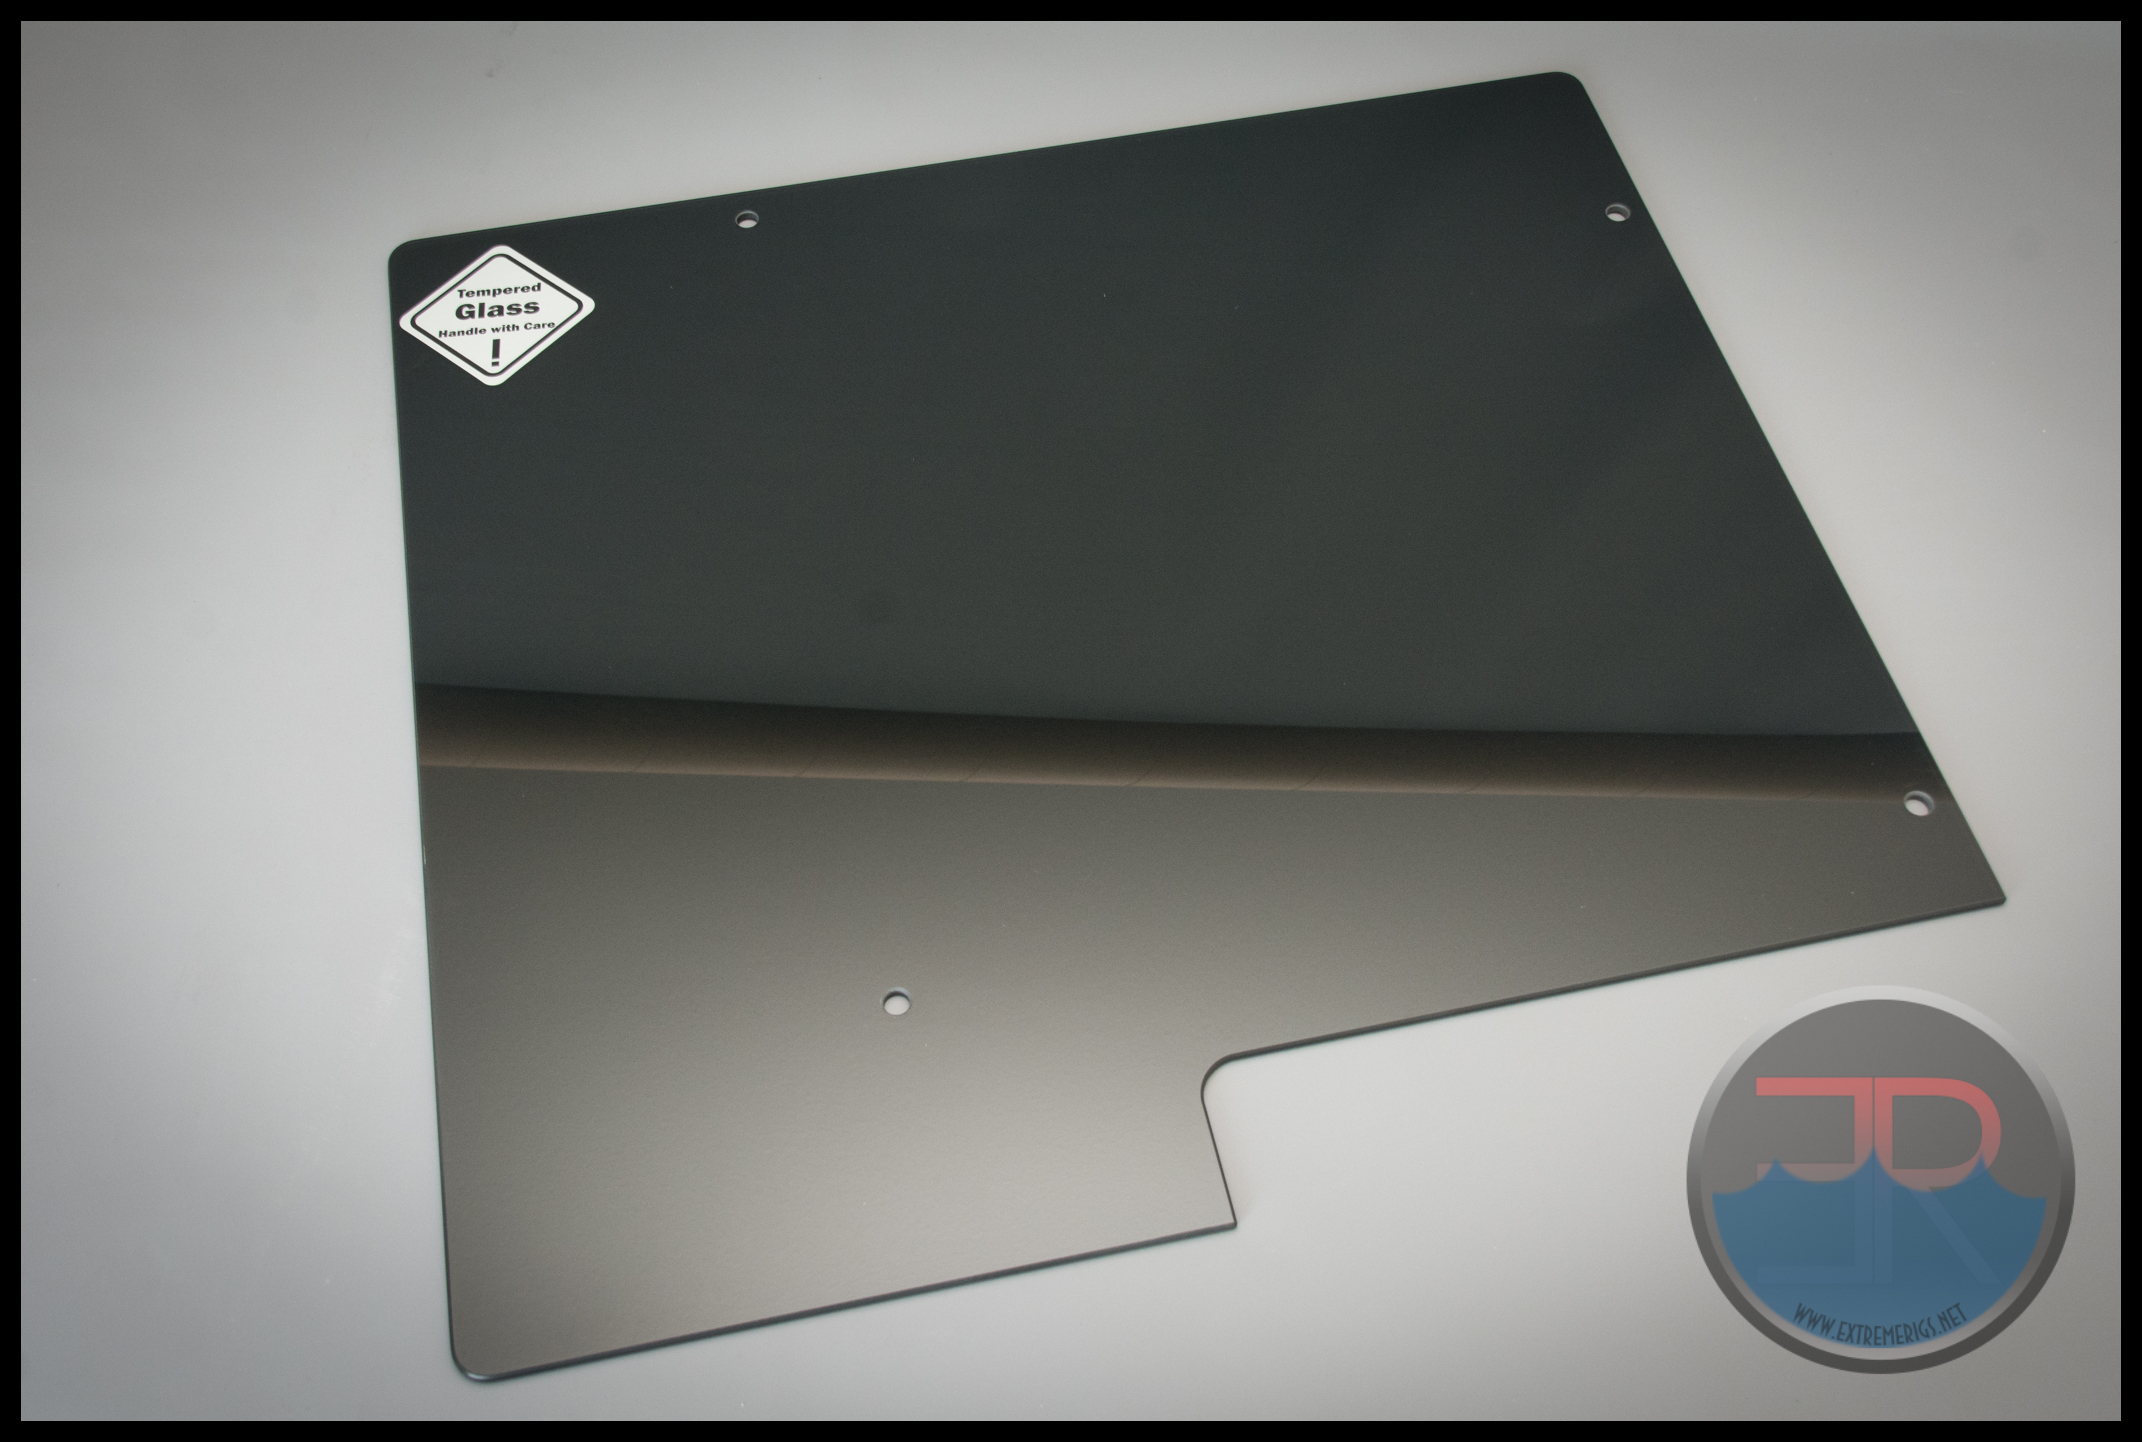
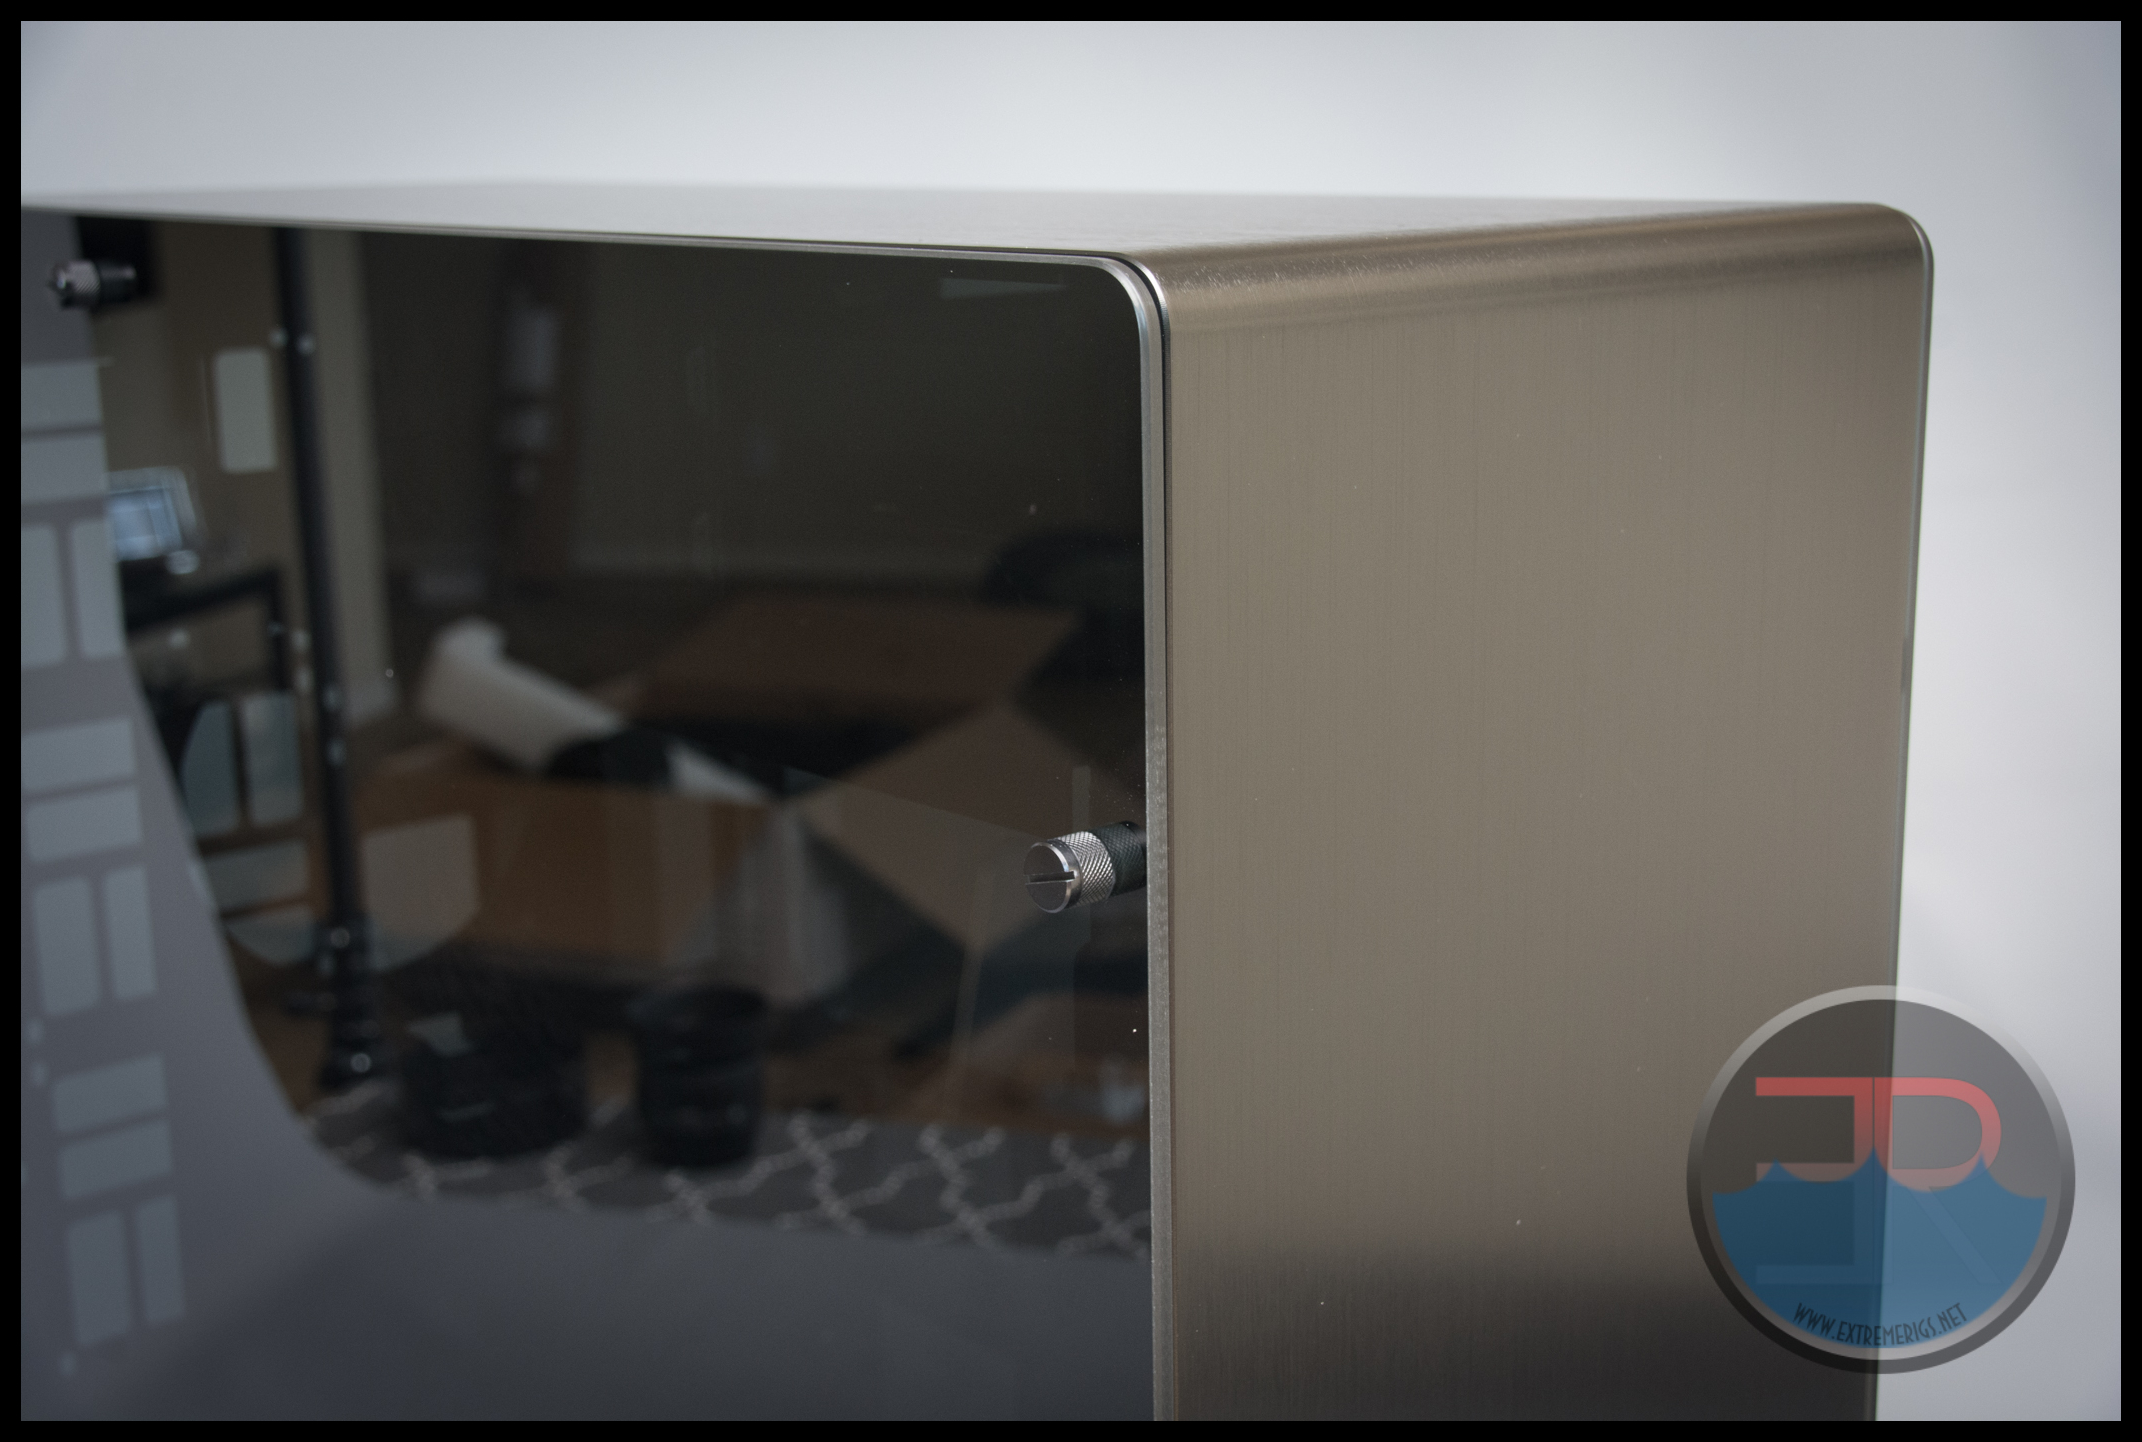
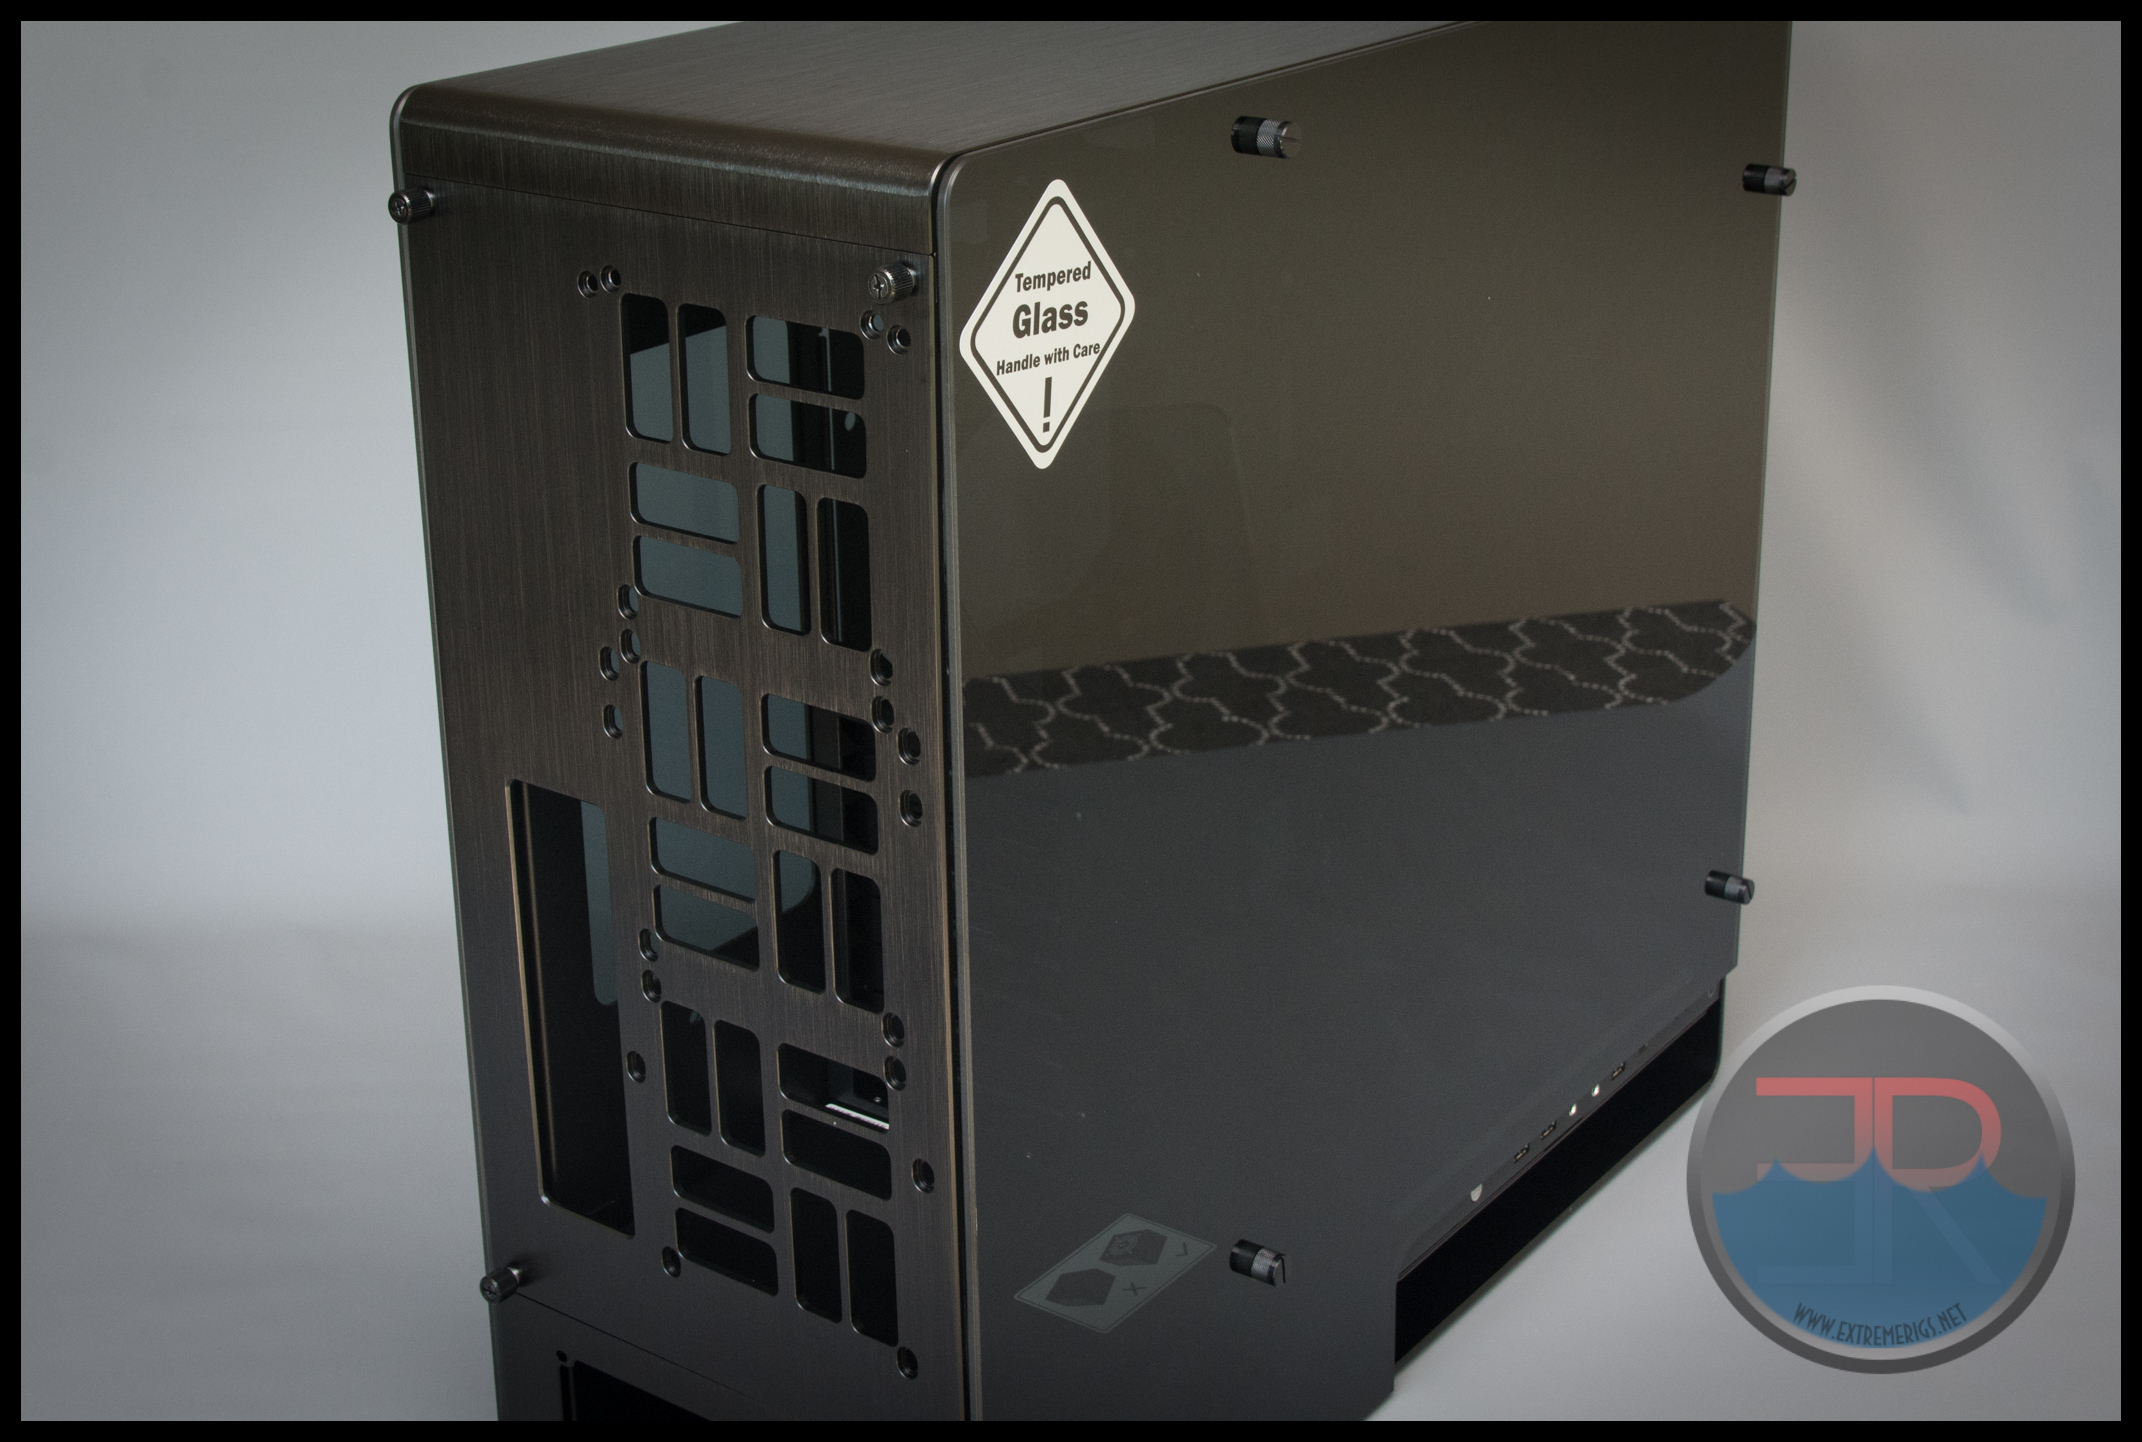
There are a few things that stand out when you first look at the case. The first is the smoked glass panels:
They are thick – and therefore heavy. The thickness is a good thing, after all, we accidentally shattered the In Win 805’s glass panels which were much thinner.
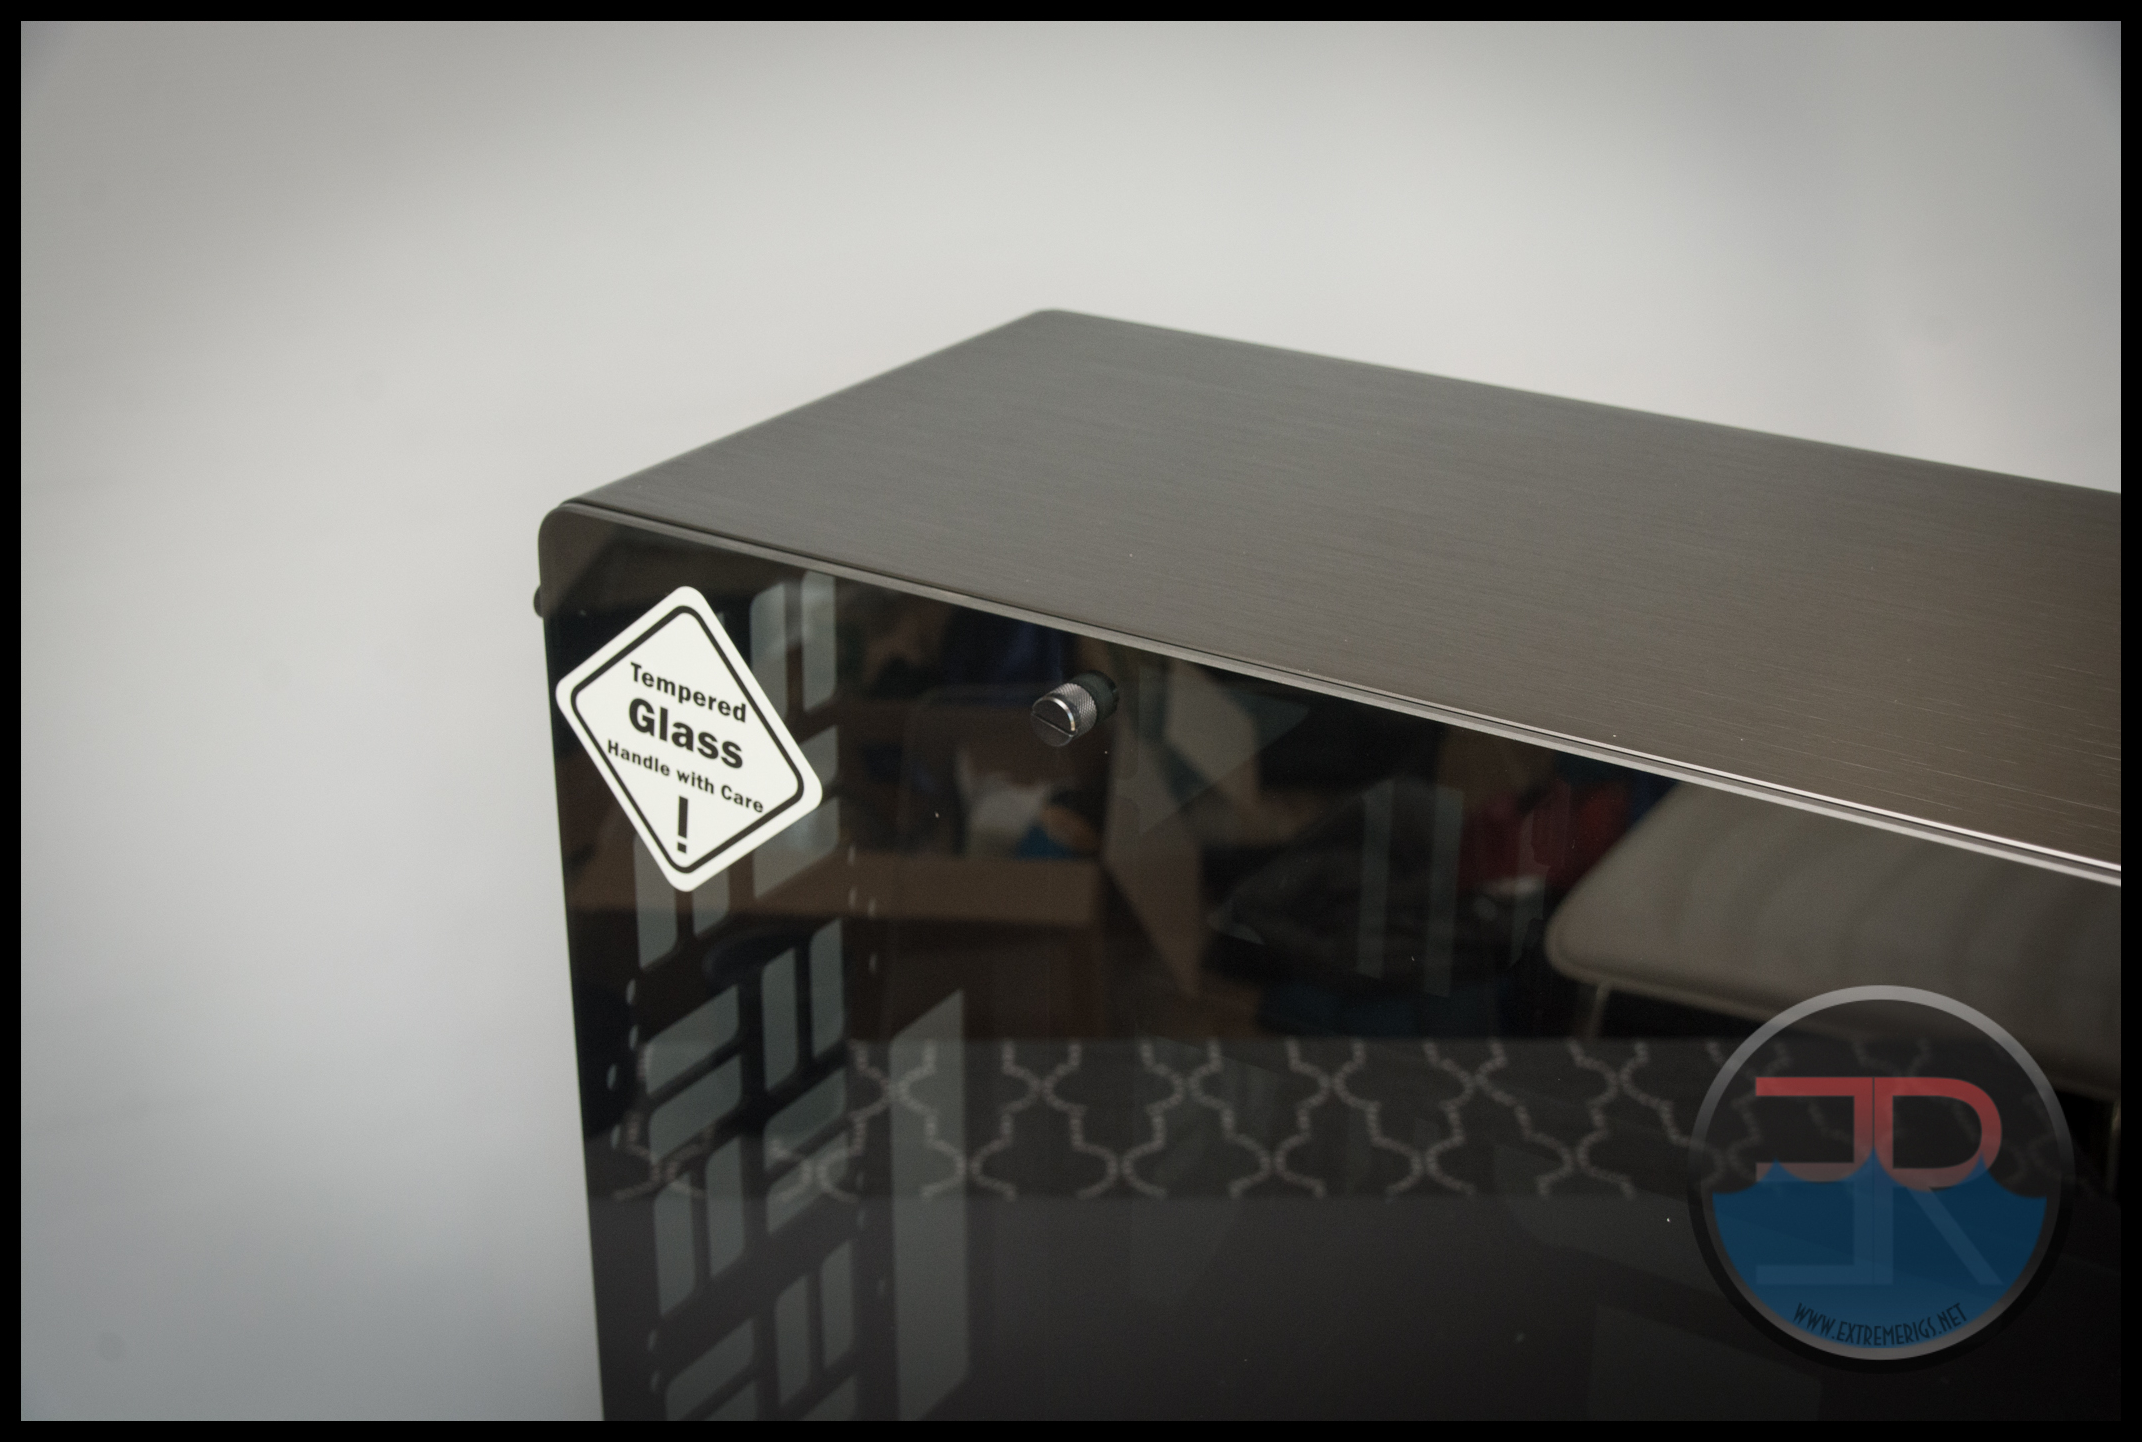
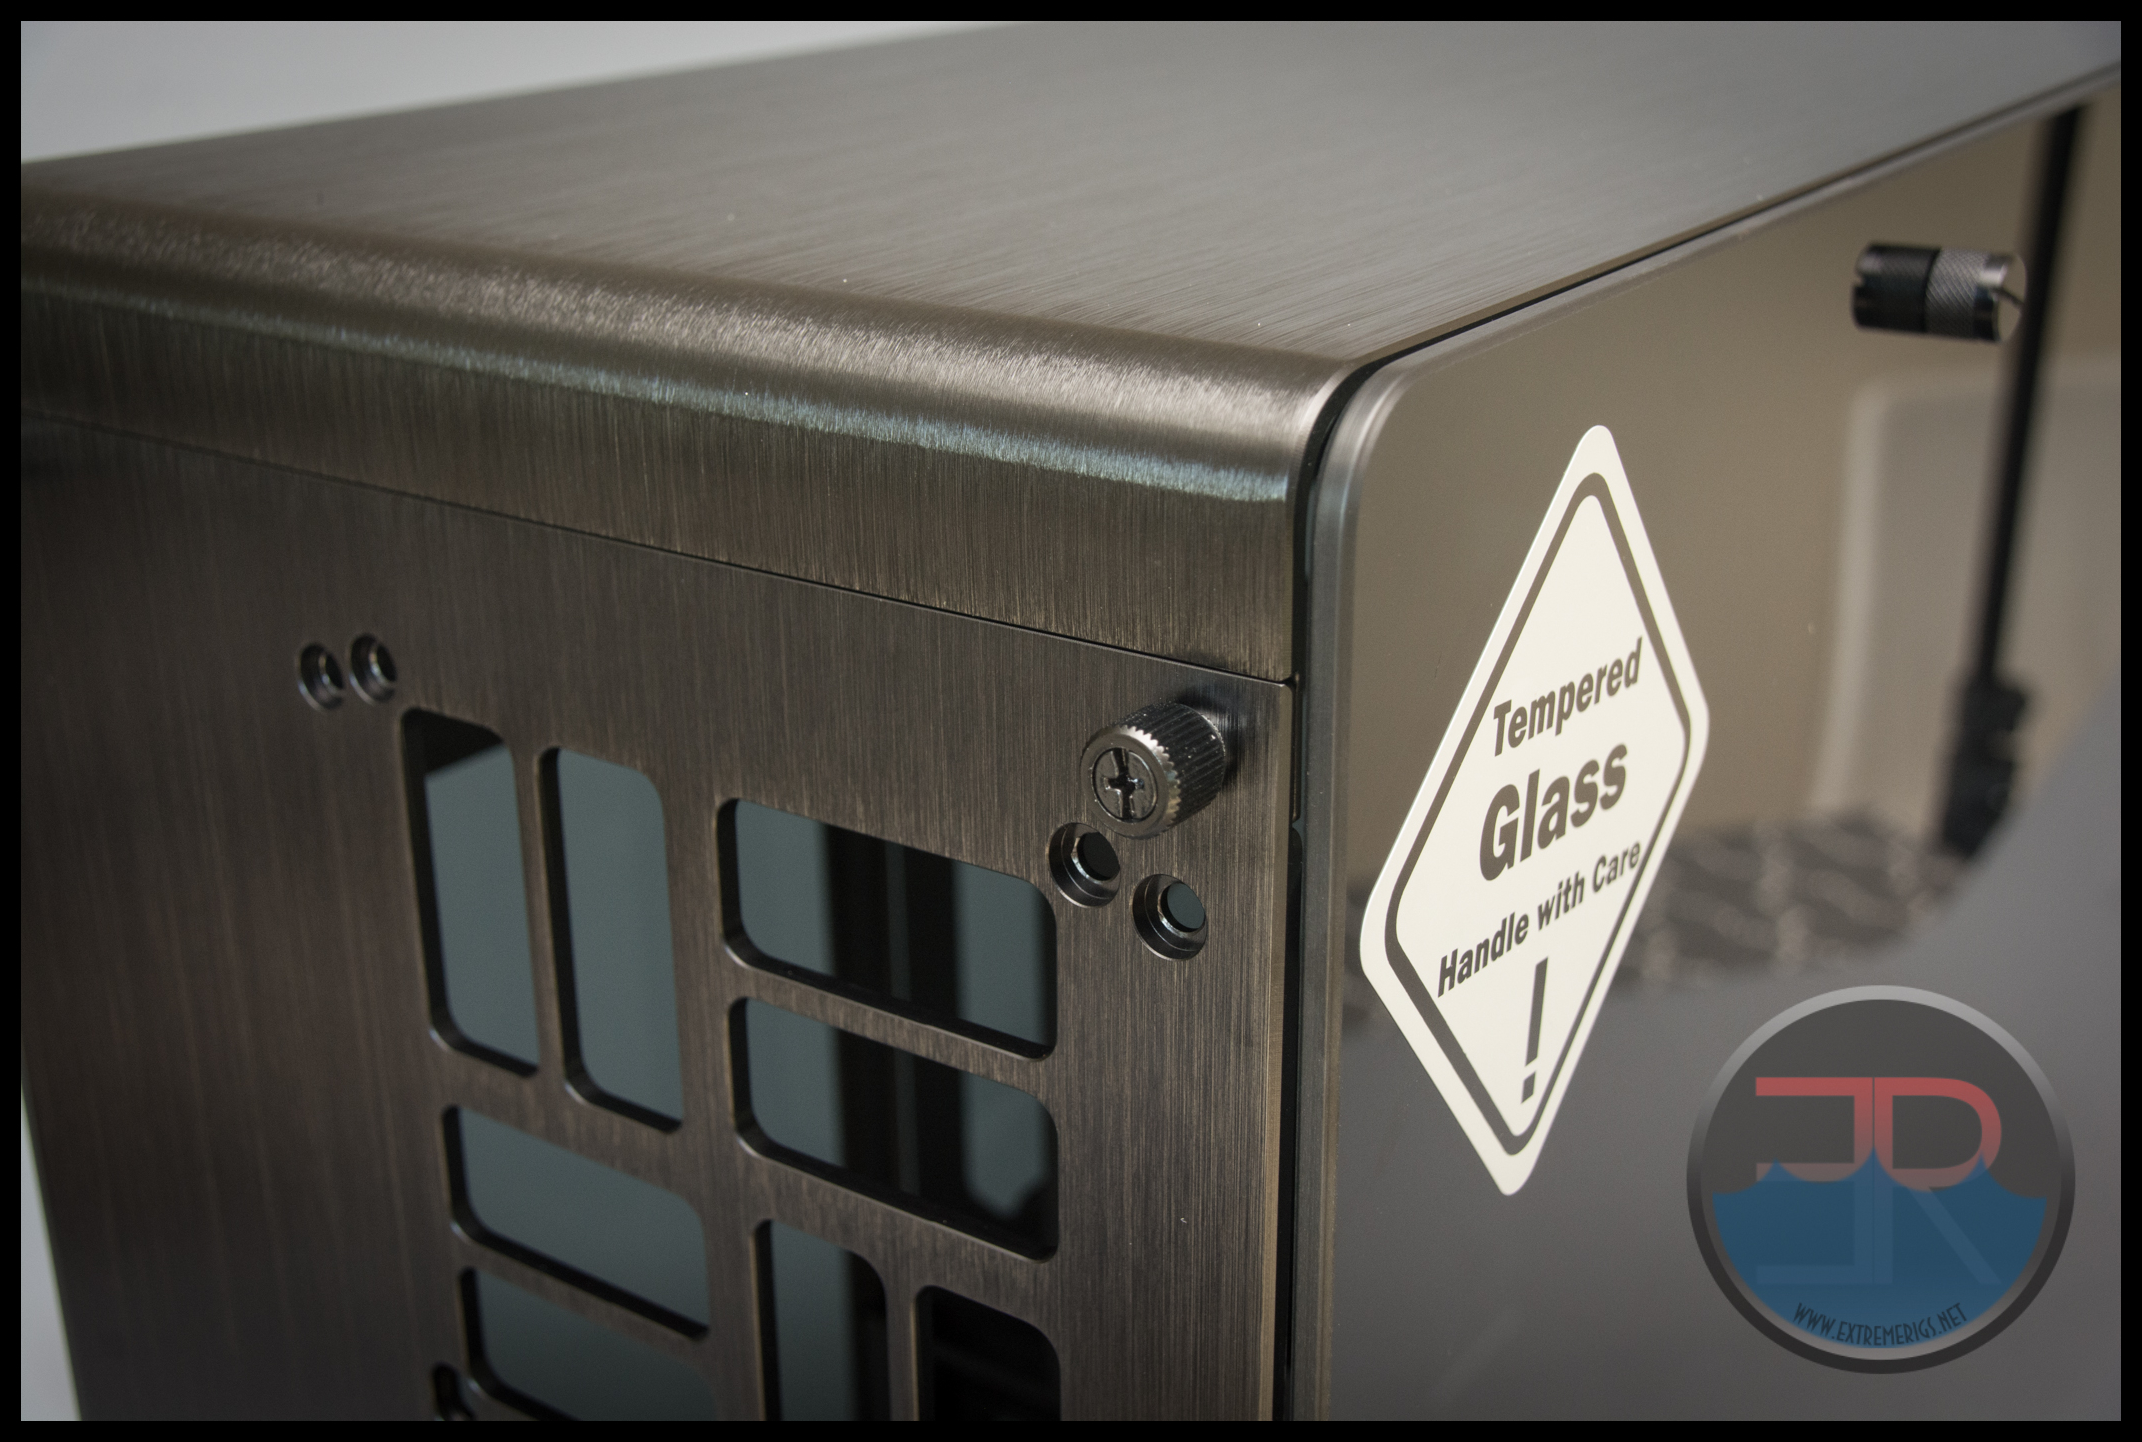
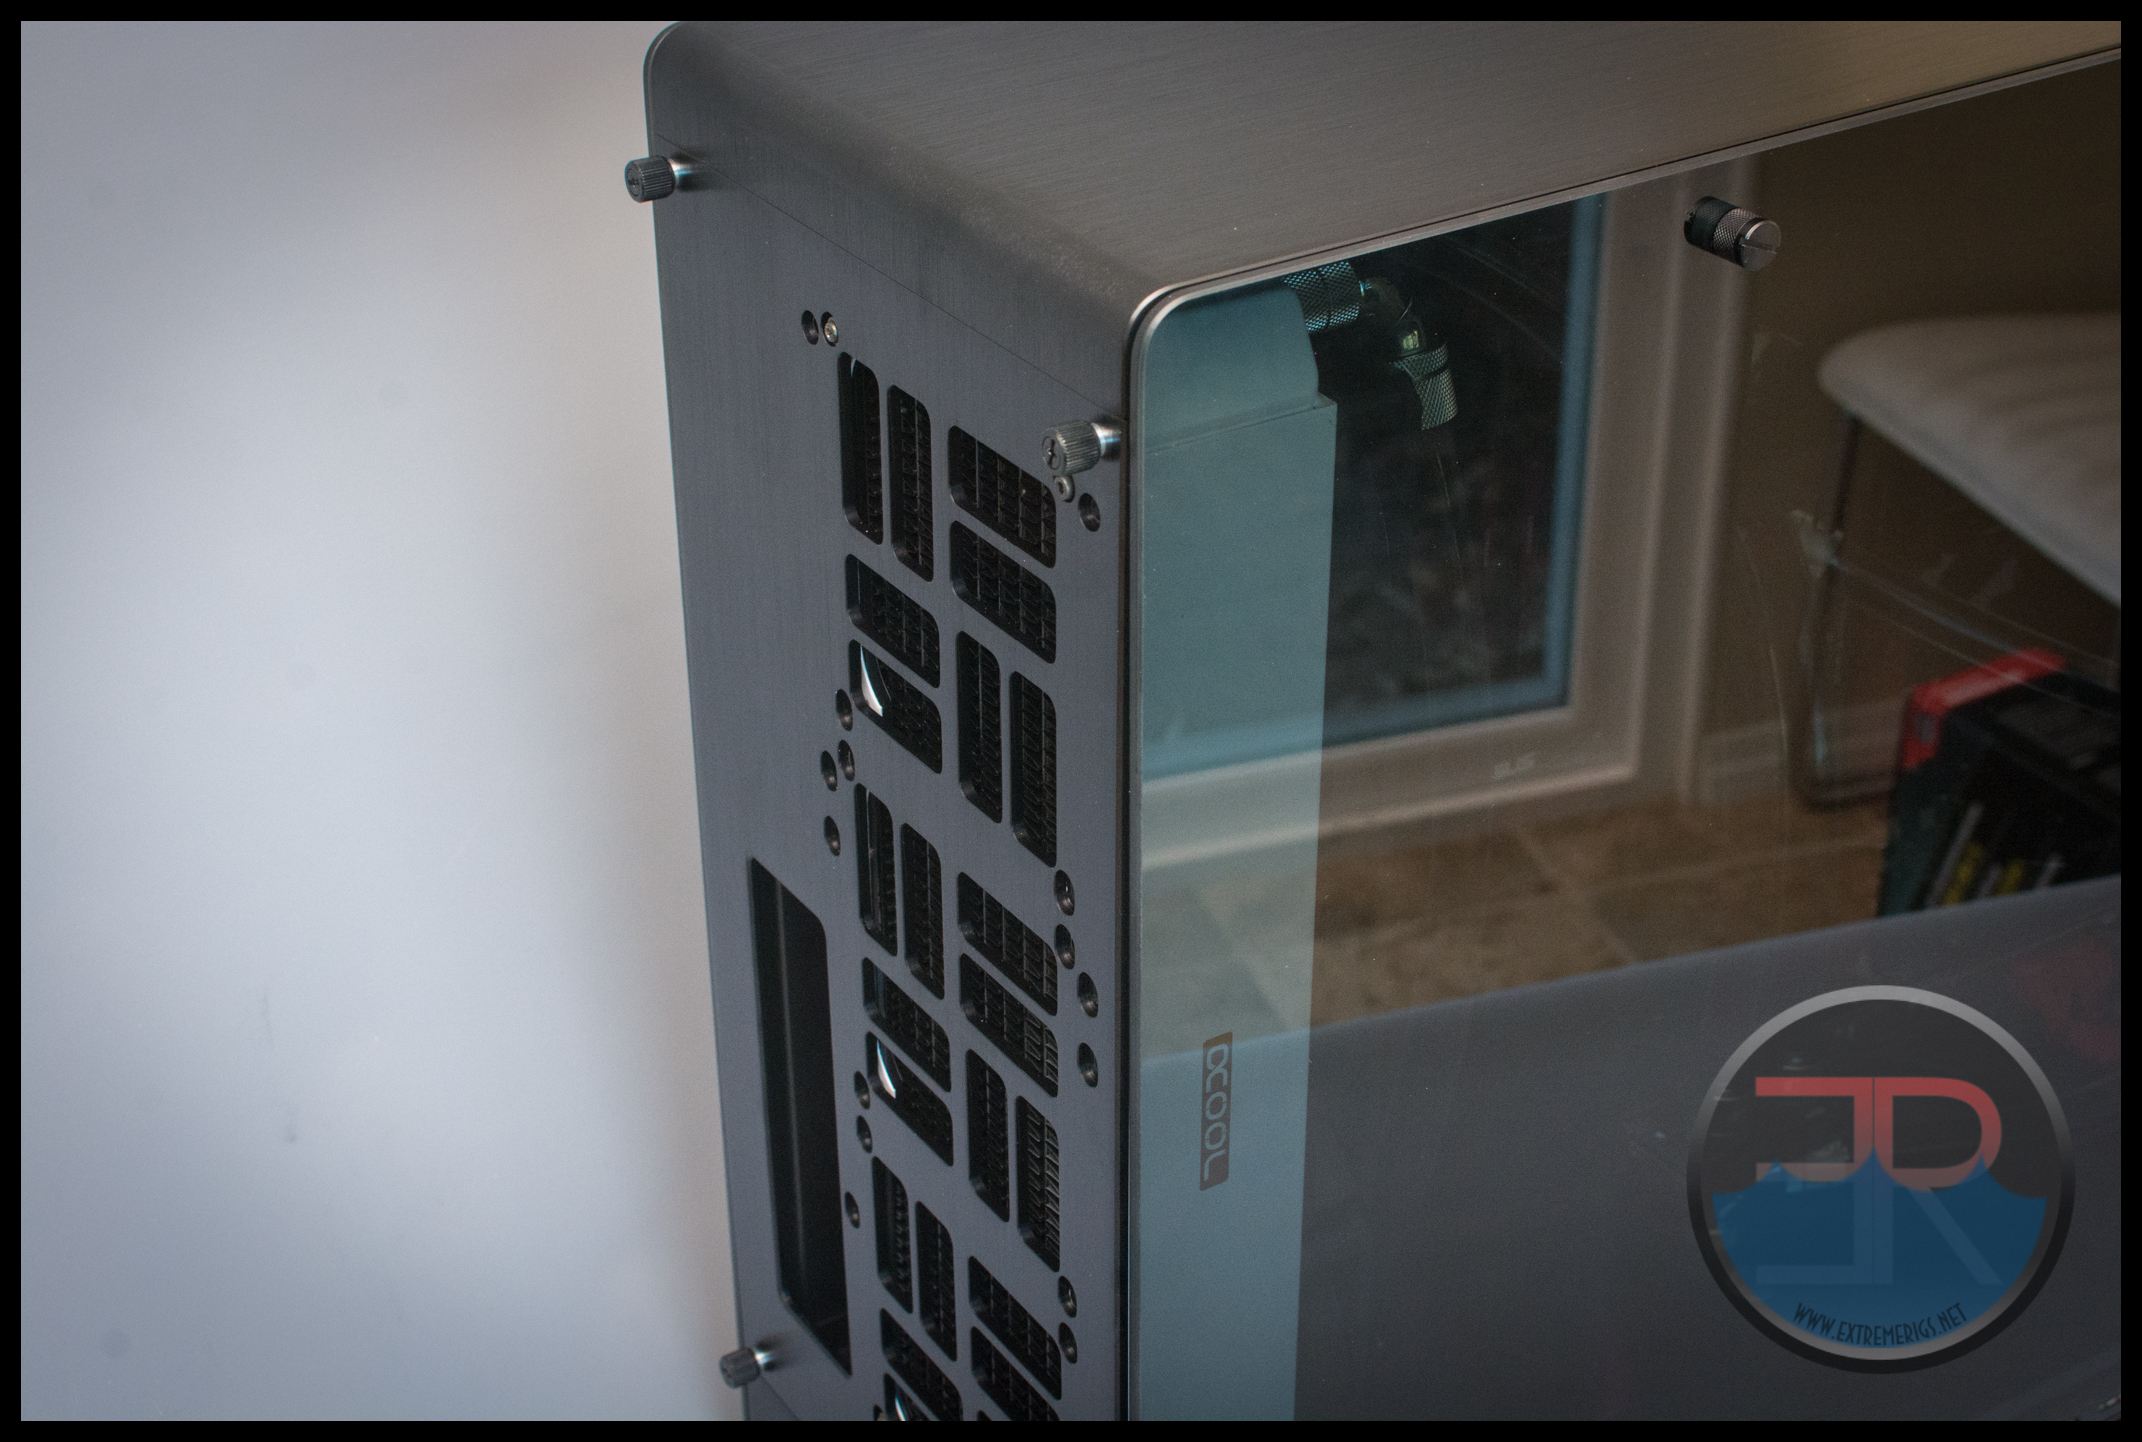
The glass is indeed tempered – which we got to prove on the 805. The sticker telling you this is easy to remove. At this point you’ll notice that there are four thumbscrews use to secure the glass:
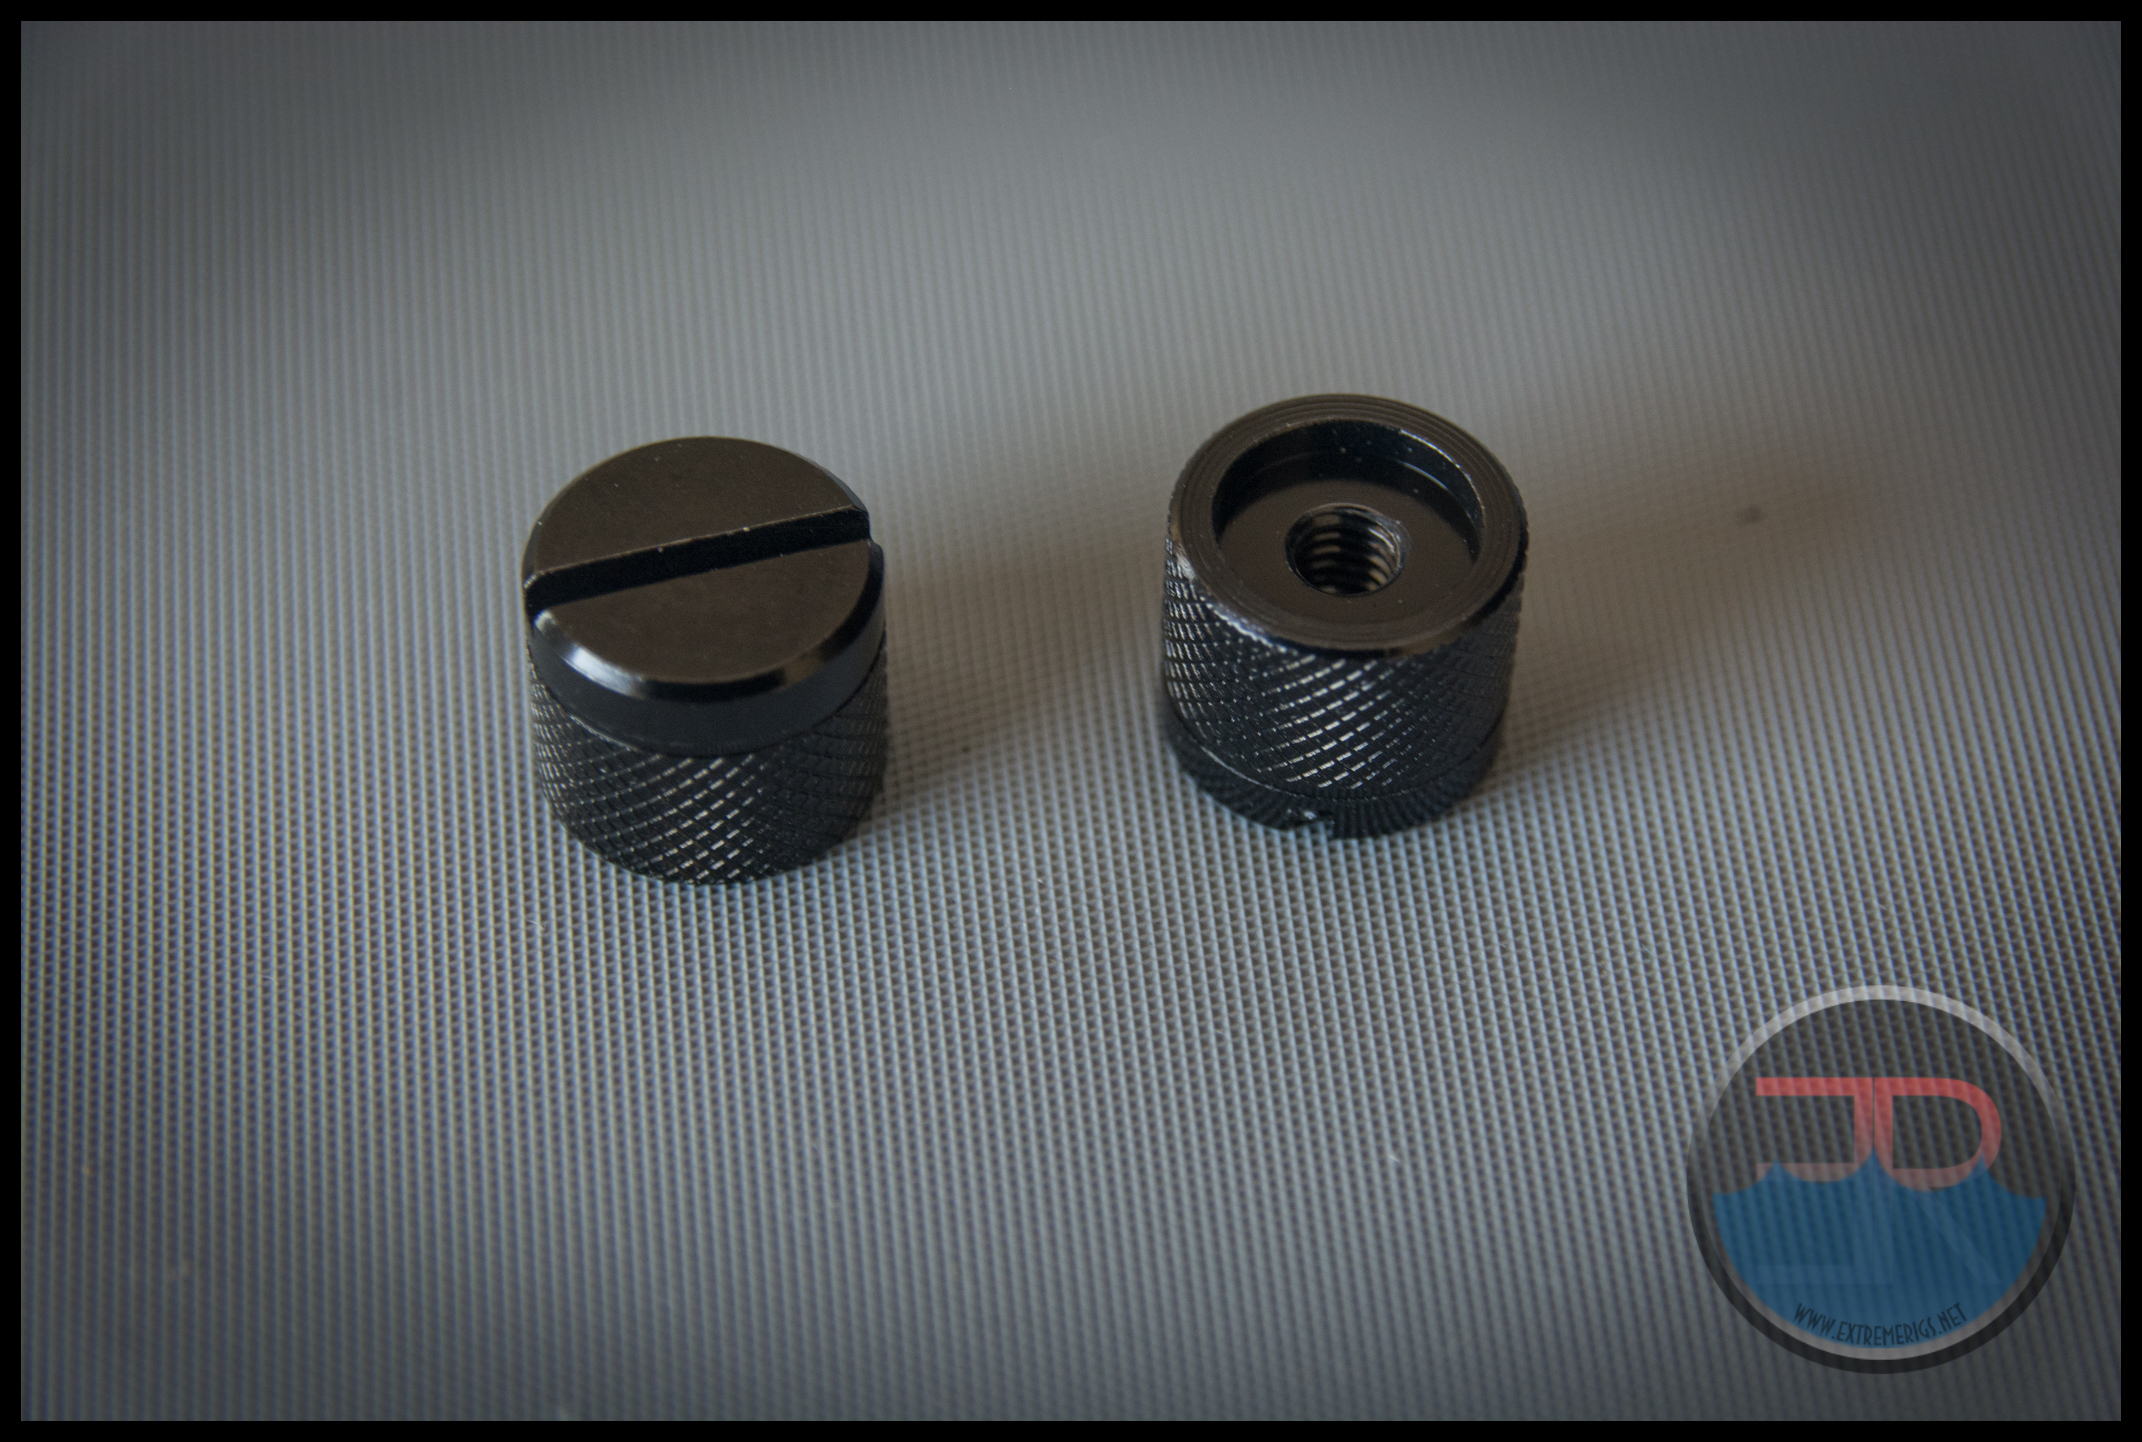
These are actually larger than the ones used on the 805 which is a bit of a shame, because they stick out further. unlike the 805 thumbscrews, they are actually female threaded rather than male, so the male part sticks out of the case:

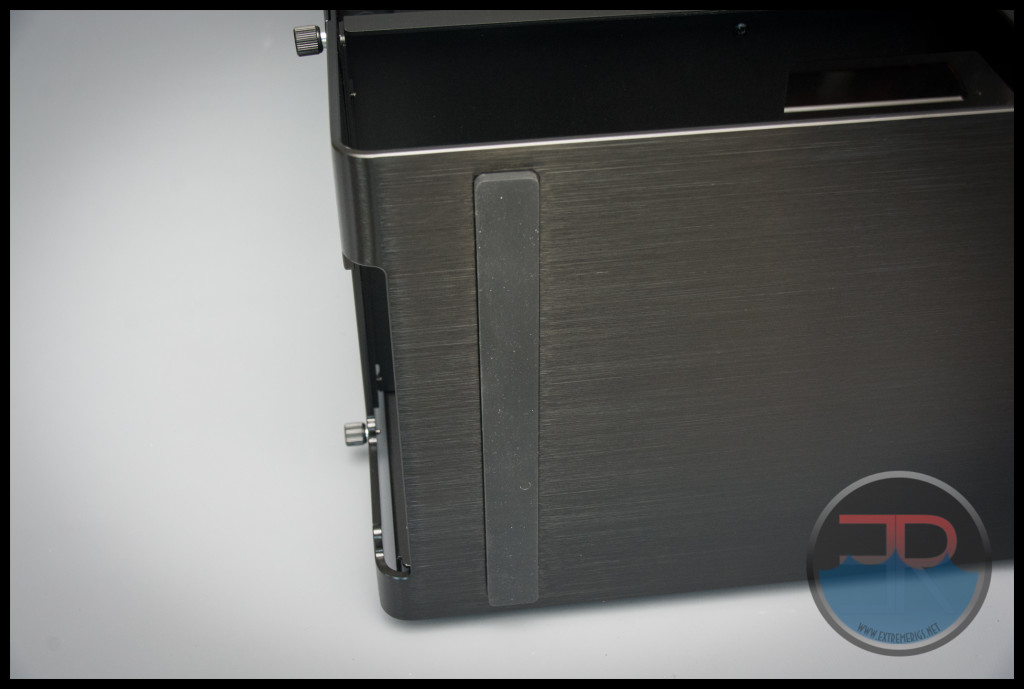
From the front of the case the thumbscrews are quite noticeable:
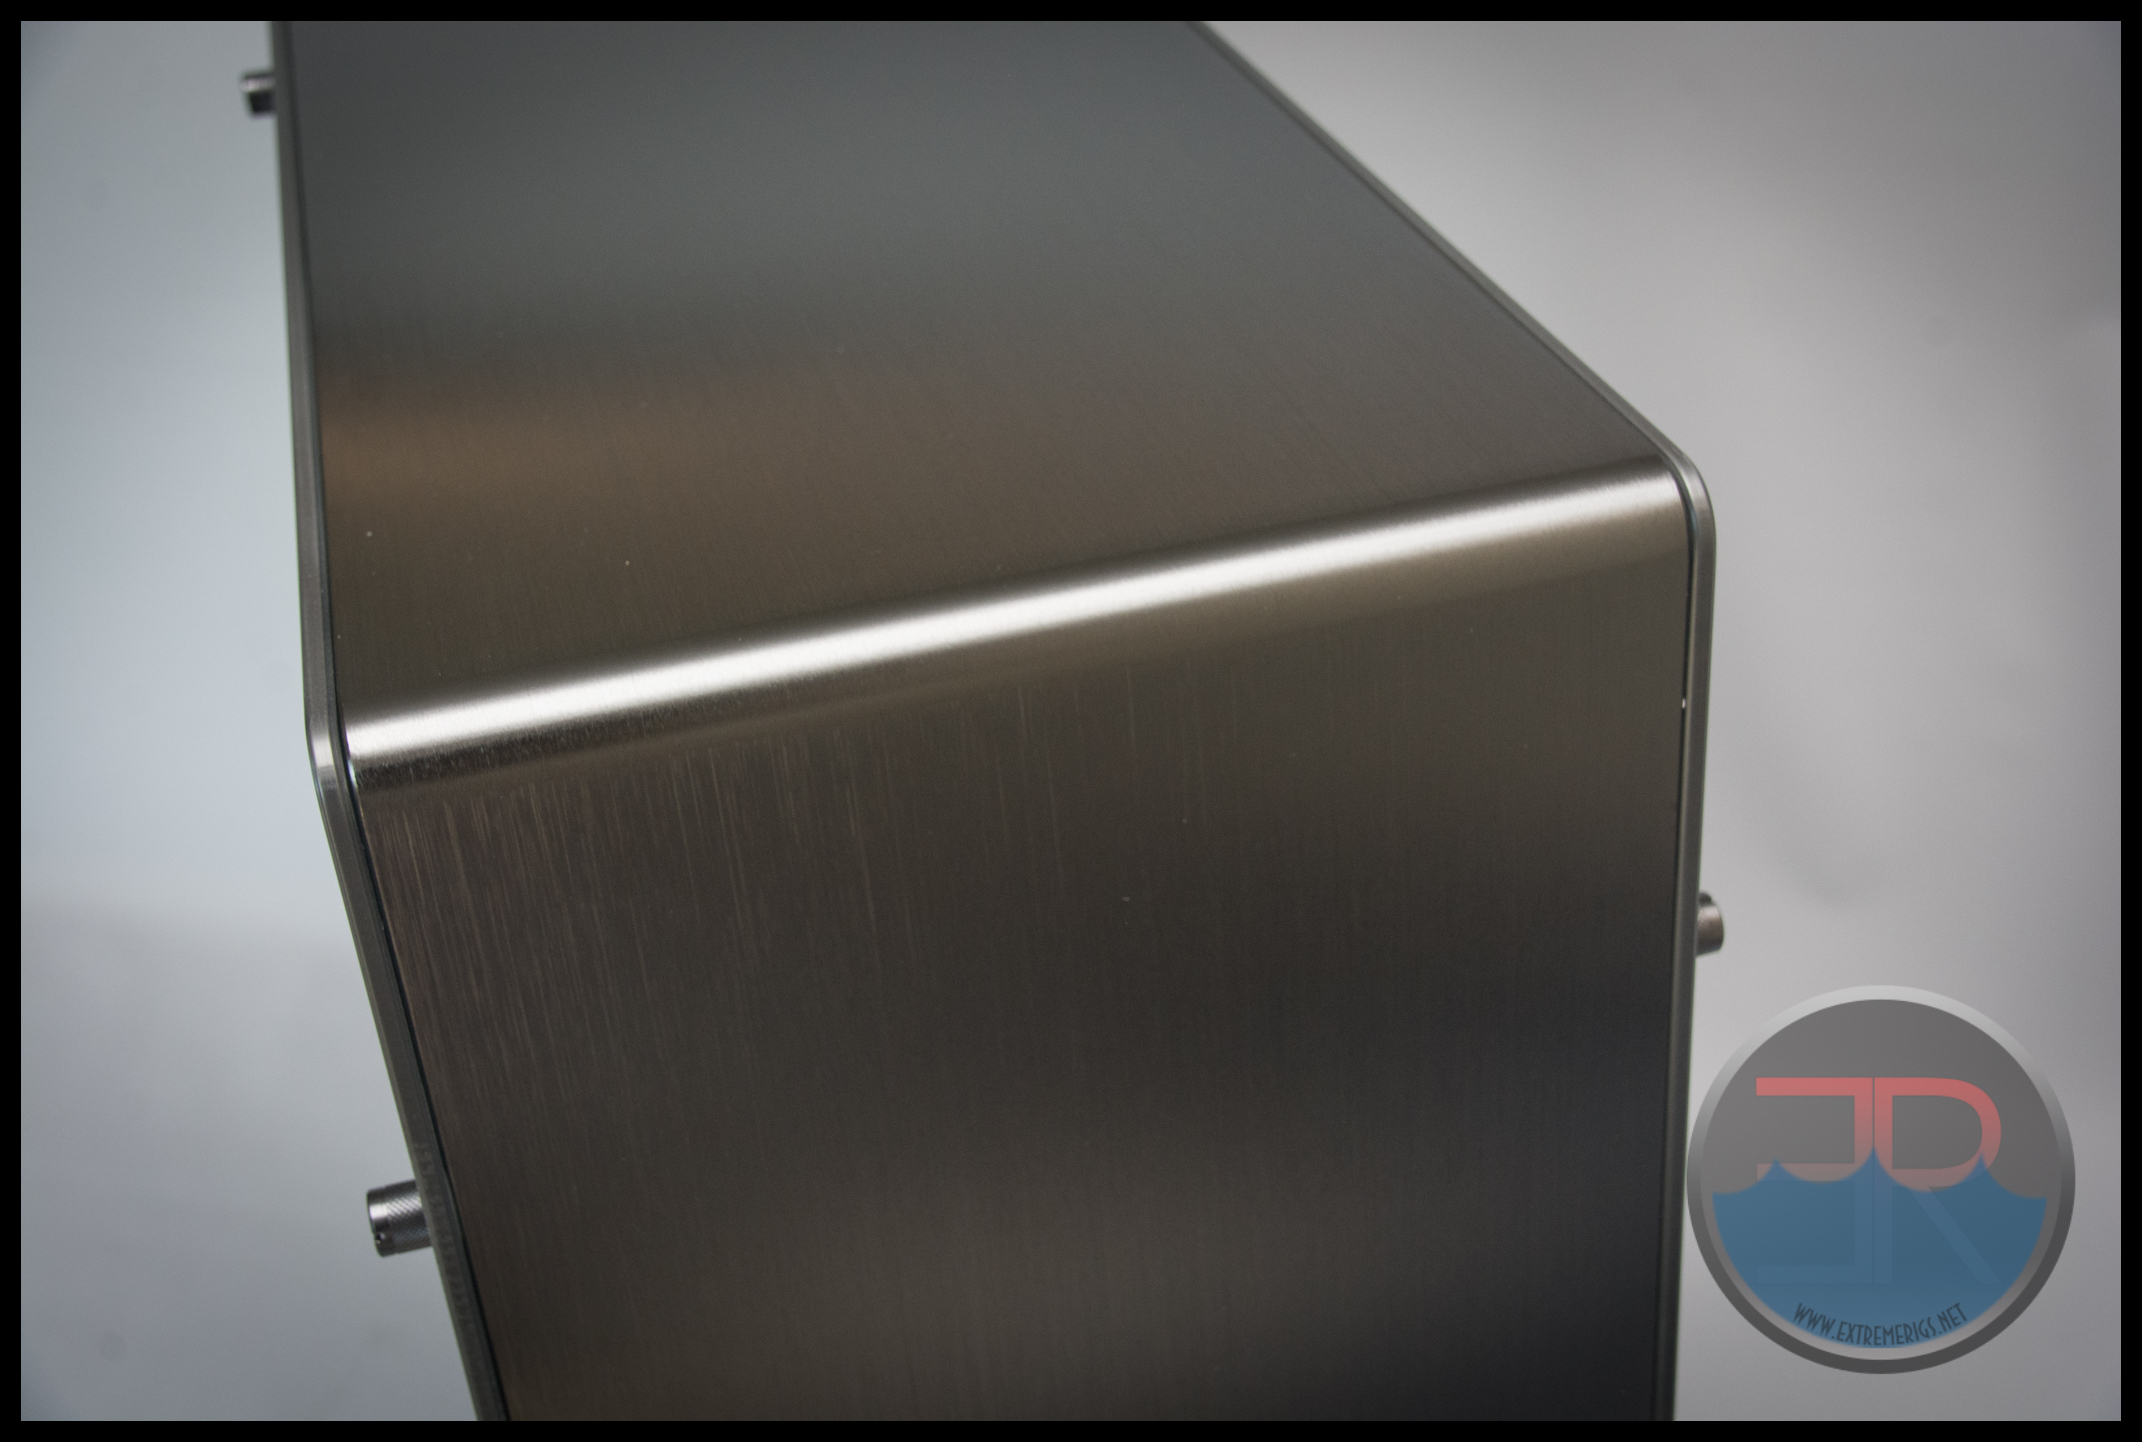
However the beautiful brushed aluminum finish of the front and top are much more likely to distract you as the metal is single piece that wraps around with only a break in the rear of the case:
In the rear we get an indication of the unusual case layout. Instead of the “normal” layout of an i/o plate and pcie slots there is a small access port and a 360/280 radiator mount. The fan cutouts are of a different design to the “normal” grills and we really quite like it. Note that the rear panel is also thick brushed aluminum even though that is likely to be hidden from view. We love this attention to detail:
Thumbscrews can be used with Philips head or flat head screw drivers. The mounting holes for the radiators are recessed because the rear panel is so thick.
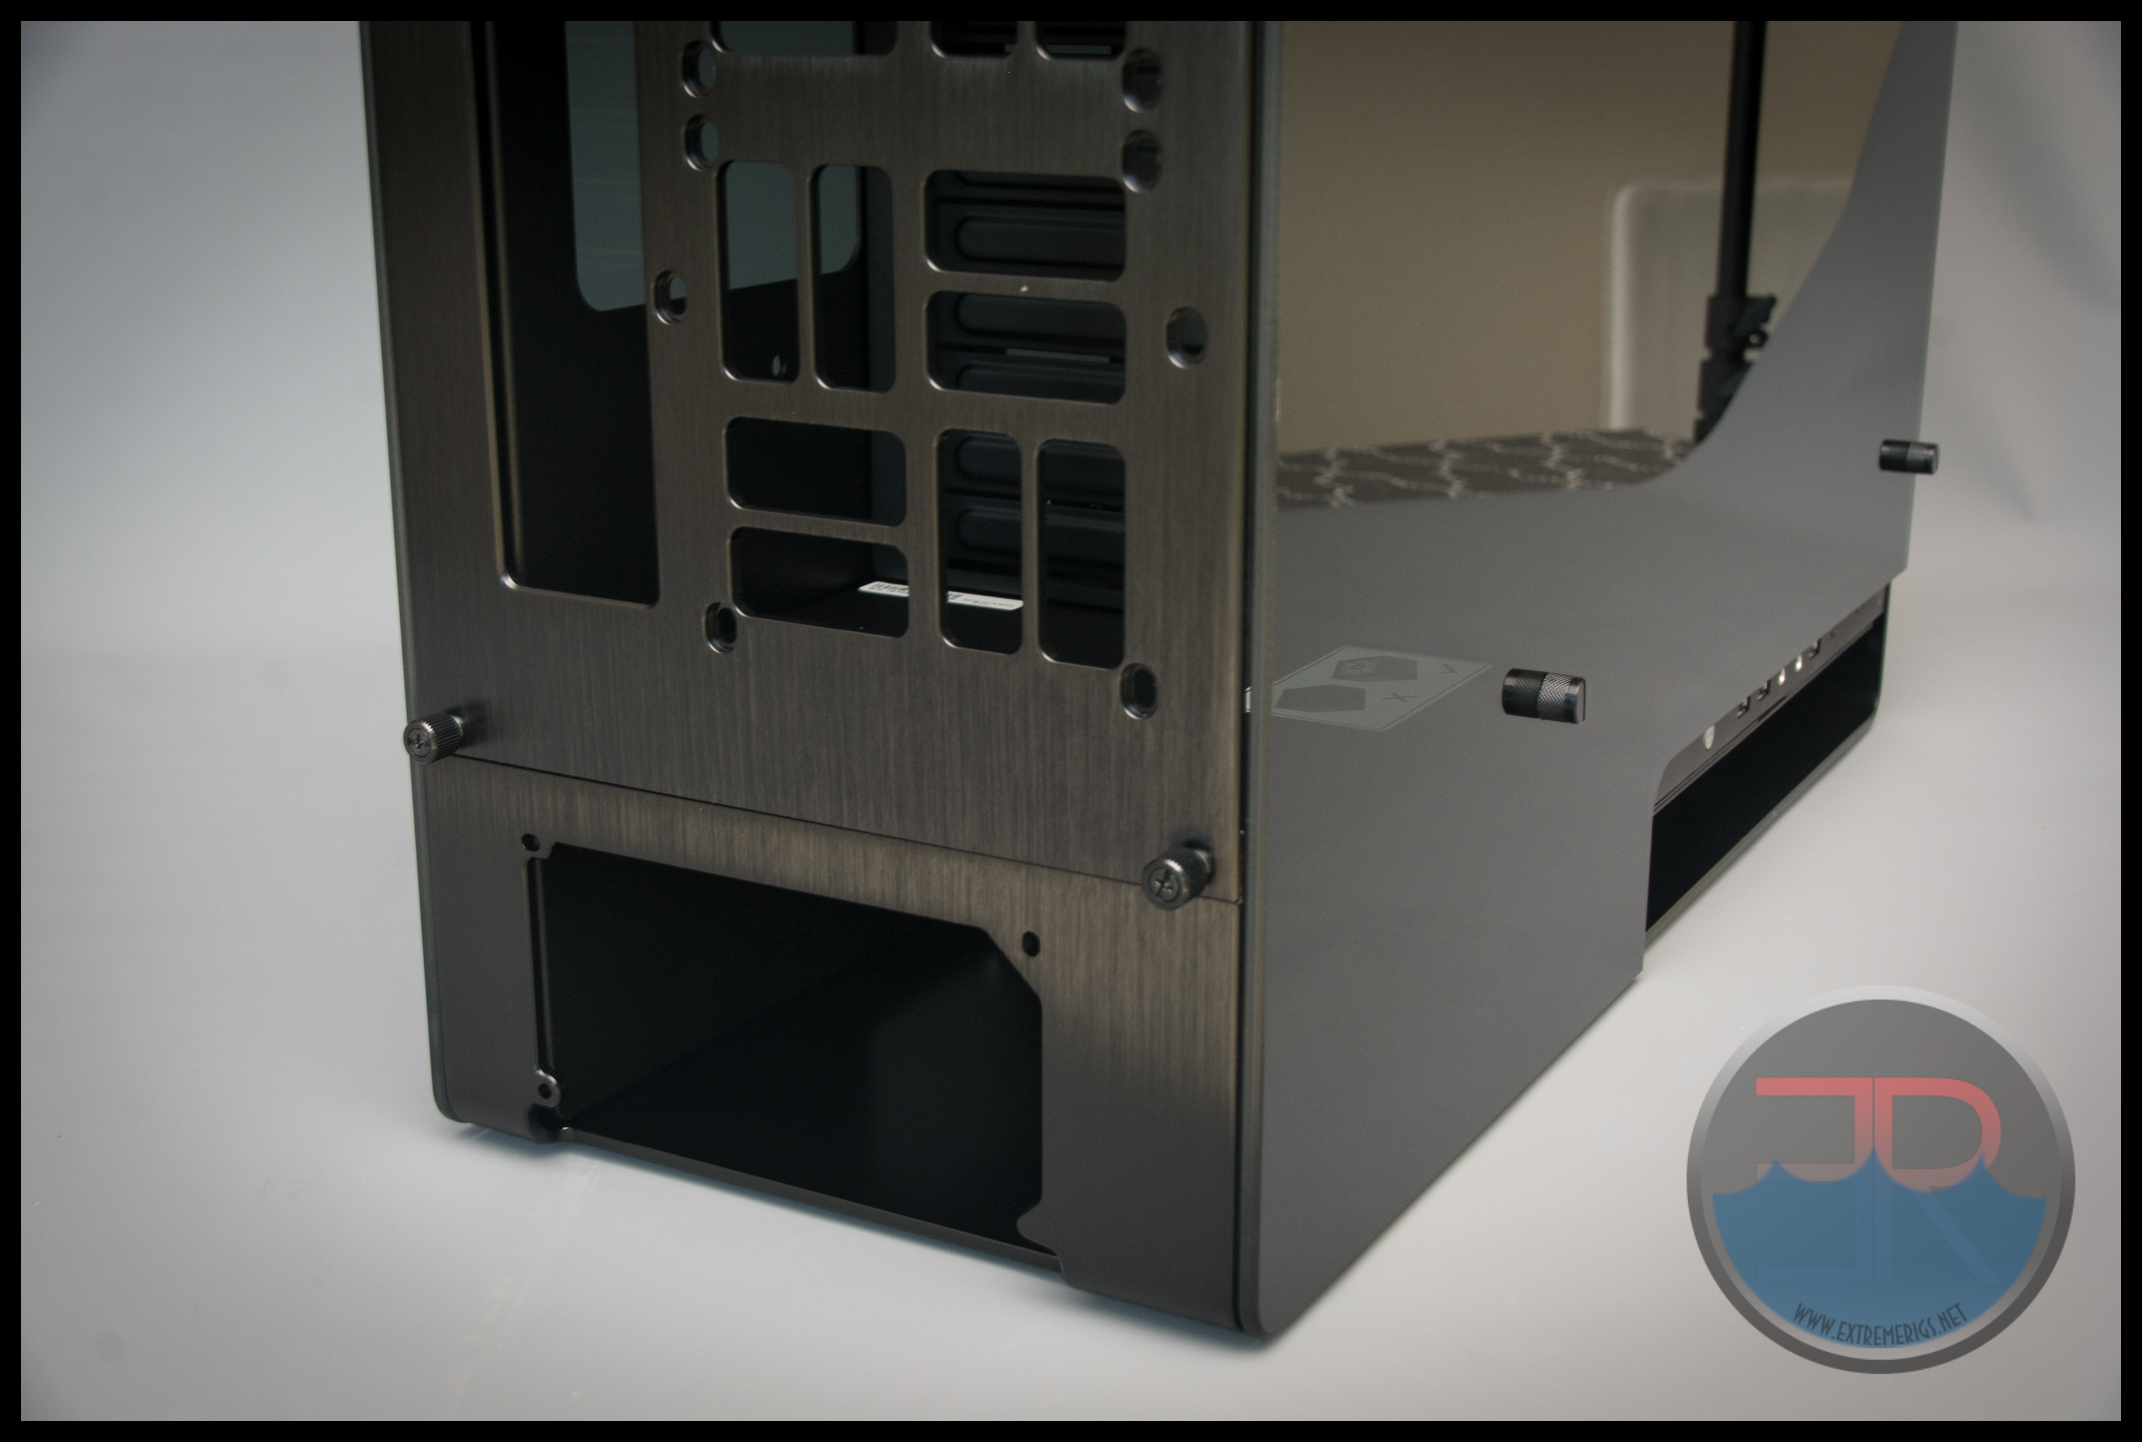
Even the cut out holes are bevelled so that you don’t cut yourself on any sharp edges:

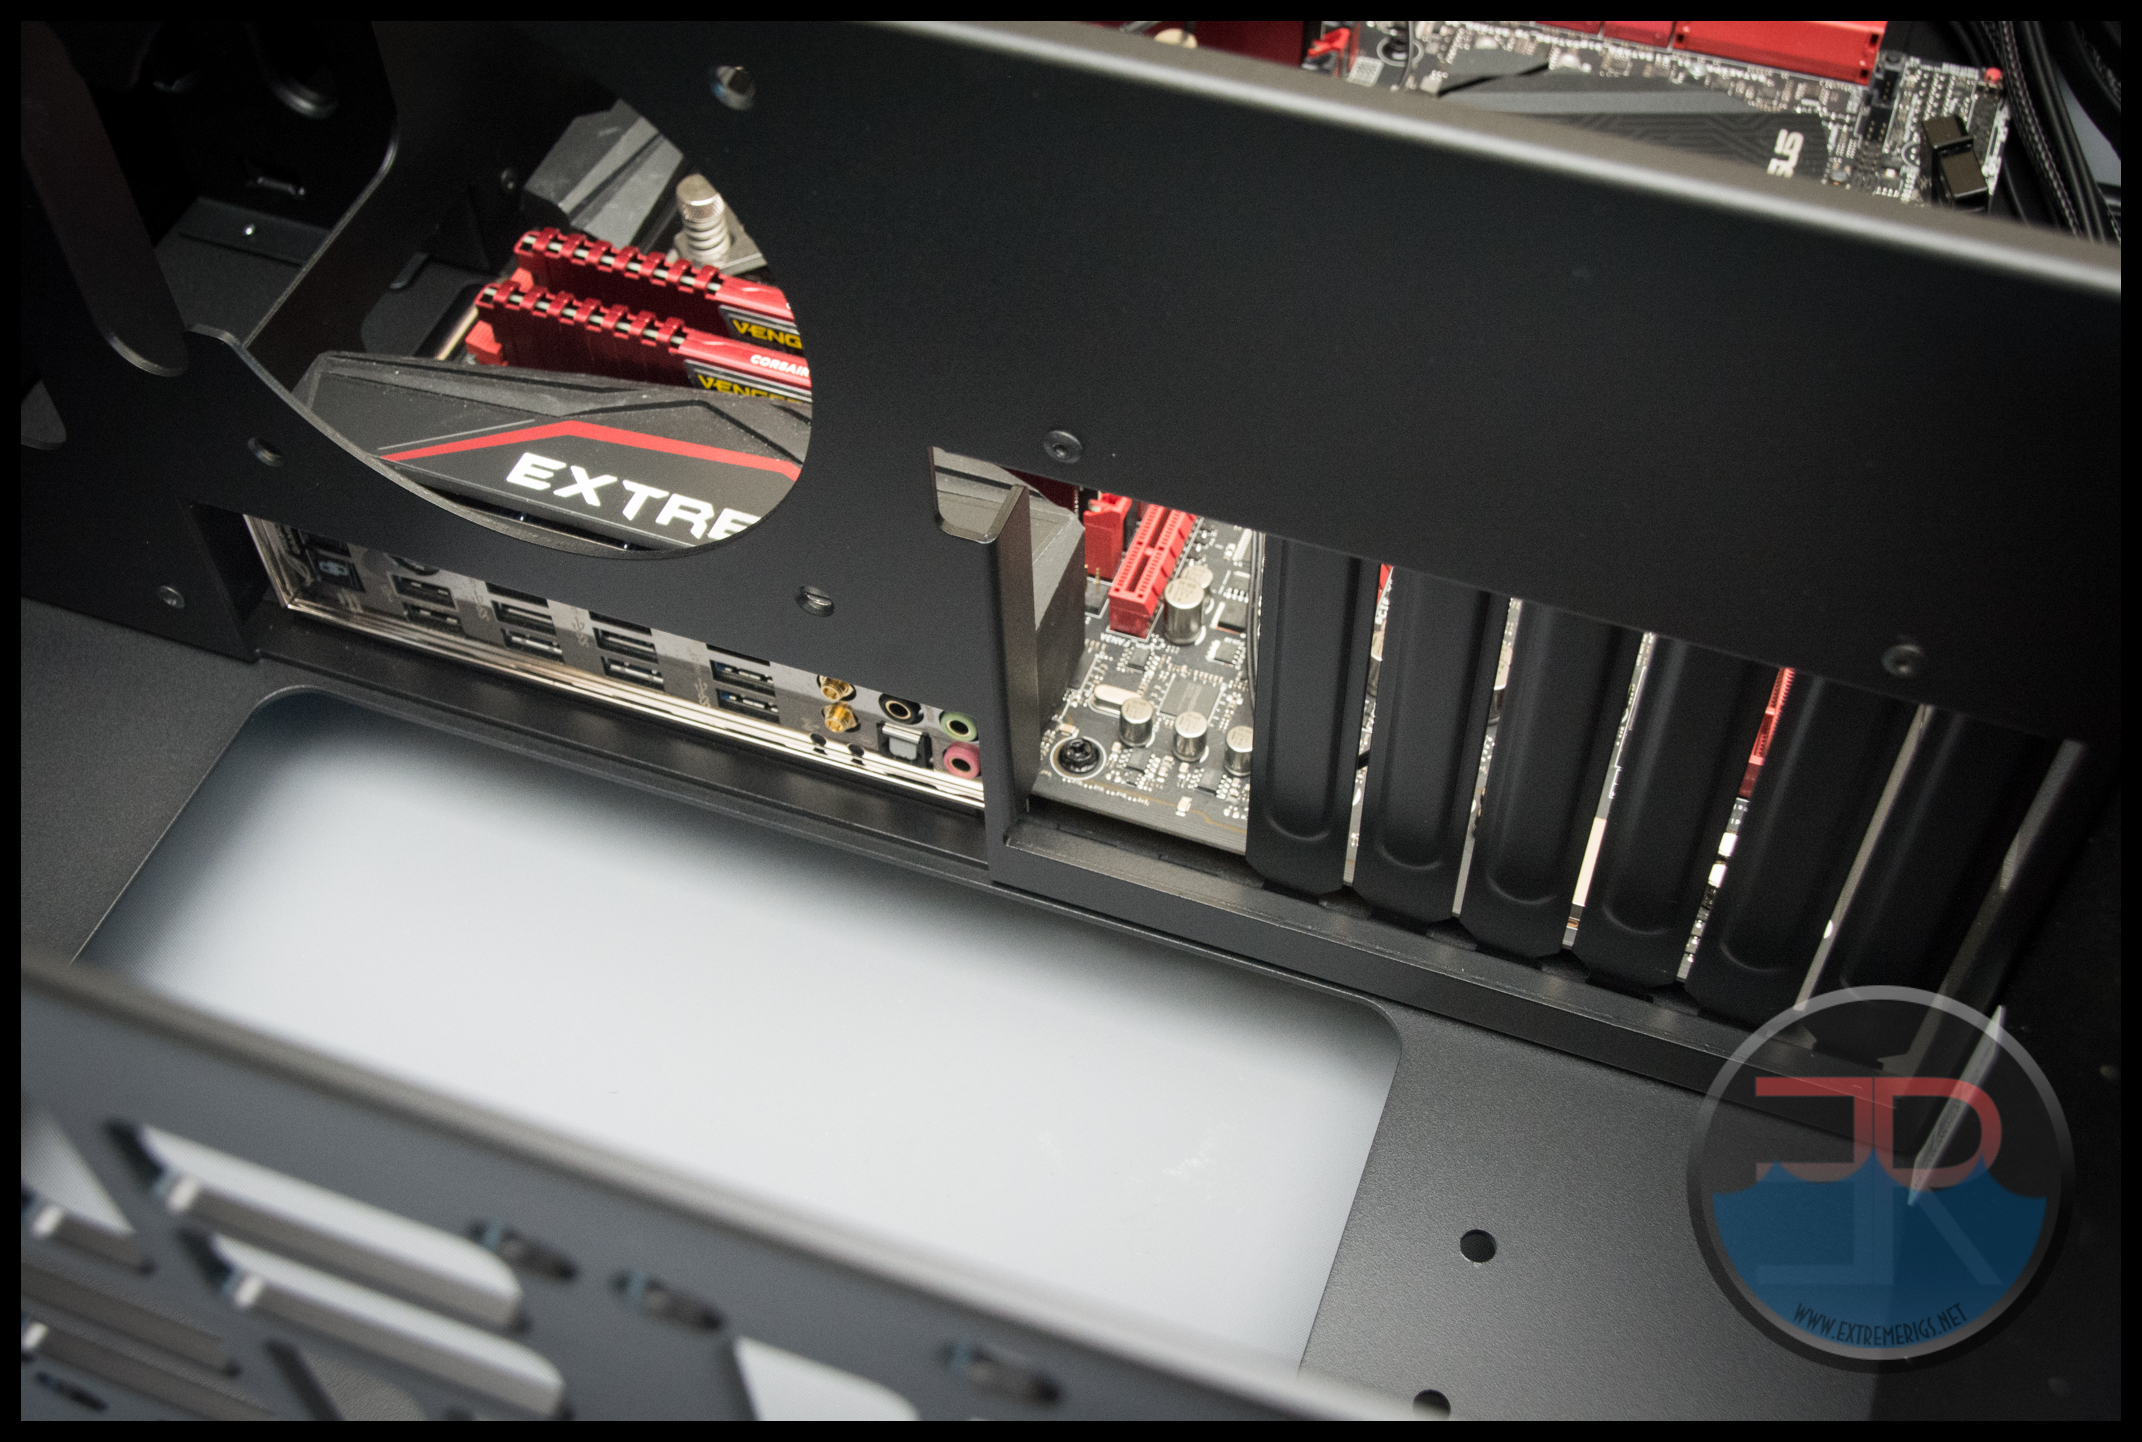
Peering through the cut outs we get a glimpse of how the case is layed out:
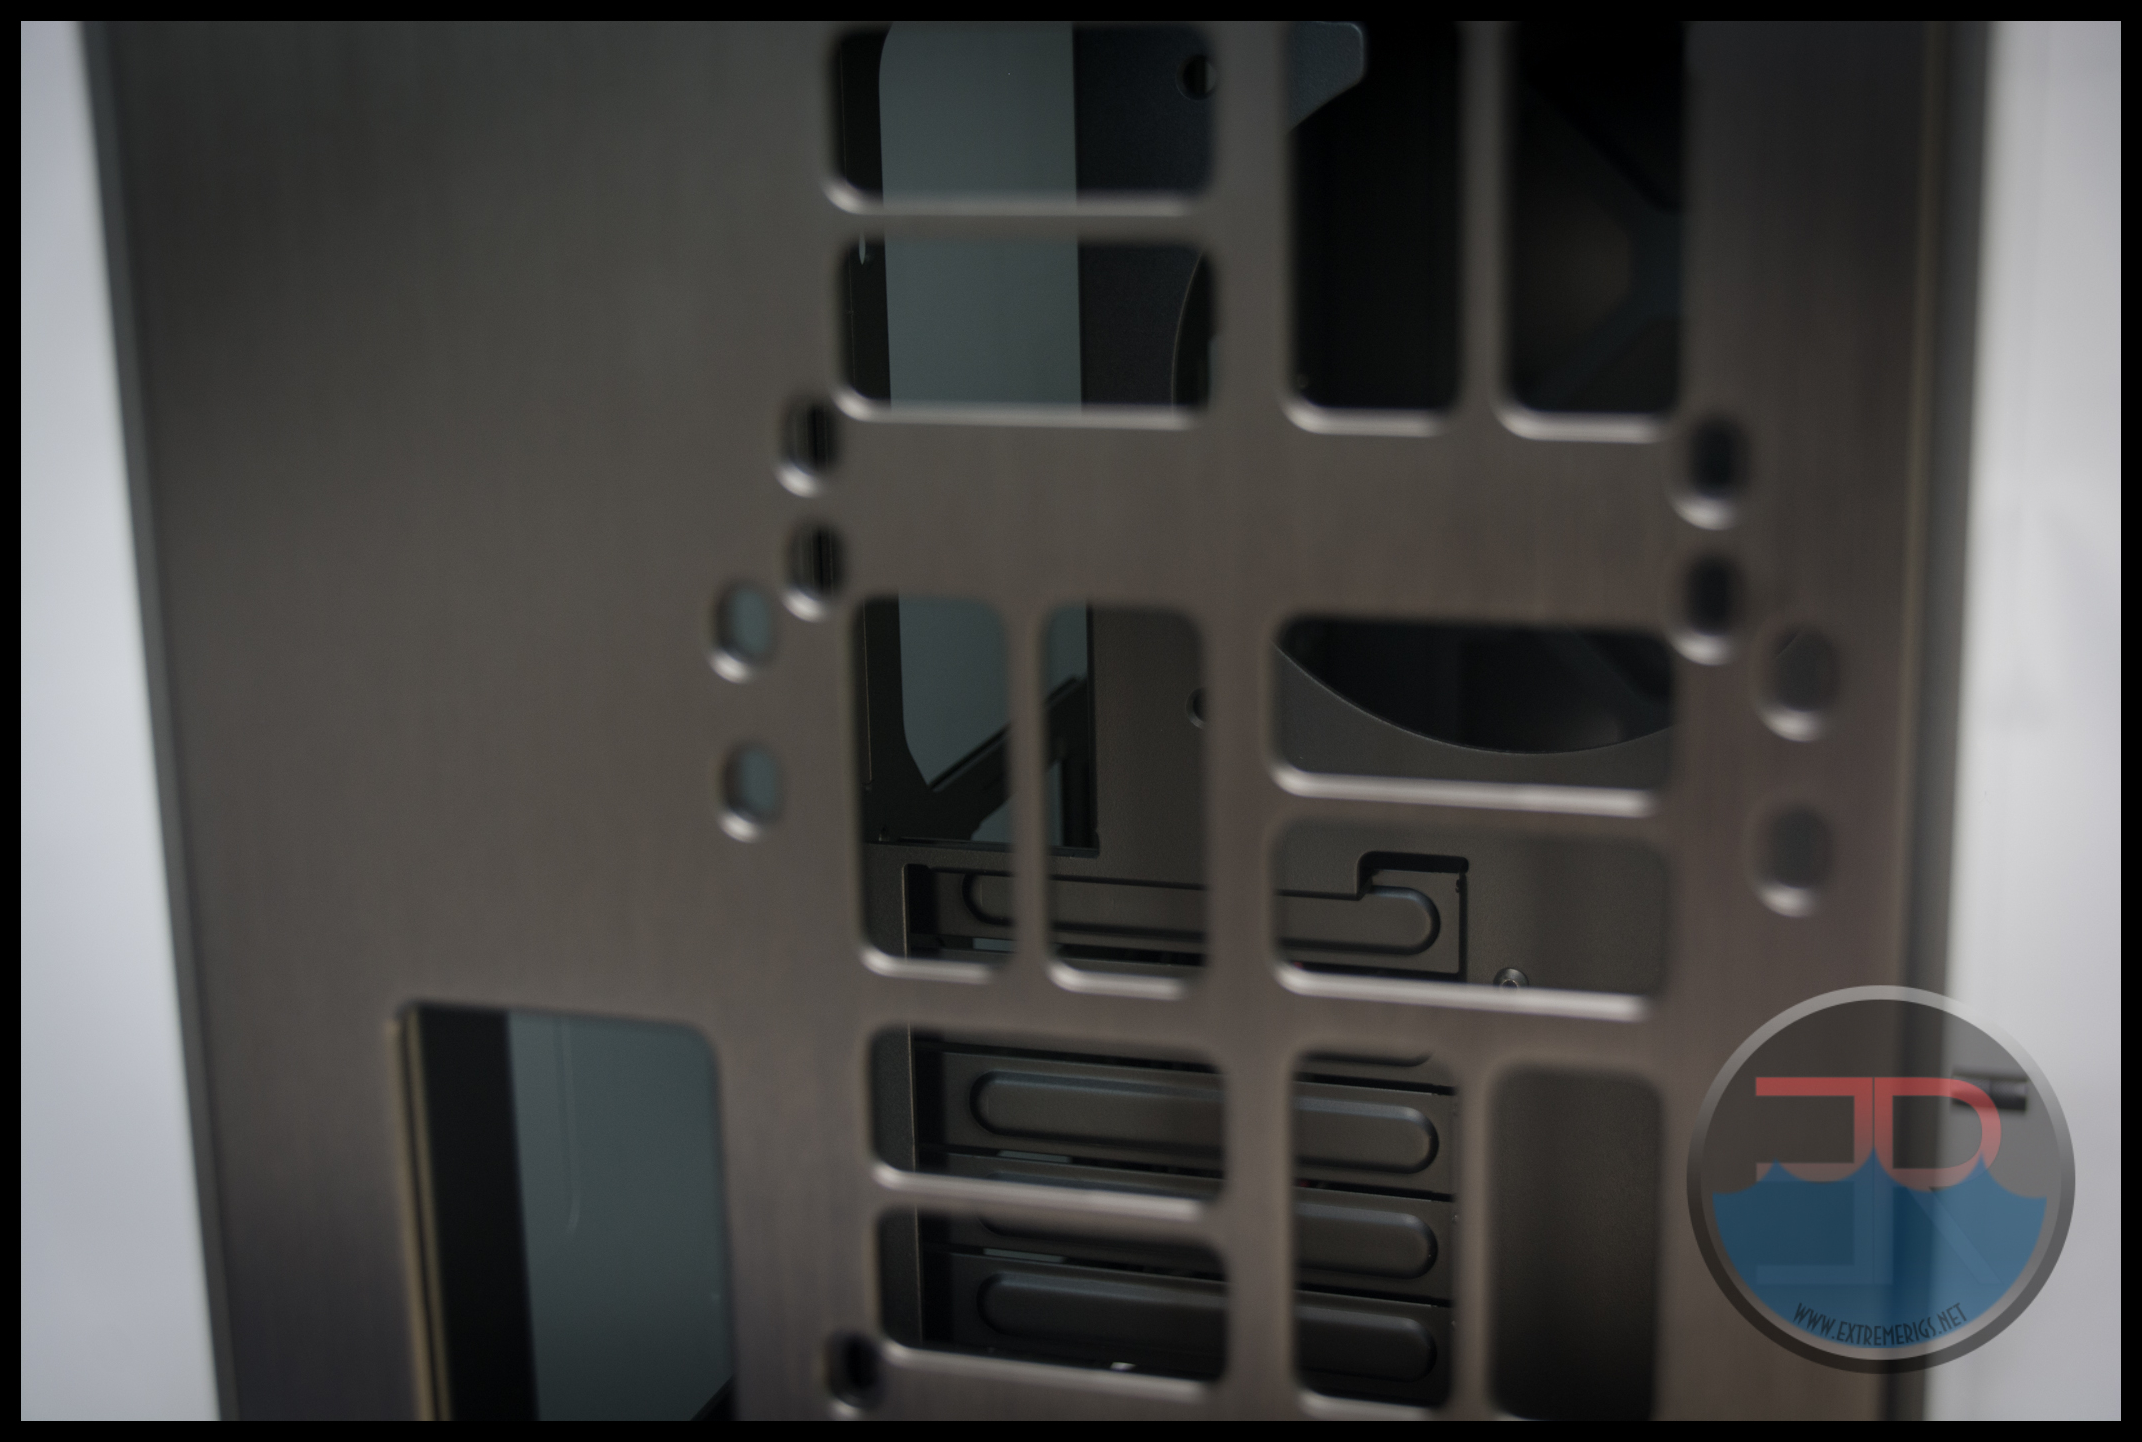
You can just make out the standard io plate and pcie slots in the interior. In other words the motherboard layout is in a traditional orientation, but it’s simply offset inside the case.
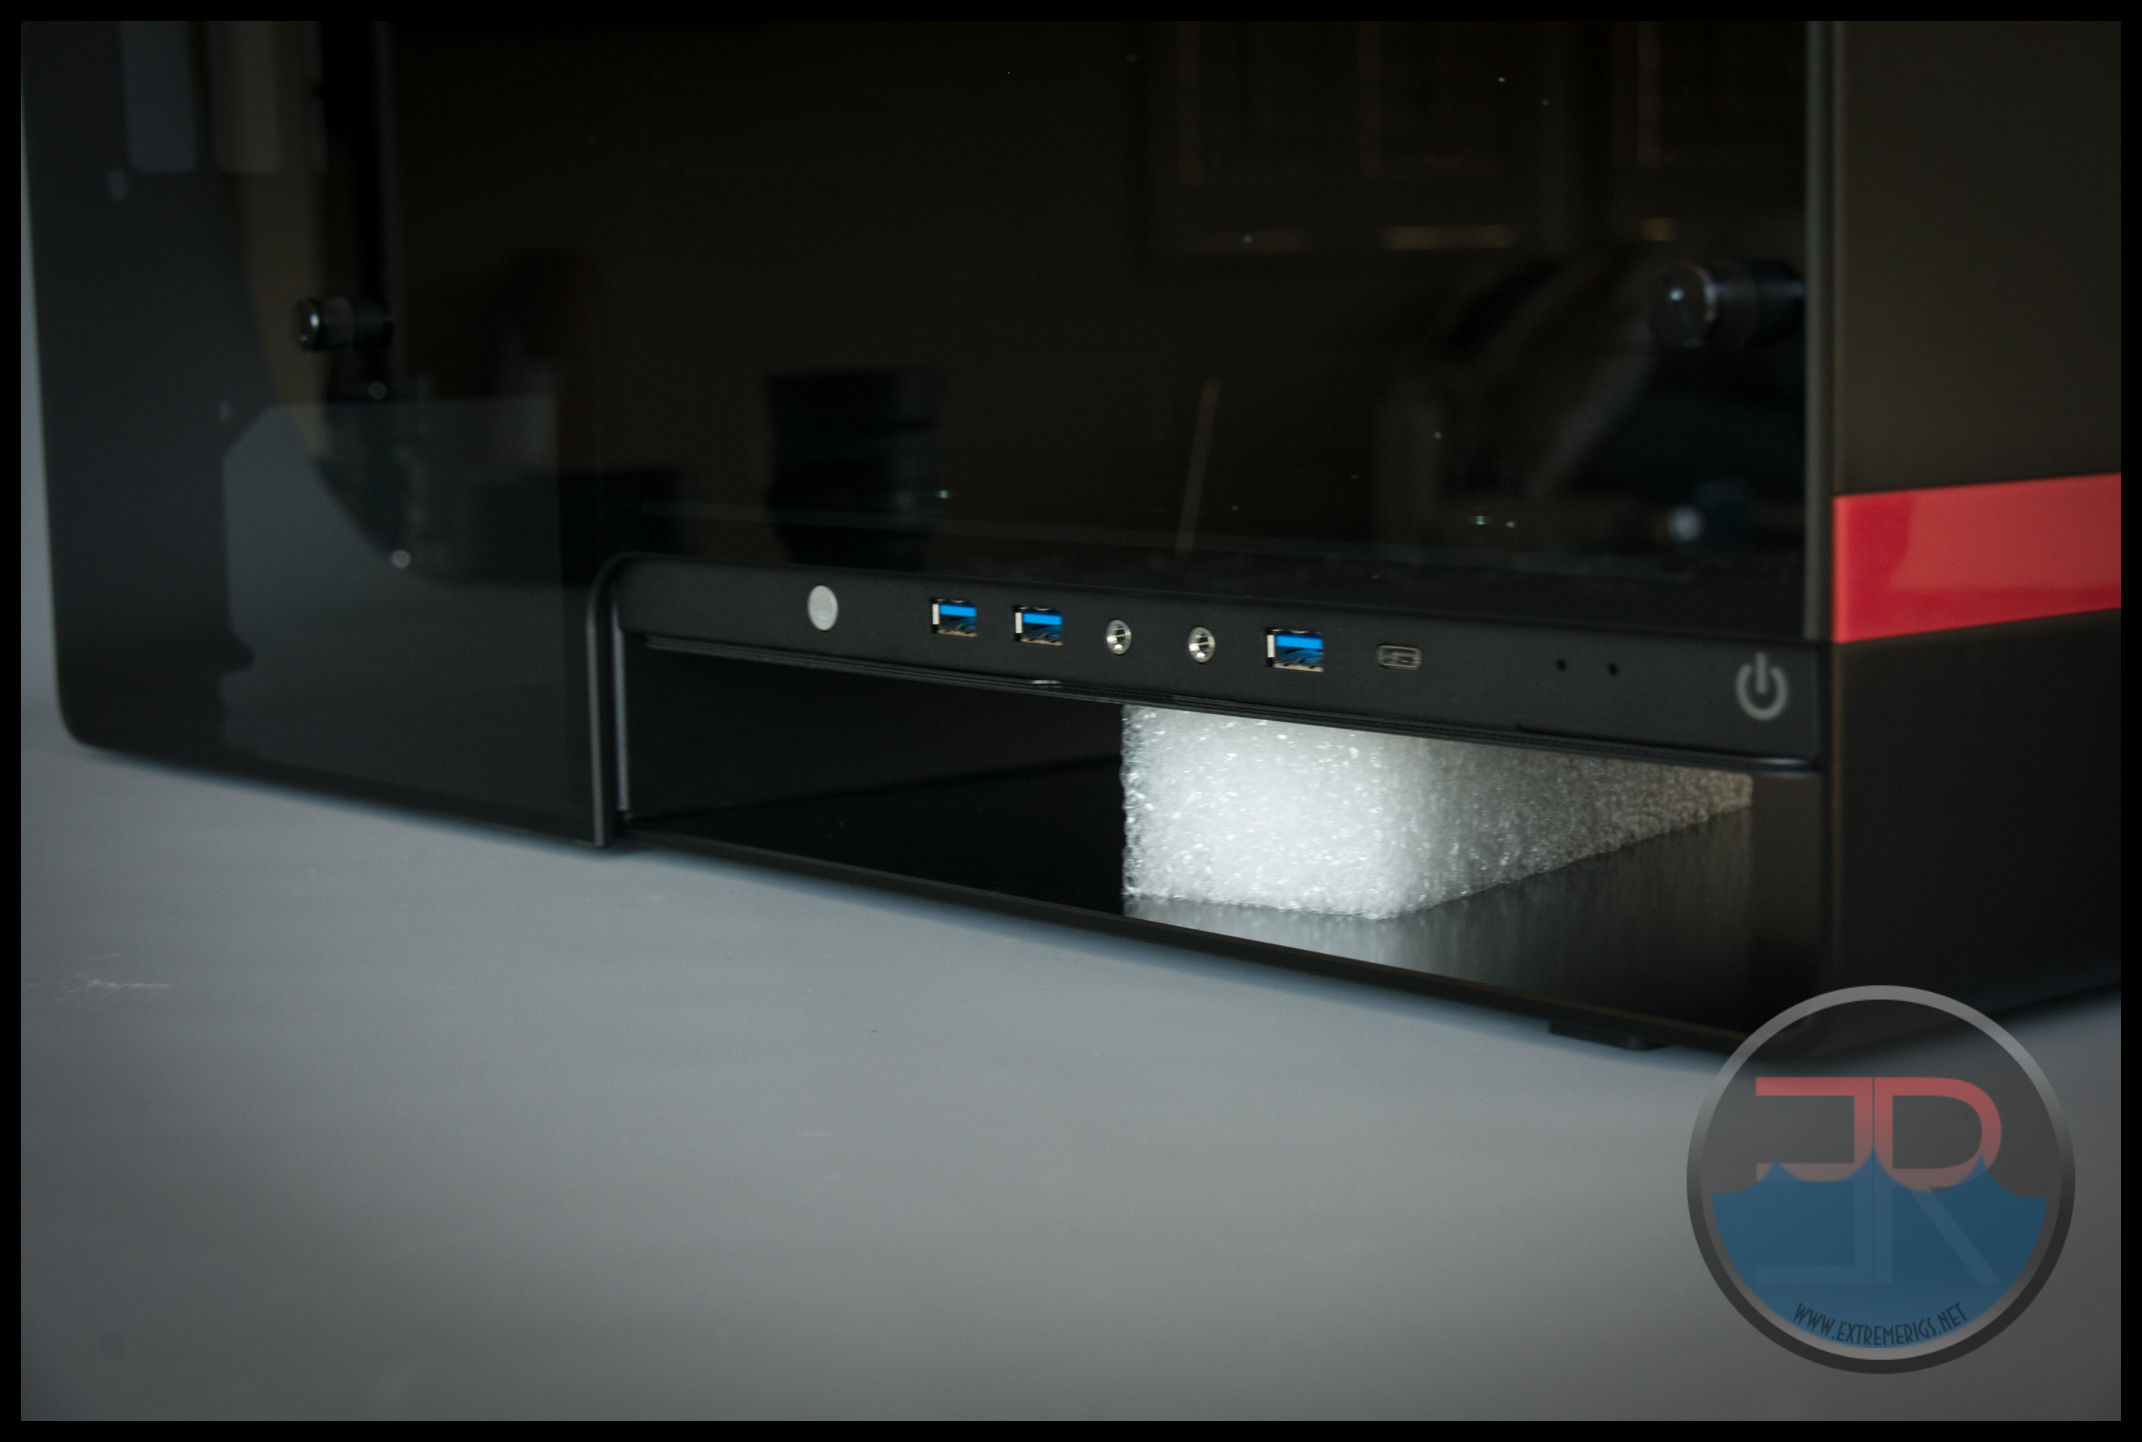
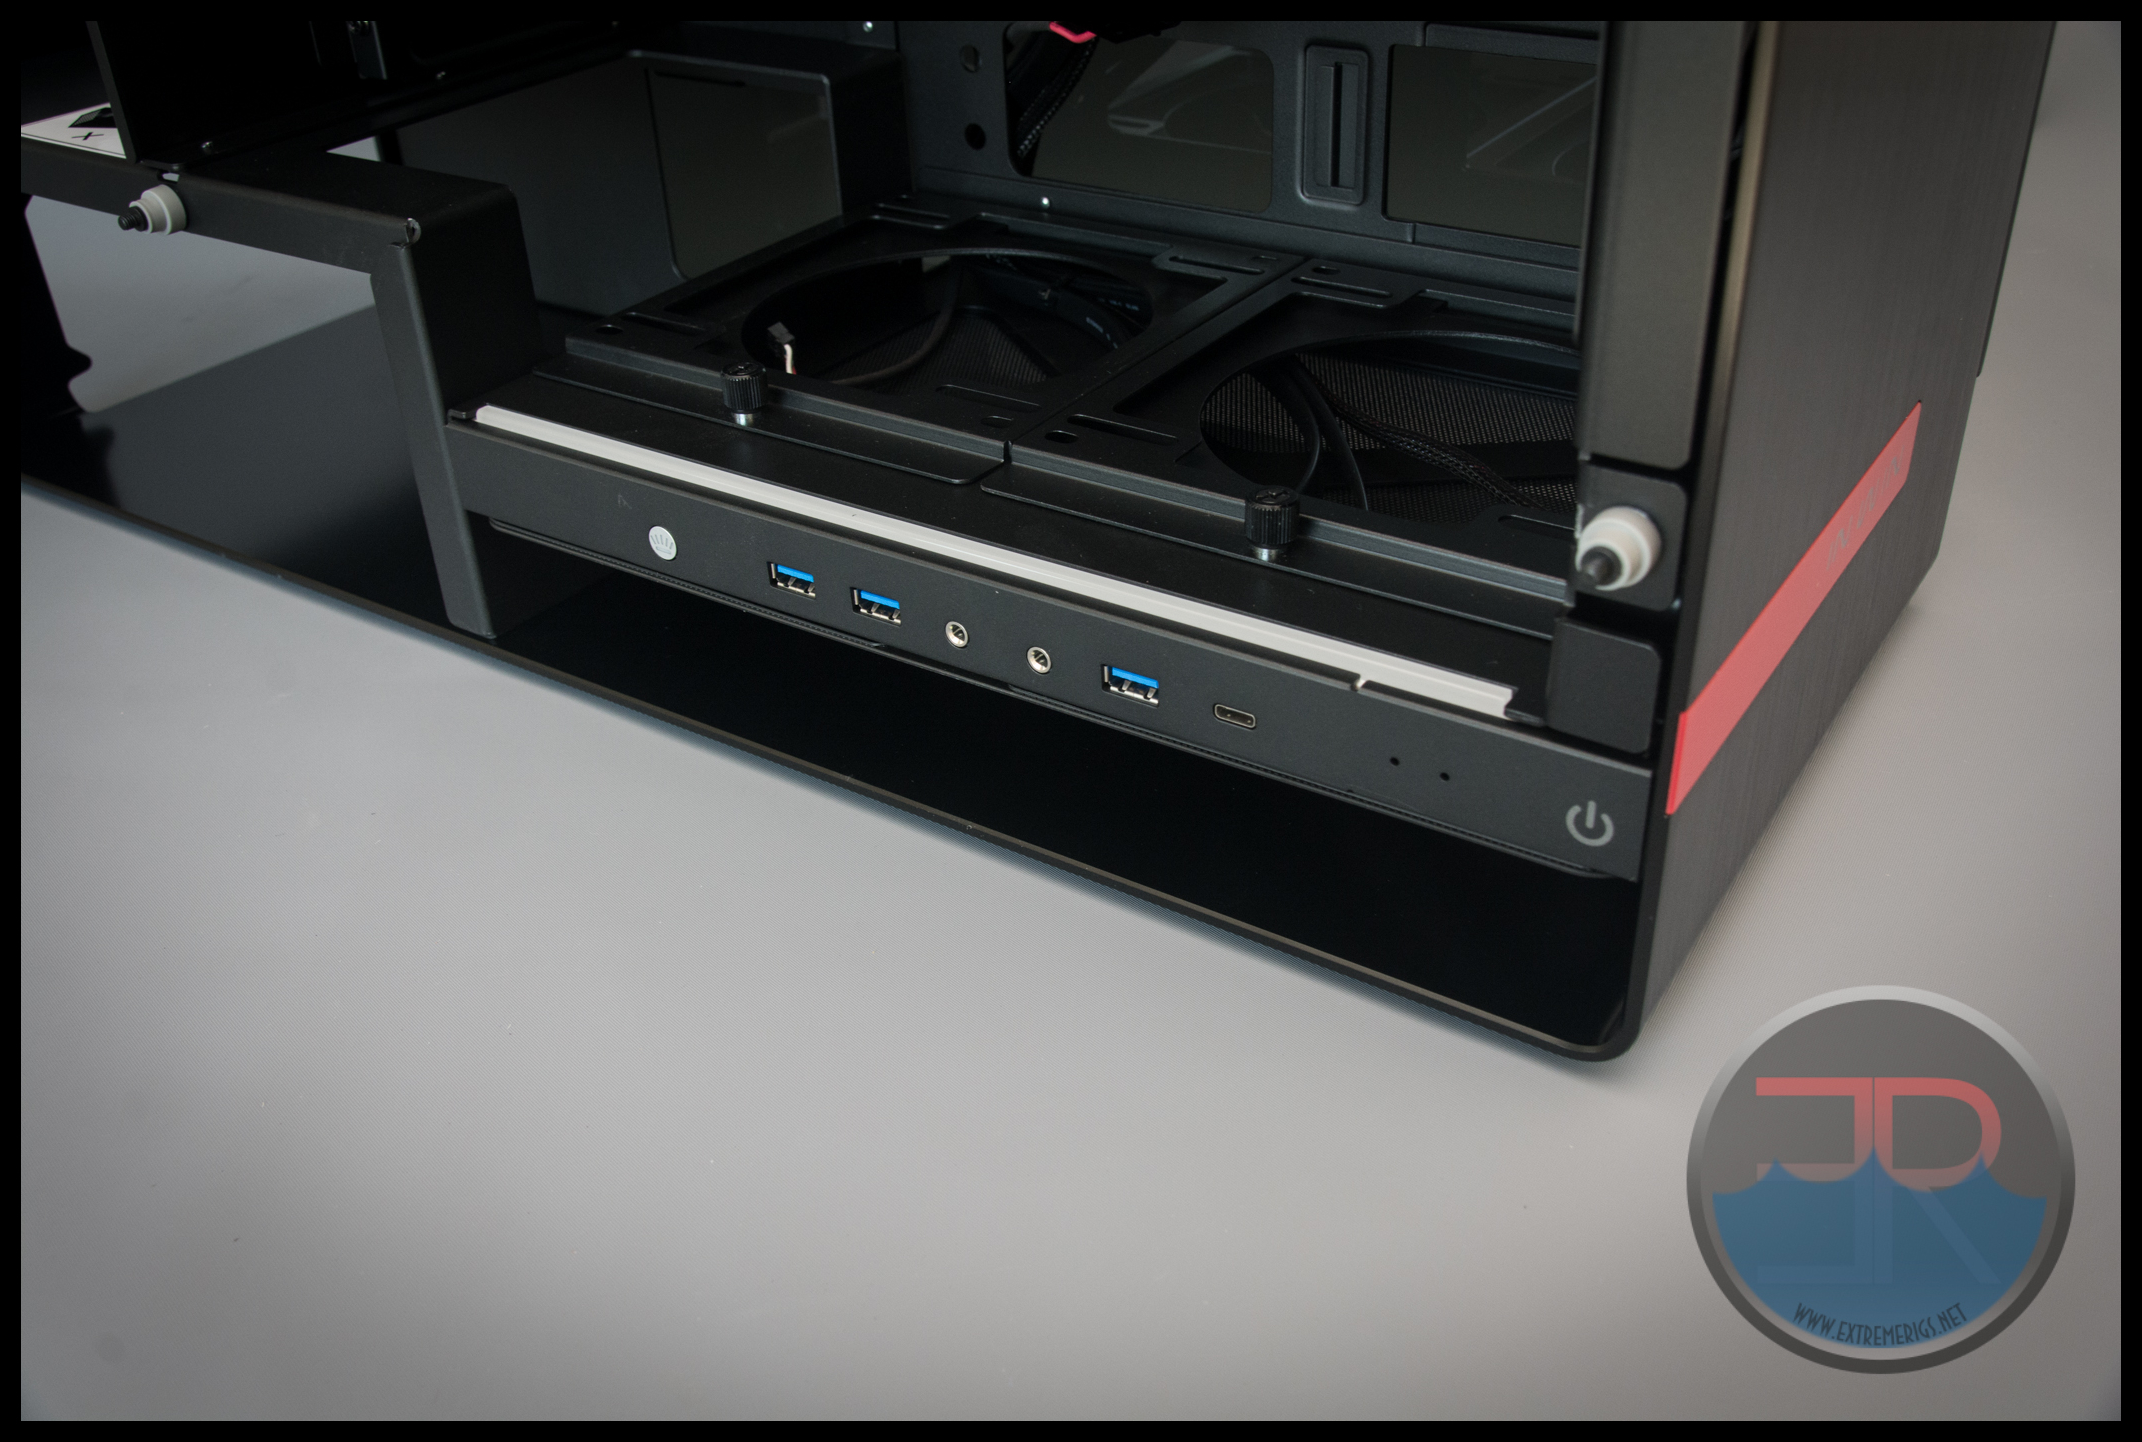
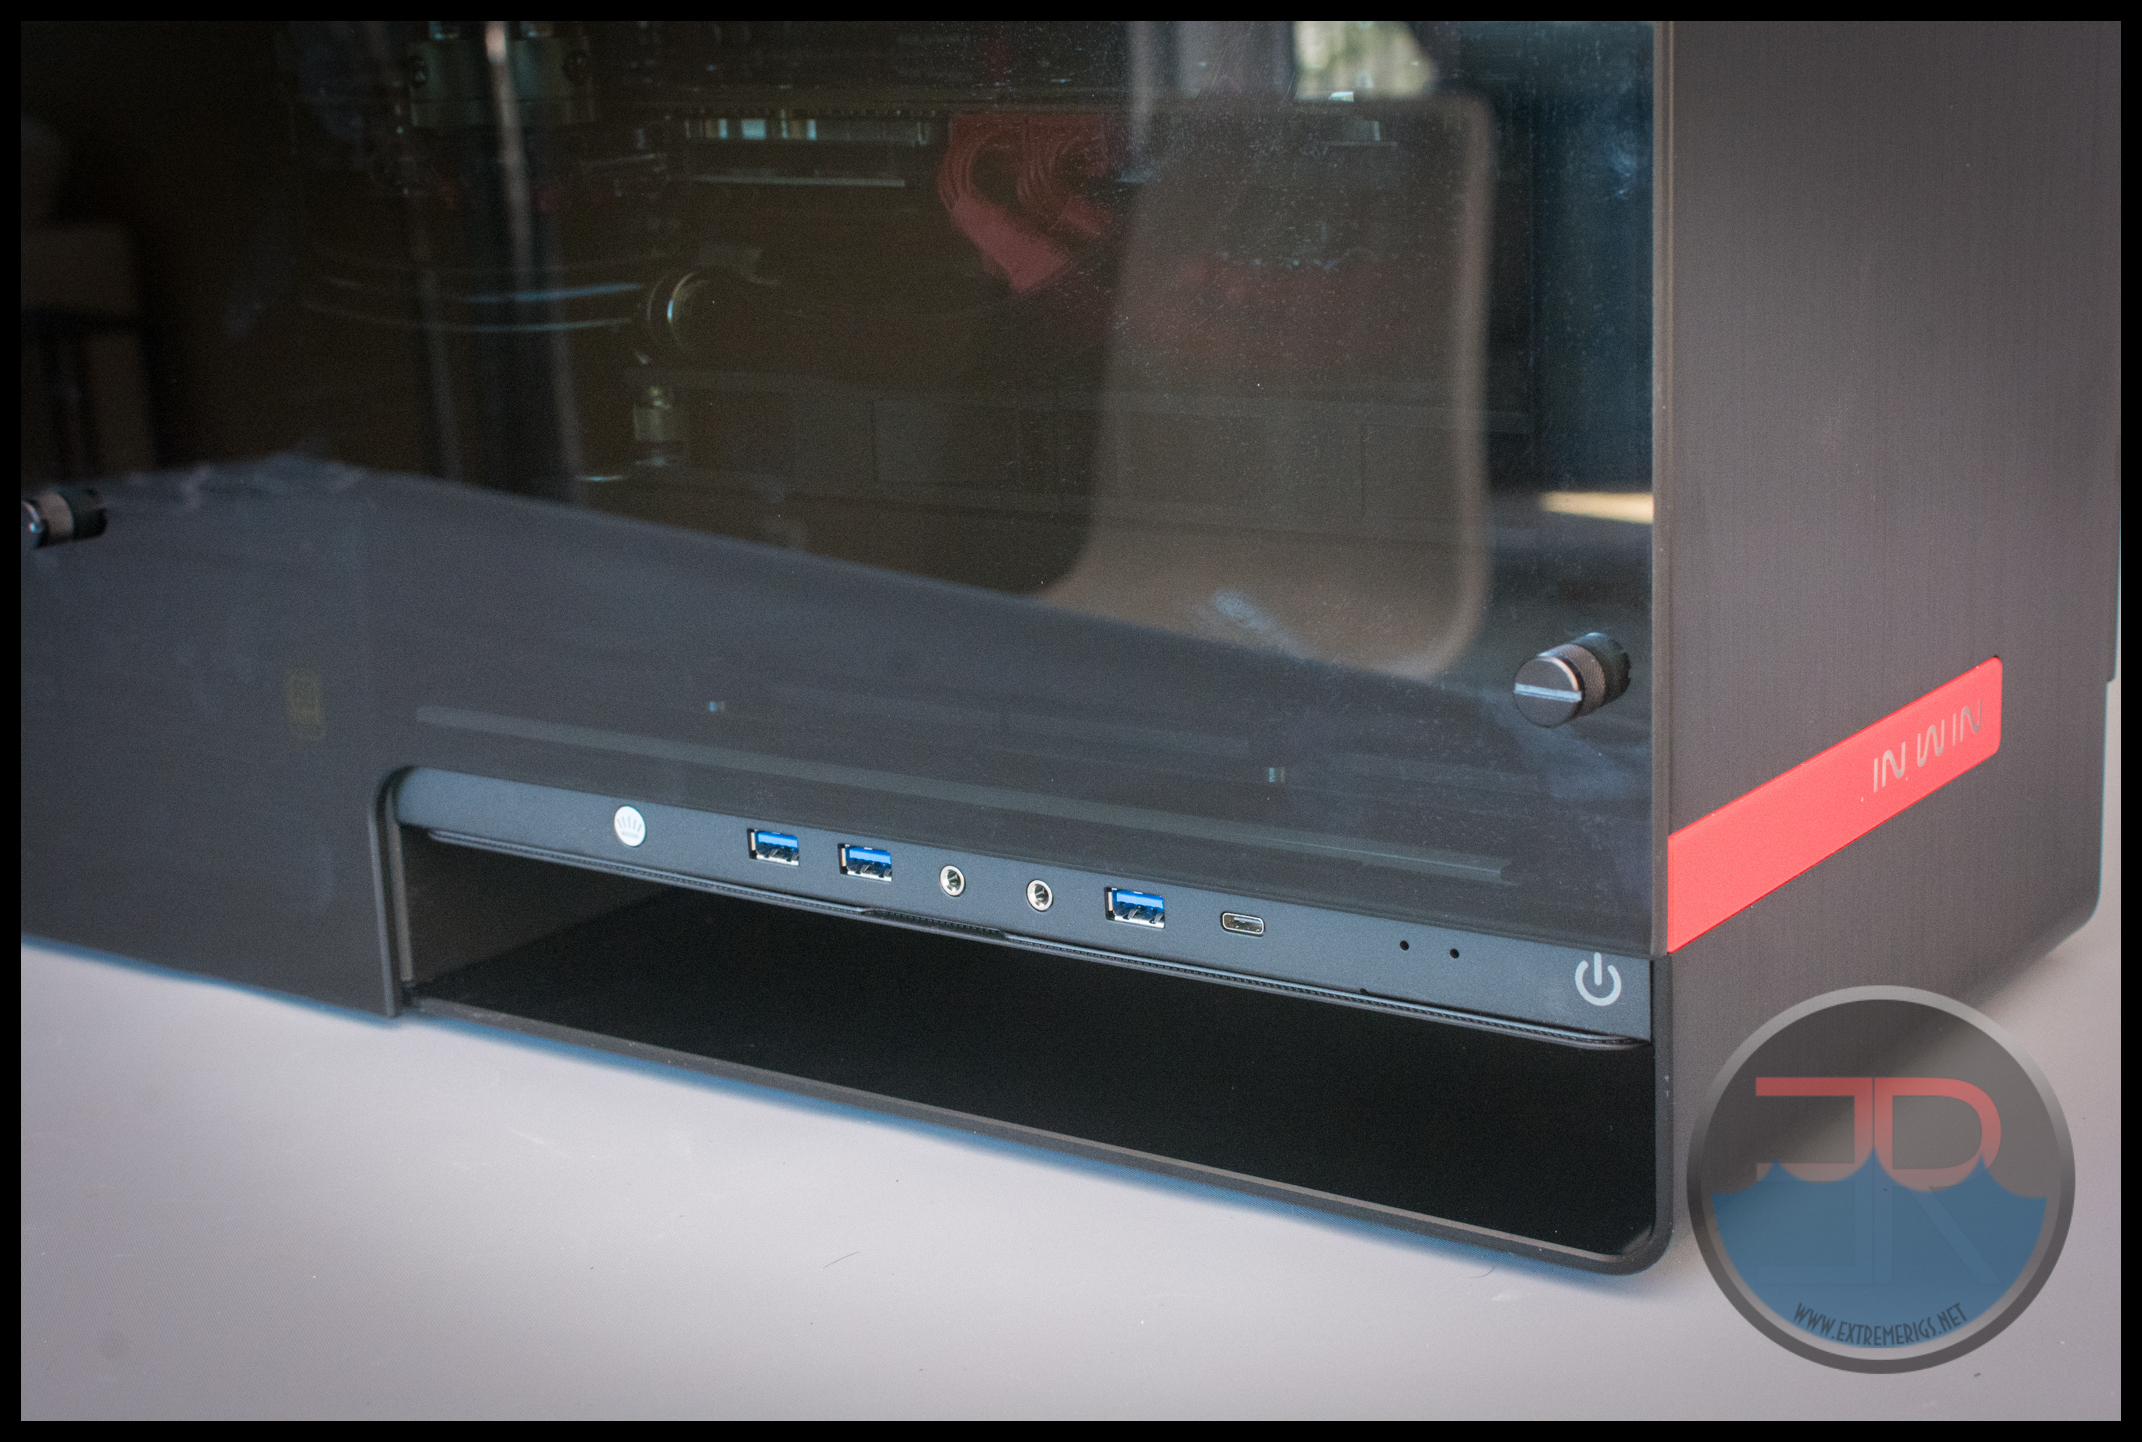
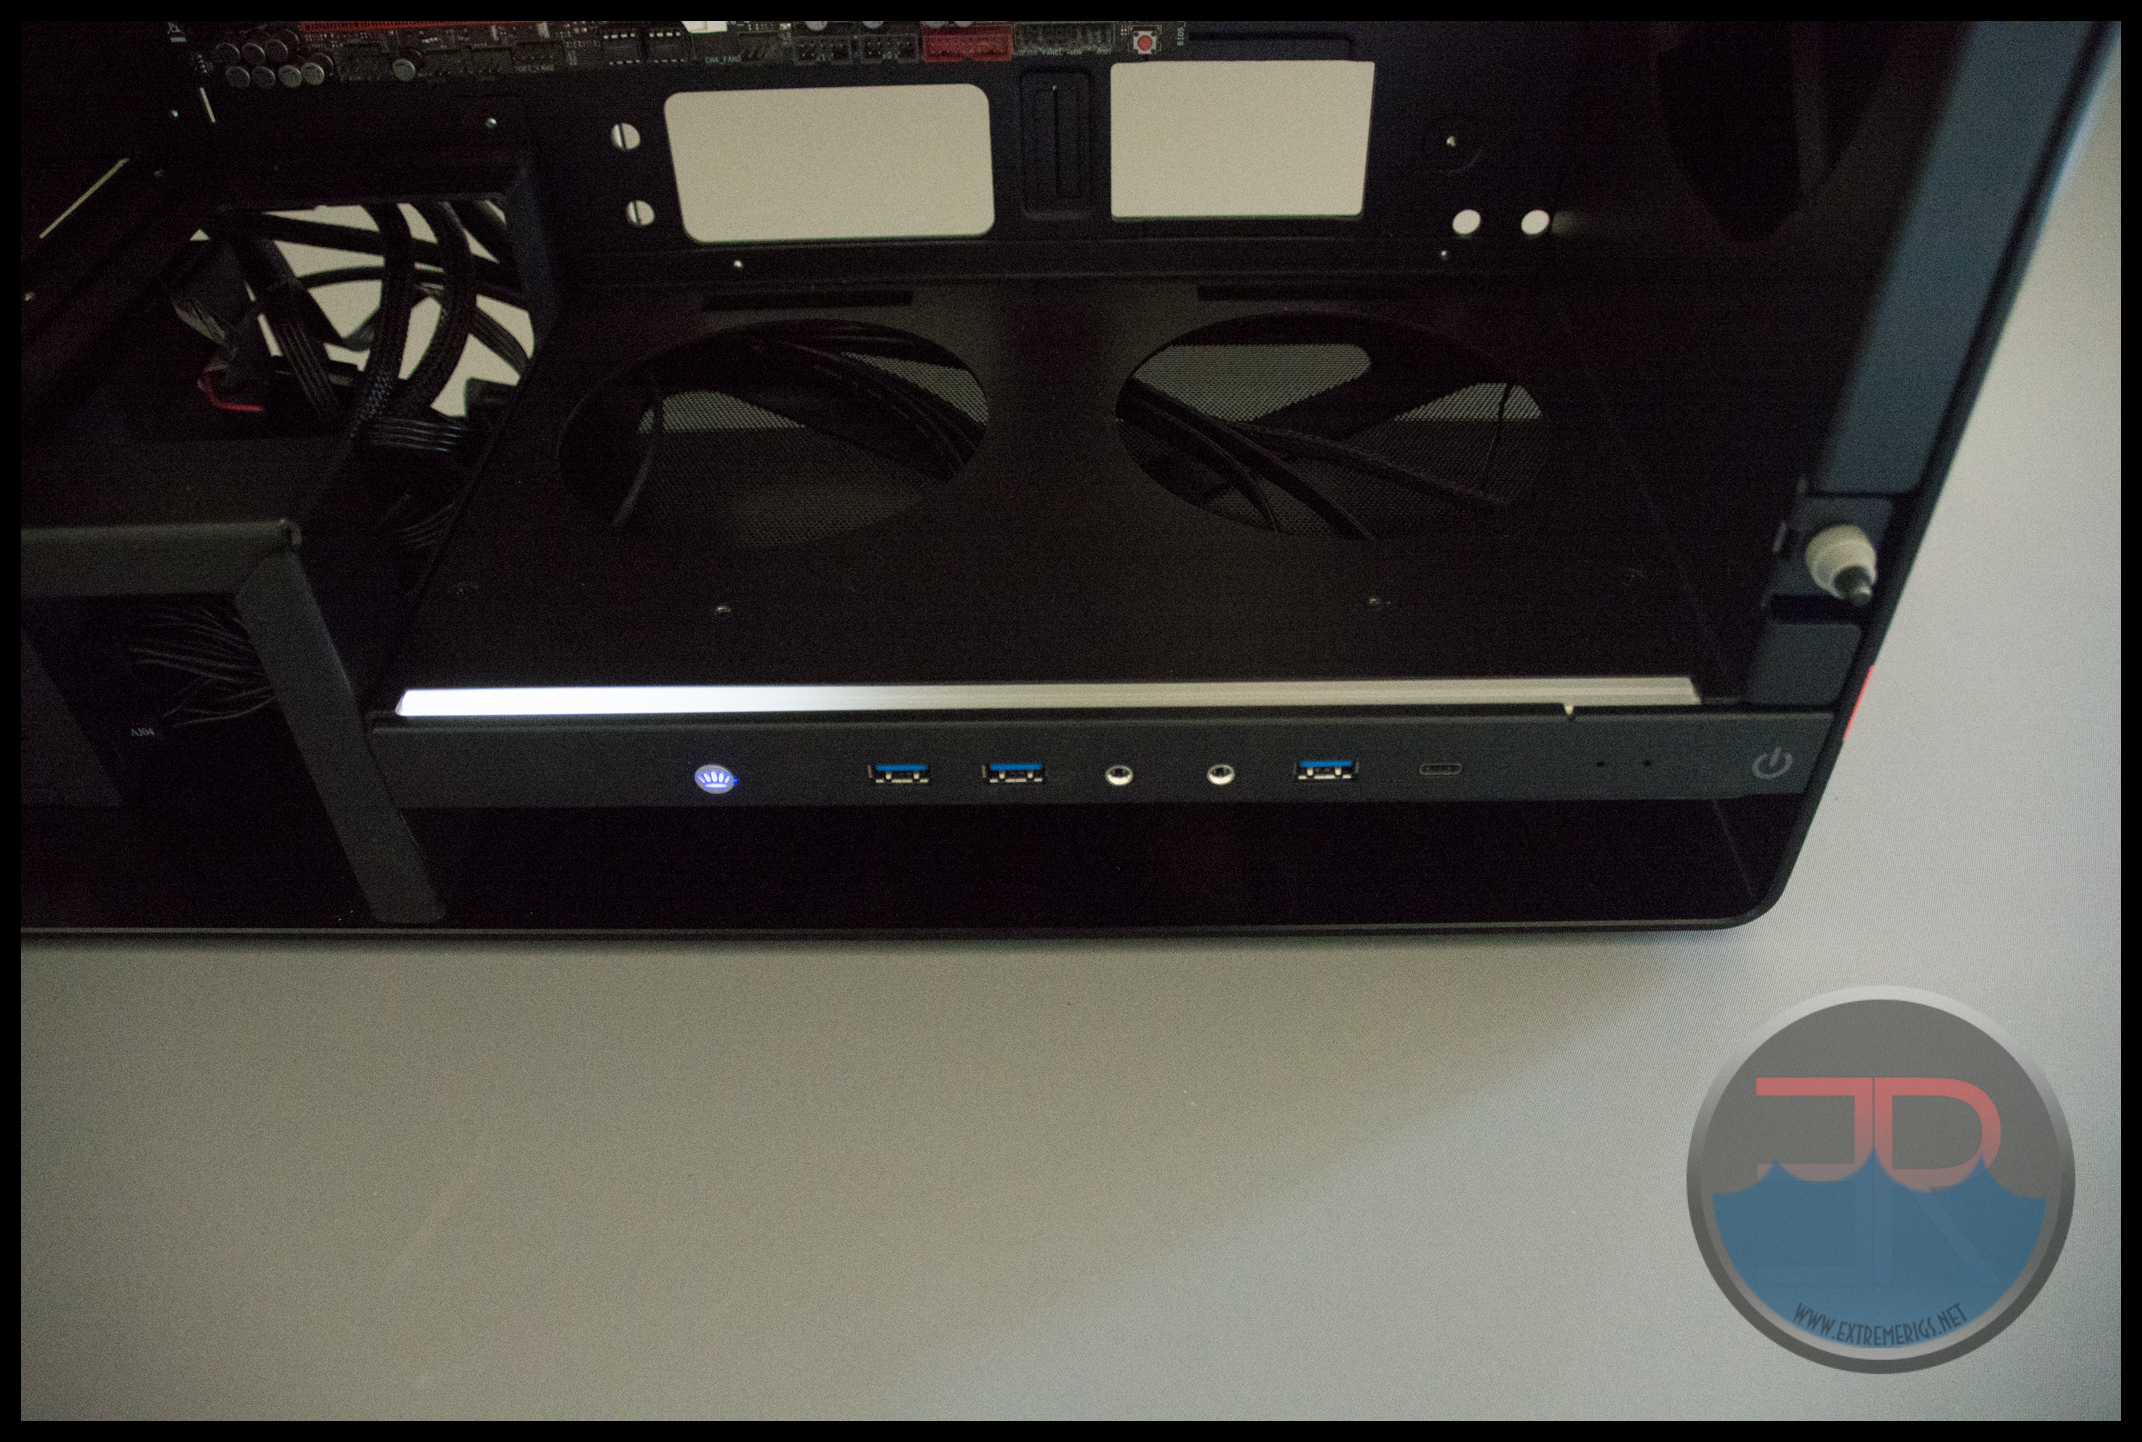
Once you’ve picked up your jaw from the ground over that single piece of brushed aluminum wrapping the case then you’re going to be taking a look at the interesting cutout at the base of the case. On the In Win 904 this “hole” was larger and you can stealth mount an ODD in it. With ODD’s in decline we are glad that this is now smaller. There are now no 5.25″ bays supported at all. We like this and we are glad that In Win is brave enough to not support them anymore. Now the “hole” is there purely to act as an air intake. Just above the air intake are the i/o ports and switches. There are three normal USB 3 ports, and one USB type C connector. There are head phone and mic jacks, a power switch, two LEDs and a switch for the lighting. In our case the switch for the lighting was actually unplugged. We love that a USB type C connector has been used – if you’re buying a case this expensive you want to get one that is future proof. Type C is the future. Our suggestion though would be to have have a ratio of 2:2 rather than 3:1.
As this space is used for an intake there is also a magnetic dust filter underneath that protects your insides from getting ugly. Moving around to the front of the case – there is a simple red strip with In Win text in clear plastic that lights up with LEDs:
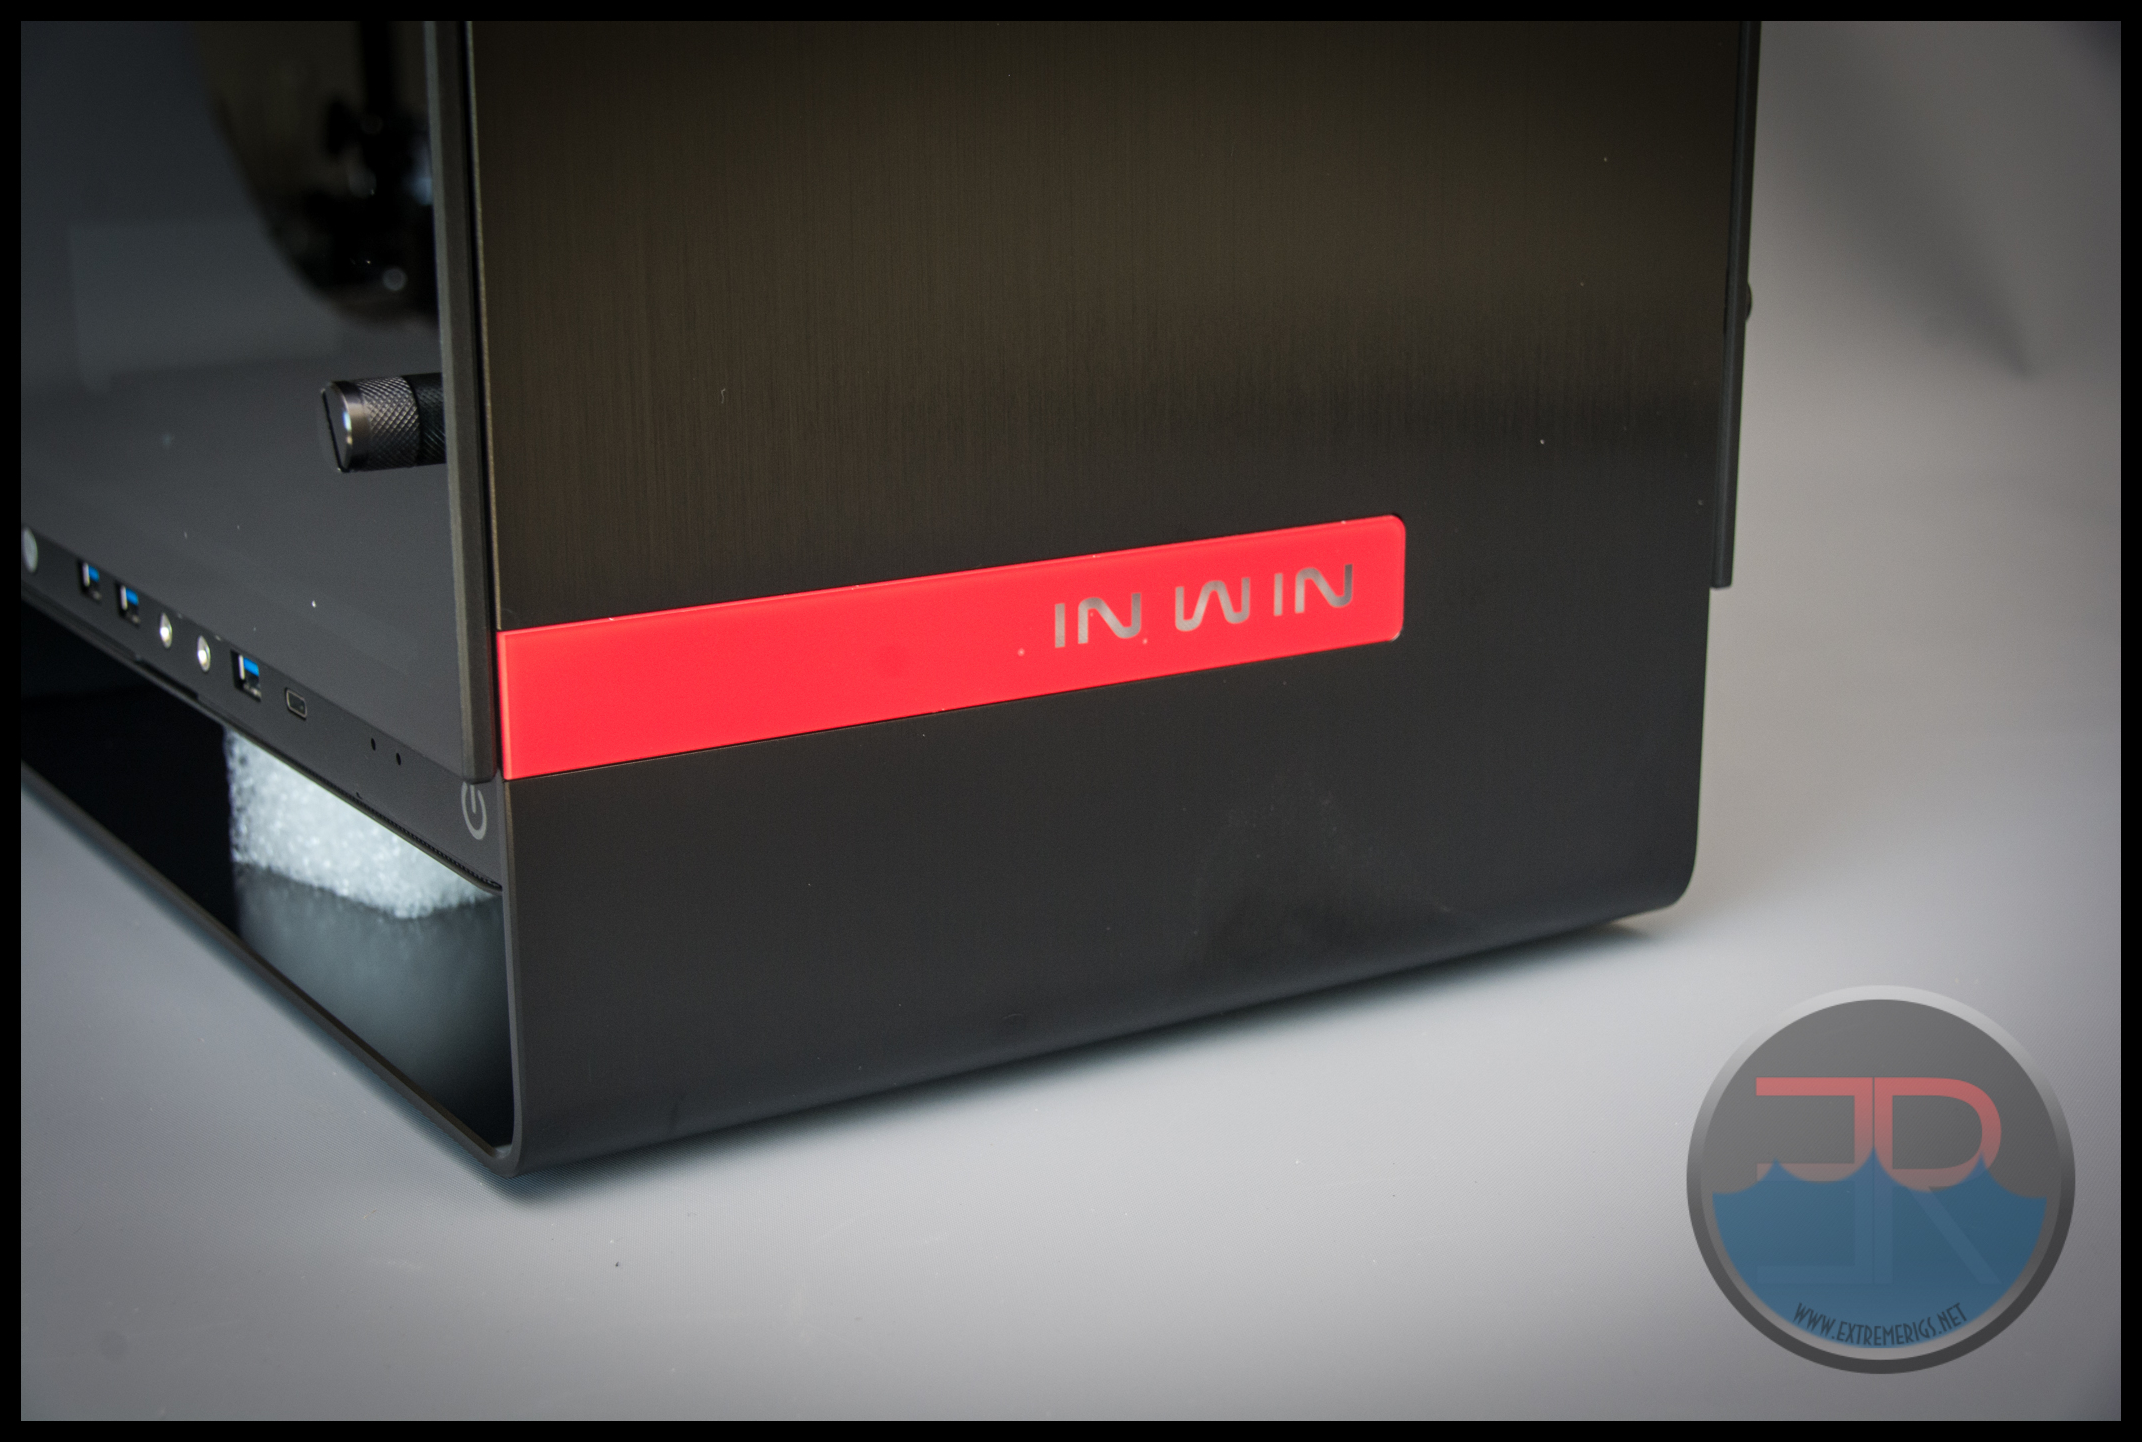
The effect is subtle and classy. Alright enough ogling – time to get the panels off:
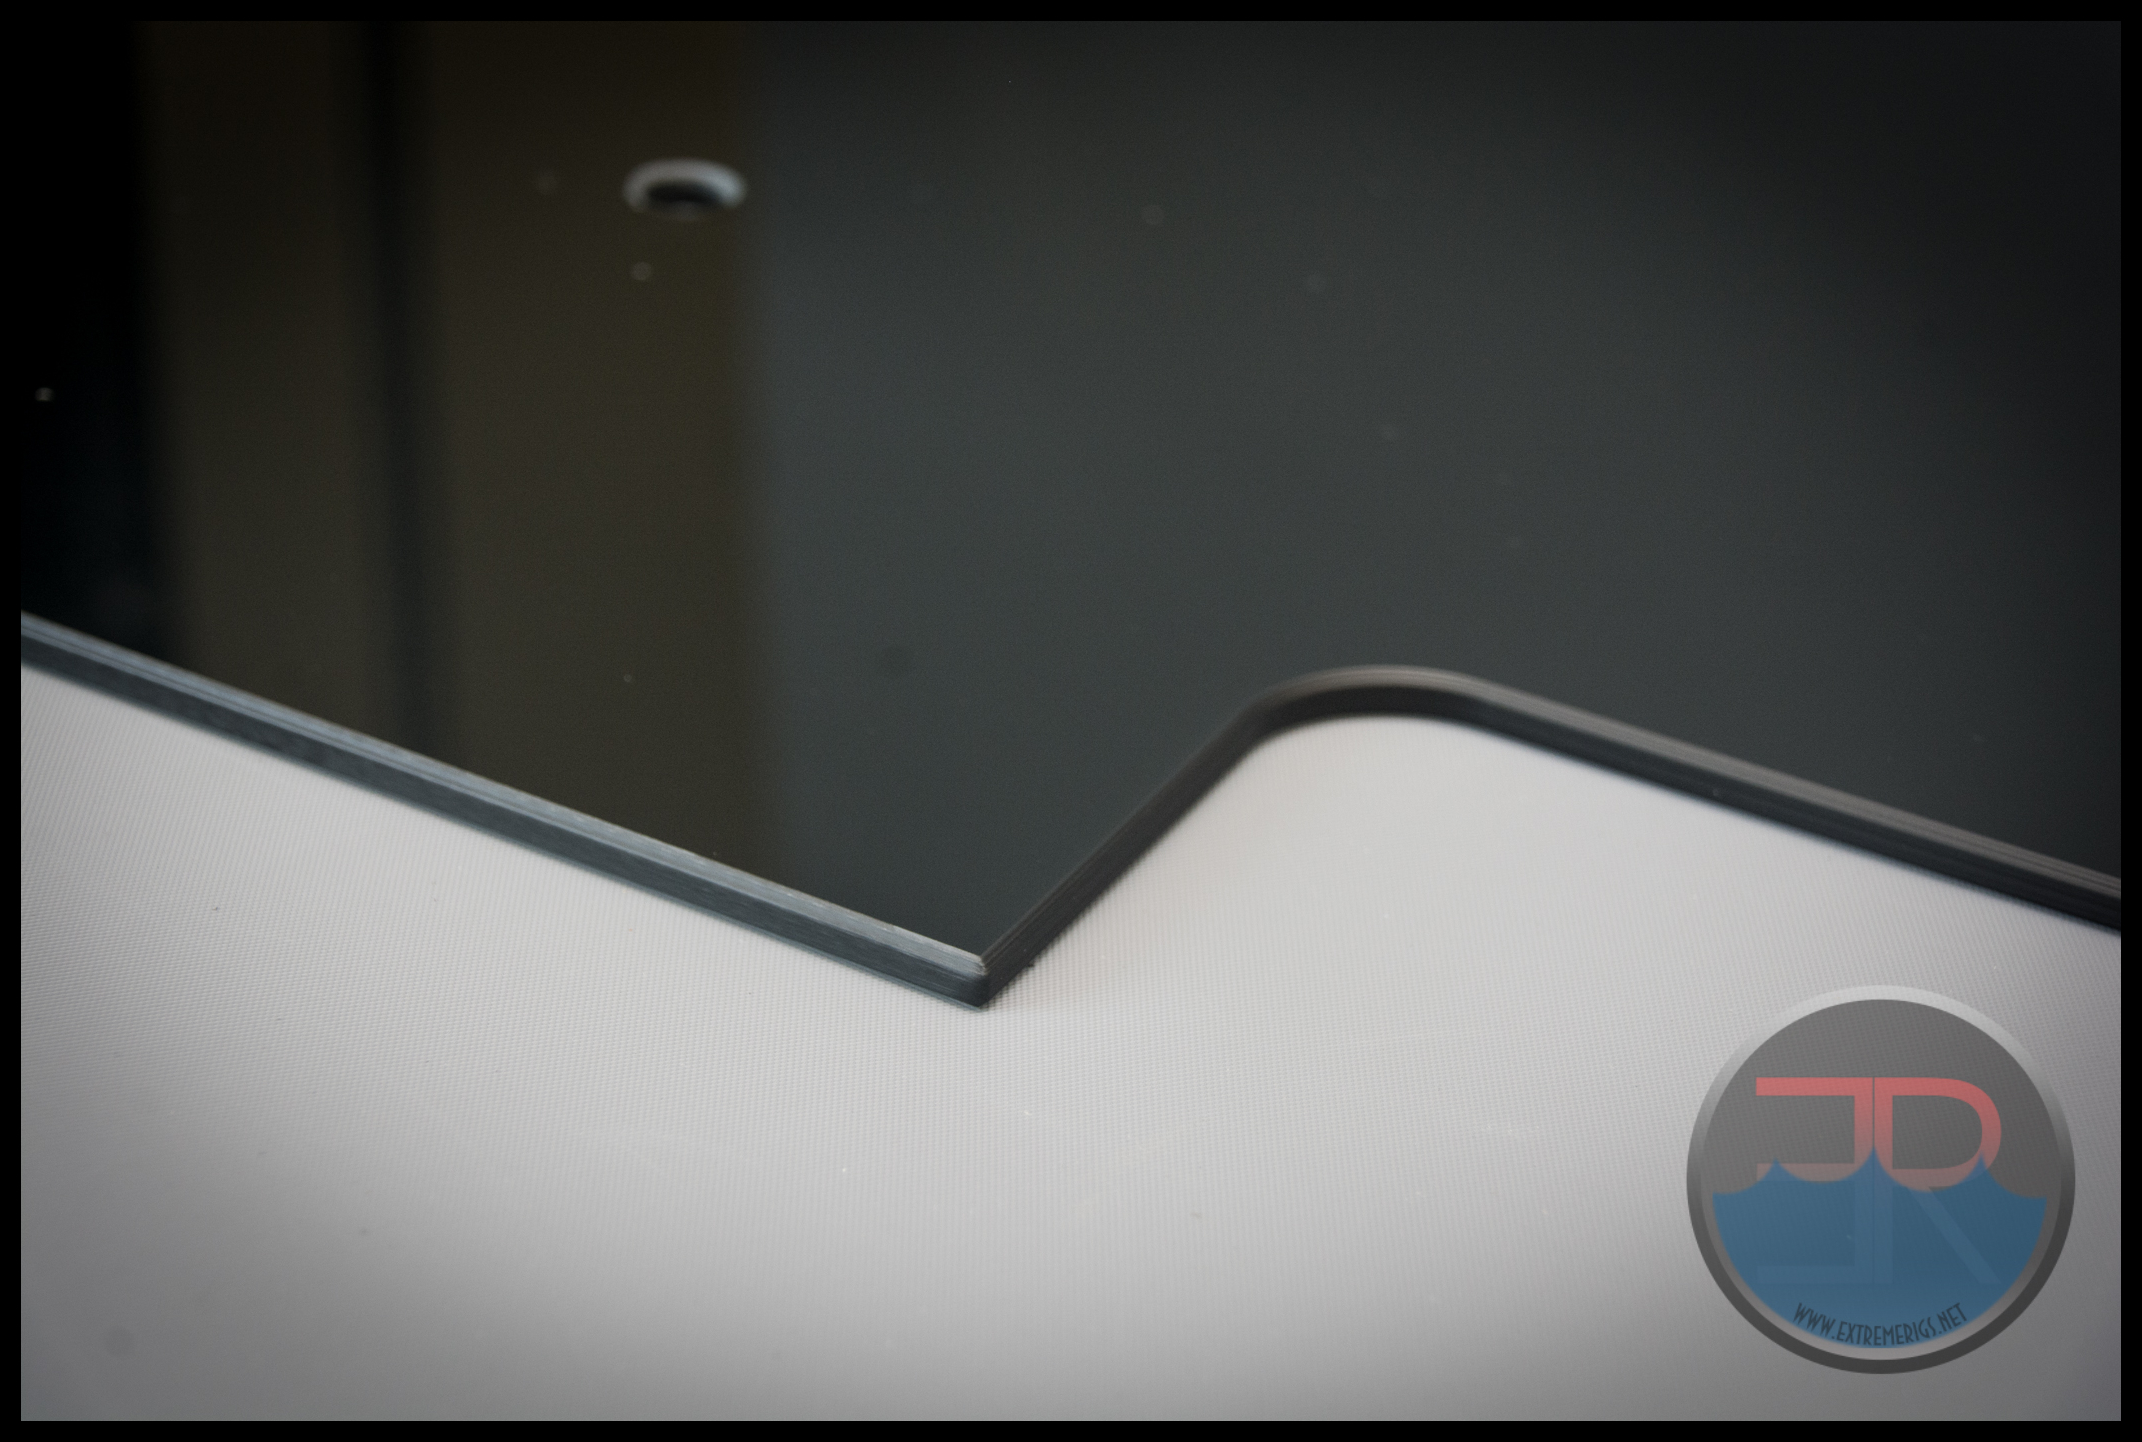
As can be seen the glass panels are really quite dark. This can be good – for example it has a tendency to hide any minor issues from those of us who are OCD. However it also means that if you want to really see the detail of the build that you slaved over – you’ll need some serious lighting.
That glass is thick – and bevelled along the cuts. Again more details that really impress and give an overall feeling that this is one quality product:
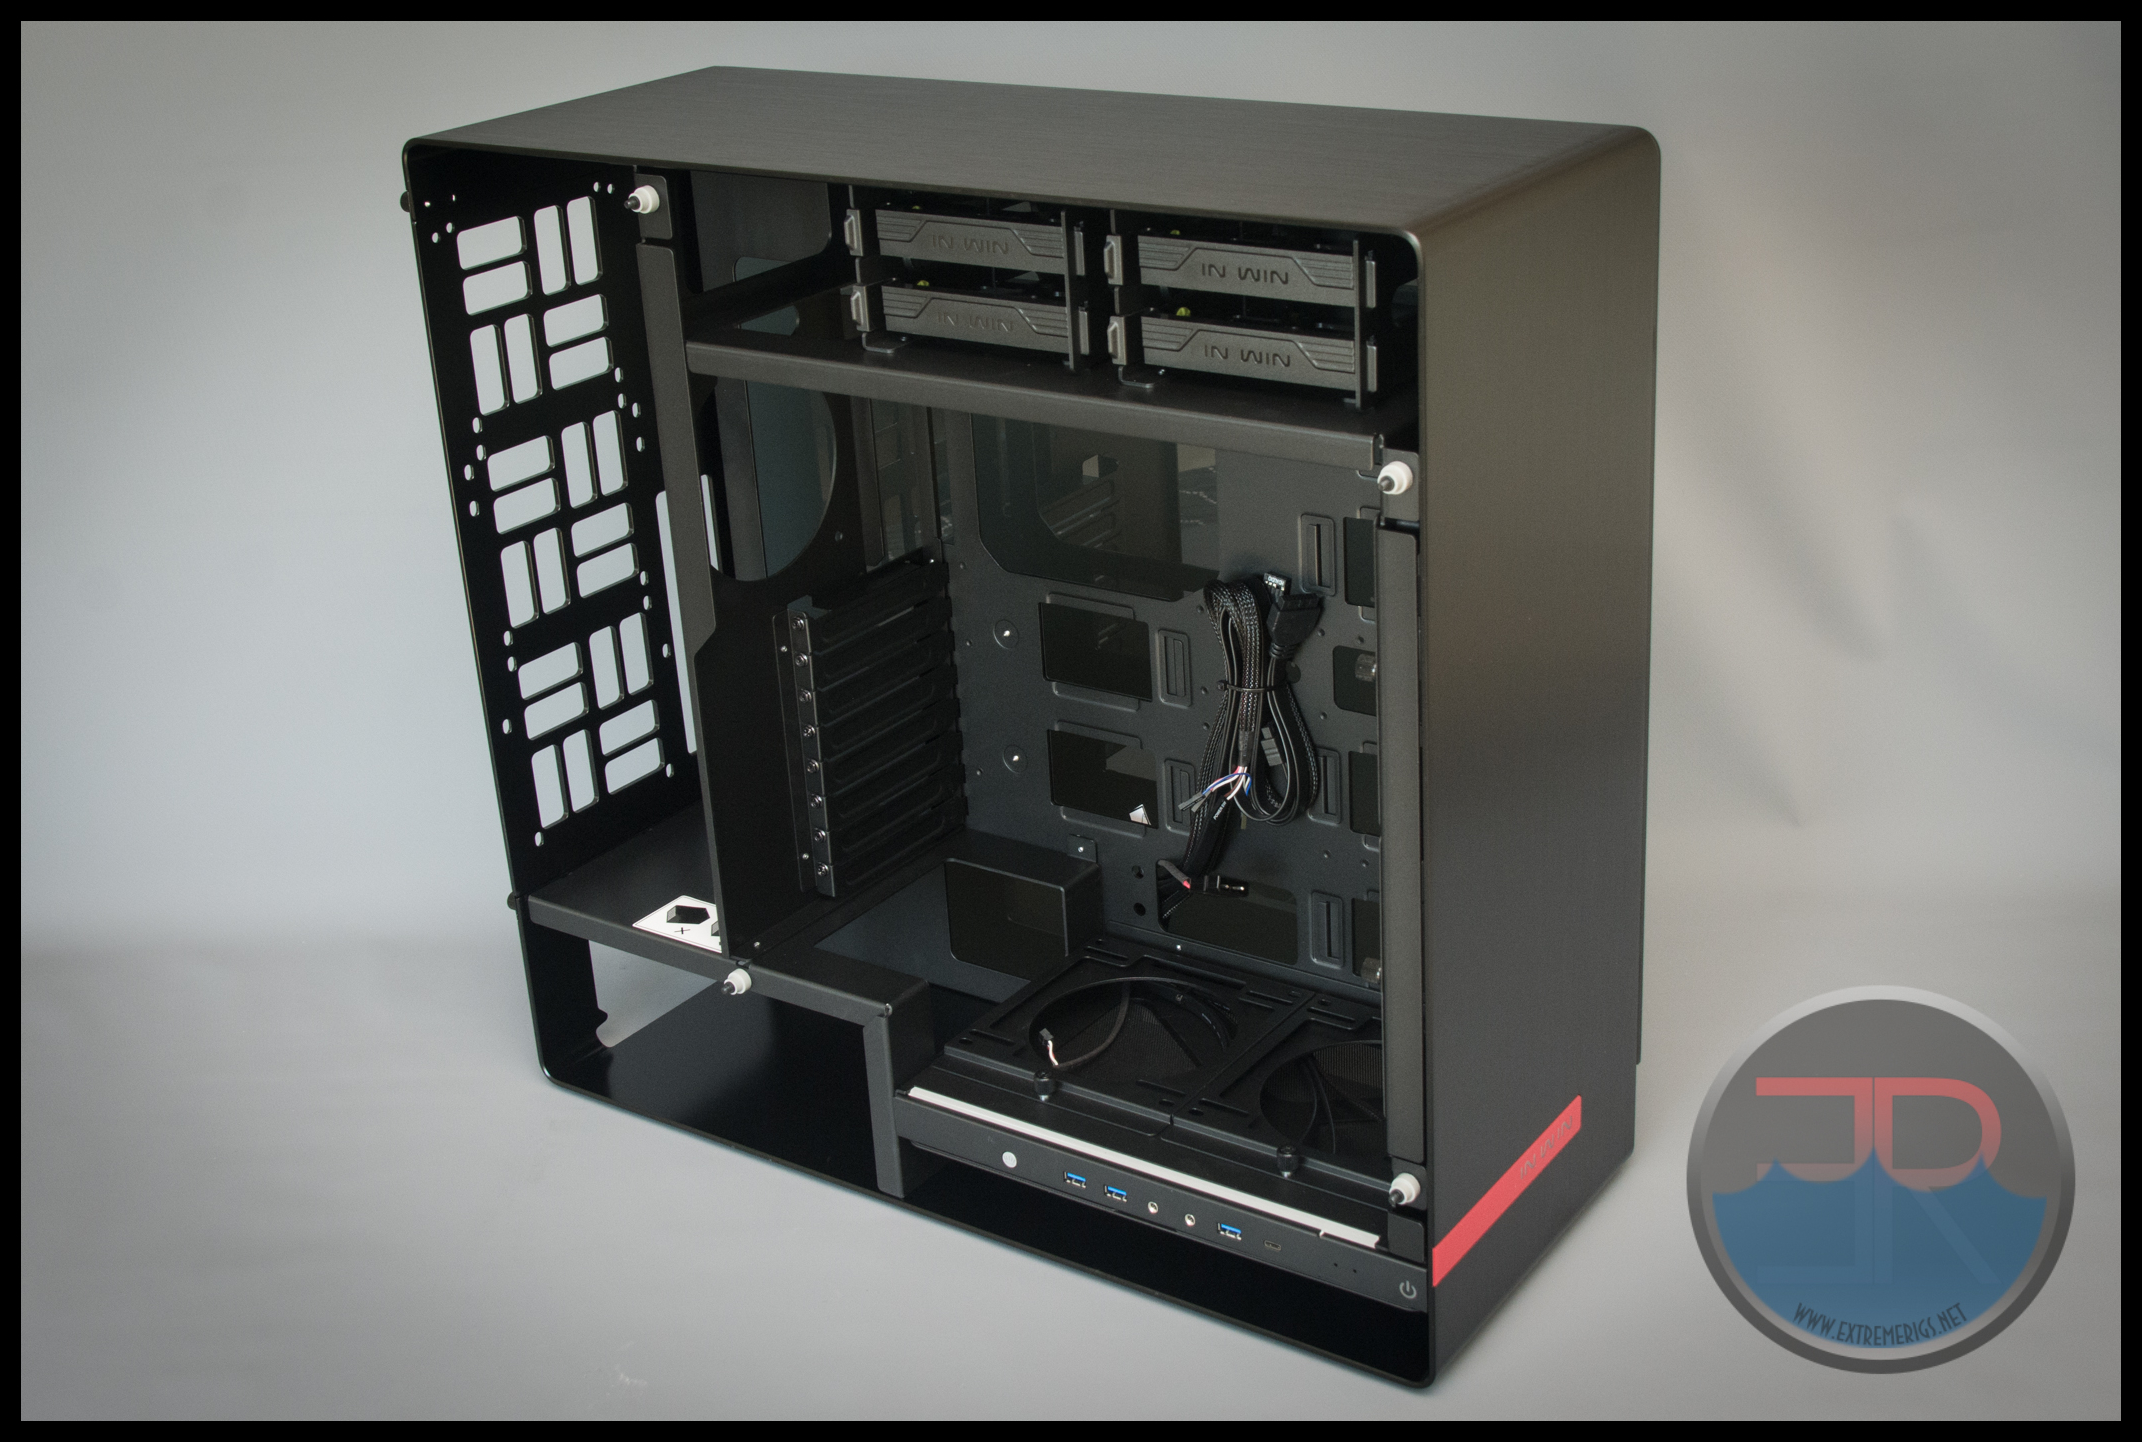
So here’s the overall layout of the case. First off – the motherboard sits in the main central chamber:
 It supports 8 slots which means ATX but not XL-ATX or HPTX – however there is space for wider motherboards like SSI CEB and EATX boards. That 8th slot has a bit of clearance should be OK running a card with a 2.5 slot cooler. However a triple slot cooler is going to run into problems.
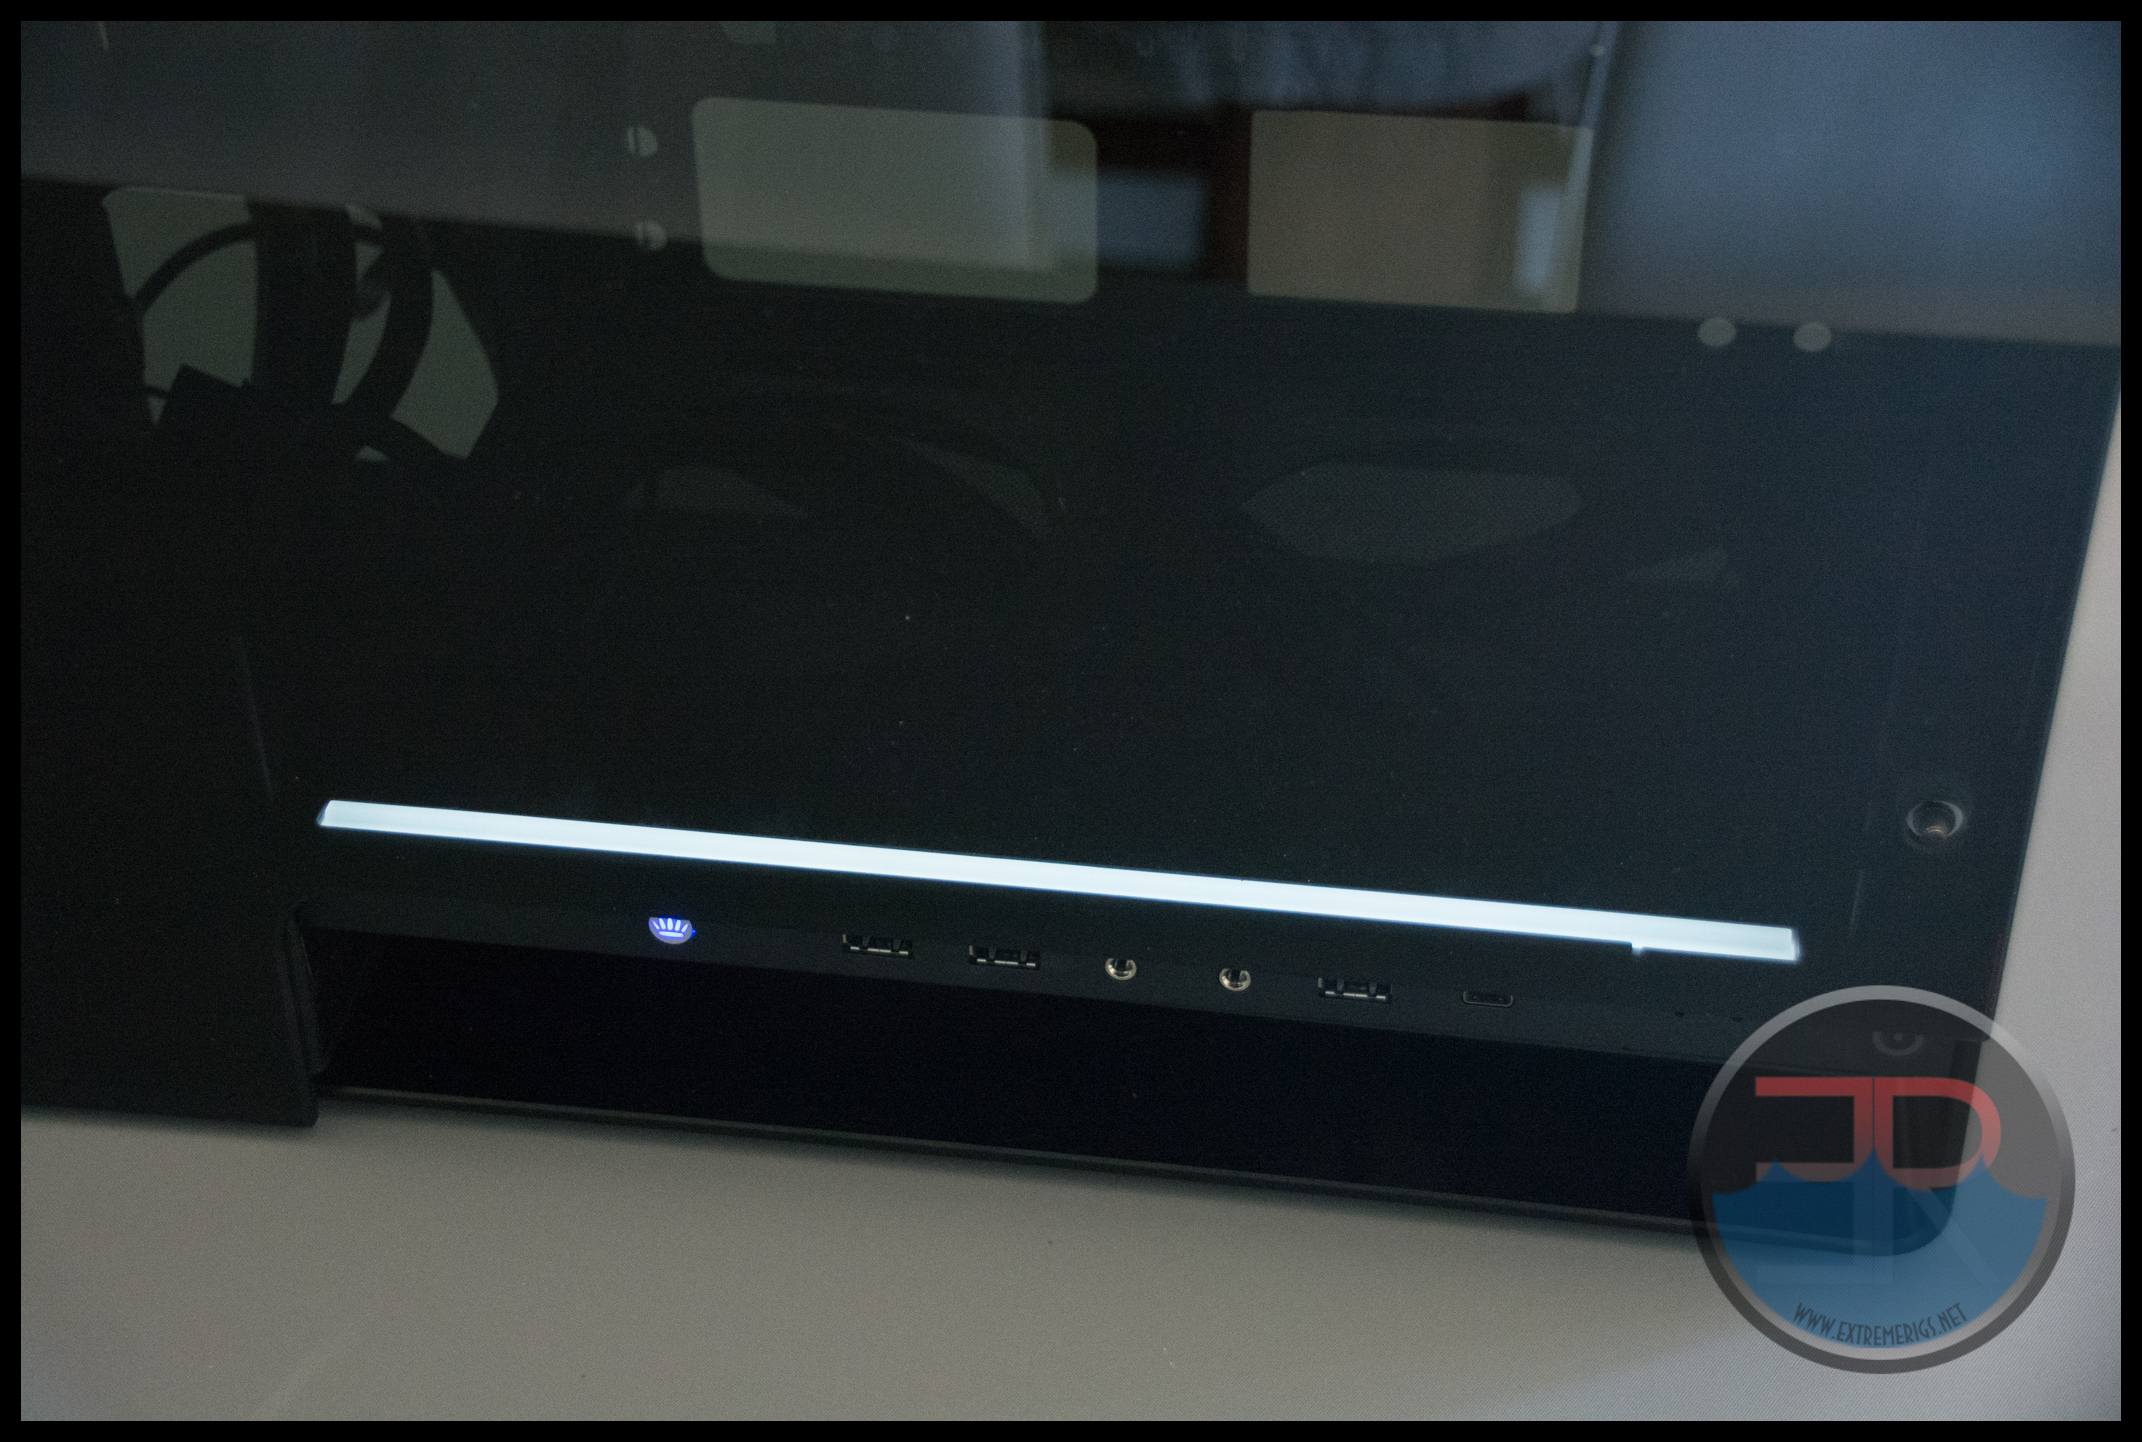
That “grey” strip above the USB ports is a built in LED light strip. This is great, but in our opinion, the case also needs some lighting in the top of the motherboard chamber too.
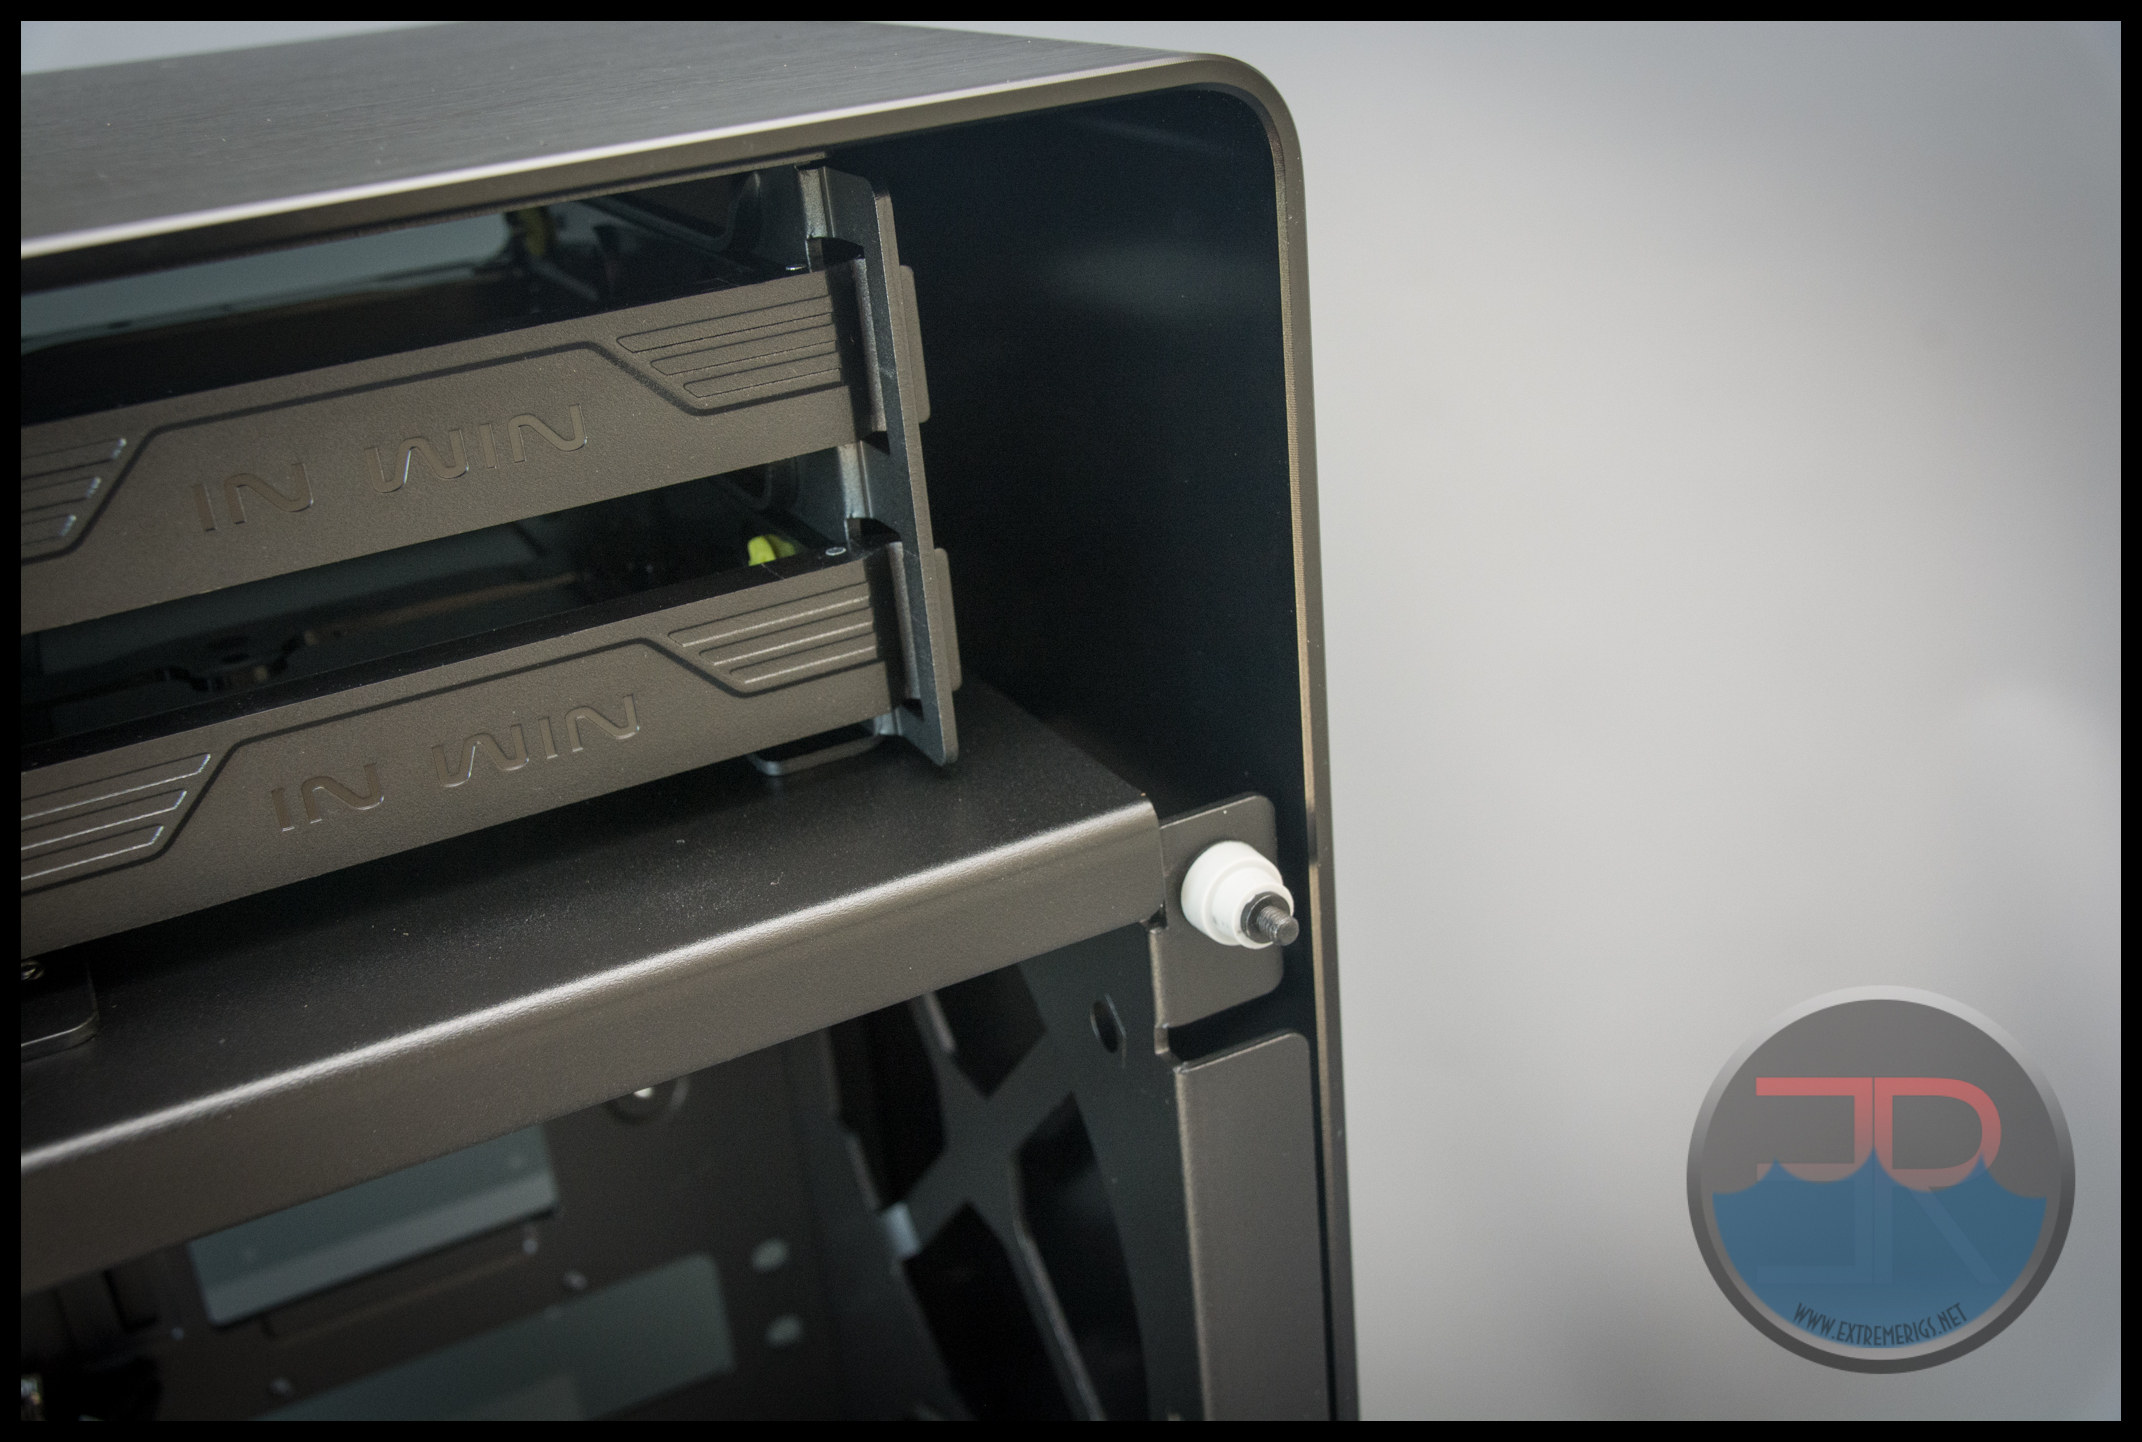
Above the lighting strips are two quick release fan/radiator mounts. A single thumbscrew secures each:
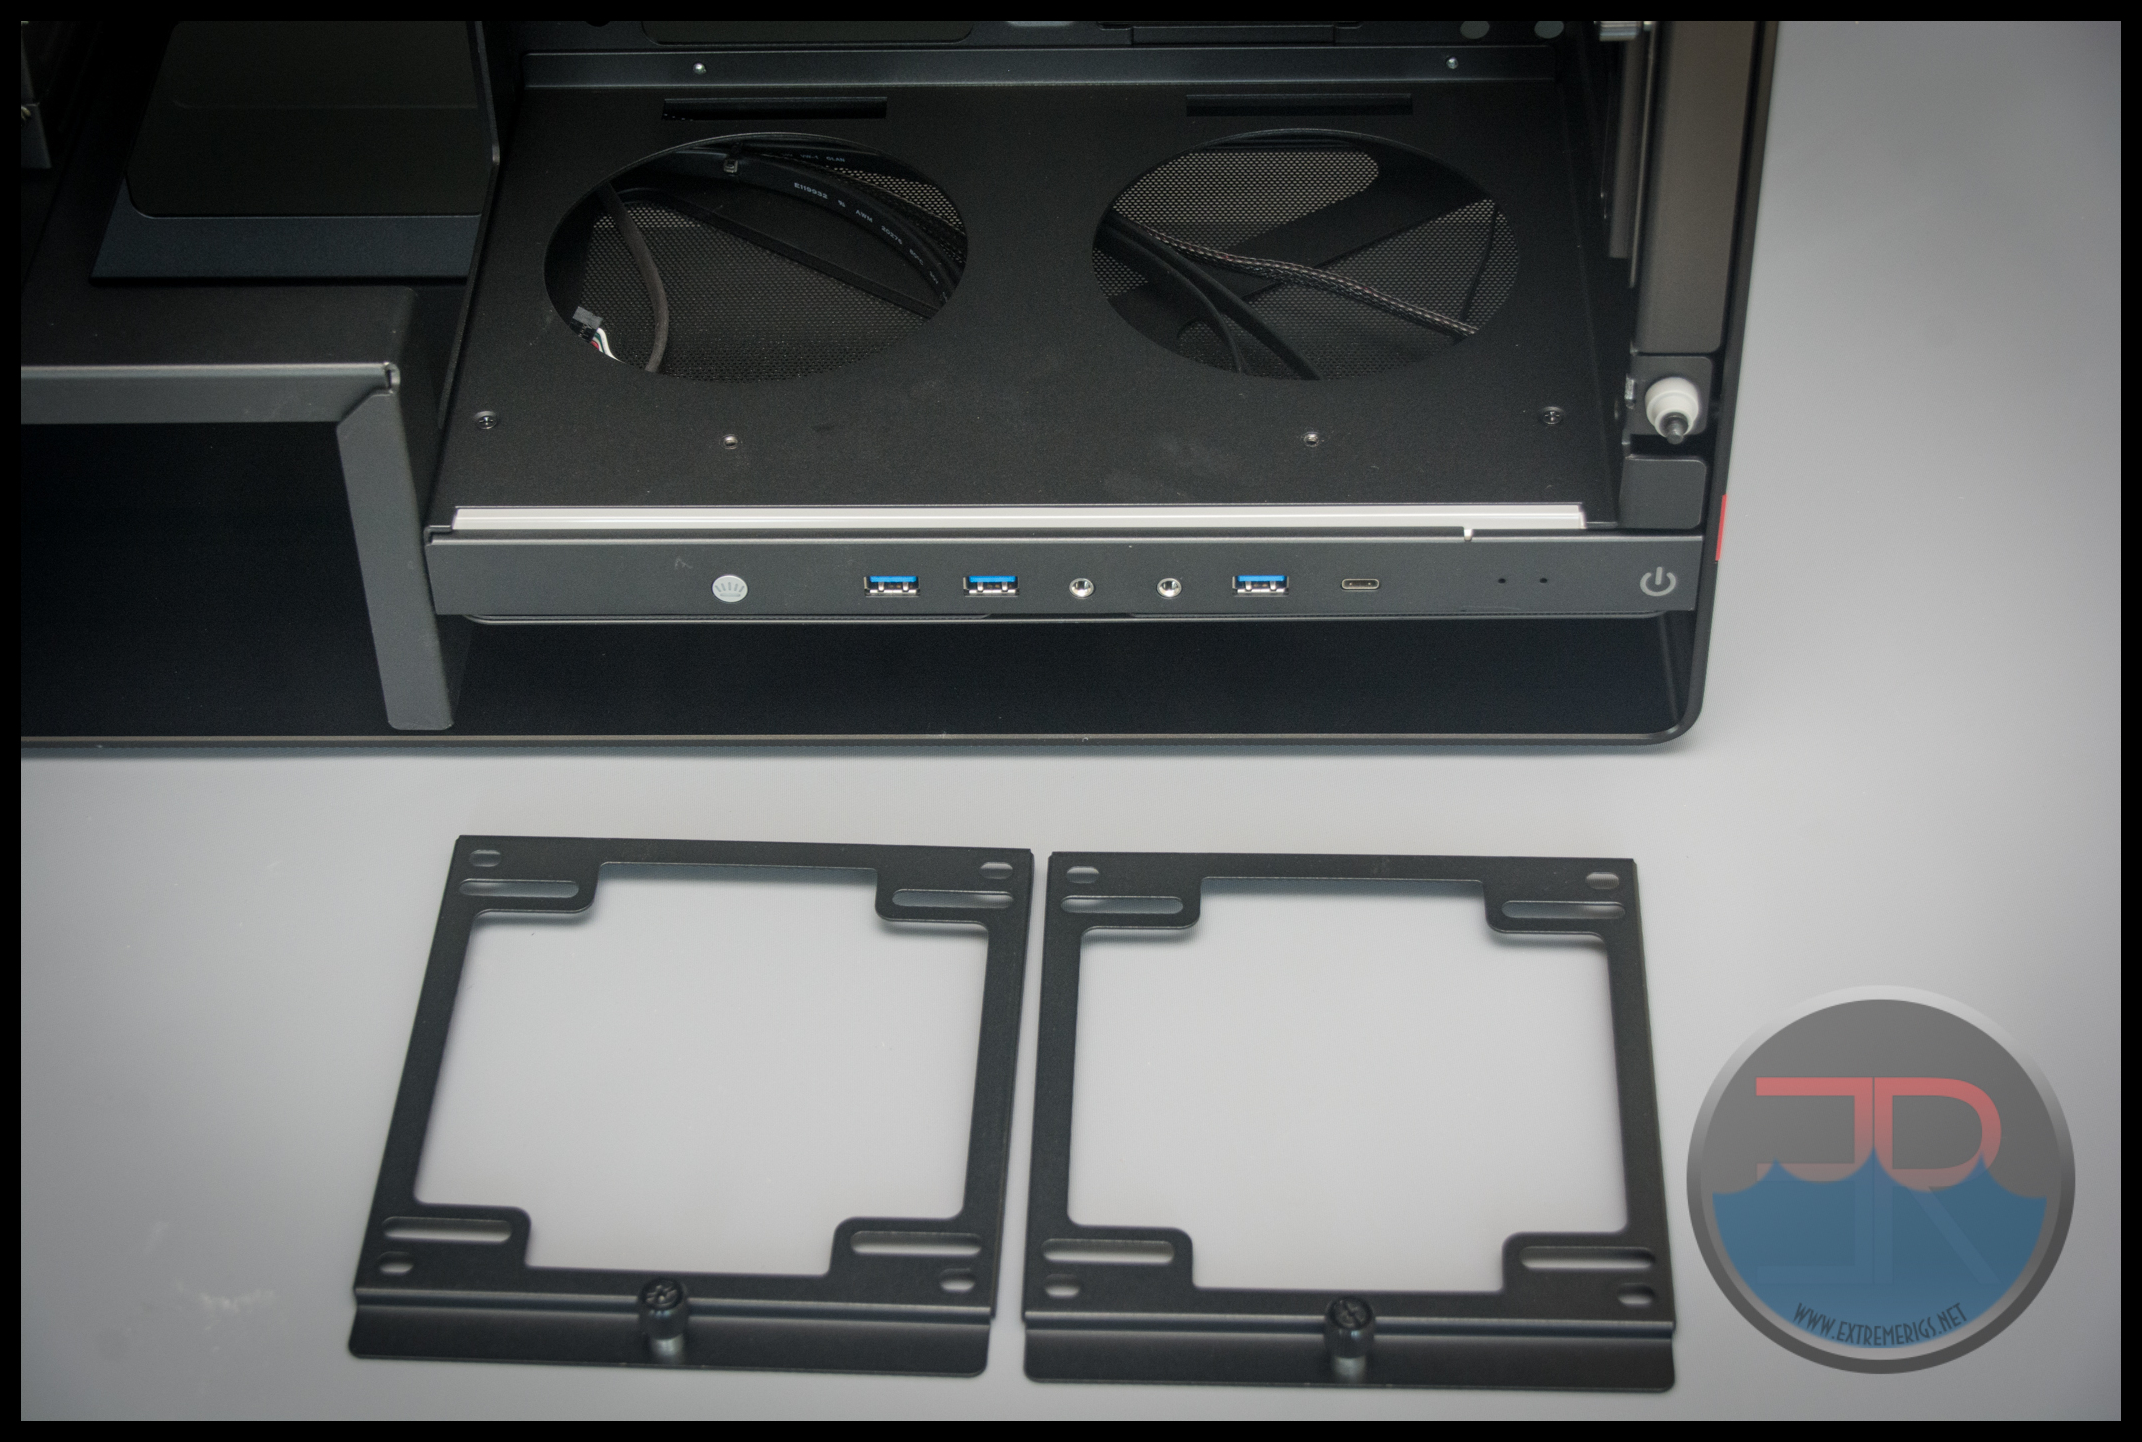
Each mount supports 140 and 120mm fans. However you will not fit a 280mm radiator here, only a 240mm.
Through those fan hole cutouts you can see the IO cables as well as the magnetic dust filter which can easily be pulled out:
The magnets are really nice and strong so once “stuck” it really isn’t going anywhere.
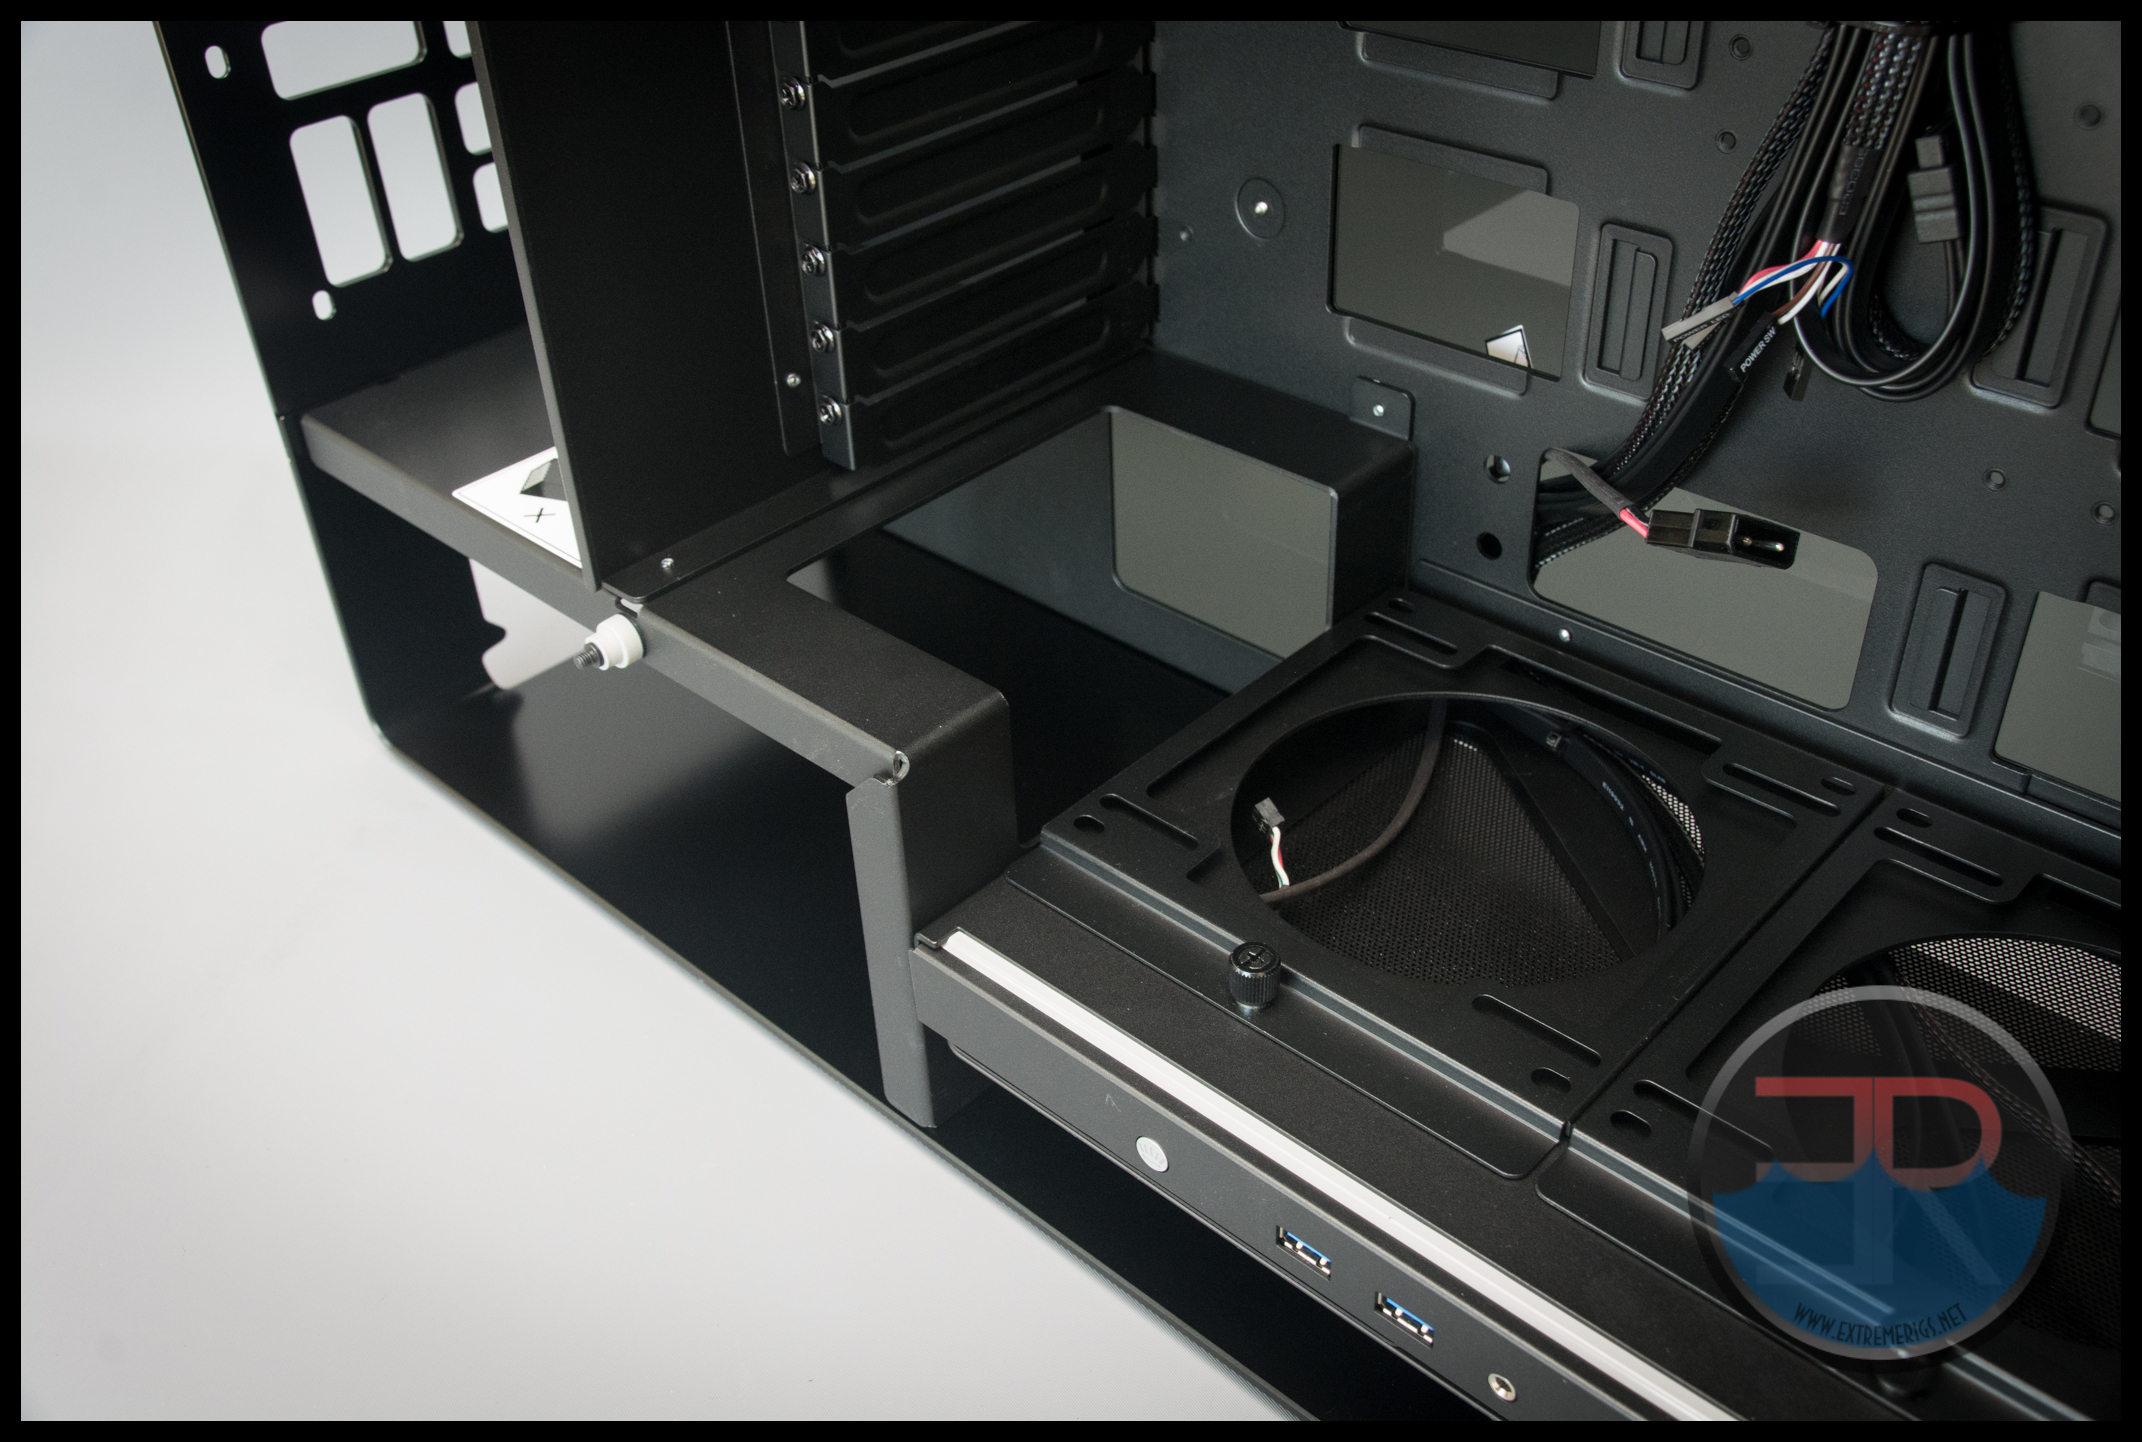
In that rear cutout lives the power supply. It’s nice that there are cable (and finger) routing channels for the PSU cables both from the sides but also more directly.
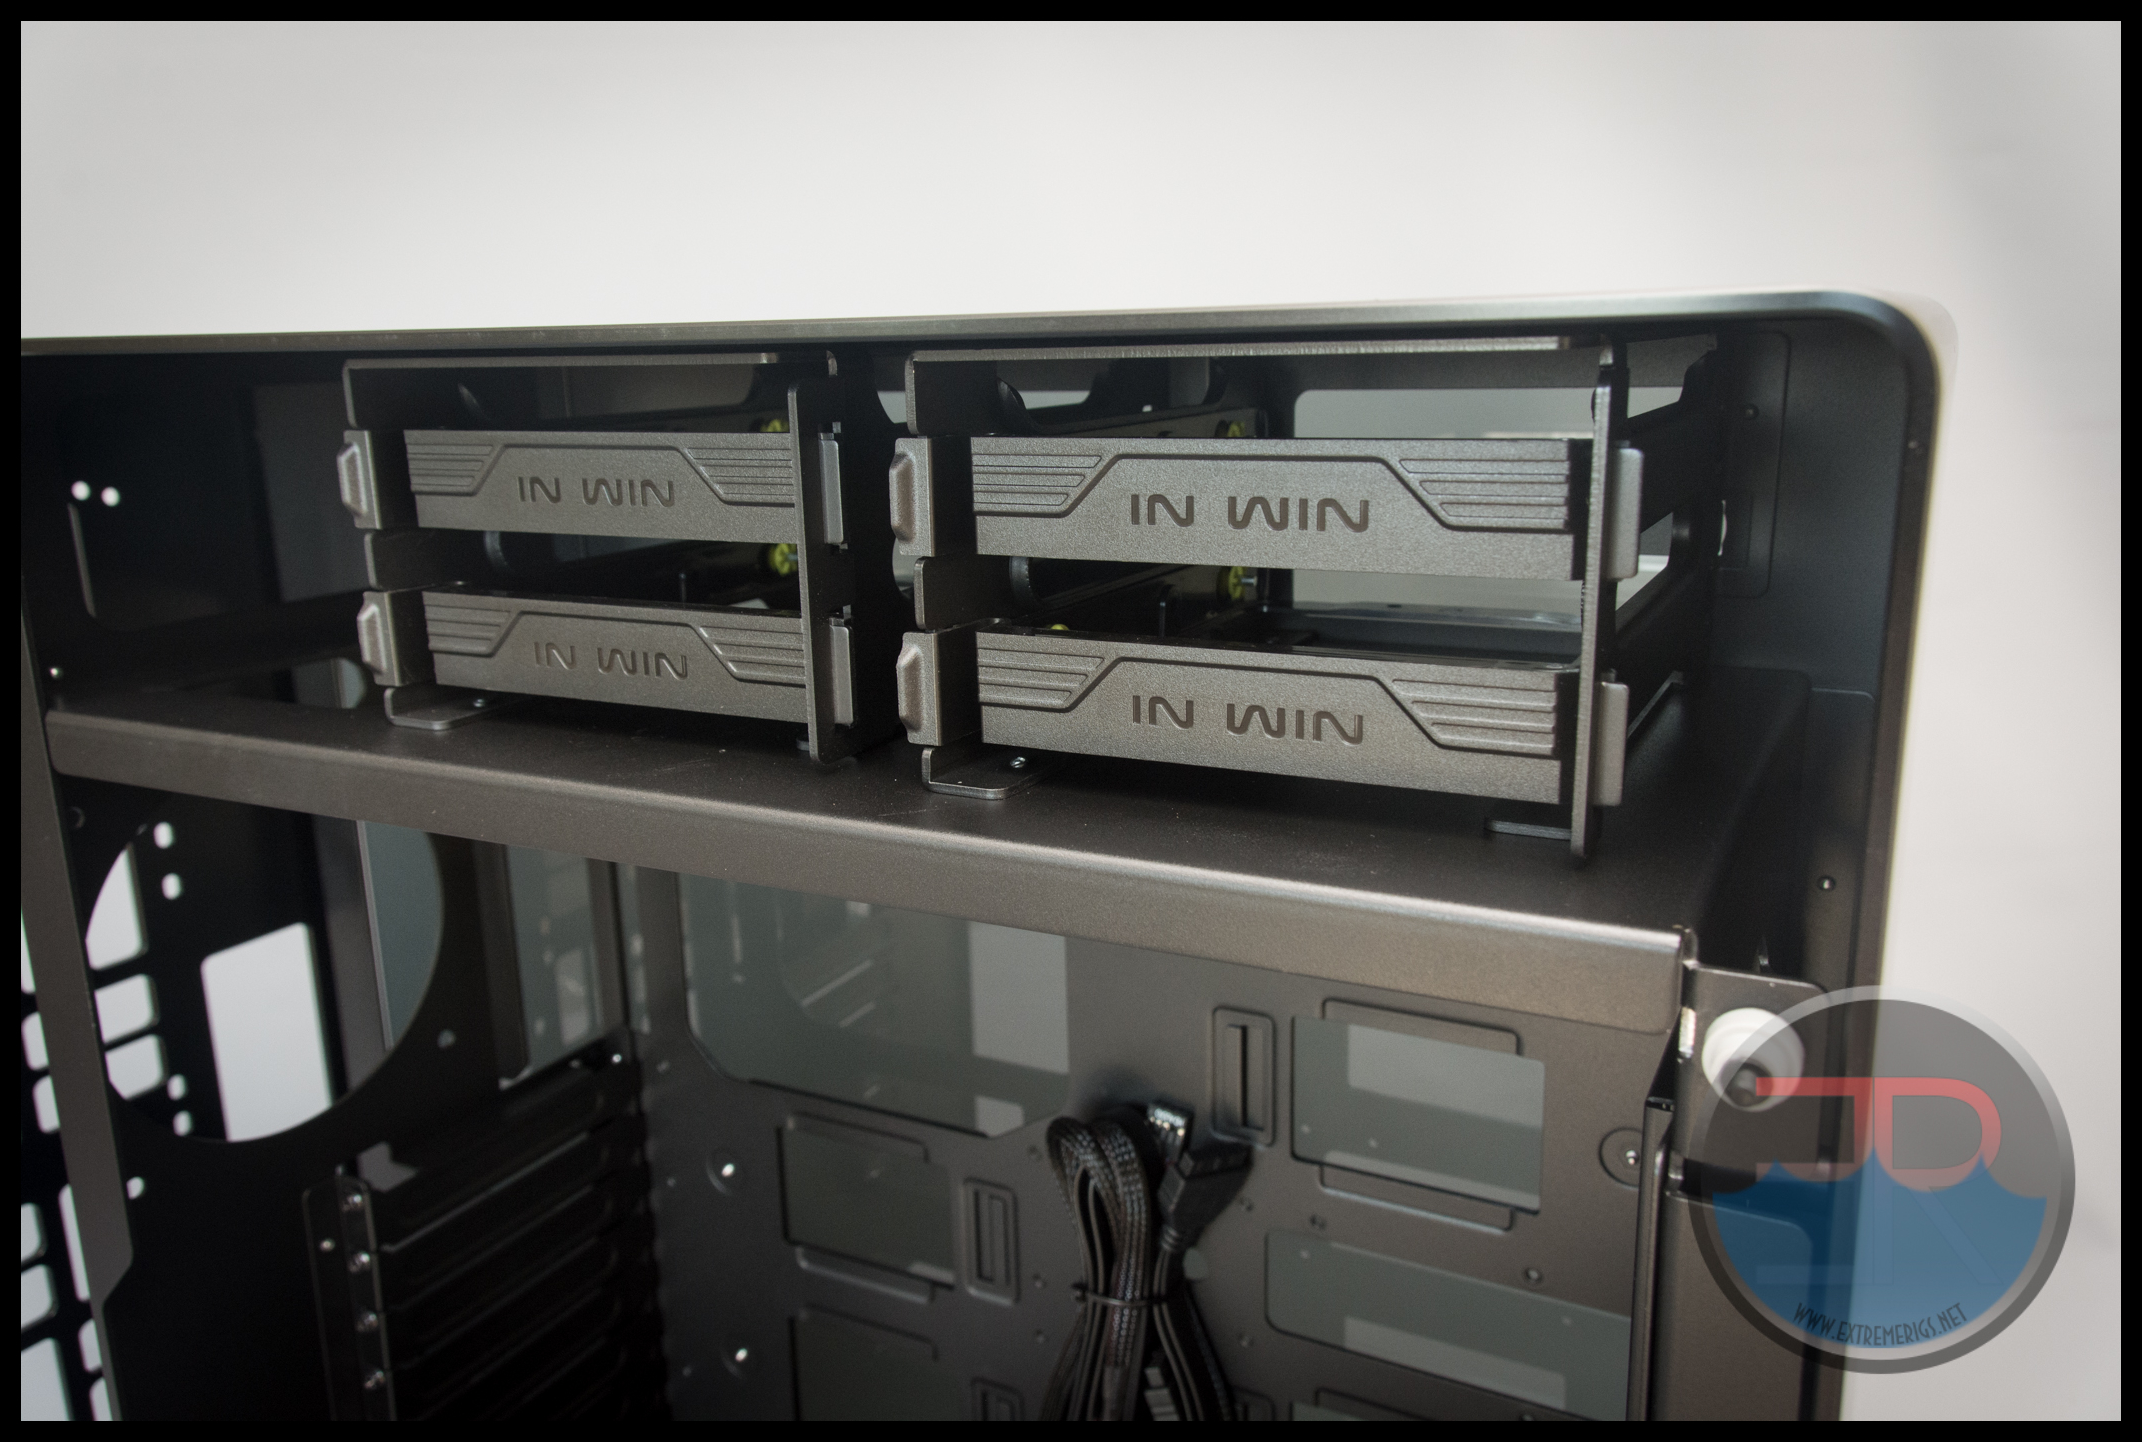
Above the motherboard chamber is a HDD mounting area:

We have made it no secret that we hate mechanical hard drives. They are big, heavy, old technology. These days you can get a 1TB SSD for $250-300. So in our ‘extreme’ opinion hard drives should only be allowed to live in a NAS. Therefore for some users these hard drive bays are a waste of space. In fact most mods that you see with this case remove them and we would suggest doing the same. Indeed it would be an awfully nice place to put a reservoir or radiator (if the top was modded for airflow).
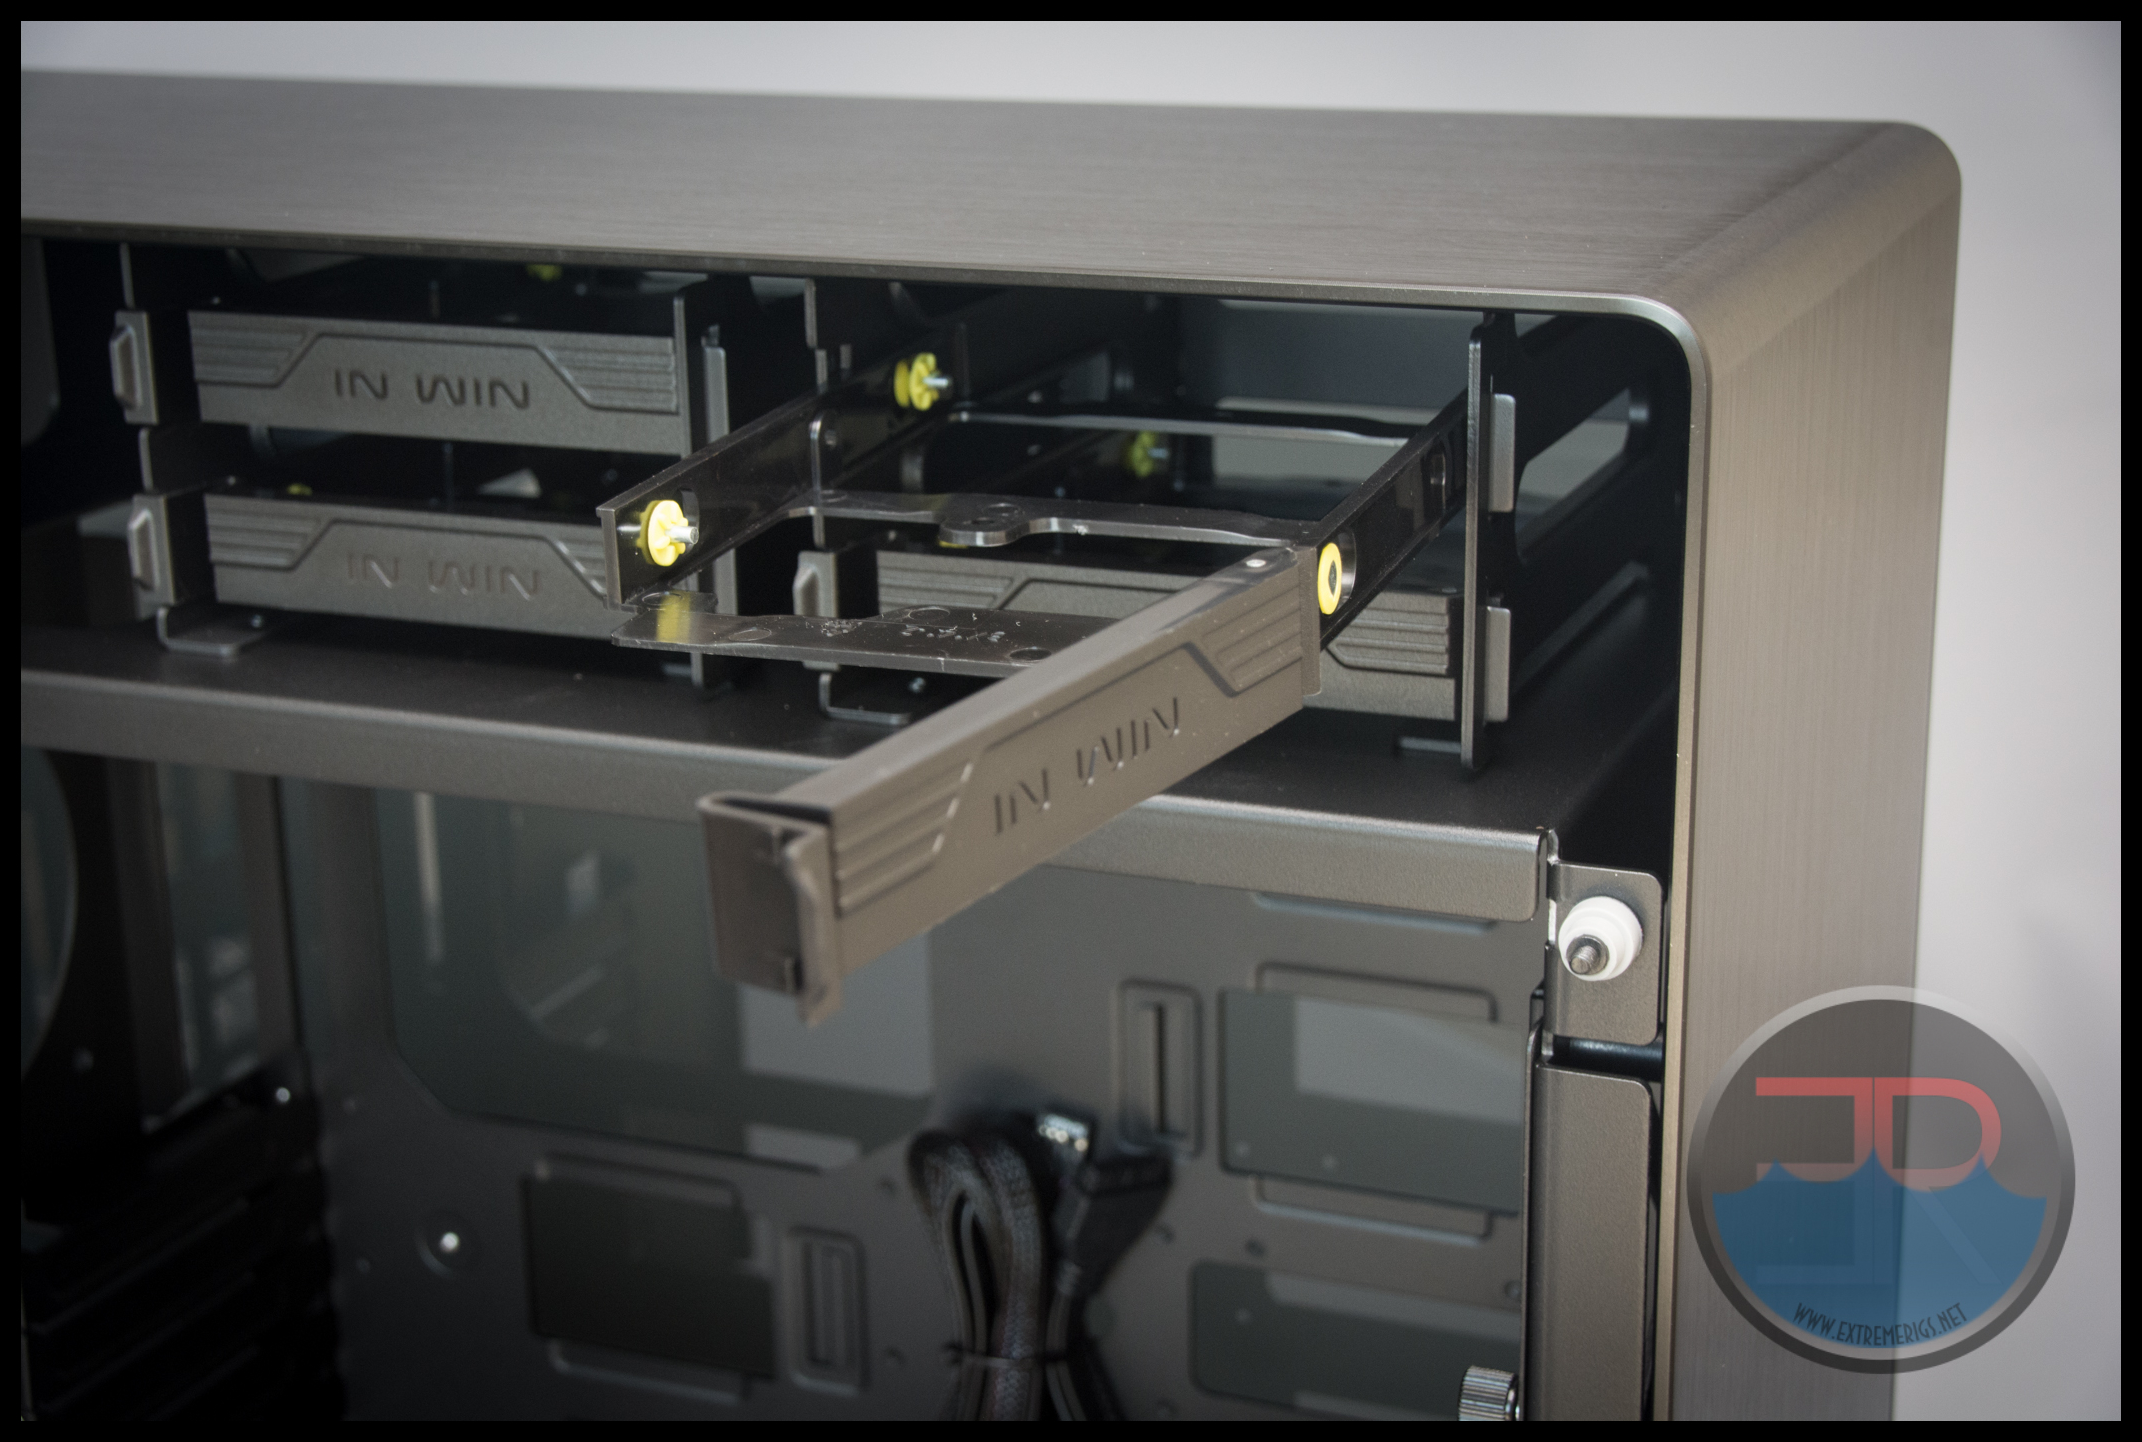
The HDD cages are however In Win’s standard quick release tool free cages. While they are not hotswap type, they are a nice option for those that use HDDs.
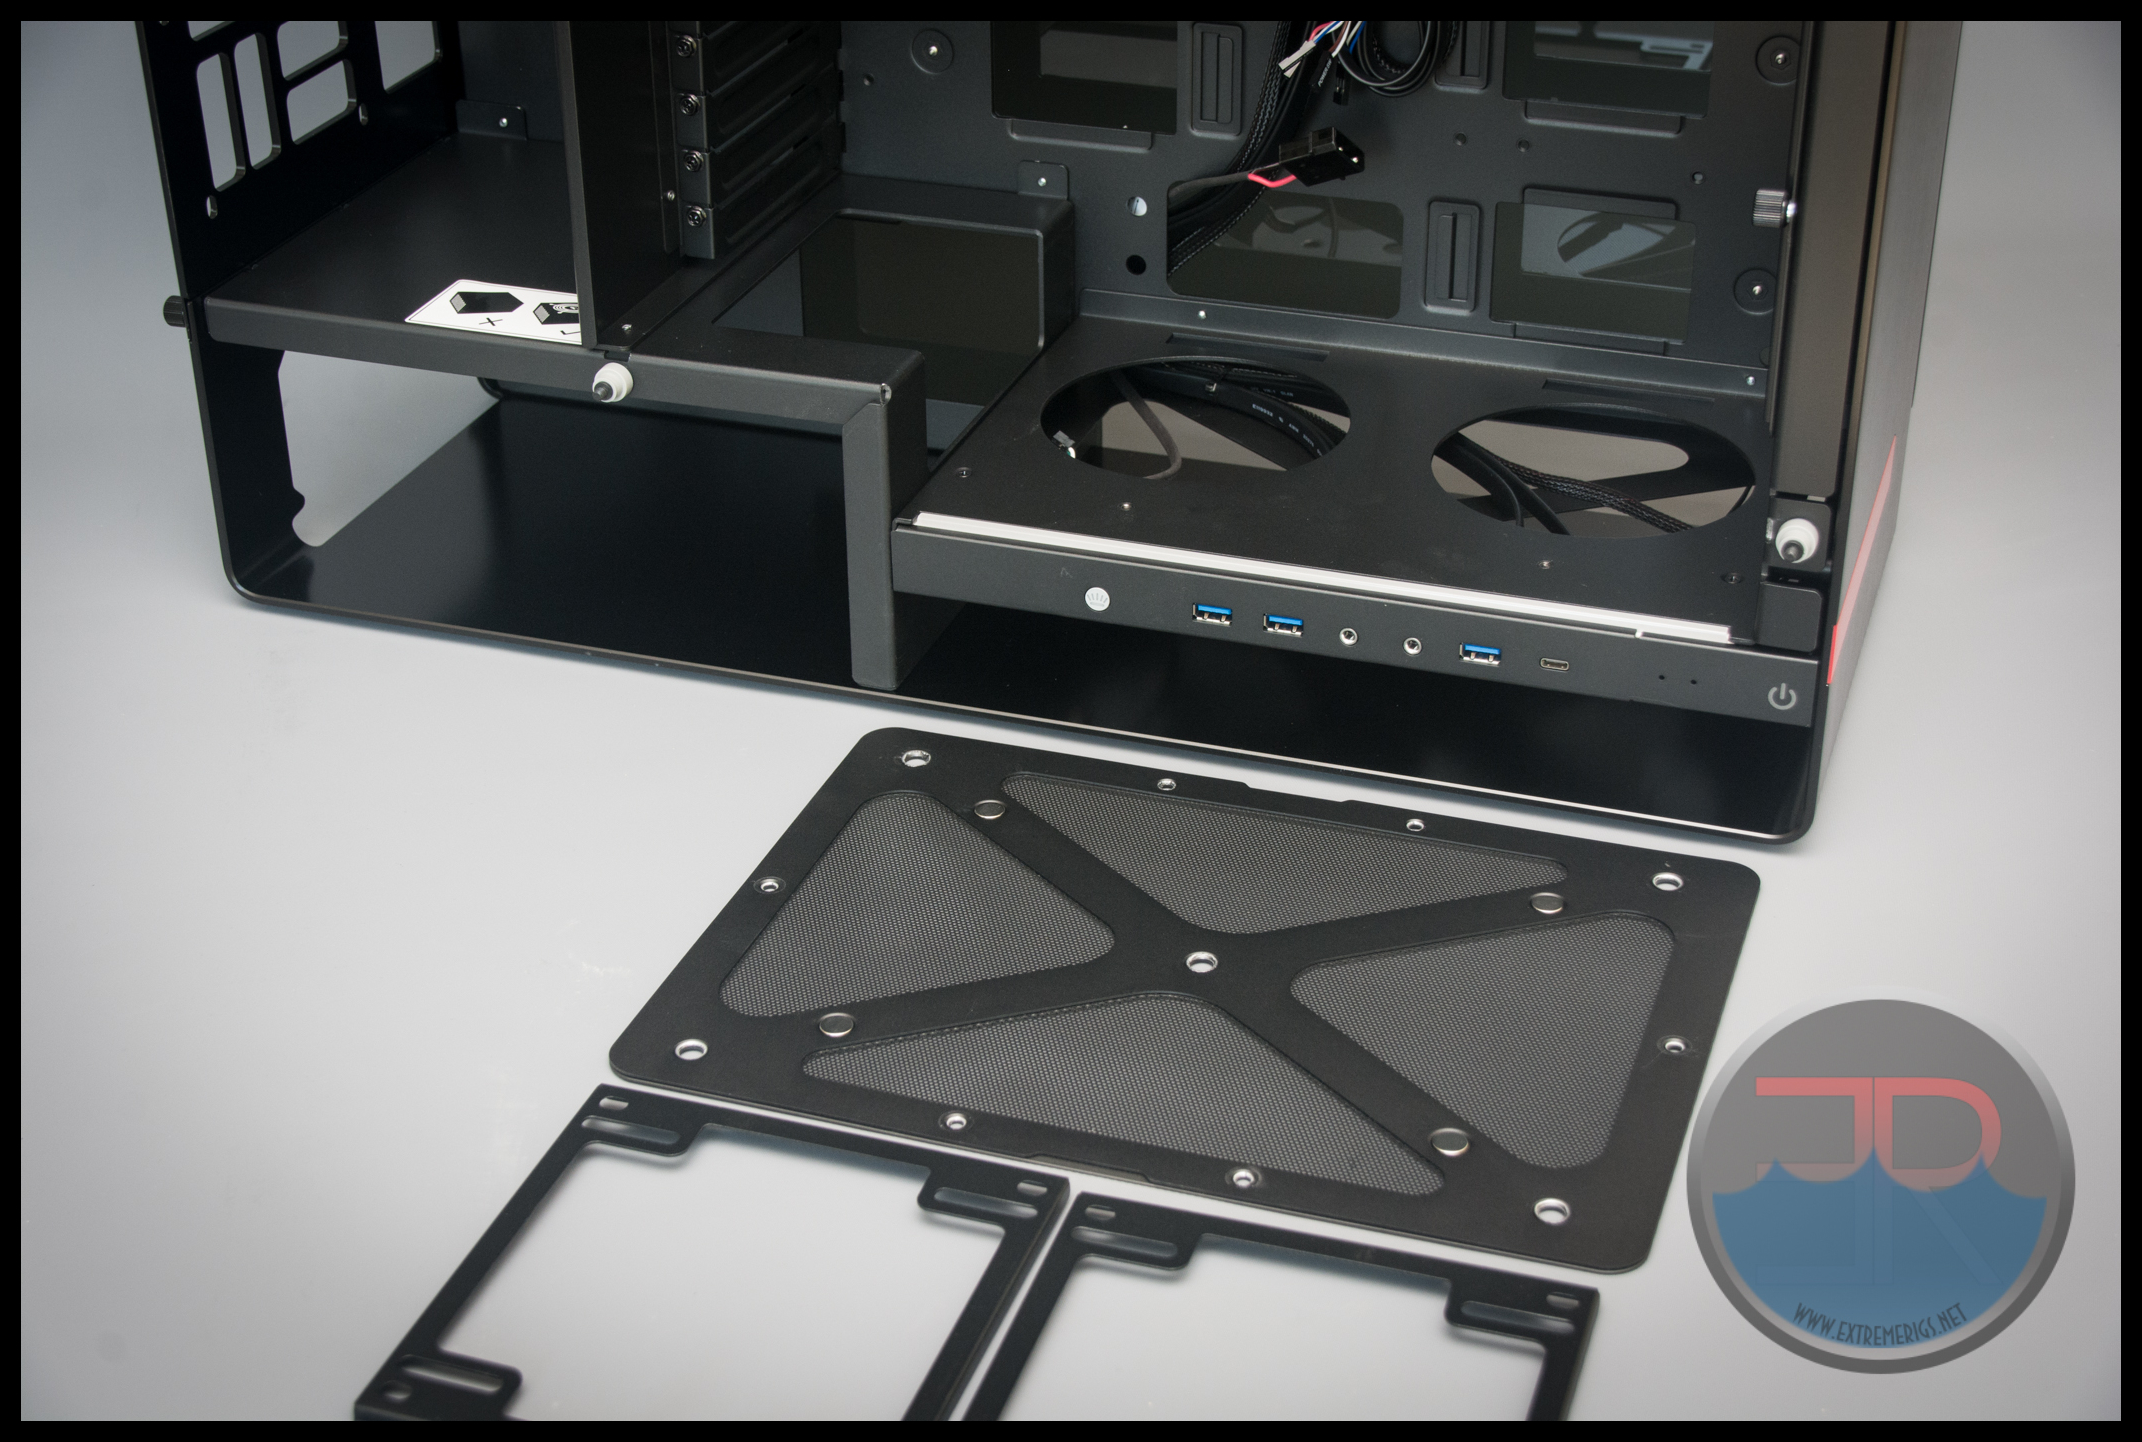
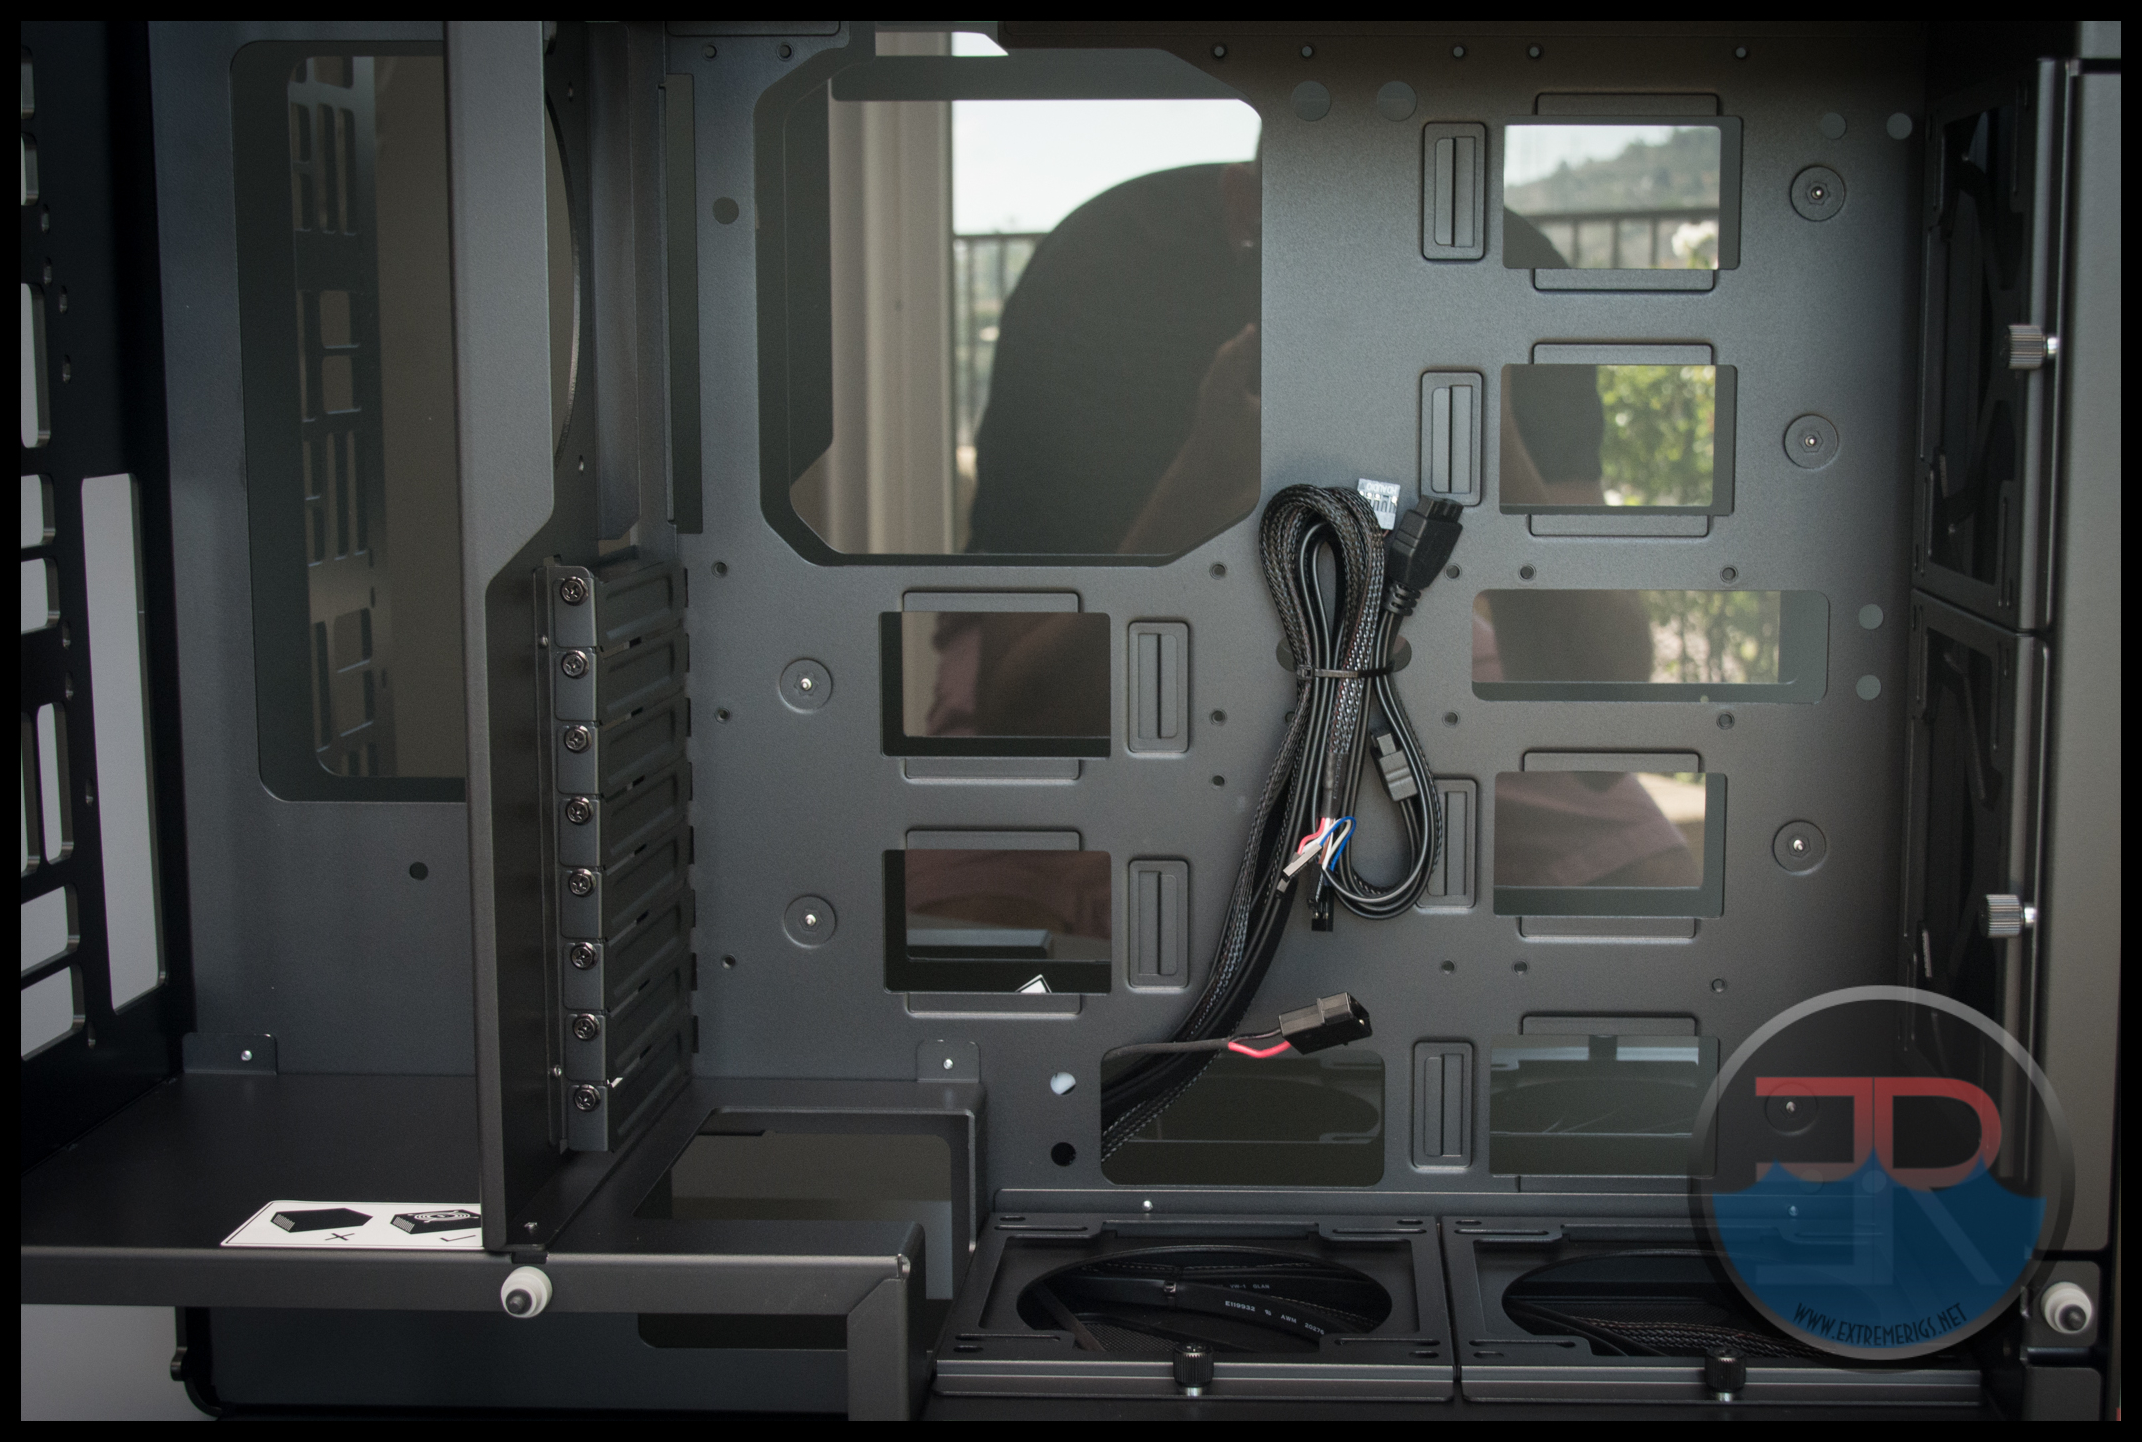
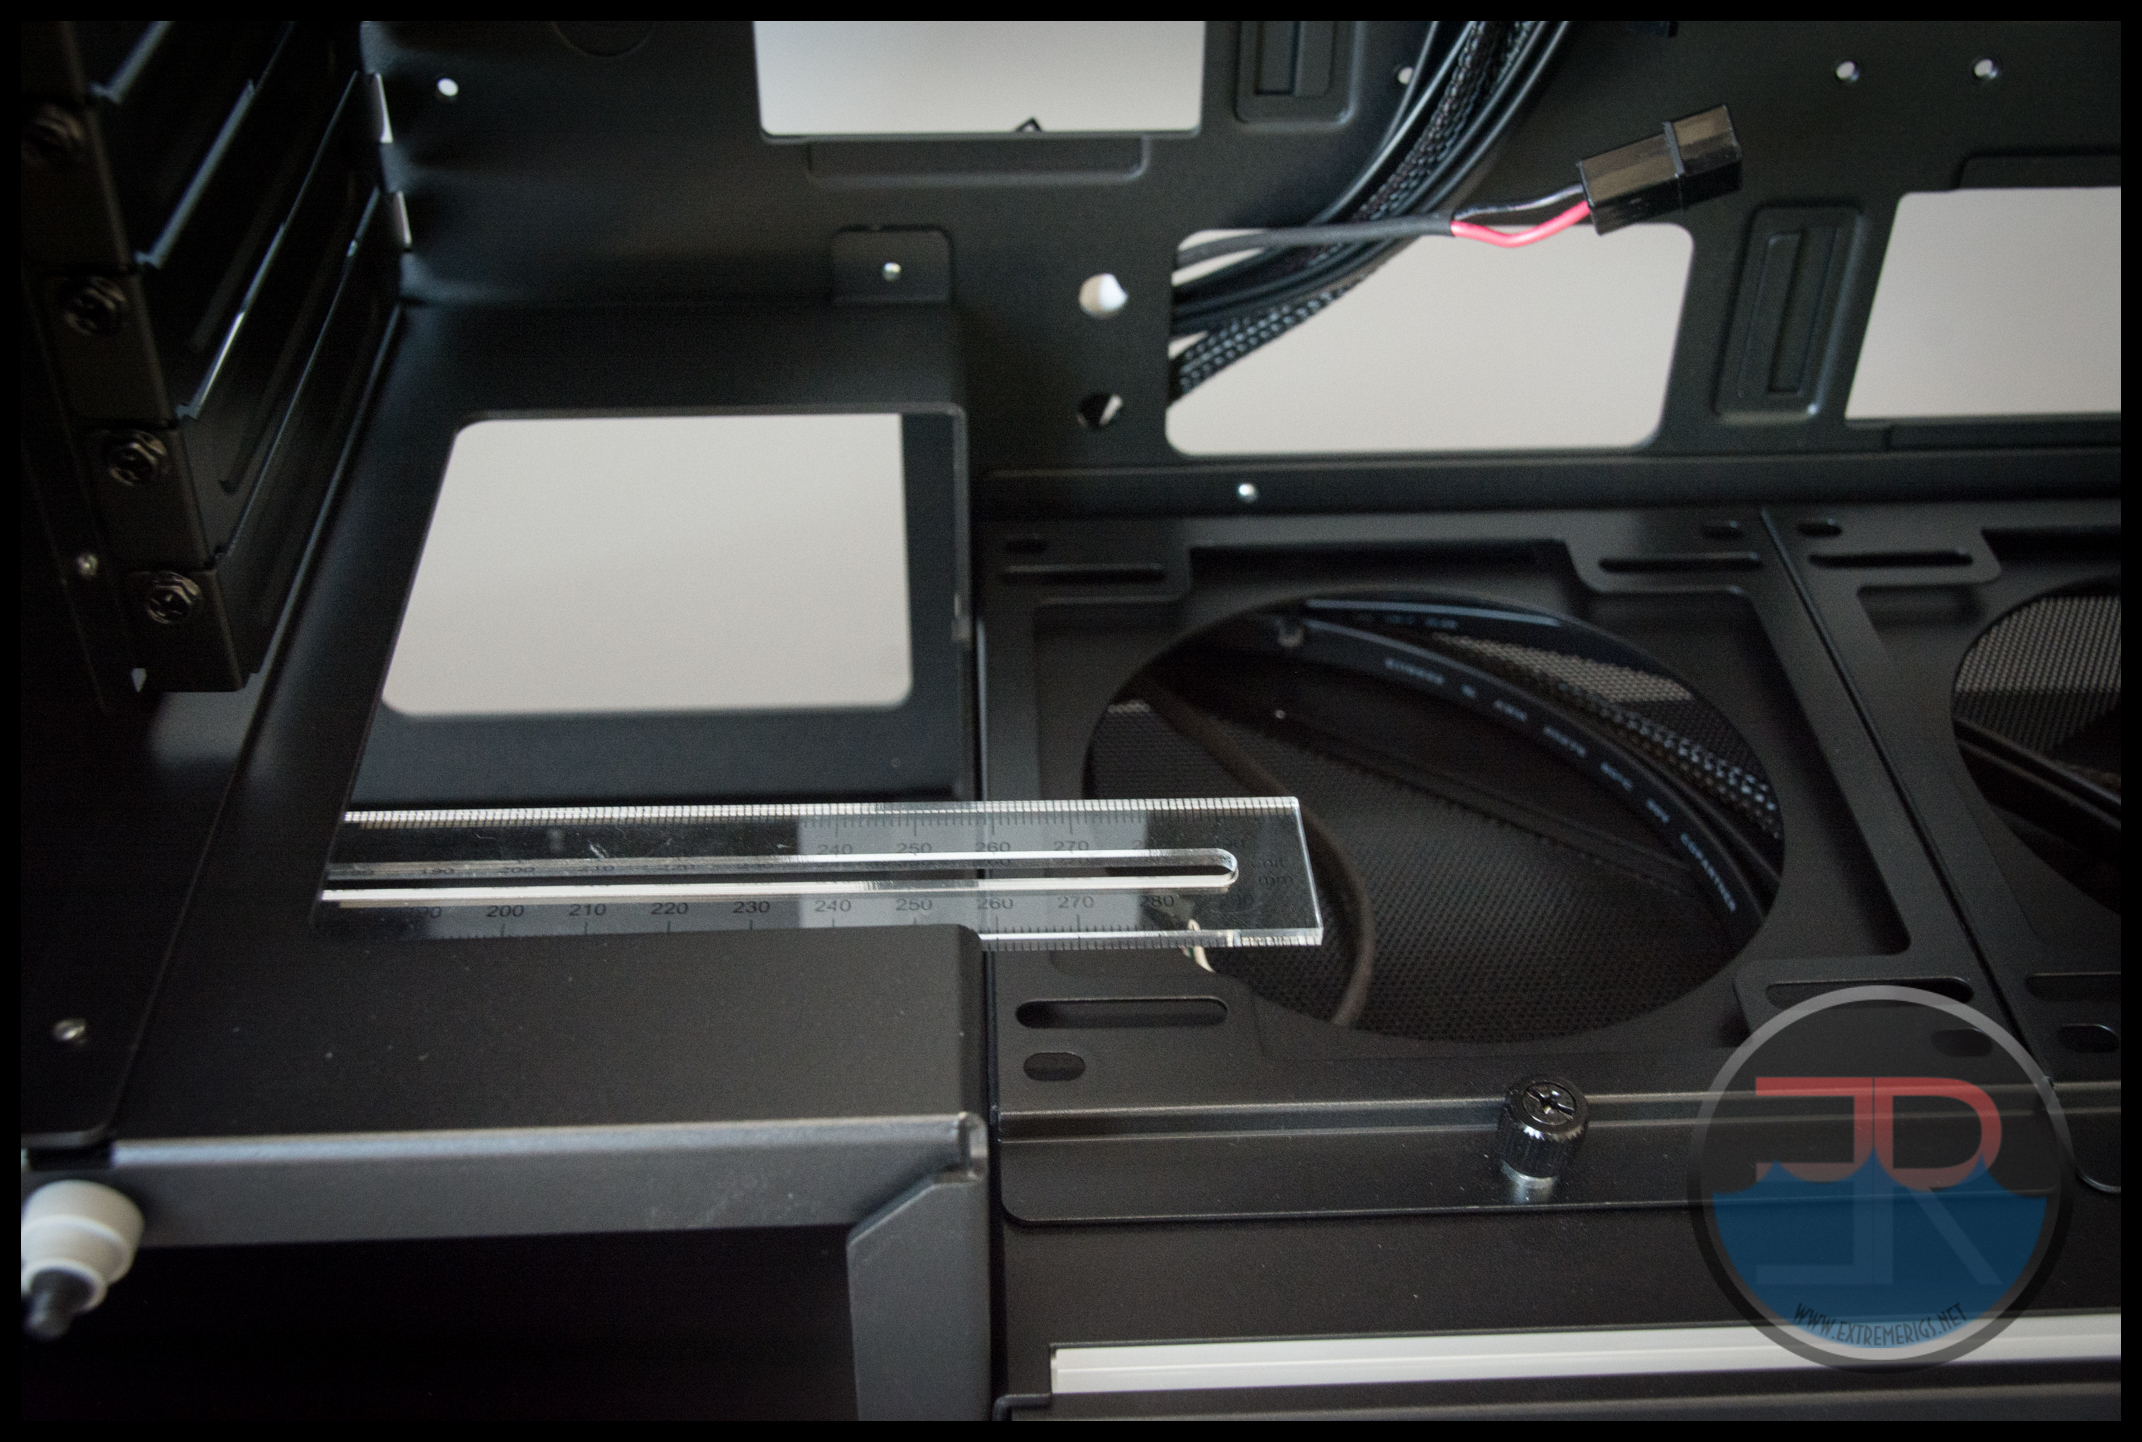
At the front of the case are two more quick release fan mounts. Once removed these show a larger fan opening – clearly designed for 280/240 radiators.
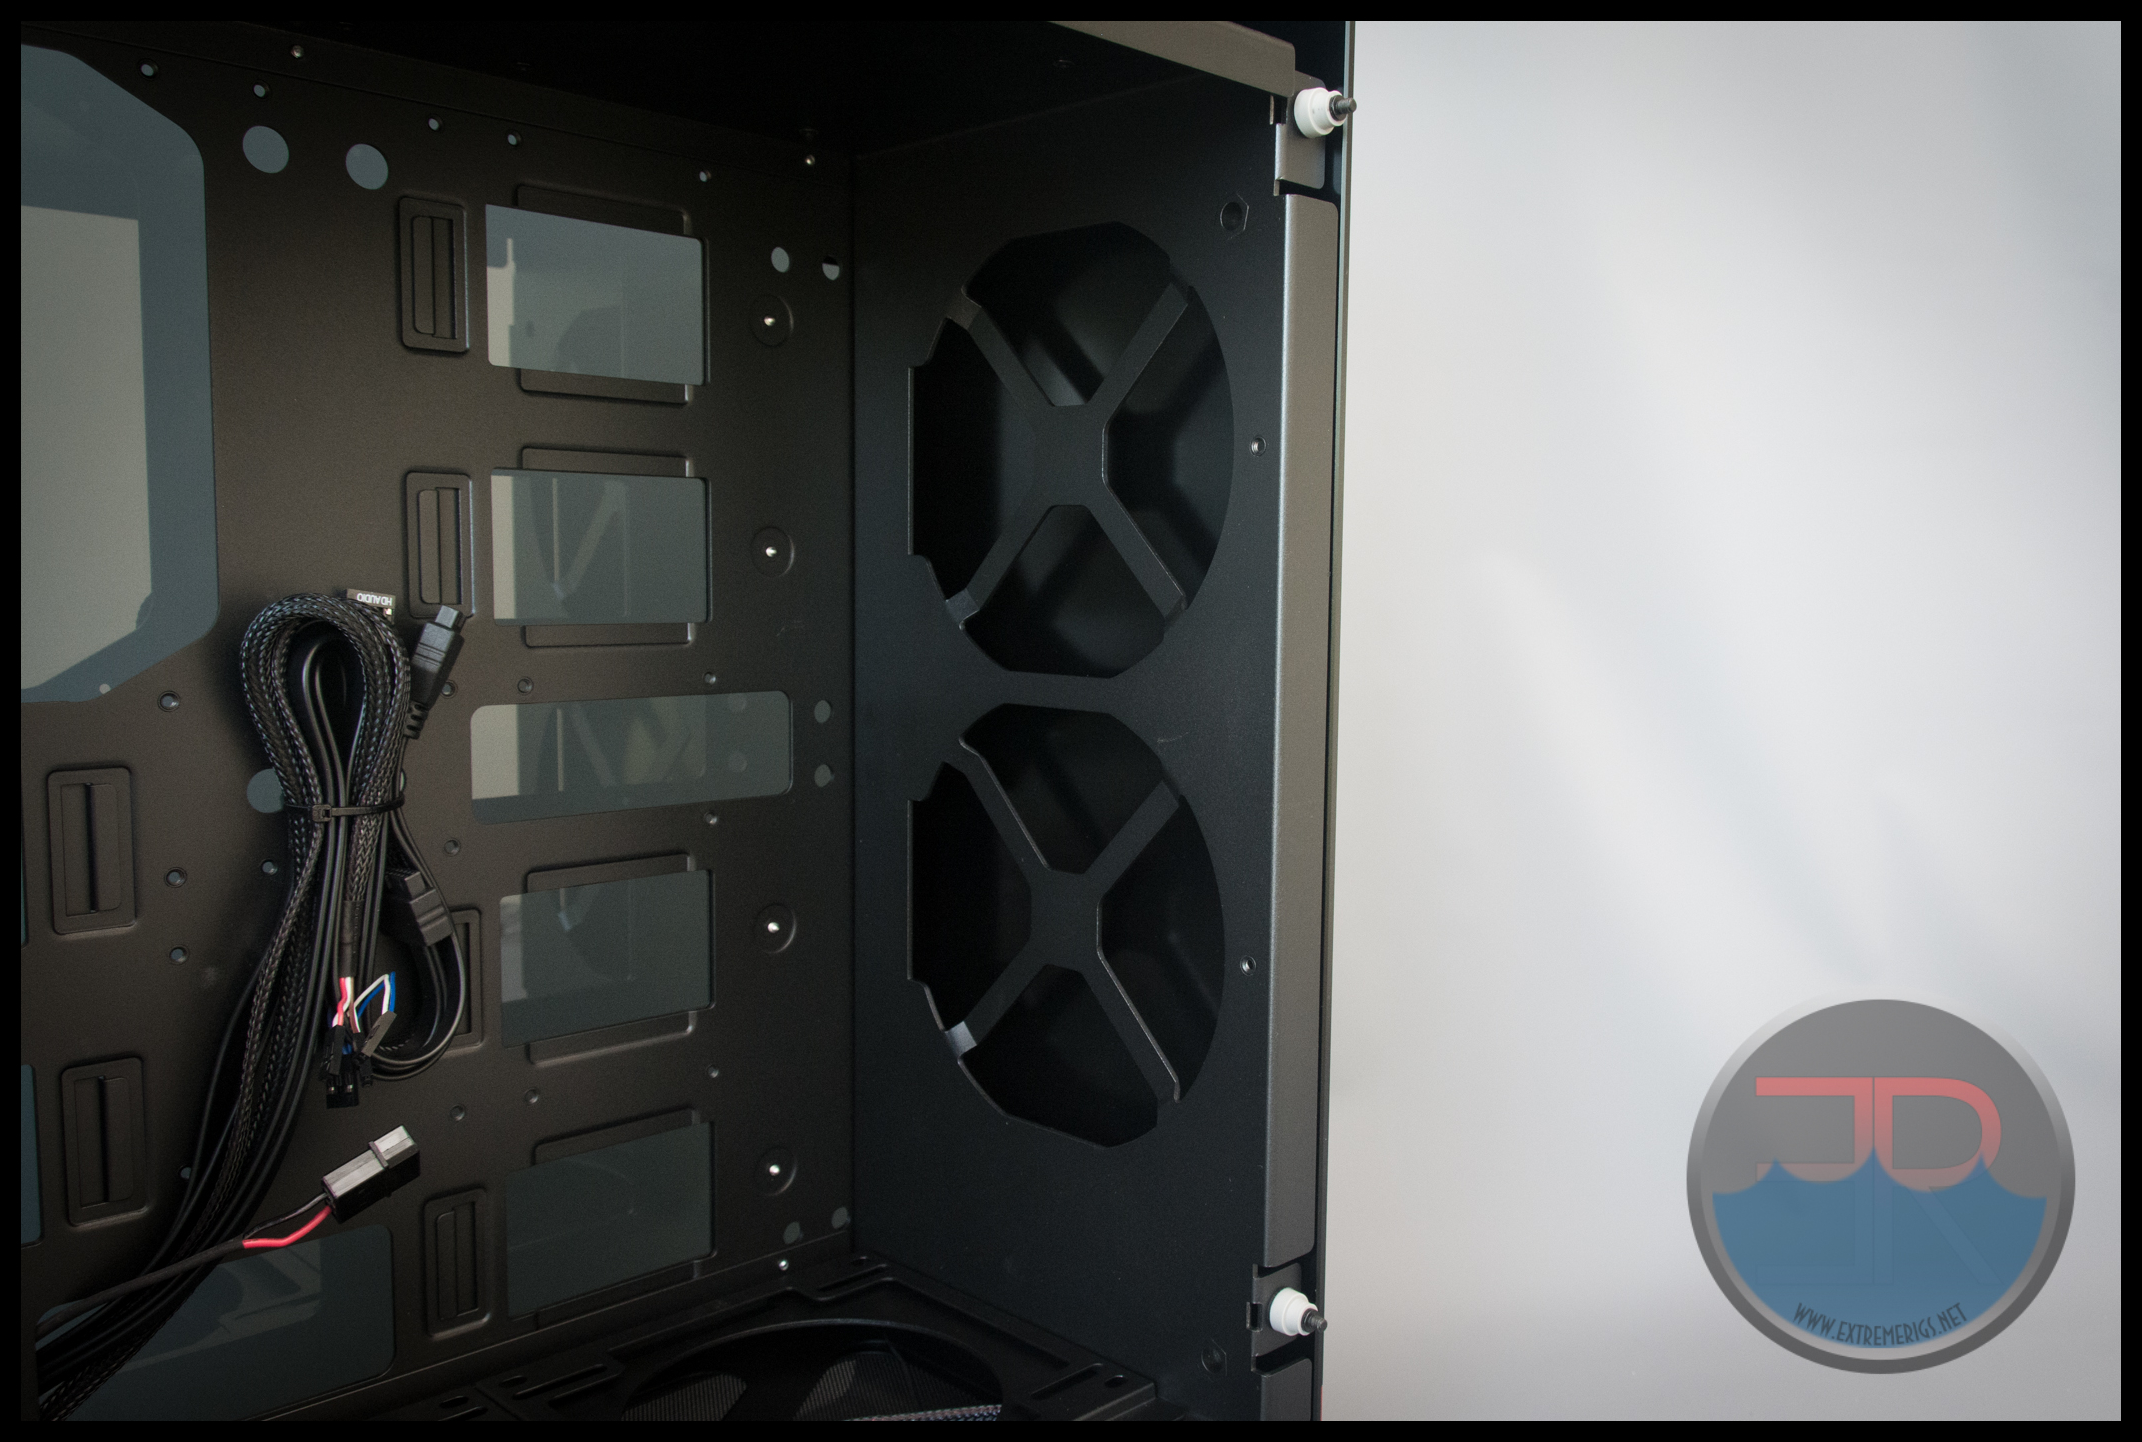
However you’ll notice that there is no side airflow into this section. The only air comes from the roof chamber, and from the bottom air intake. The air coming from the roof chamber of course will be warm:
This means that a radiator mounted to the front will not perform well at all. Instead it will perform similarly to the radiator mount in the 805 case which really struggled to get any cool air at all. We would suggest simply mounting fans or pumps/reservoirs here and instead using a bottom mounted 240 for an intake radiator.
The rear of the motherboard chamber also as a mounting point for a 120 radiator – and usefully it also has cutouts for tube routing. This is a nice feature, but a surprising one. After all I would assume that anyone buying this case is definitely going to be mounting a radiator in the rear 360/280 mount.
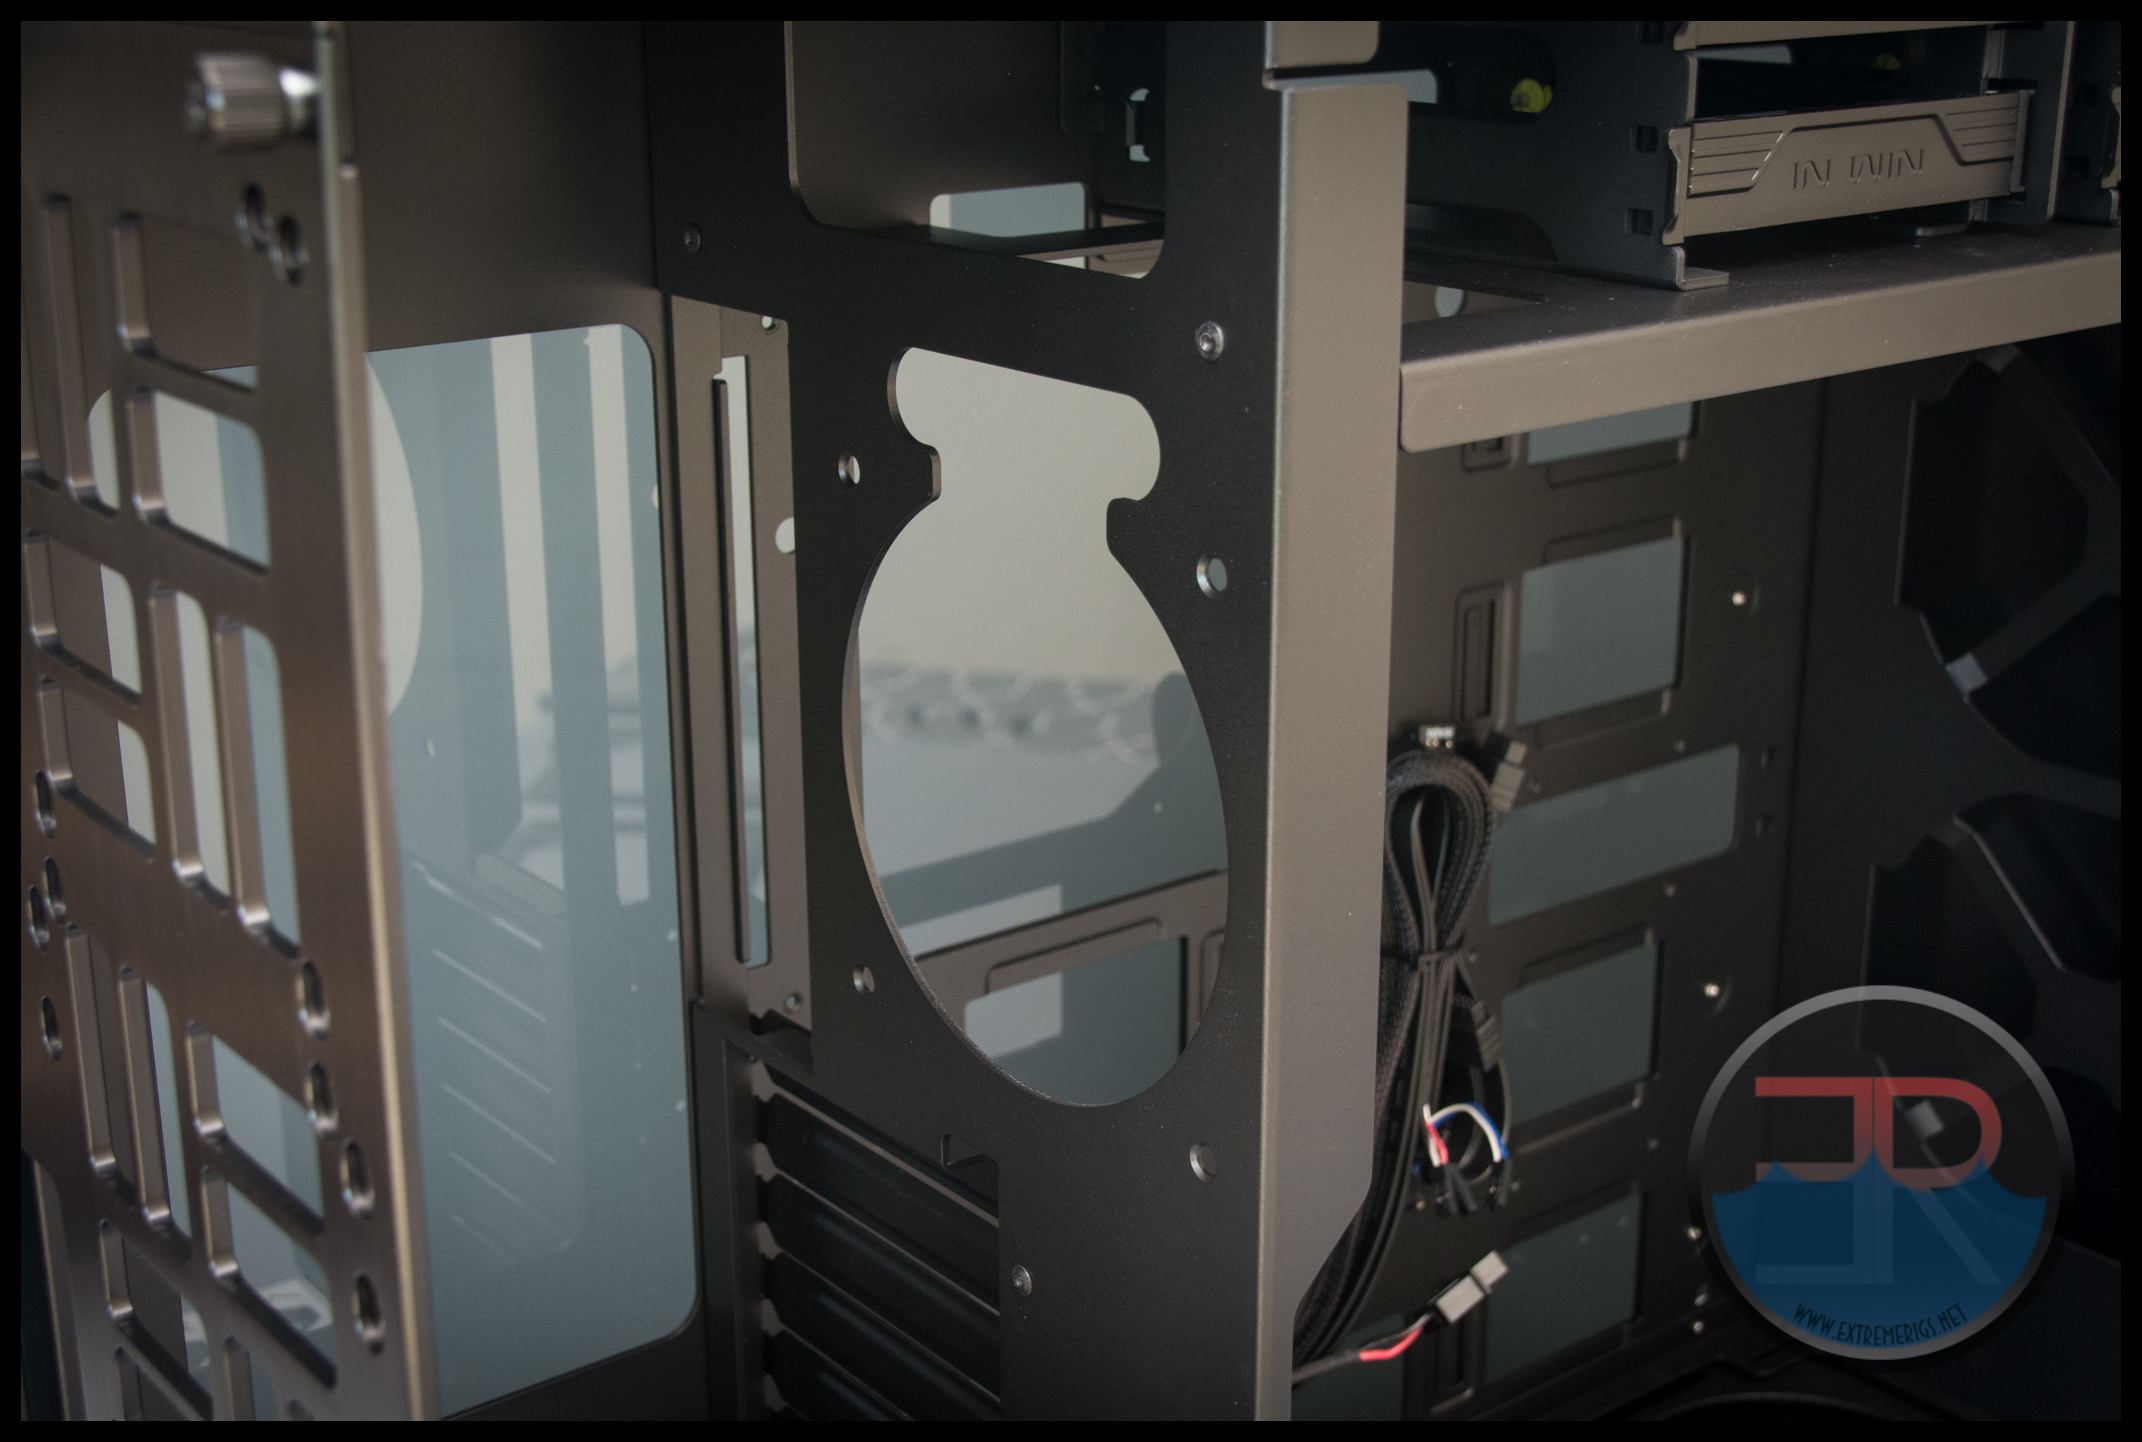
Therefore an extra 120 is going to do little except feed warmer air to the large rear radiator. It’s not a problem, just of little benefit. We’d suggest at most putting a fan here and not a radiator.
The rear chamber is deep enough to fit a 60mm thick radiator with push and pull fans. This is great but bear in mind that too thick a radiator may make plugging cables to your motherboard and graphics cards harder.
A thinner radiator – like this 38mm PE and a single set of fans gives tons of space for cables and tube:
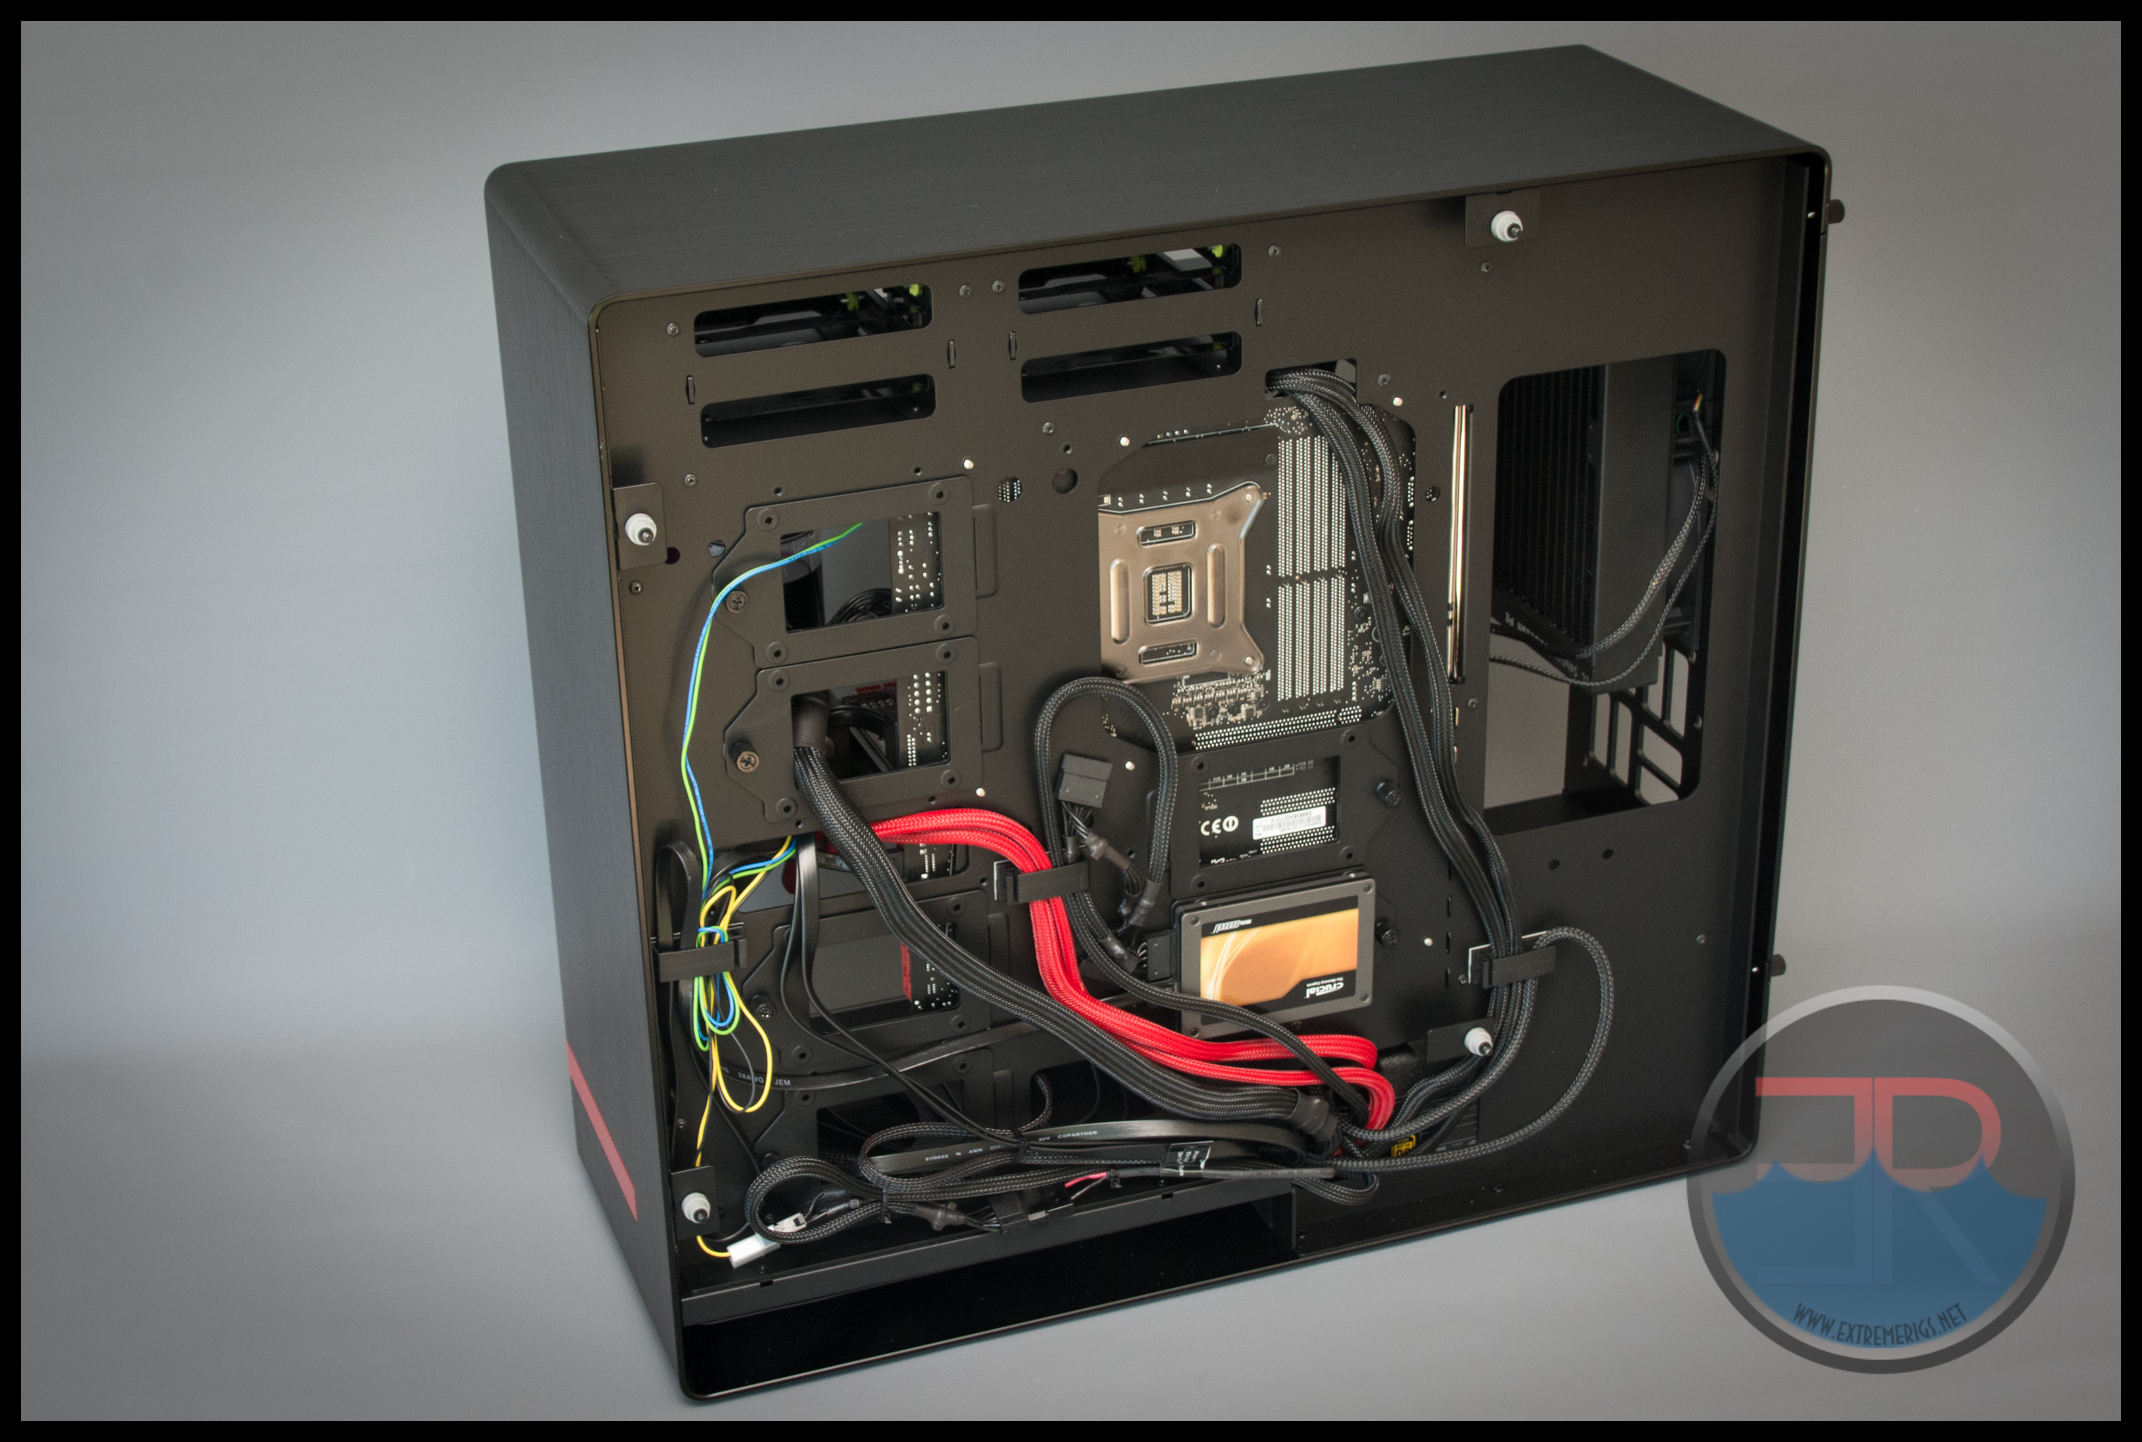
The rear of the case has a ton of cutouts for cable routing. In addition it also has 6 quick release SSD mounts:
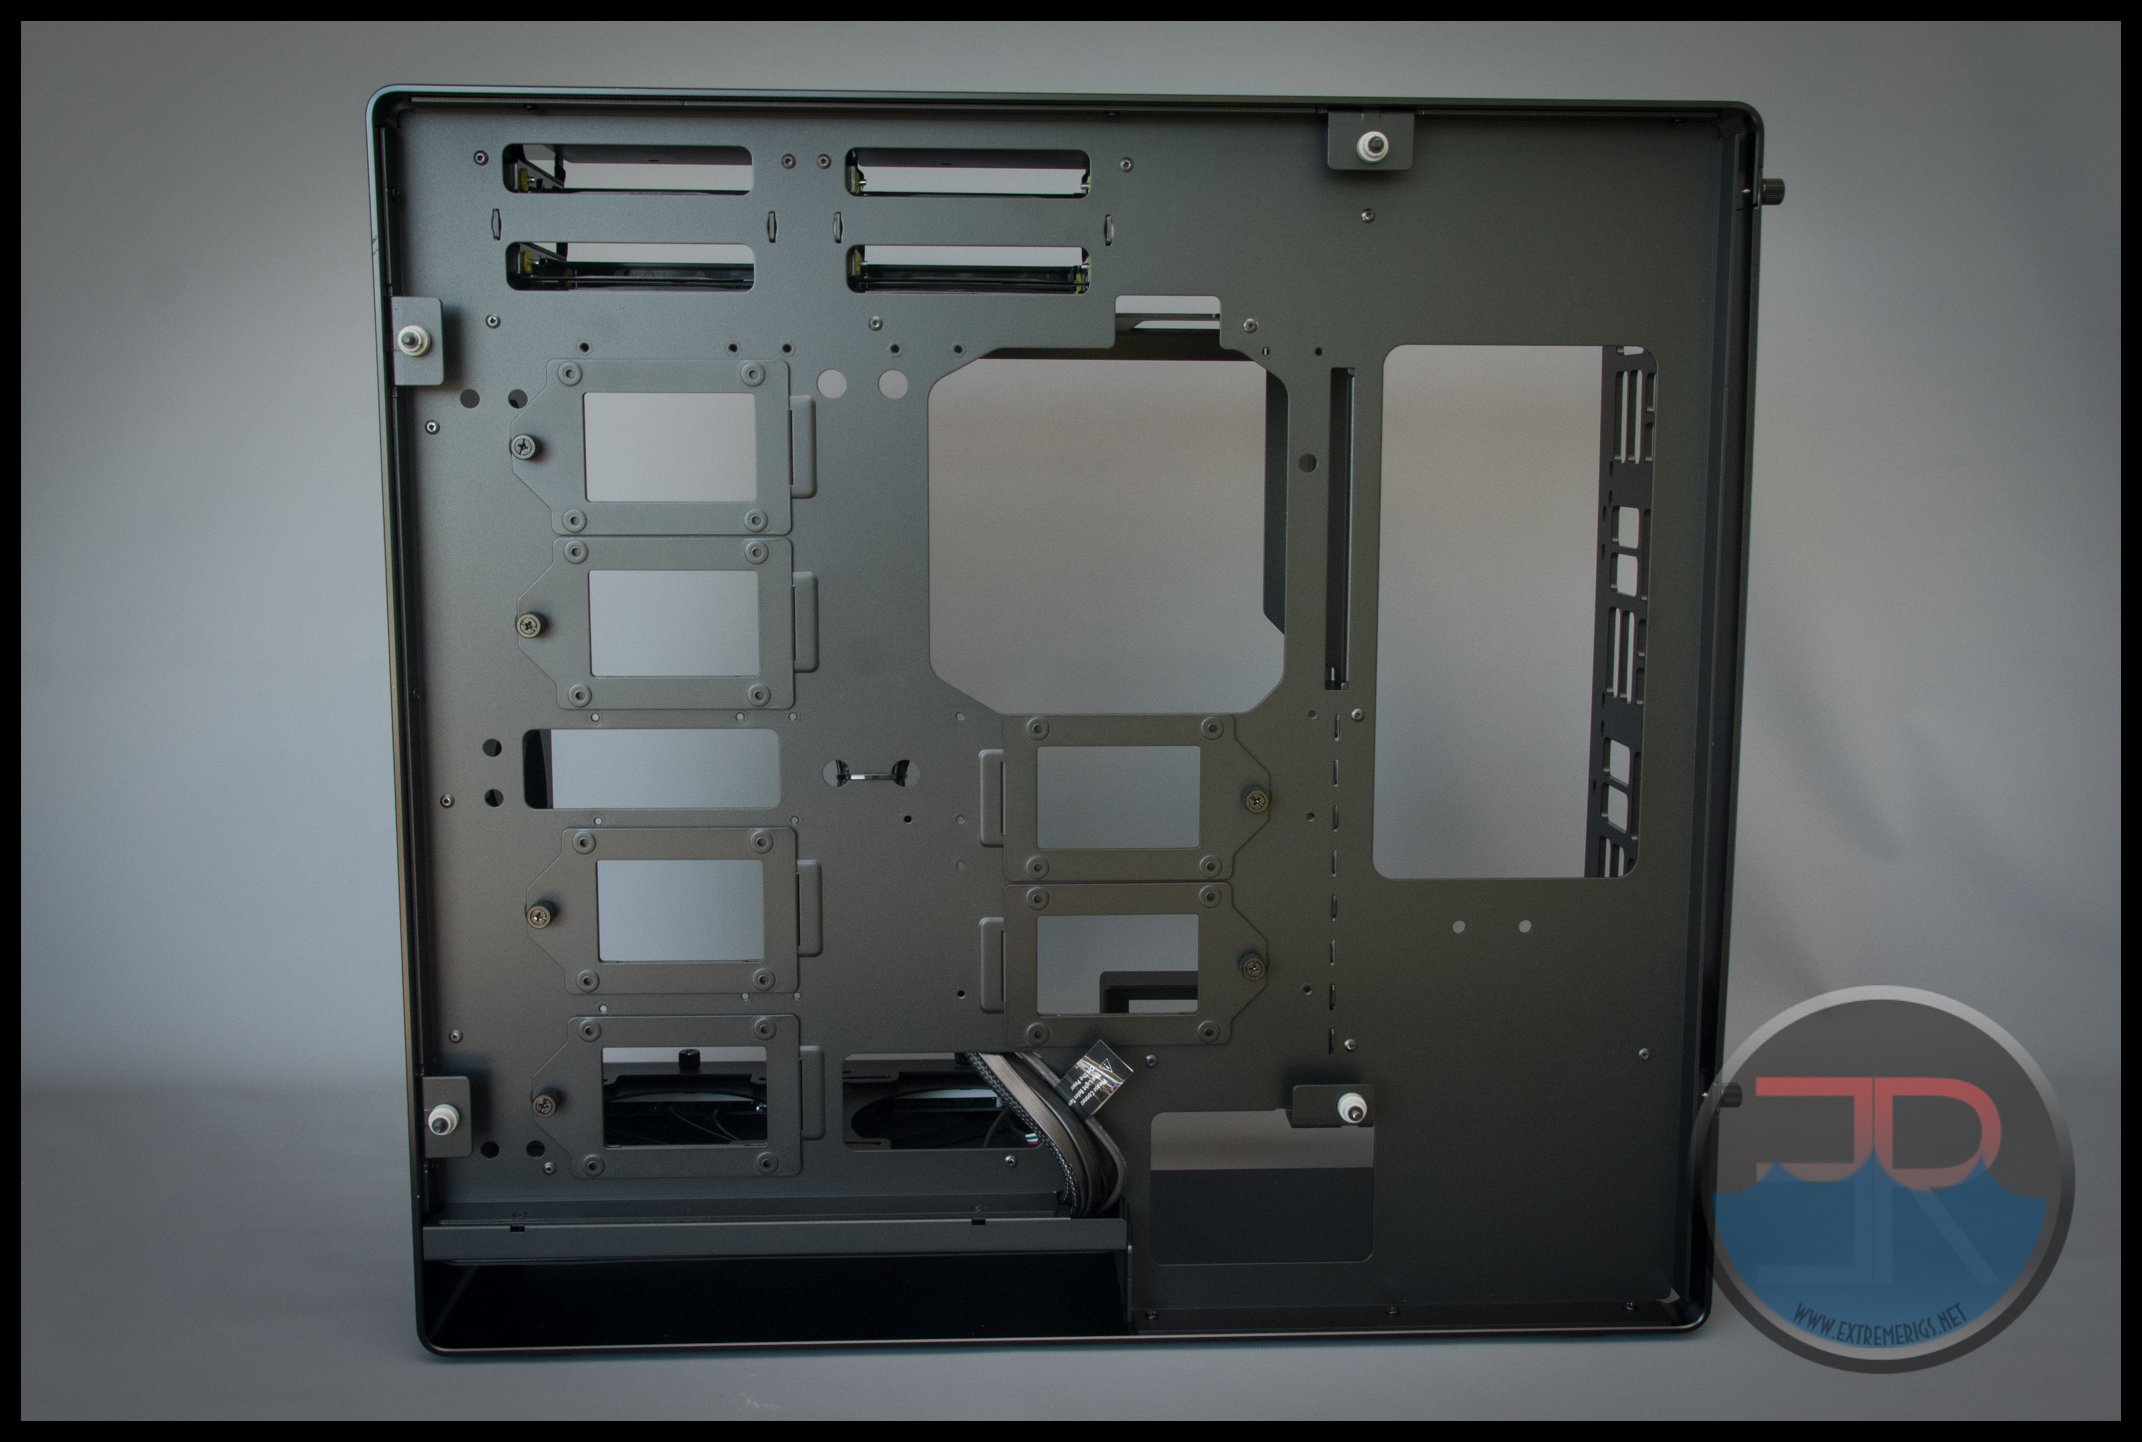
These are great, and we love that a multitude of SSDs can be hidden with these.

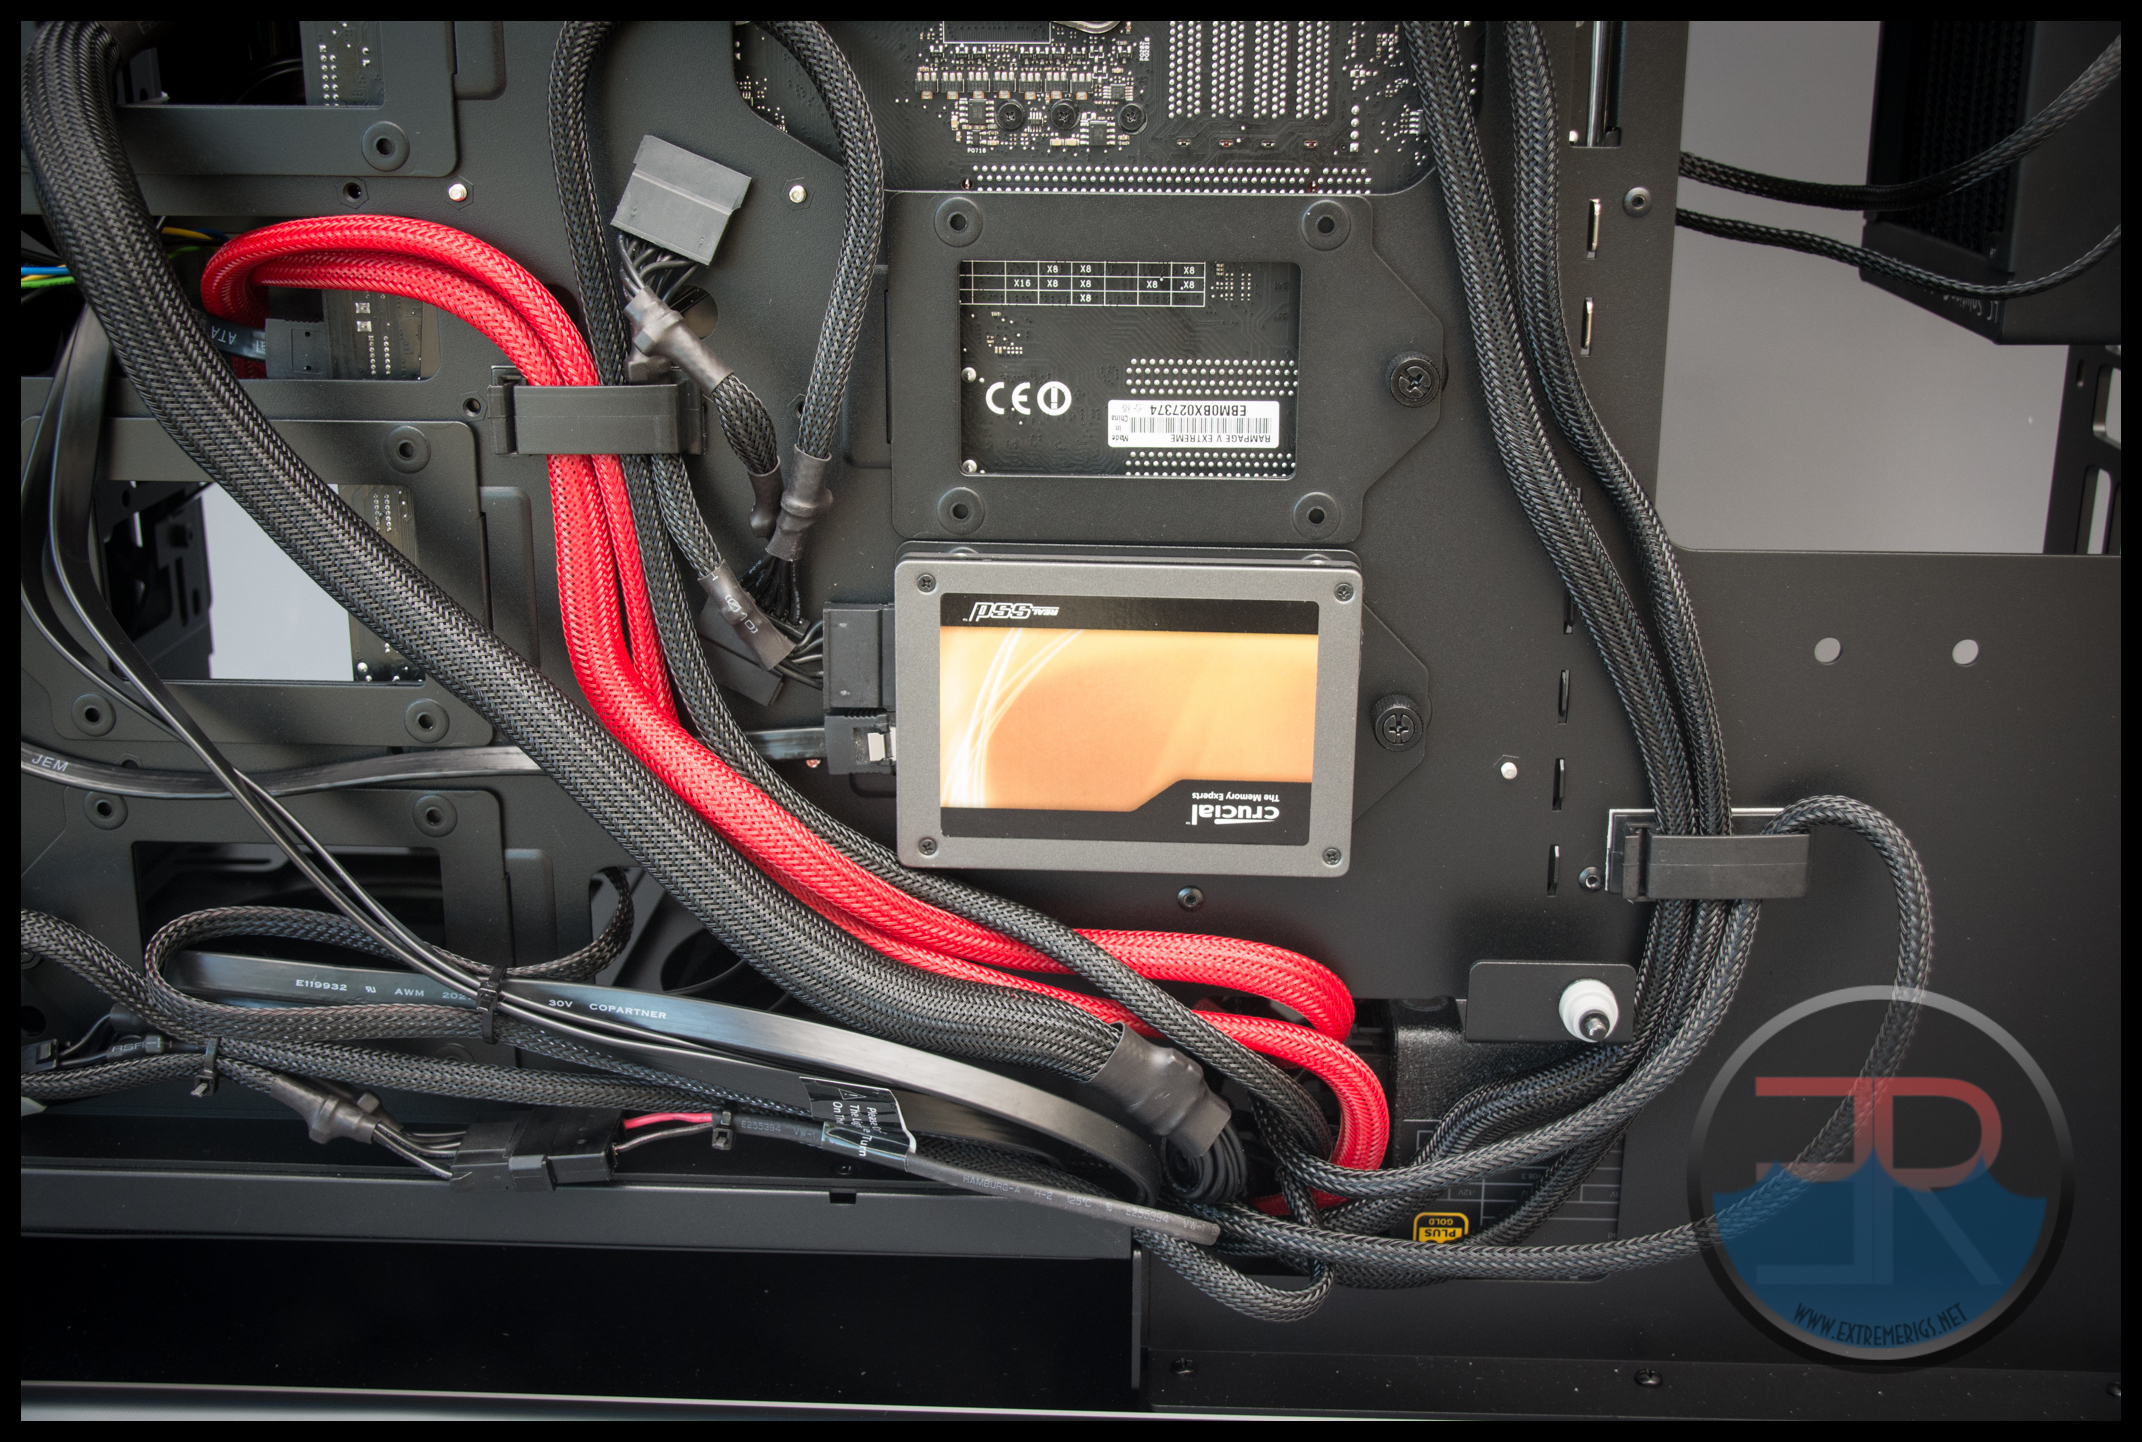
Note that the tighest part of the cable routing will be close to the PSU, and so using the bottom right SSD mount is going to severely constrain your cable routing. We learned this the hard way:
While the motherboard chamber can fit large boards, you can choose which standoffs to fit so as to use a smaller board too:
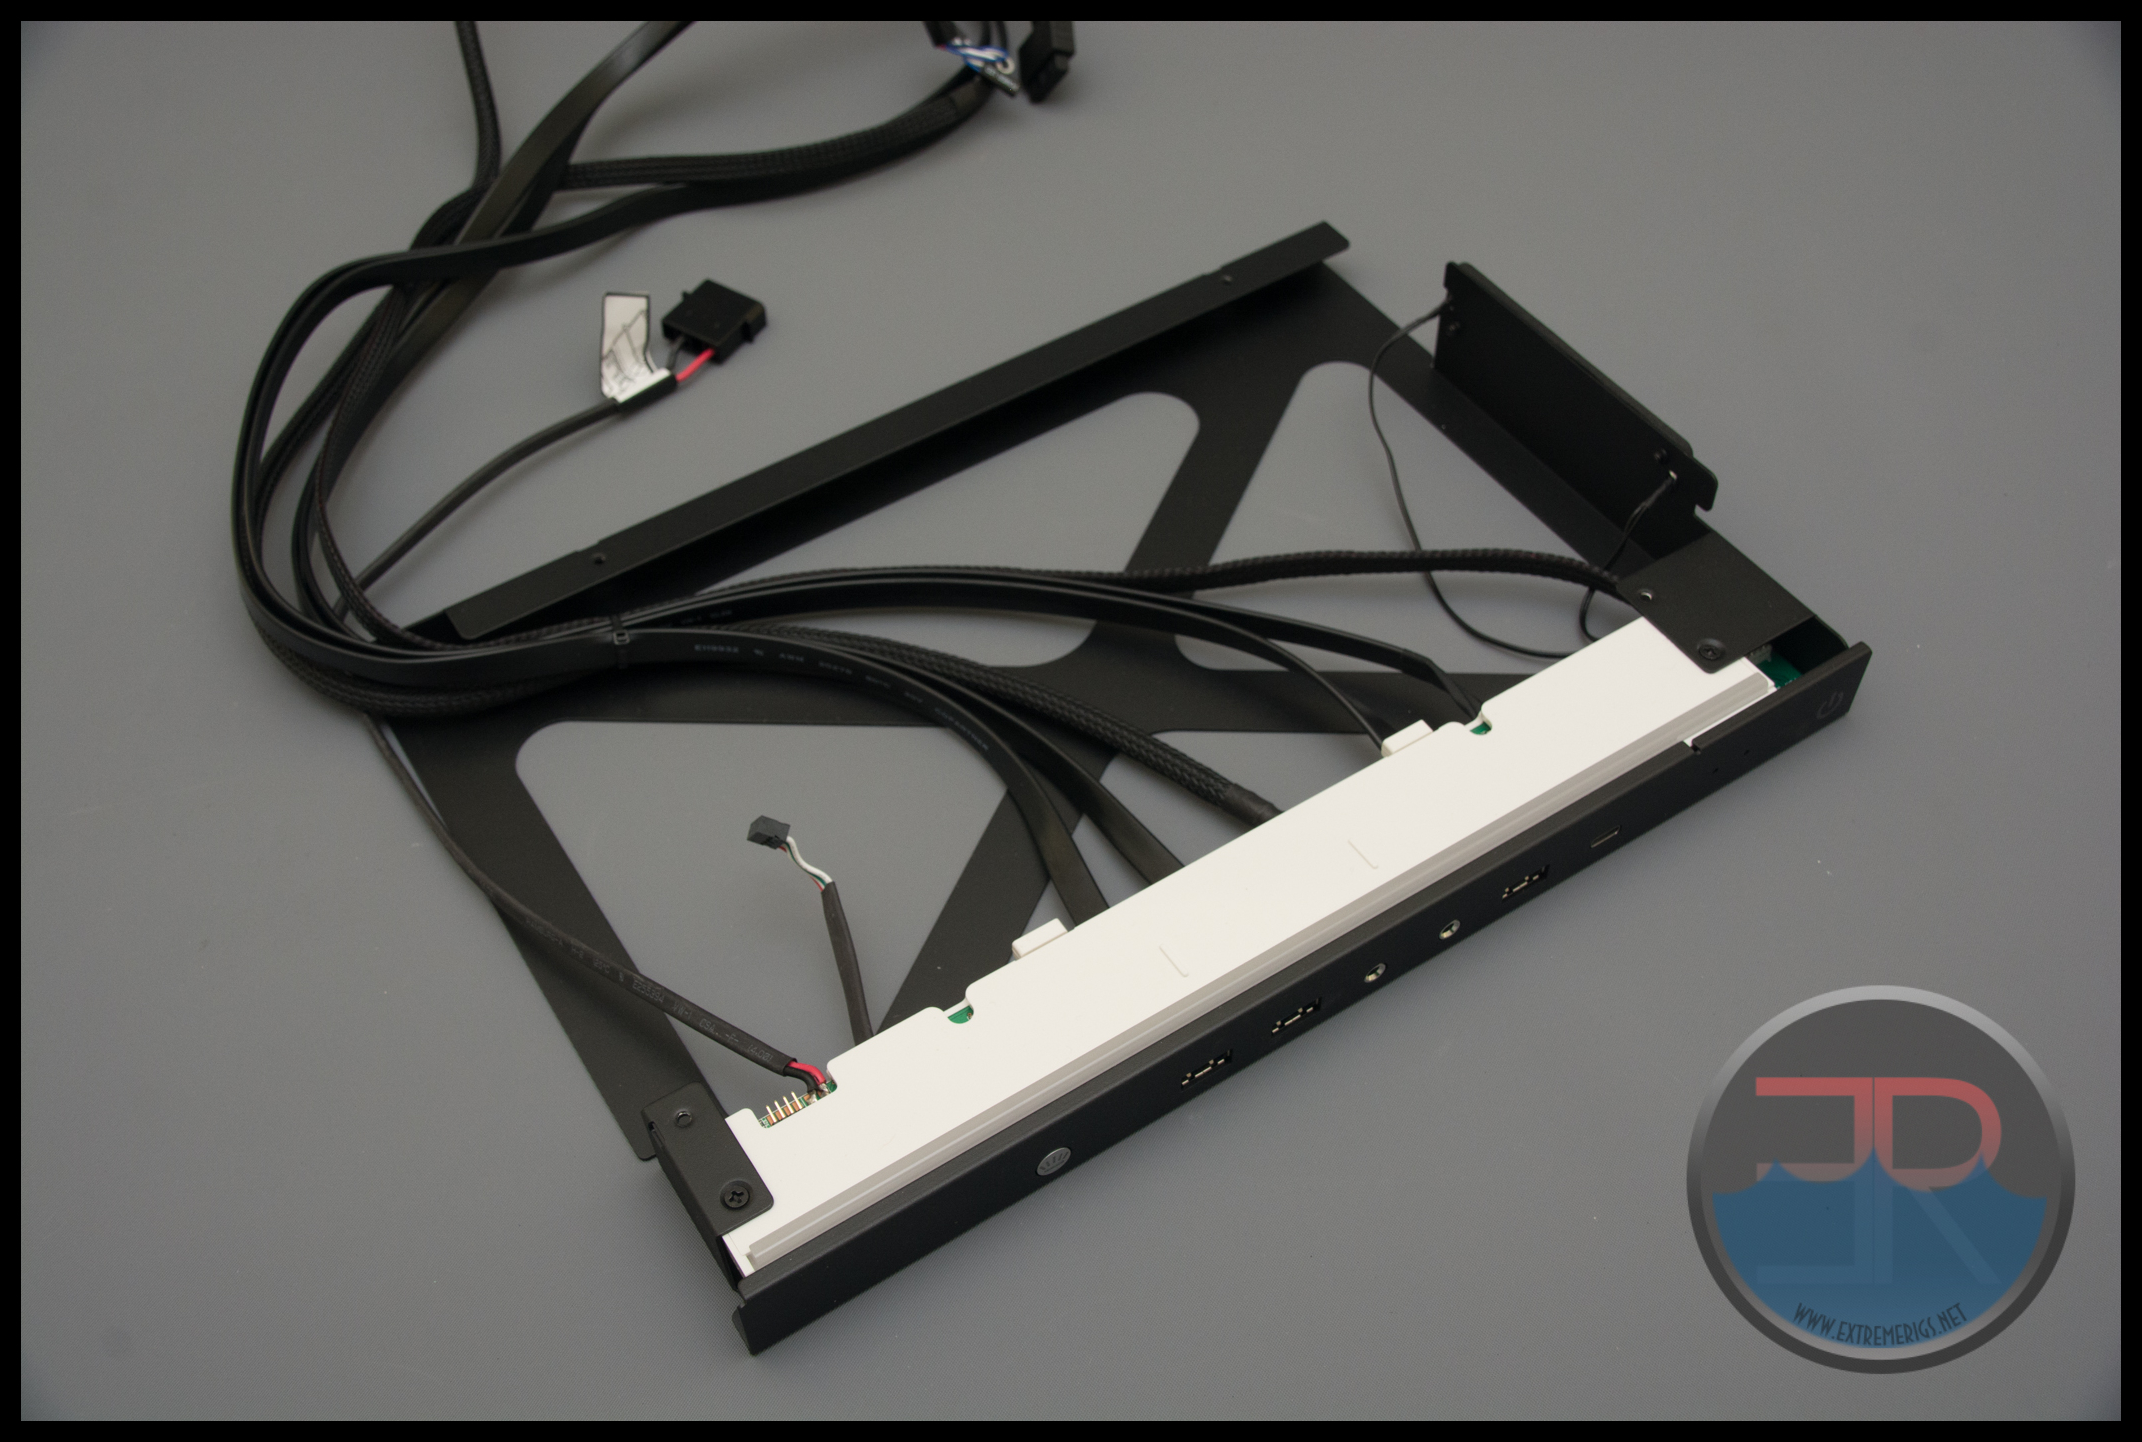
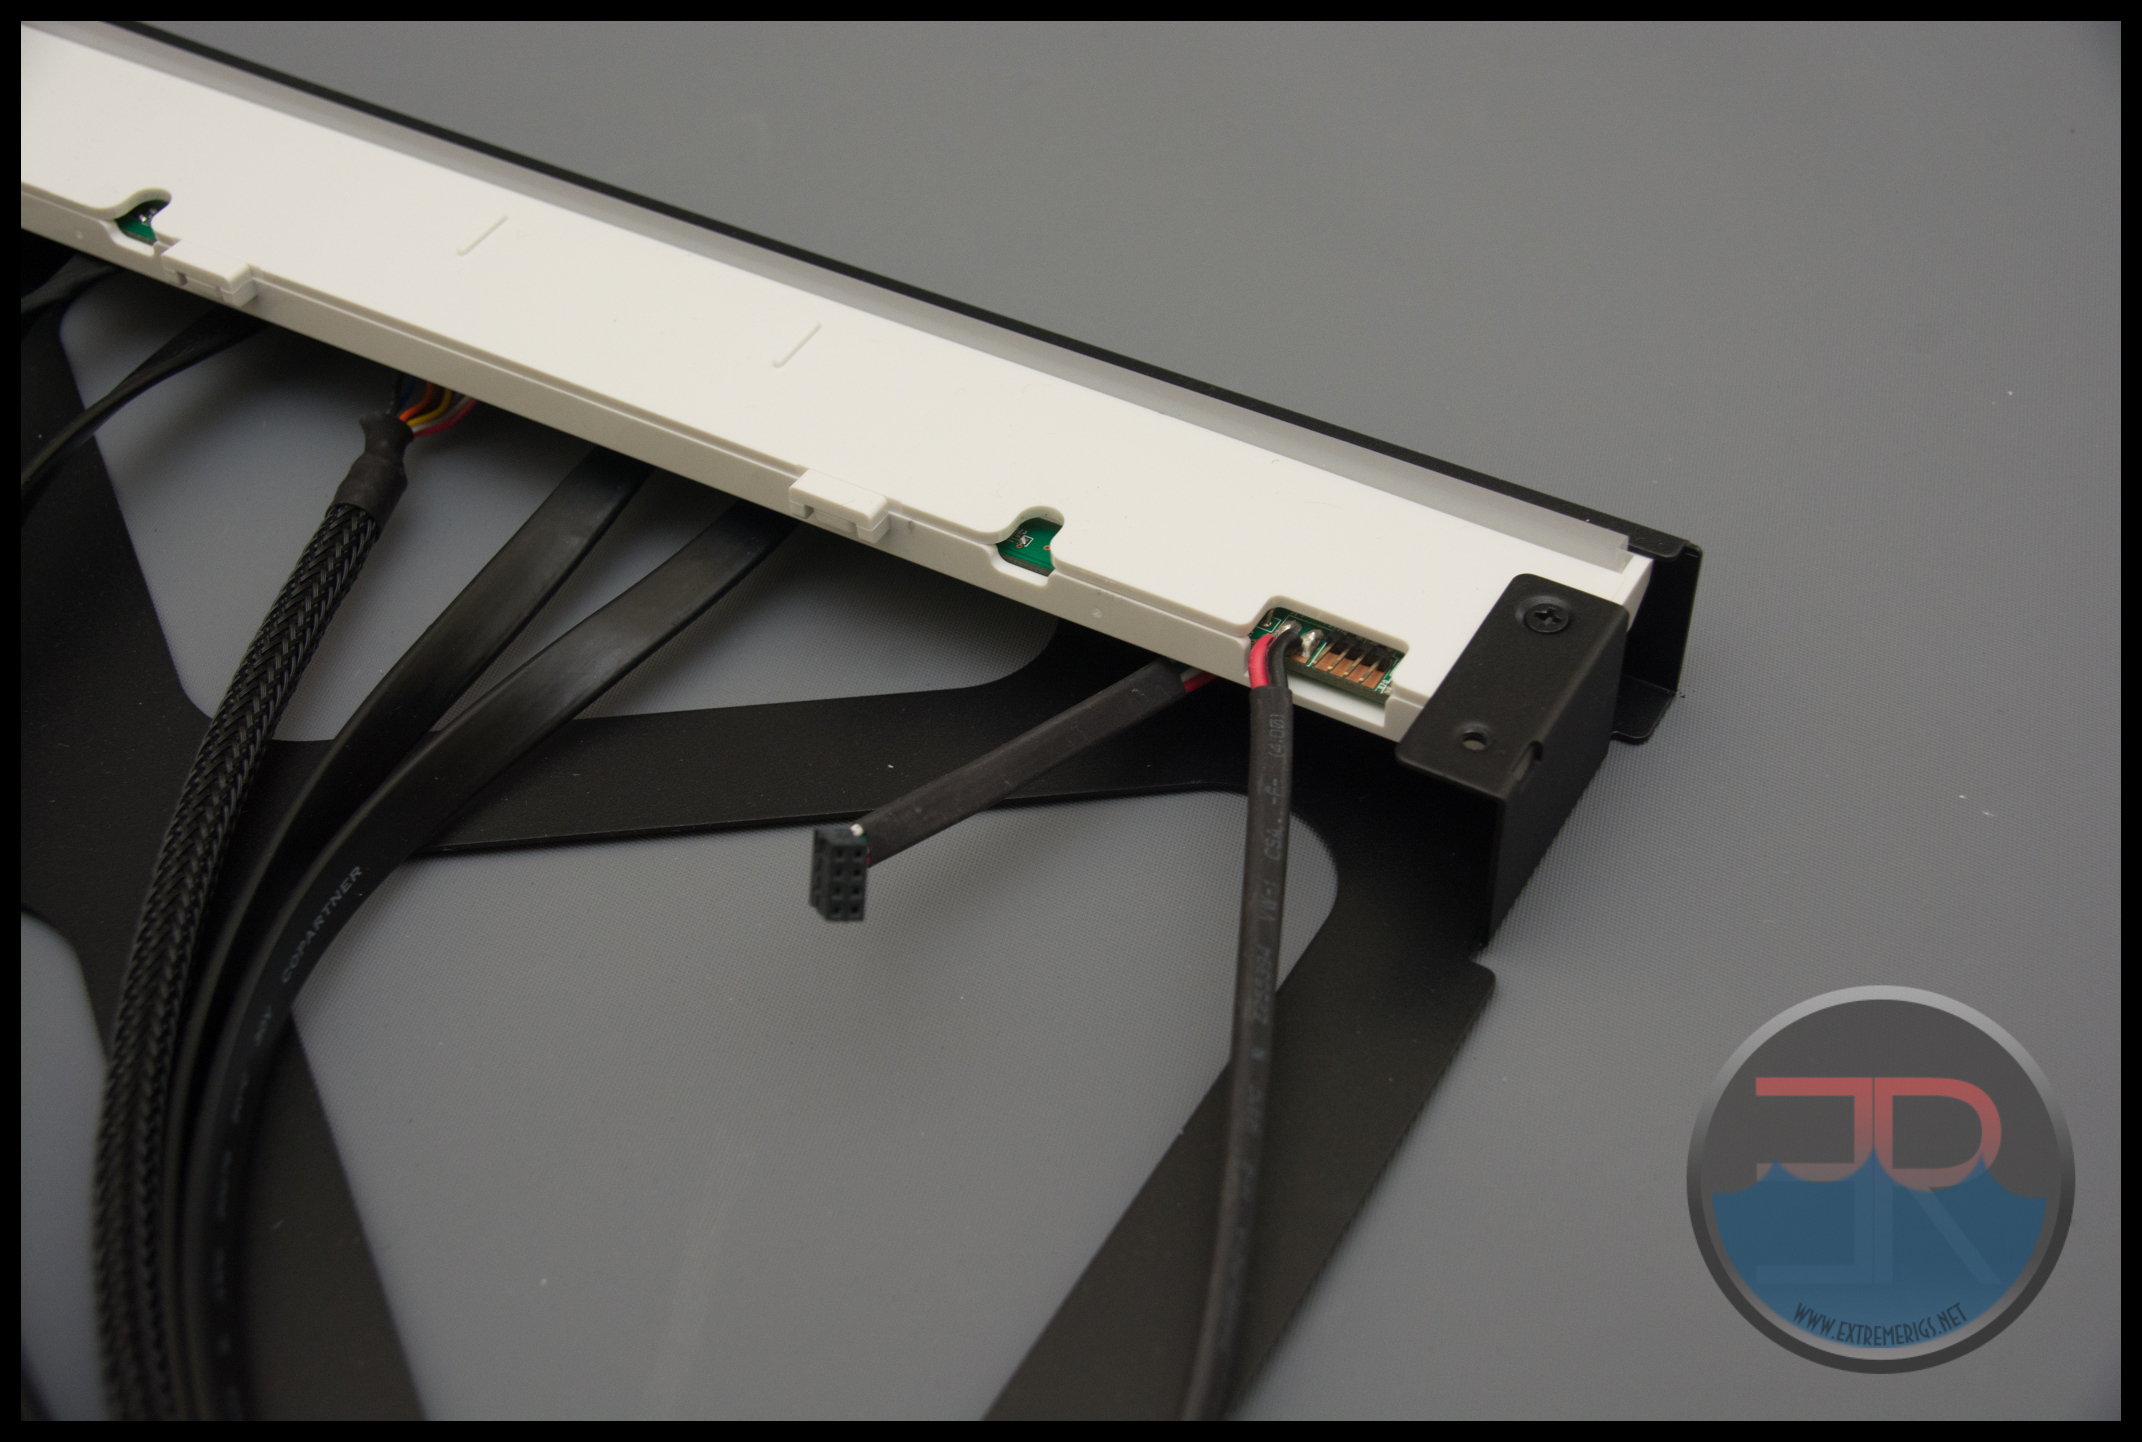
Also of note here are the cables coming from the IO panel:
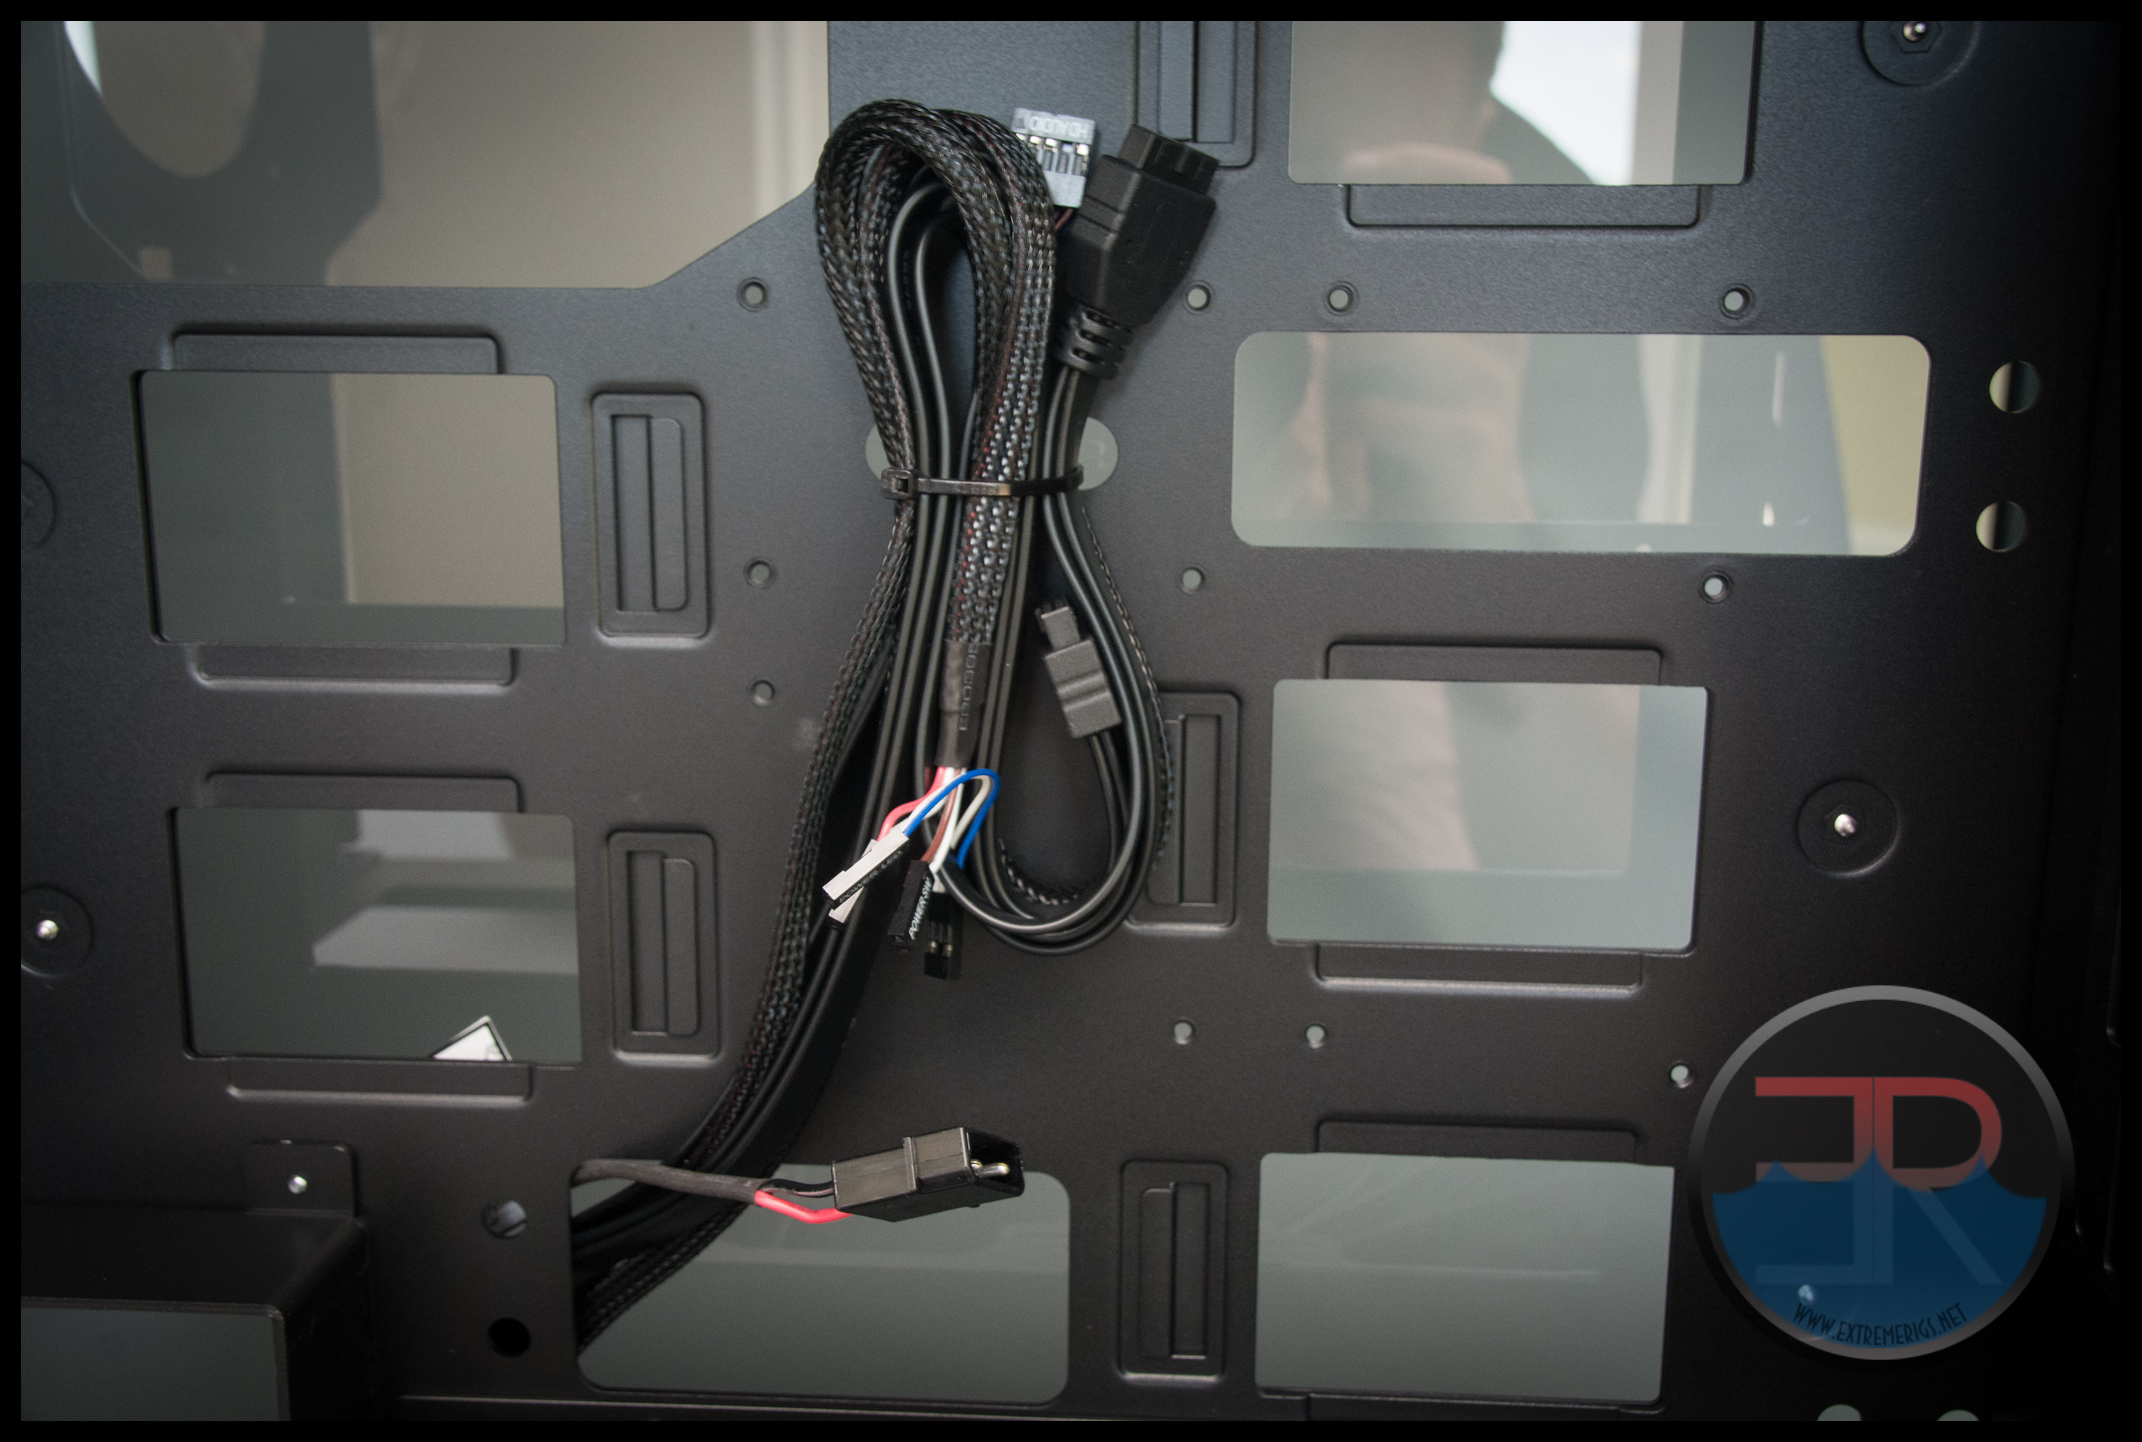
While generally black or sleeved, some of the sleeved wires are colored and are not sleeved all the way to the end. In addition the sleeve is a bit loose letting those colors through. This is disappointing, and those with OCD will need to fix this.

As usual with In Win – the IO plate is not surrounded on all four sides. This gives flexibility at the expense of security. However unlike the H-Frame Mini, the IO plate is still gripped quite firmly on two sides:
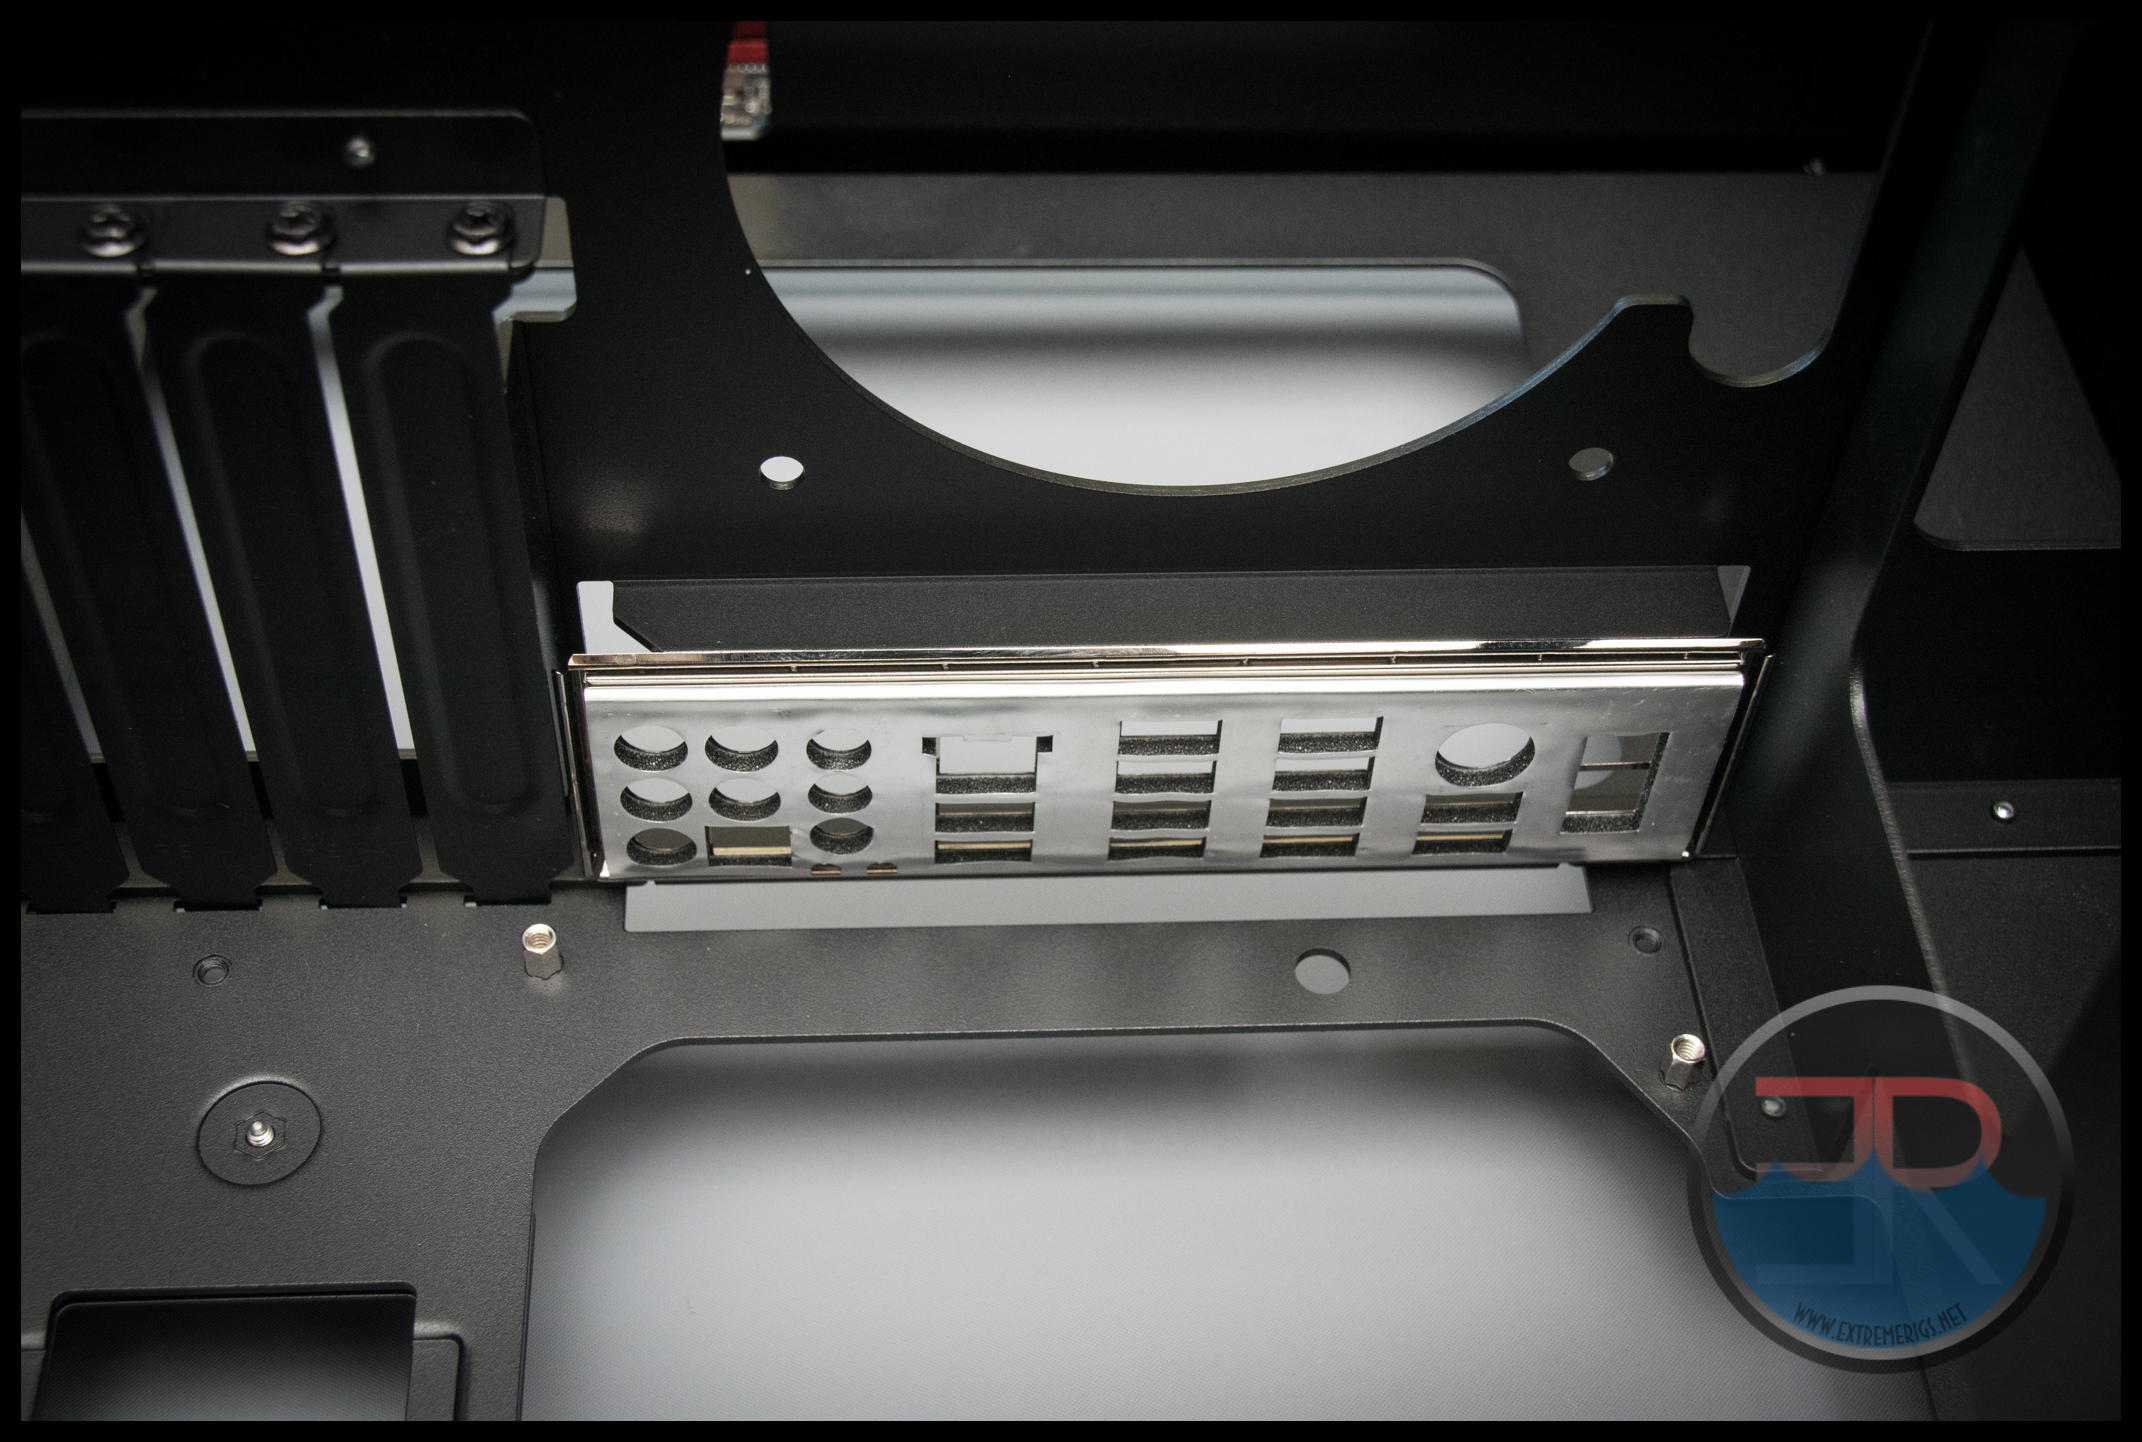
Interestingly unlike most cases – once a PCI backplate cover is removed there is nothing but a hole left. This means that fat tube can easily be routed through these if they are left empty.
Lastly – the case feet – these are thin strips of rubber:
They do the job – primarily not to scratch the surface the case rests on (and also to not damage the case), but are too thin to significantly reduce any major vibration.
Now let’s get some test builds done and check the cooling performance…
Building in the In Win 909
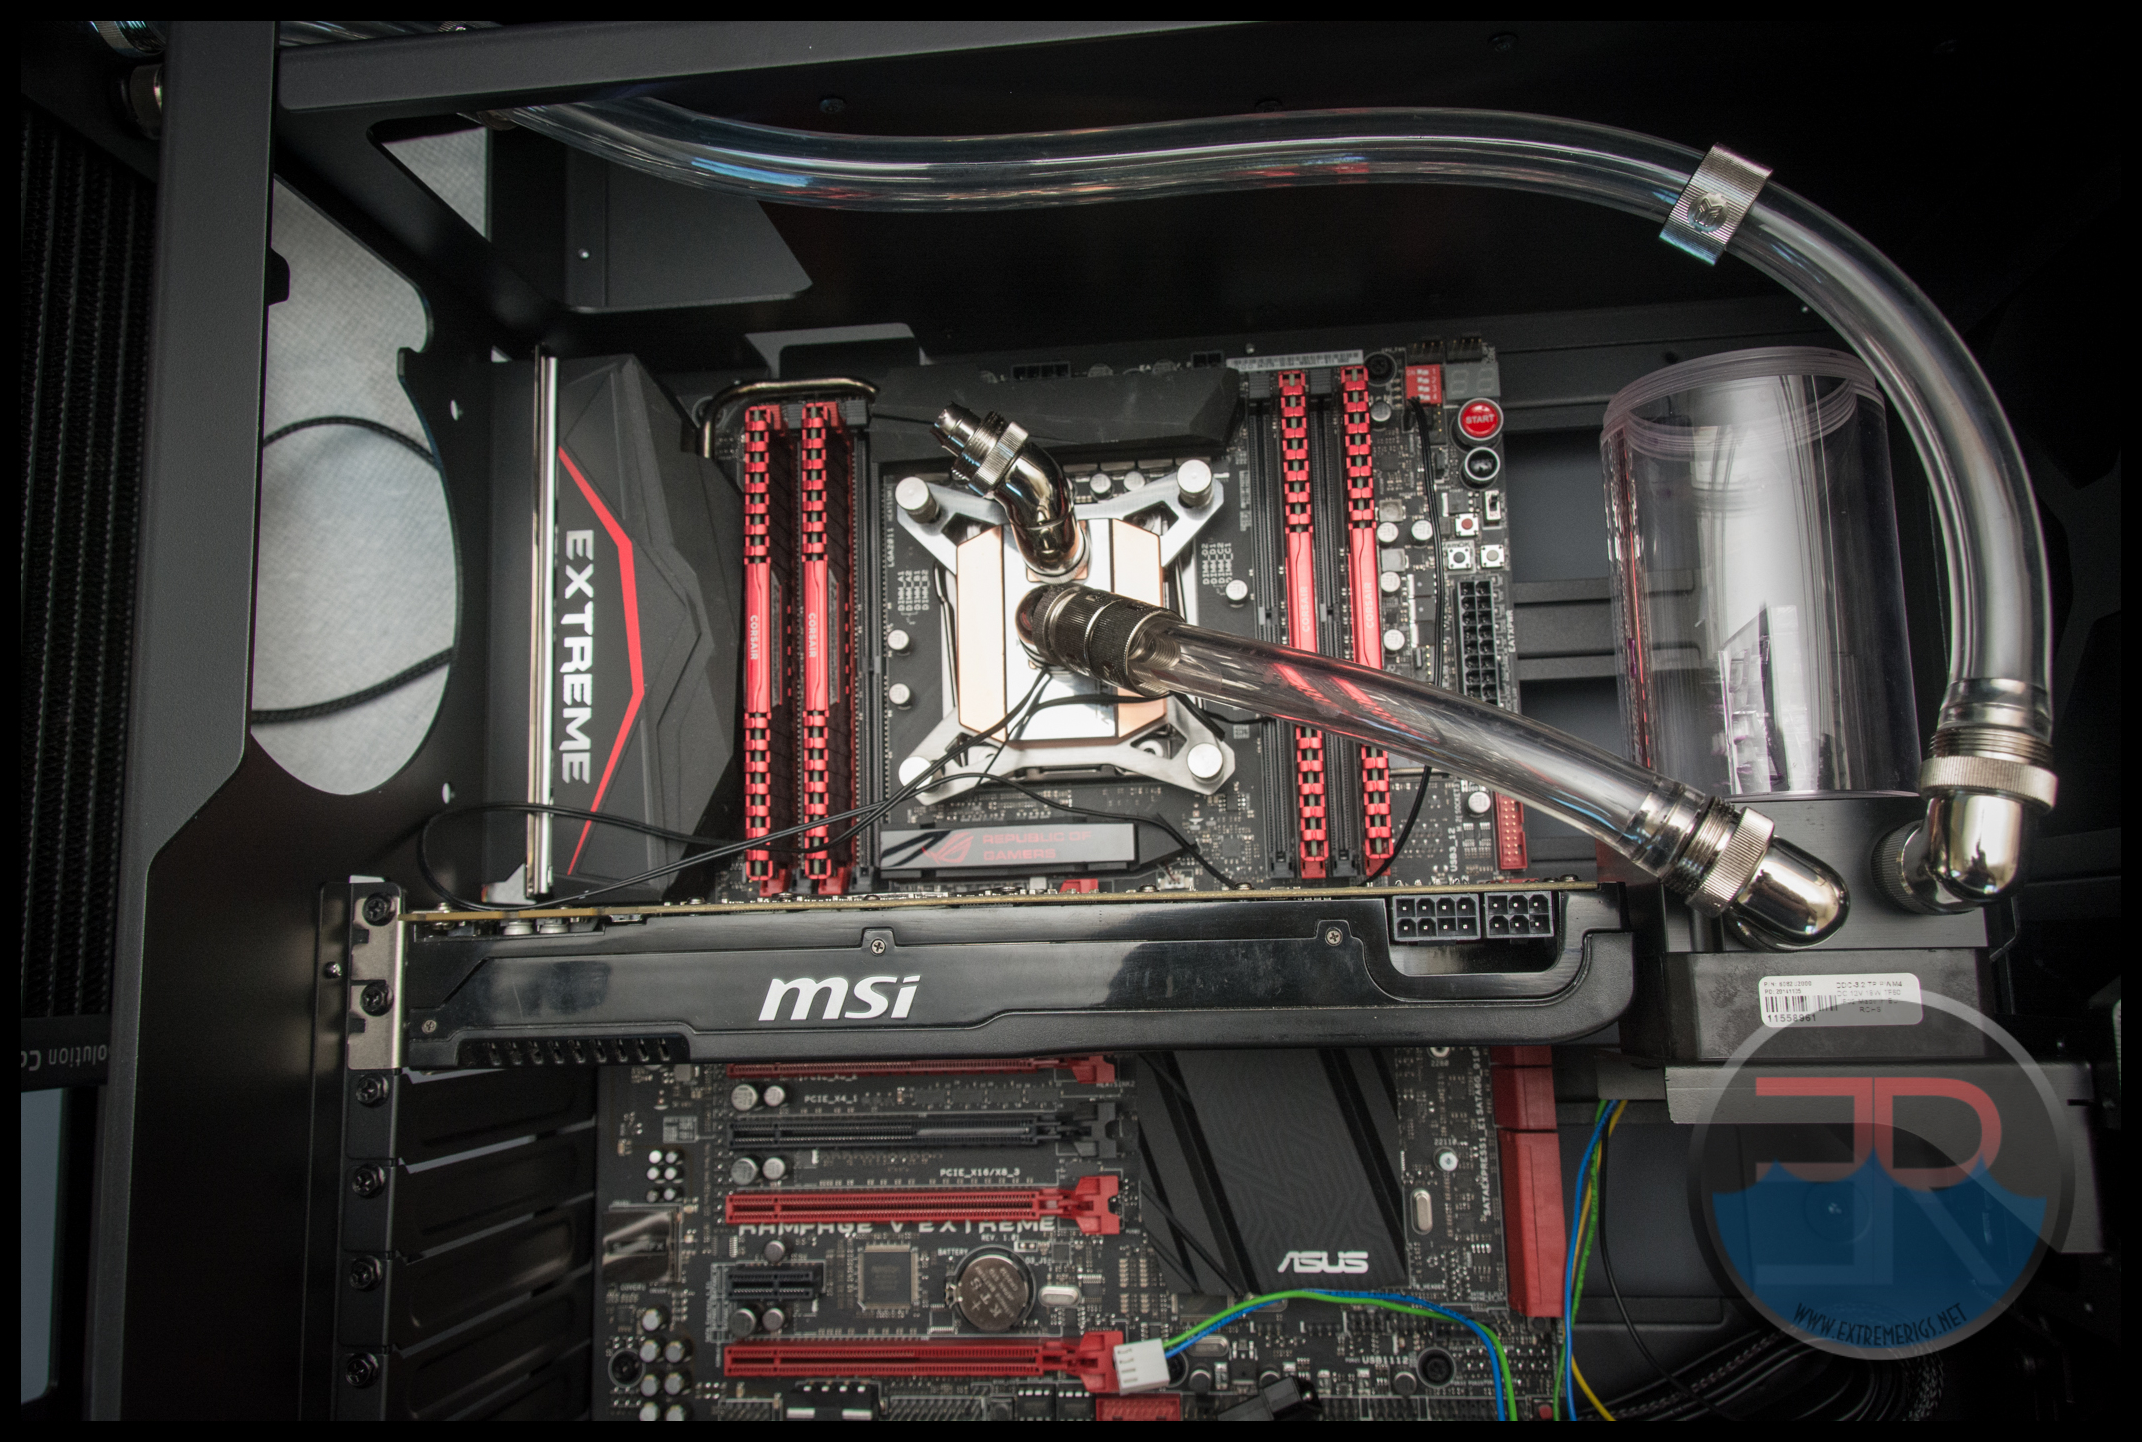
The first build we did was our ‘standard’ breathability test build. This uses a Rampage V Extreme with a Watercool cpu block, an EK DDC 140 XRes pump and reservoir, and an EK PE 240 radiator. A big thanks to Asus, Watercool and EK for sponsoring these components.
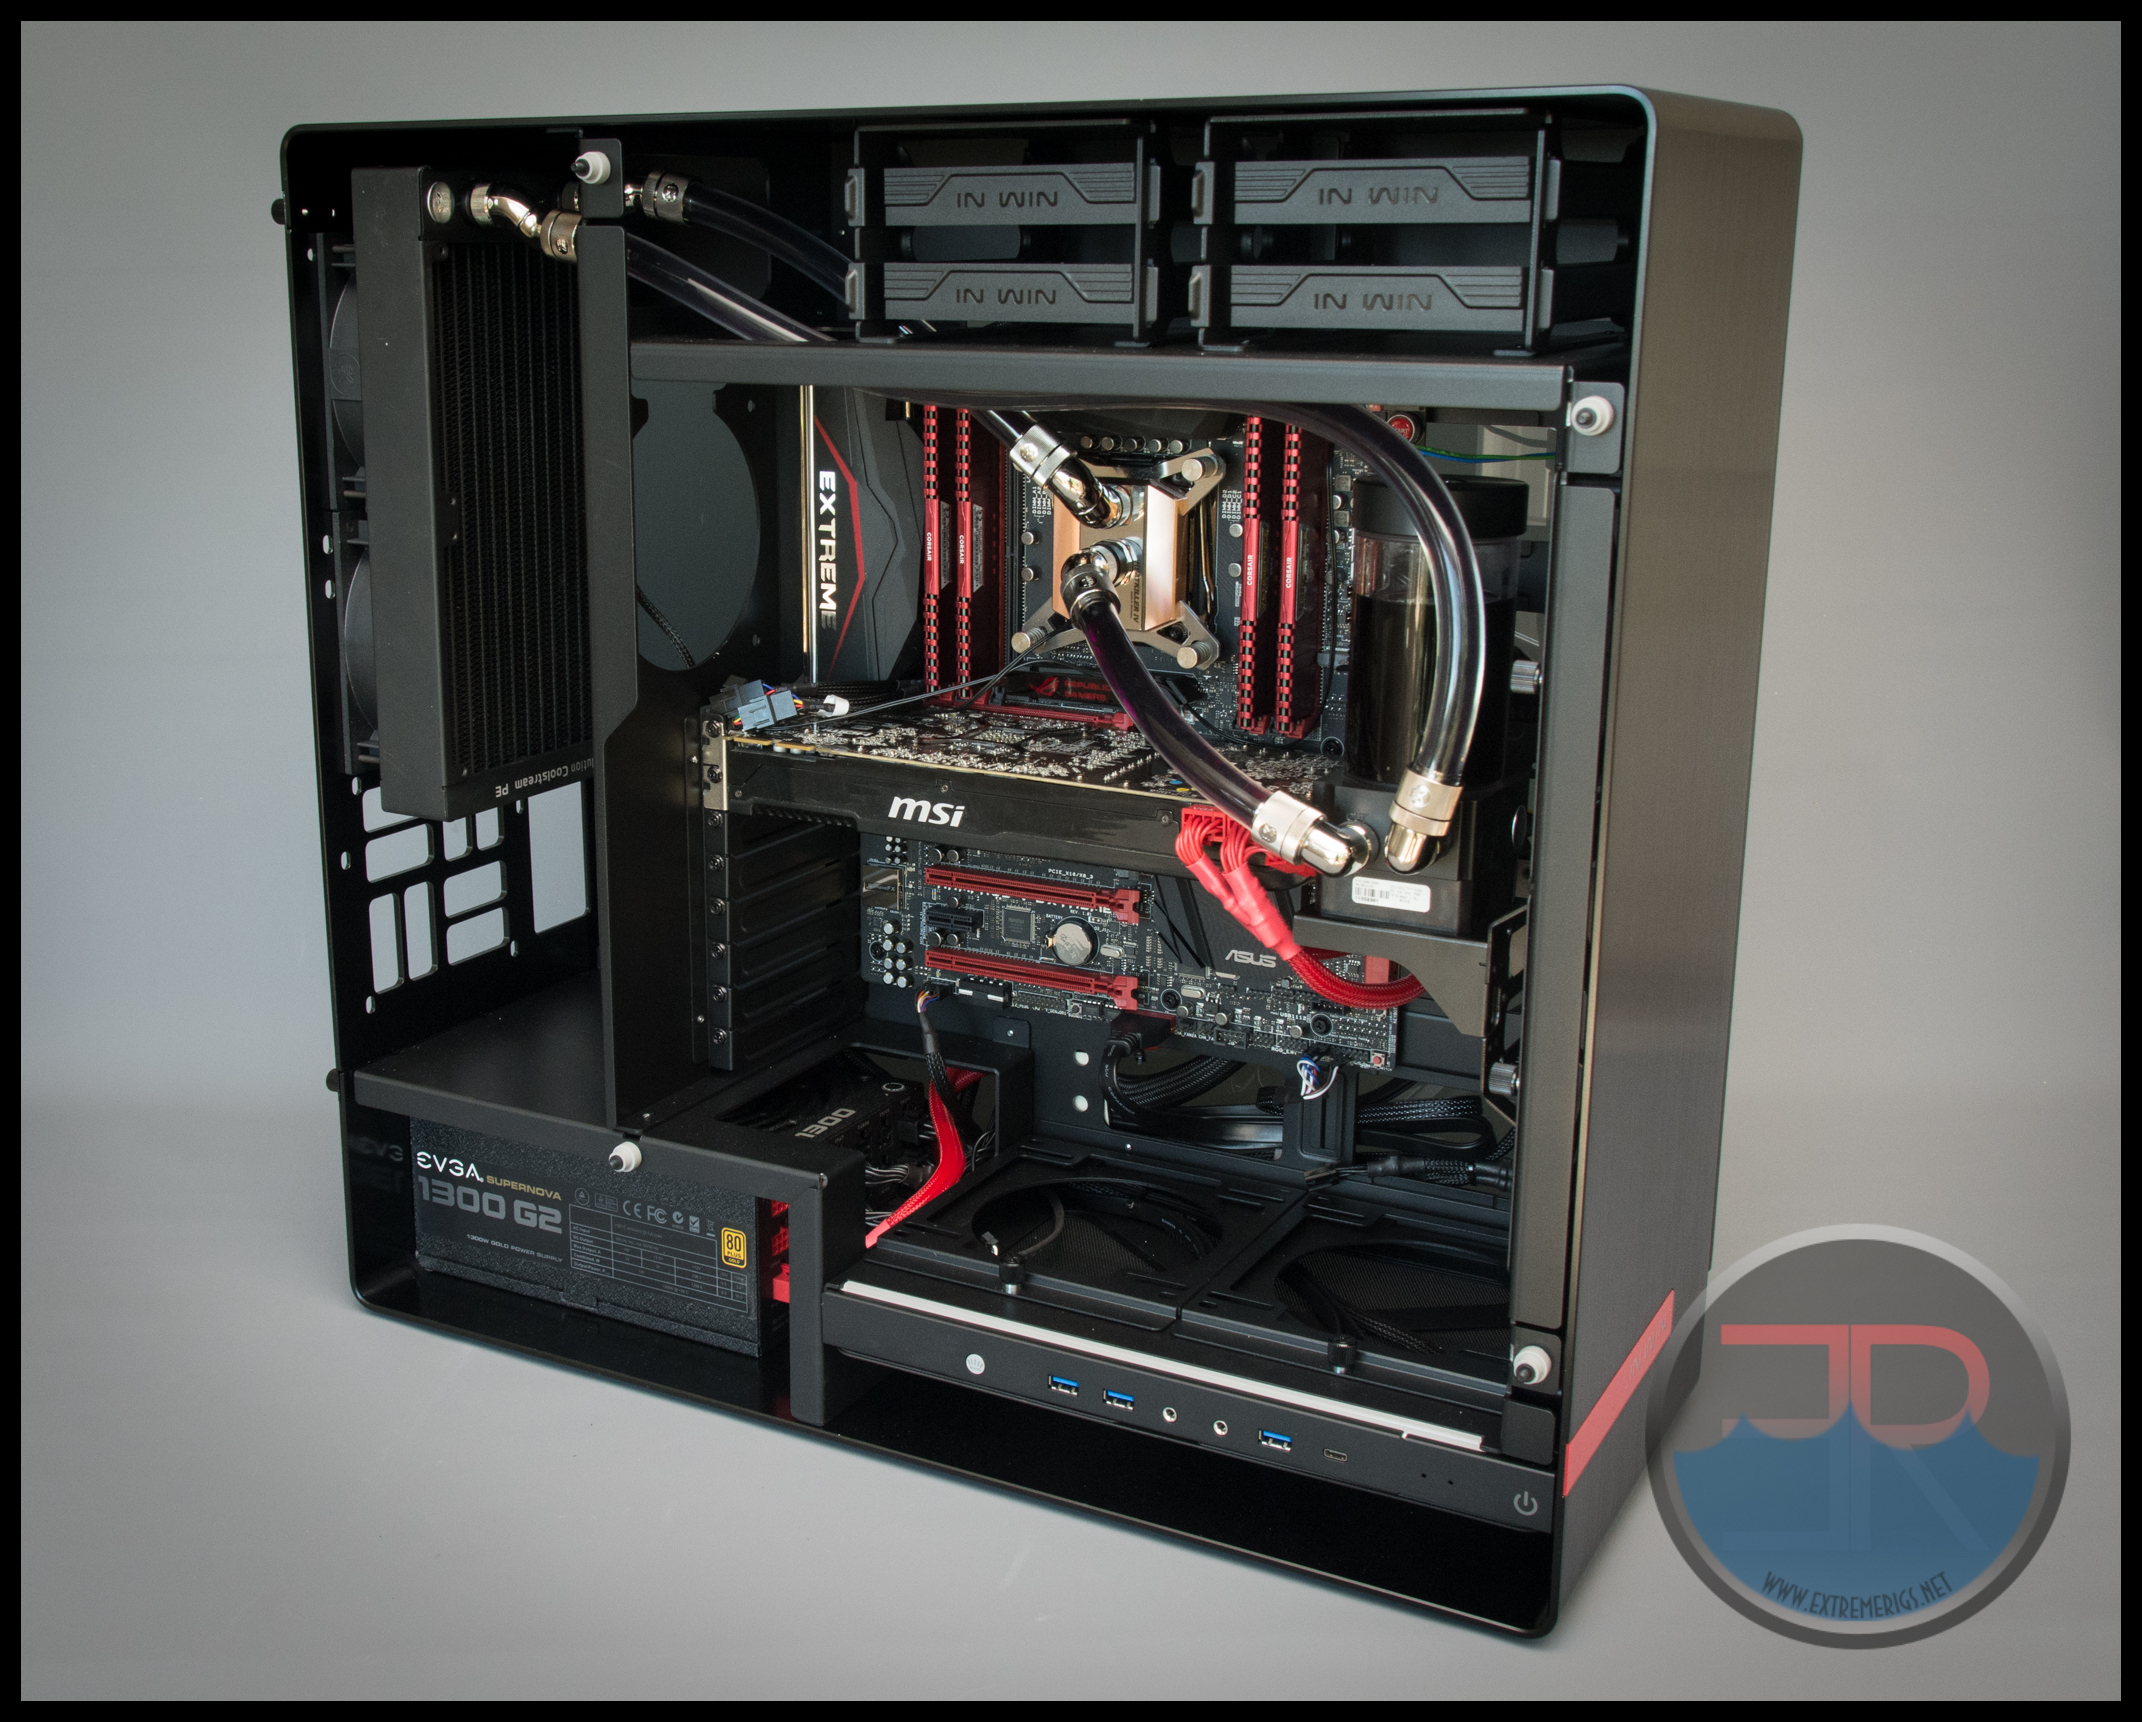
We decided to mount the radiator in what we thought was the most likely default location. This meant that it was mounted as an exhaust – using warm air from inside the case. We ran the fans in pull, though it wouldn’t matter much to run them in push either.
The DDC XRes was mounted to the quick release fan mount using an EK Uni DDC adapter. This adapter is quite inefficient space wise and meant that we had zero clearance between the pump body and the 7970 graphics card:
The end result appeared satisfactory and did the job. The cable routing on the rear was tight, mainly because of the choice of location for the SSD:
A 3/4 way GPU build would suffer from cable routing issues we suspect.
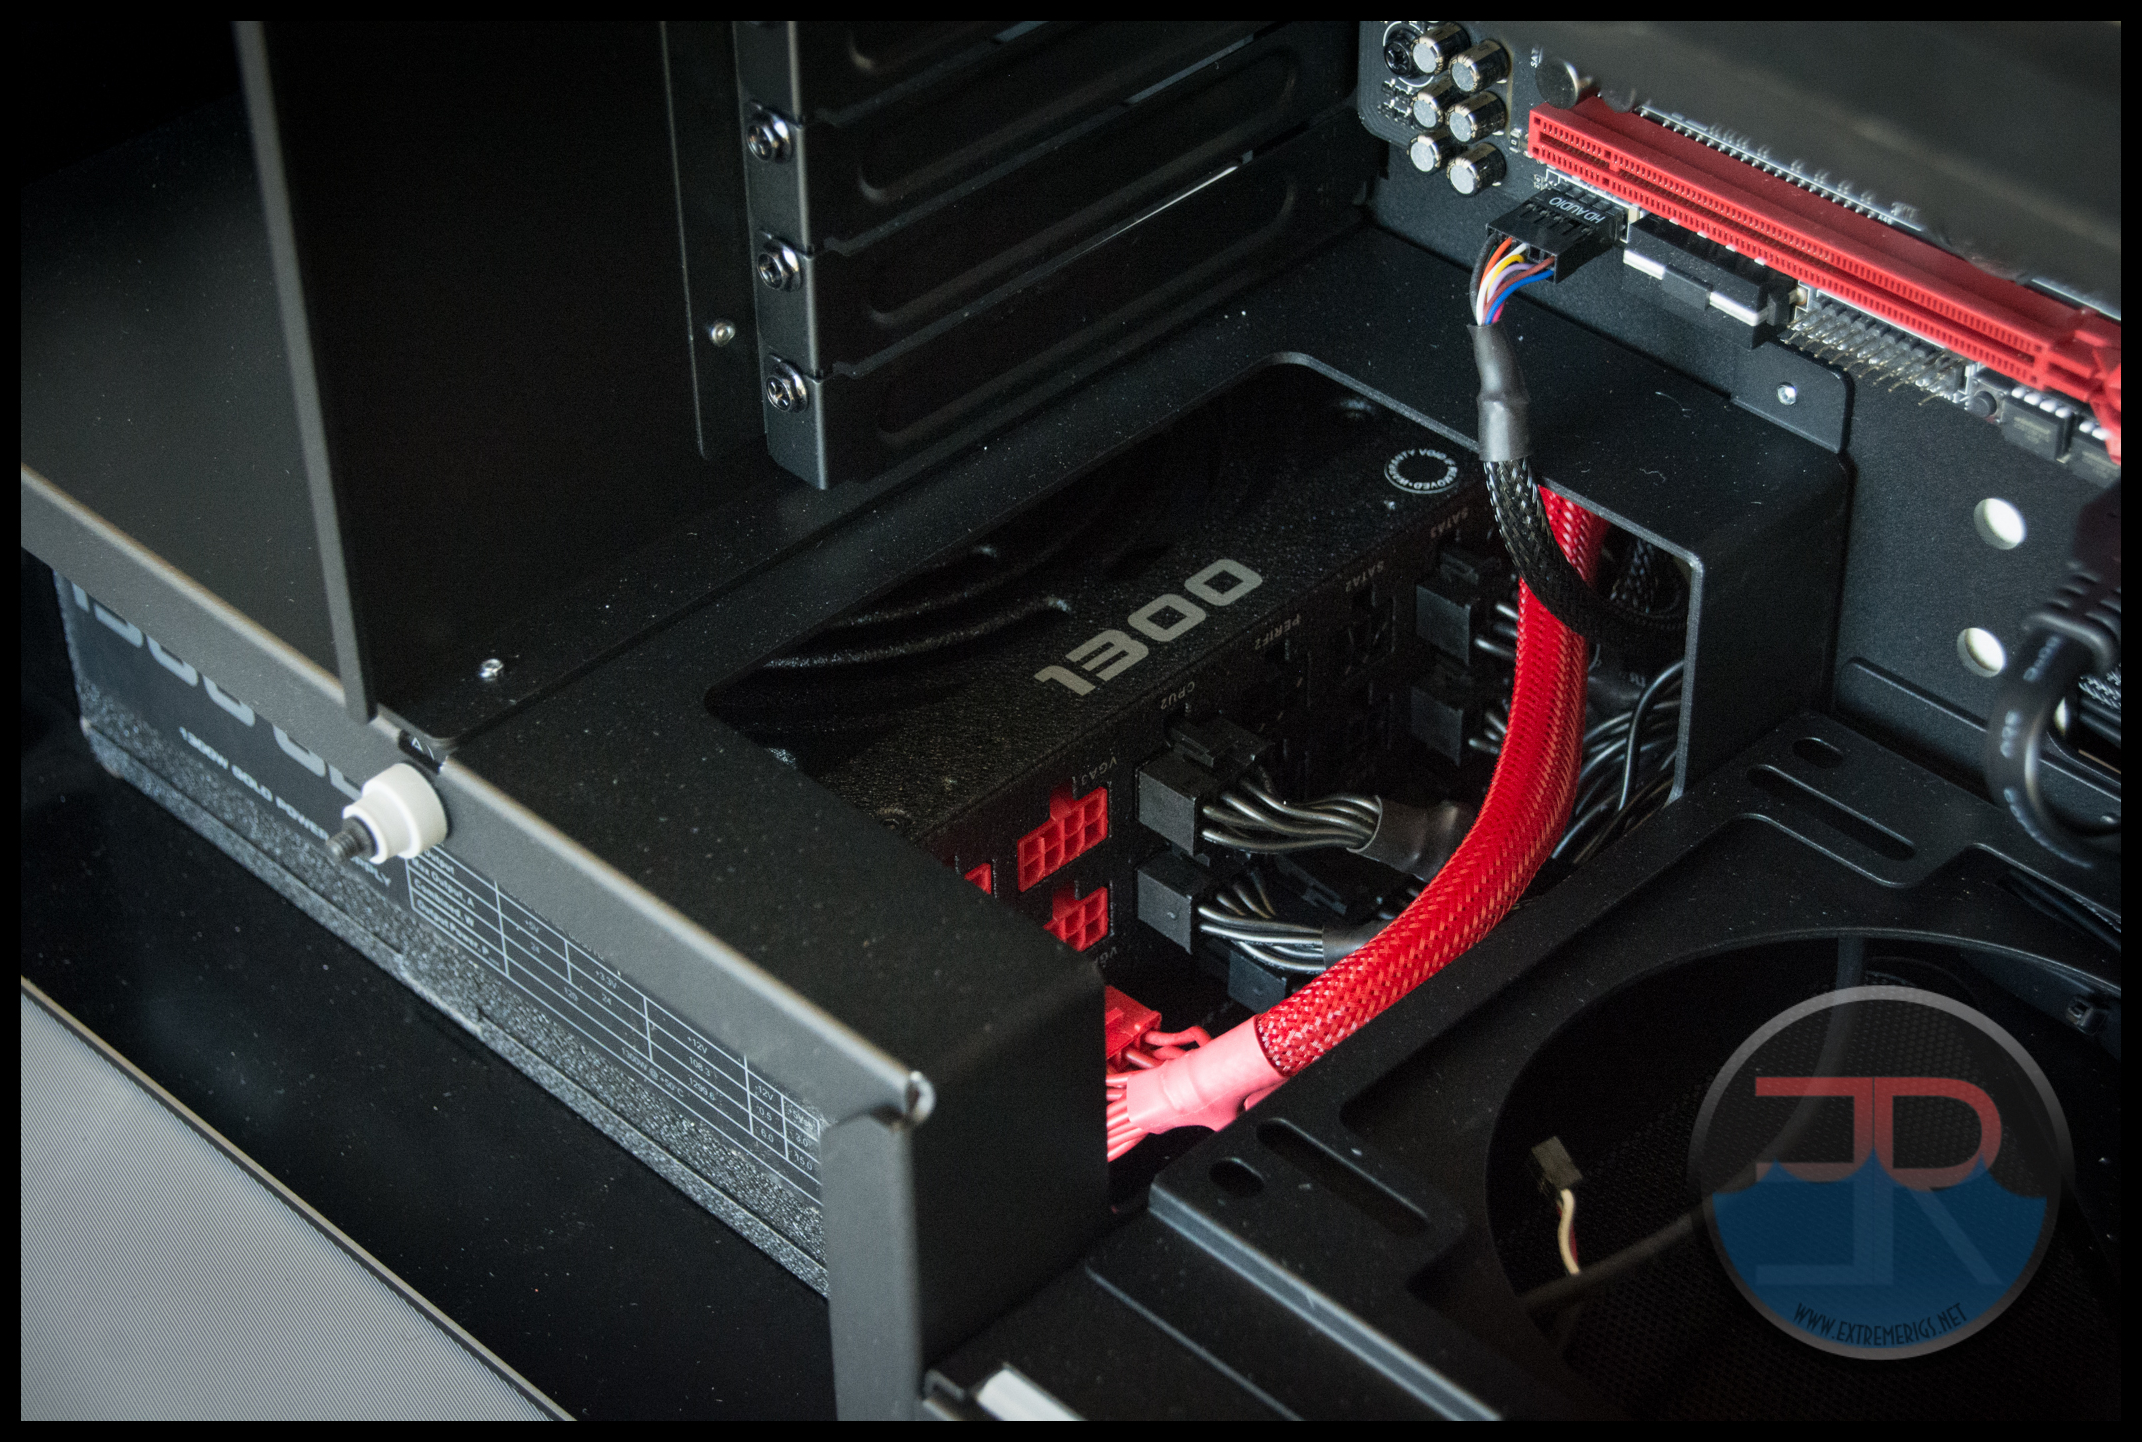
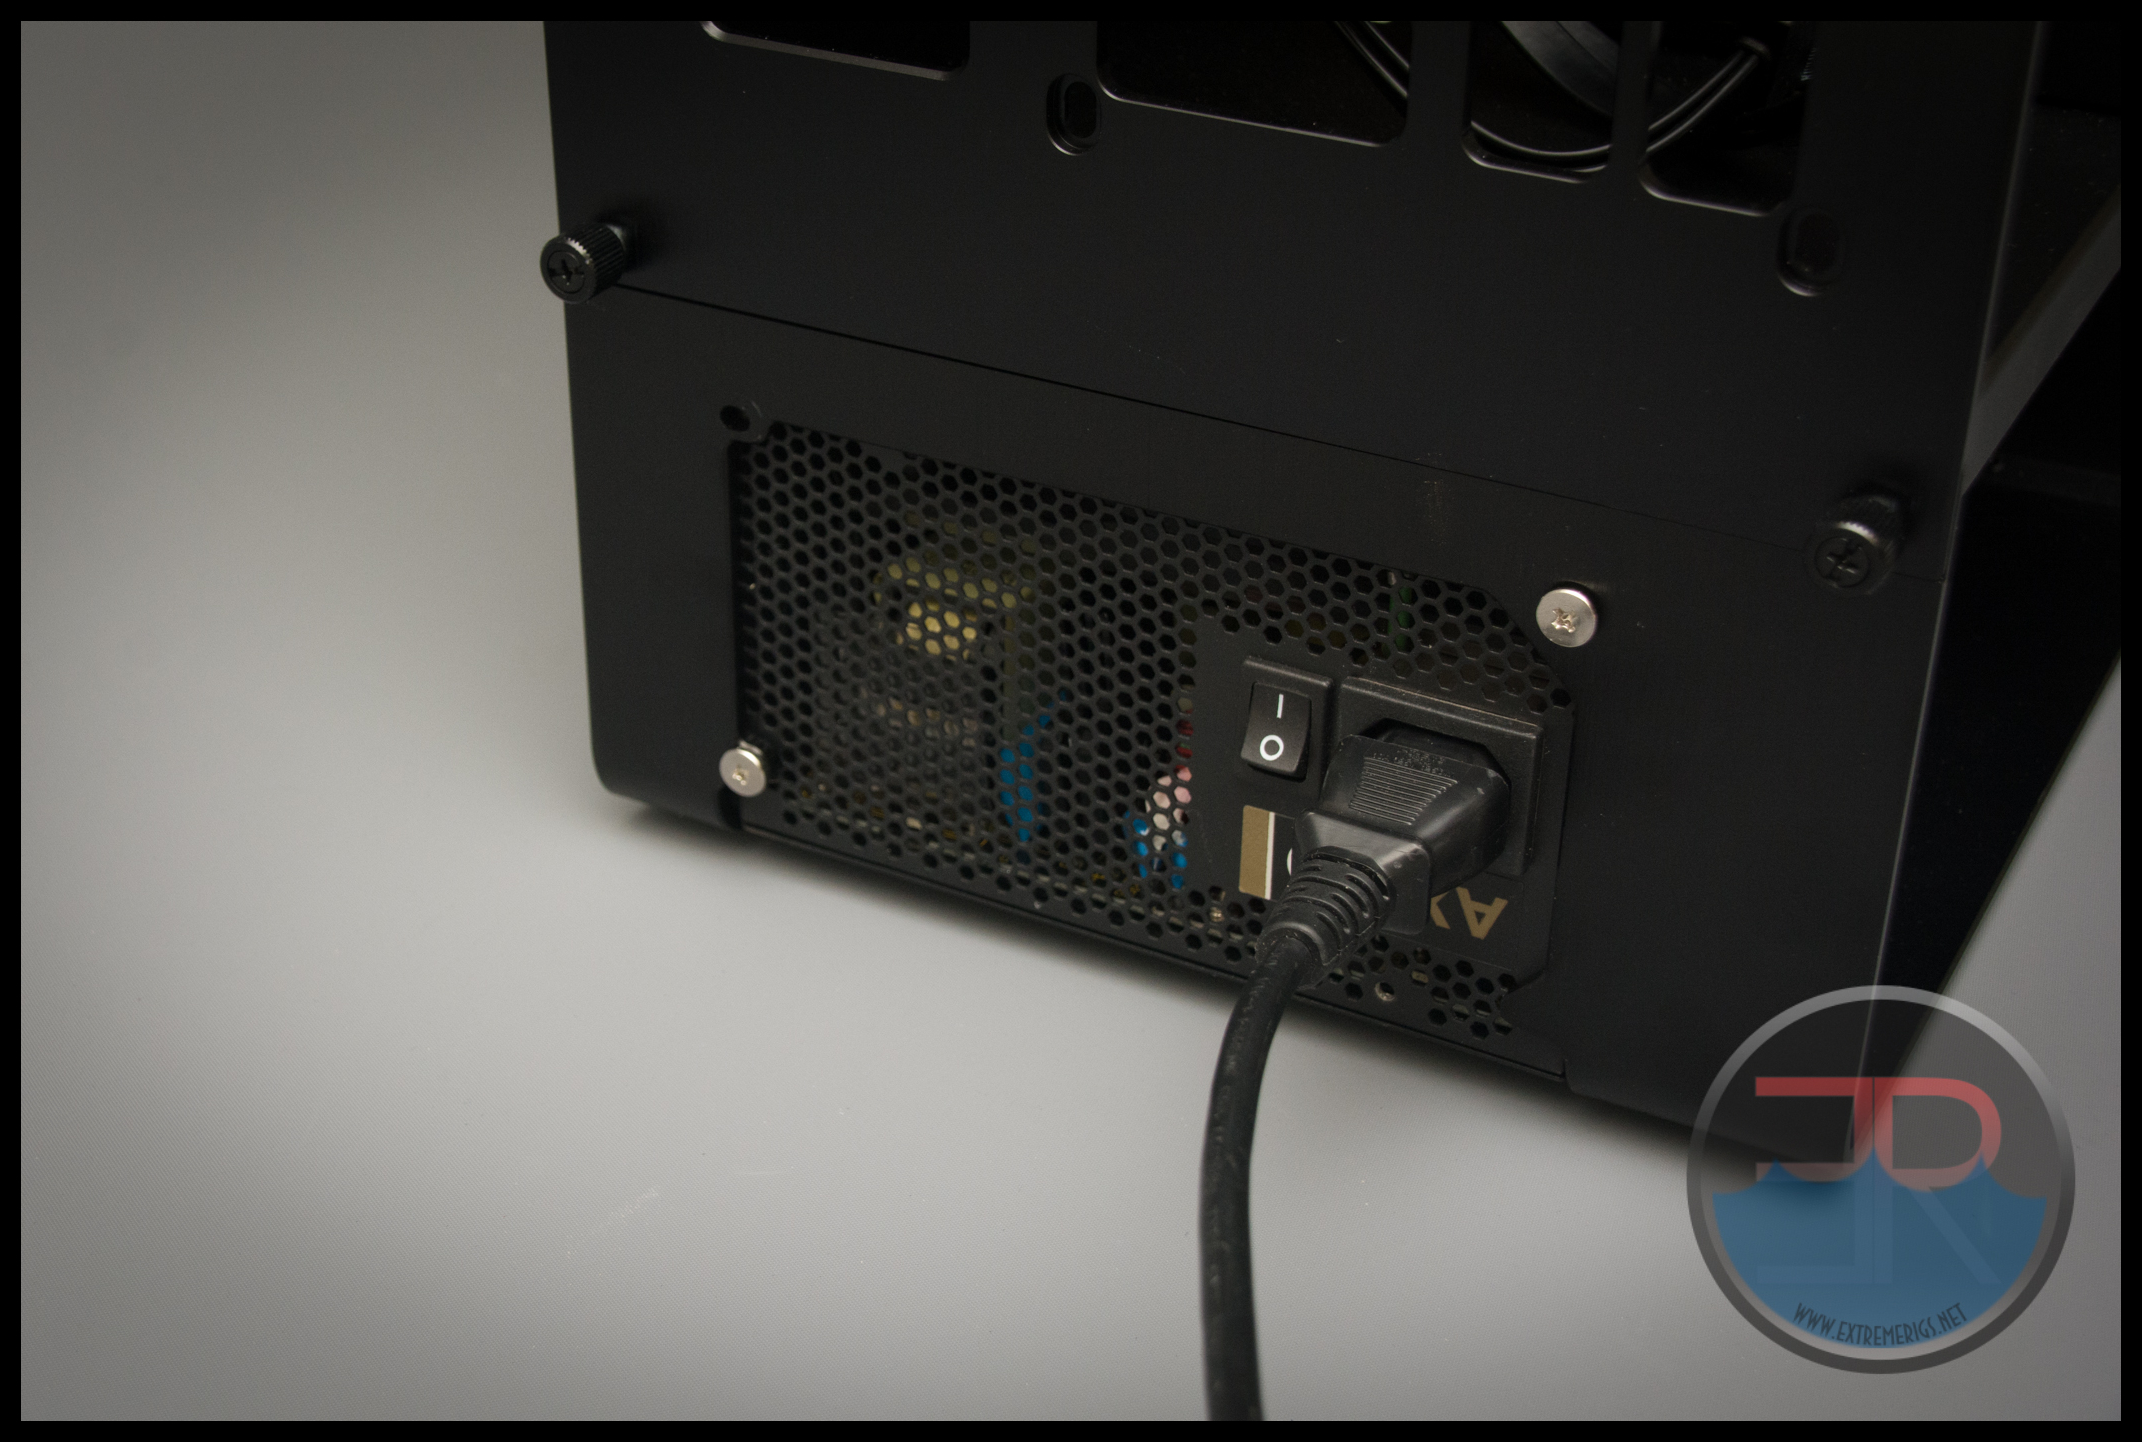
In addition although large PSU’s like this 1300G2 are supported there is not much room in front of the PSU left:
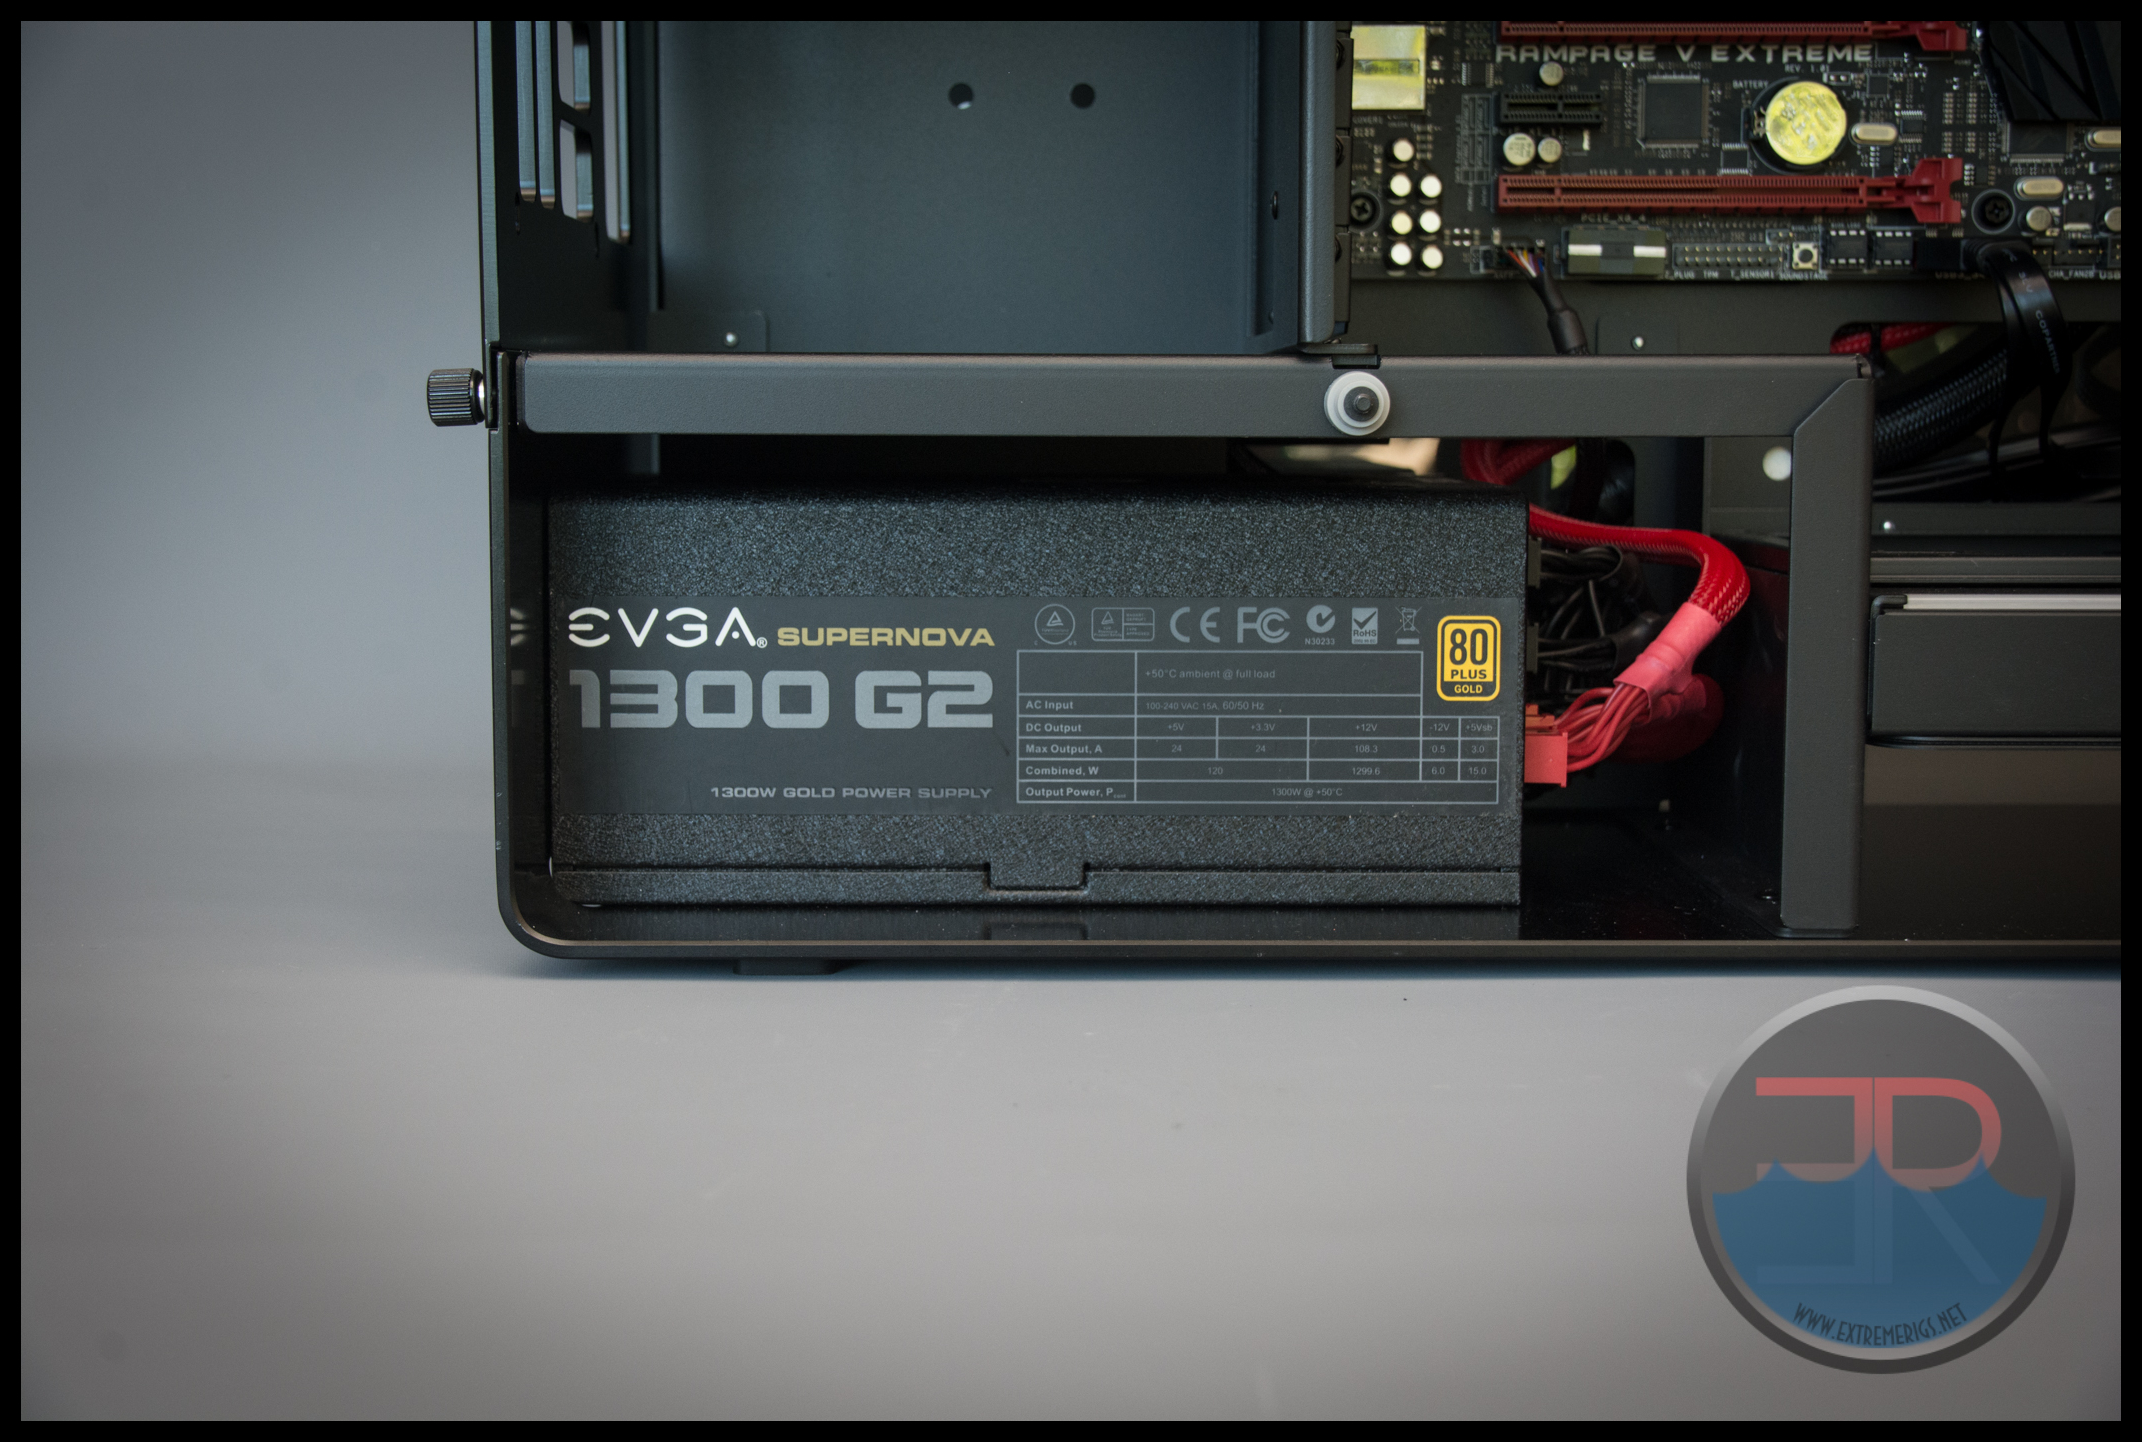
It’s also noticable that the PSU is resting on the chassis without any rubber strip to isolate it.
The total chamber length is just over 255mm:
The other disappointment about the PSU is that the mounting screws are silver when every other screws is black. There are also only mounting holes for three out of the four screws:
After tidying up the build we then launched a Prime95 run on the stock 5820K and let it run for several hours to make sure the temperatures were suitably settled. The CPU temperatures were averaged over an hour. The ambient temperatures at the inlet to the case (the bottom 240 mount) were also measured with 6 temperature probes and averaged. The coolant temperature was also measured. The coolant to ambient delta and the cpu to ambient delta are then our thermal performance metrics for the “breathability test” and can be compared to some other cases setup with the same hardware and cooling. Let’s start with the coolant:
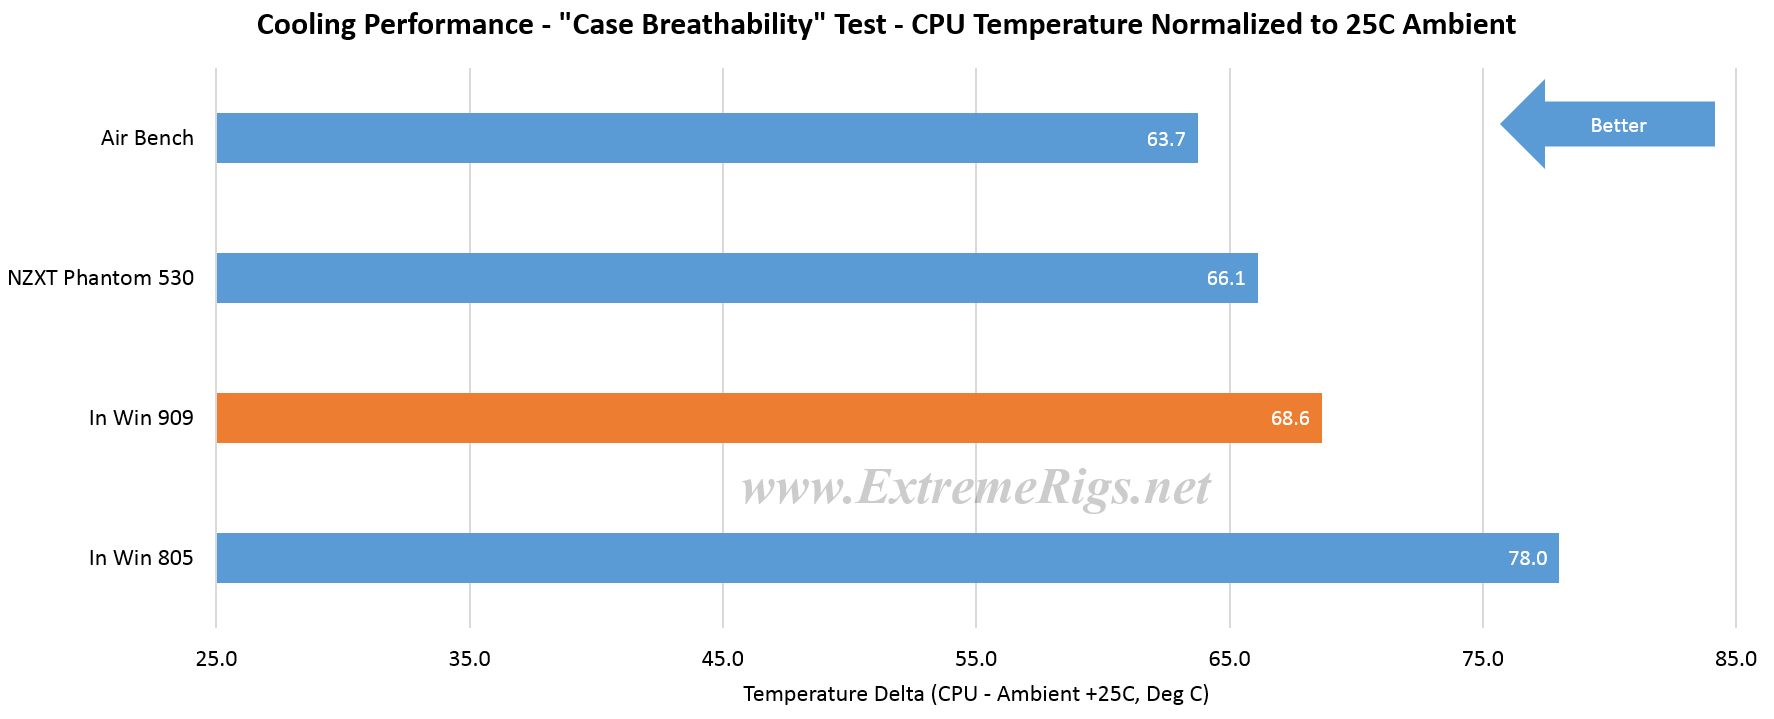
The 909, like the 530, used an exhaust setup whereby it receives air into the radiator that has been warmed by the inside of the case. It will never be that close to a perfect air bench because of this. However it’s 2C worse than the 530. This is probably because the 530 has a front mounted 200mm fan to force air into the case. The 909 by contrast is setup with no intake fans and given that it’s using a 240 rad mounted to a 360 mount it can also recirculate air from intake to exhaust through the unused section of the radiator mount.
As expected the coolant deltas have a direct linear effect on CPU temperatures. No doubt with a more optimal cooling setup the 909 would do a lot better, however this is an attempt to show how “breathable” cases are when they are setup with a standardized loop out of the box. So airflow wise the case is a bit restrictive as we might expect, but nothing like the 805 that really concerned us.
Now let’s take a look at a more representative setup that an end user might use. In a case like this there are only two useful radiator mounts – the rear 360 and the bottom mounted 240. We’ve discounted the front mounted 280 radiator because it will struggle to get air just like the In Win 805’s radiator mount.
Given that the 240 runs as an intake and the 360 as an exhaust then the effective setup is more like a single 360 radiator in push/pull. Therefore we might expect temperatures to suffer a bit because of this.
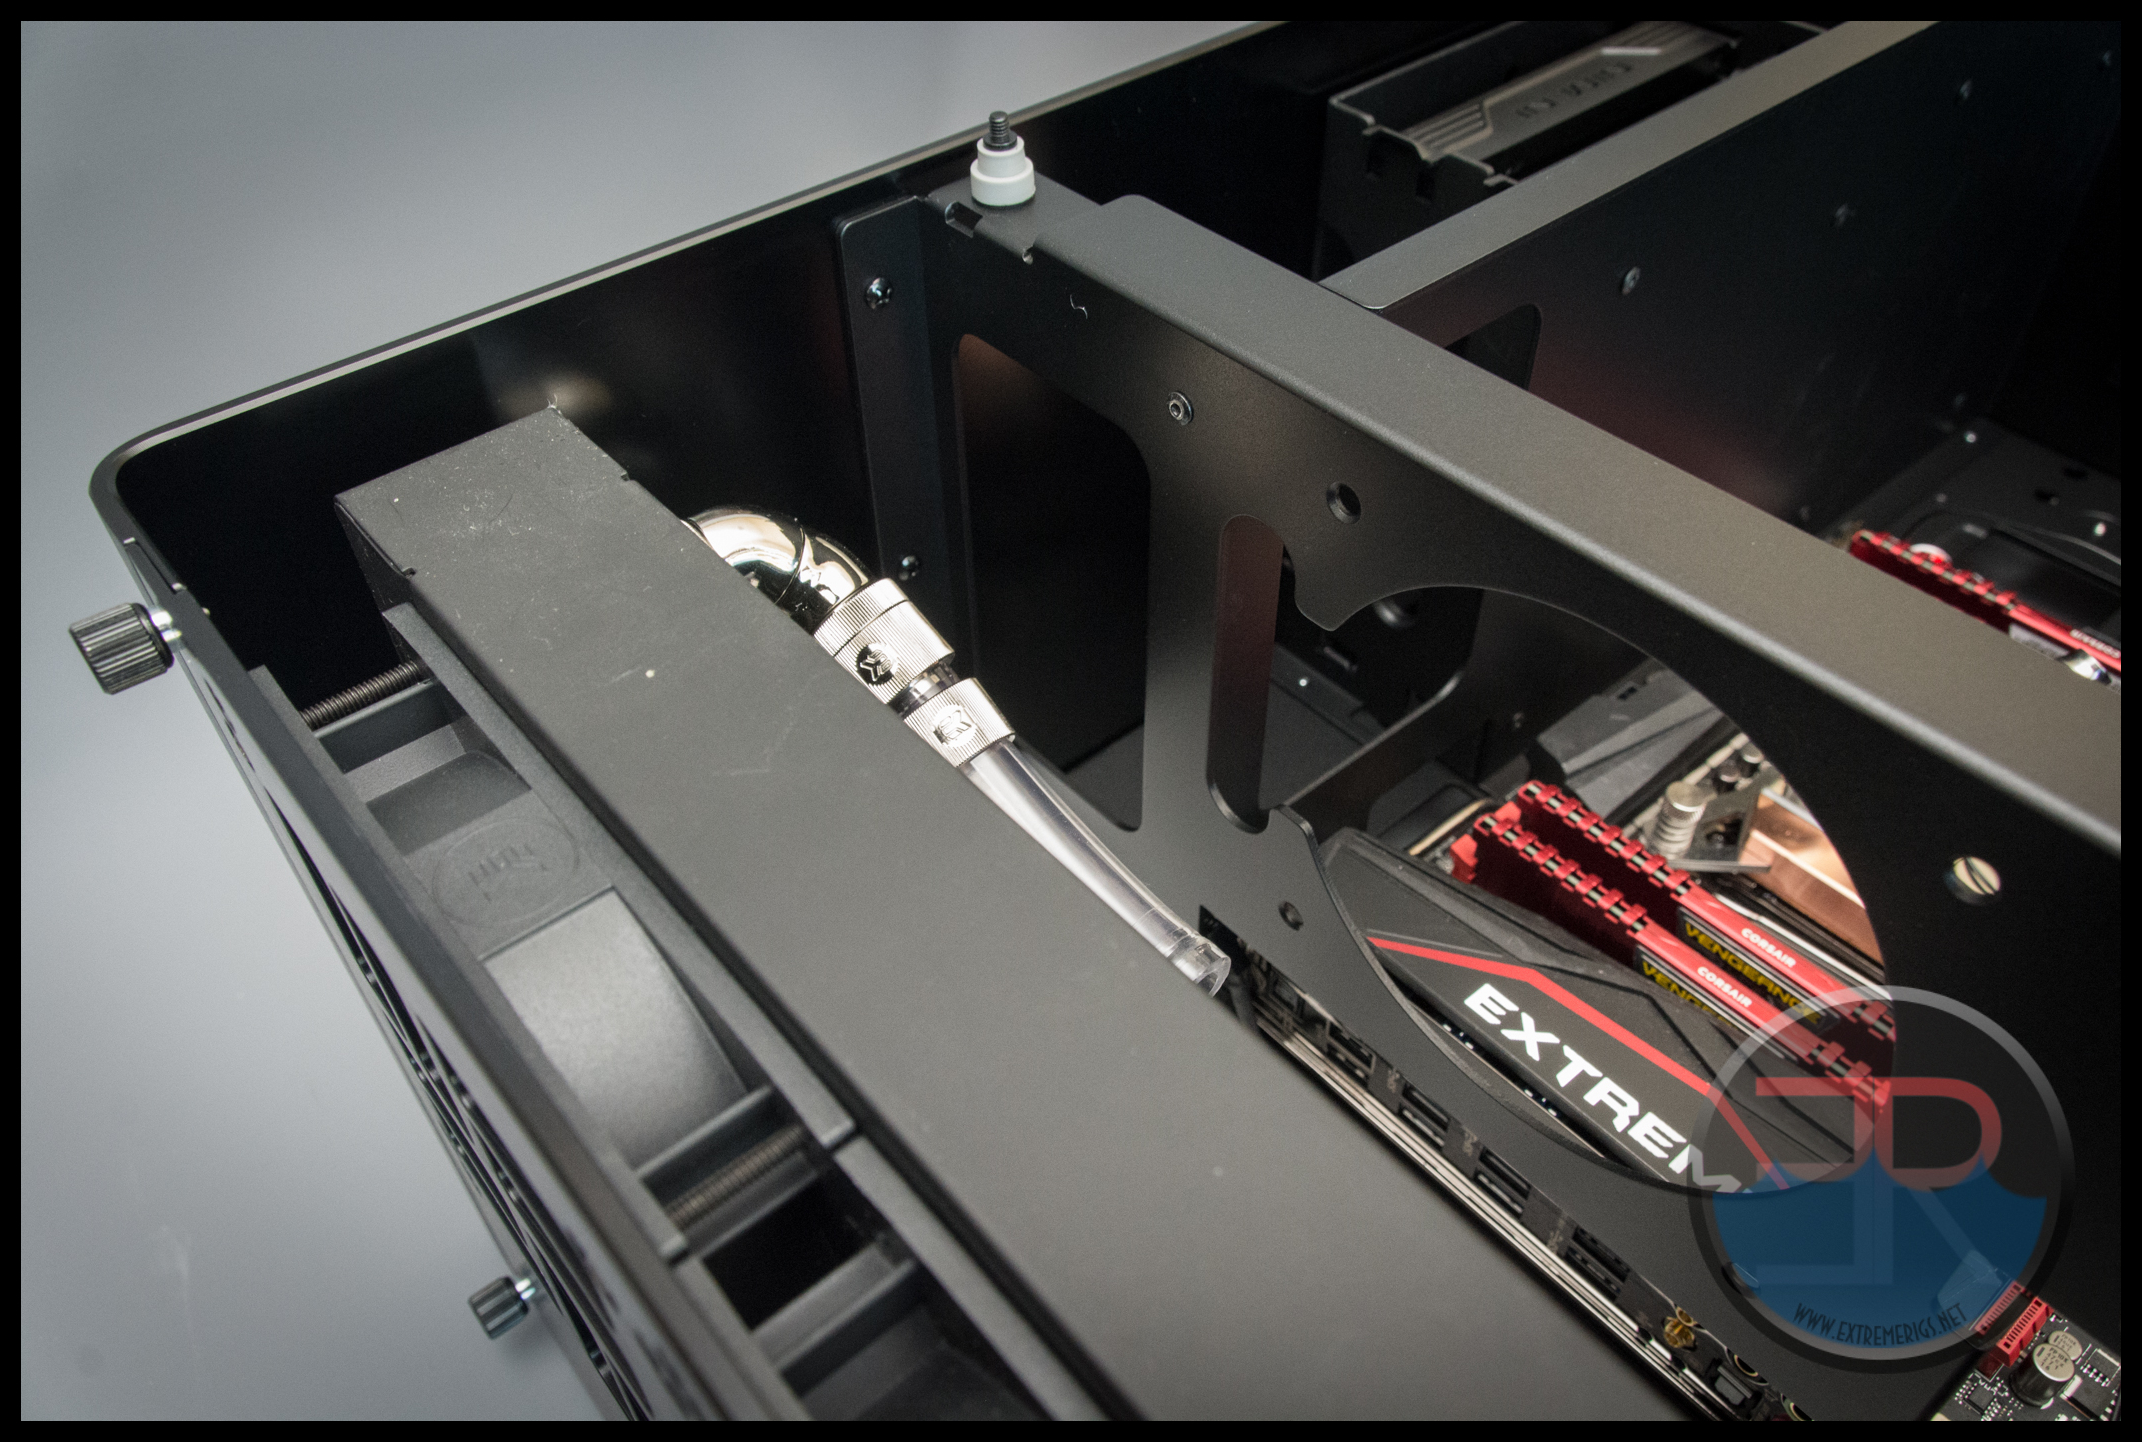
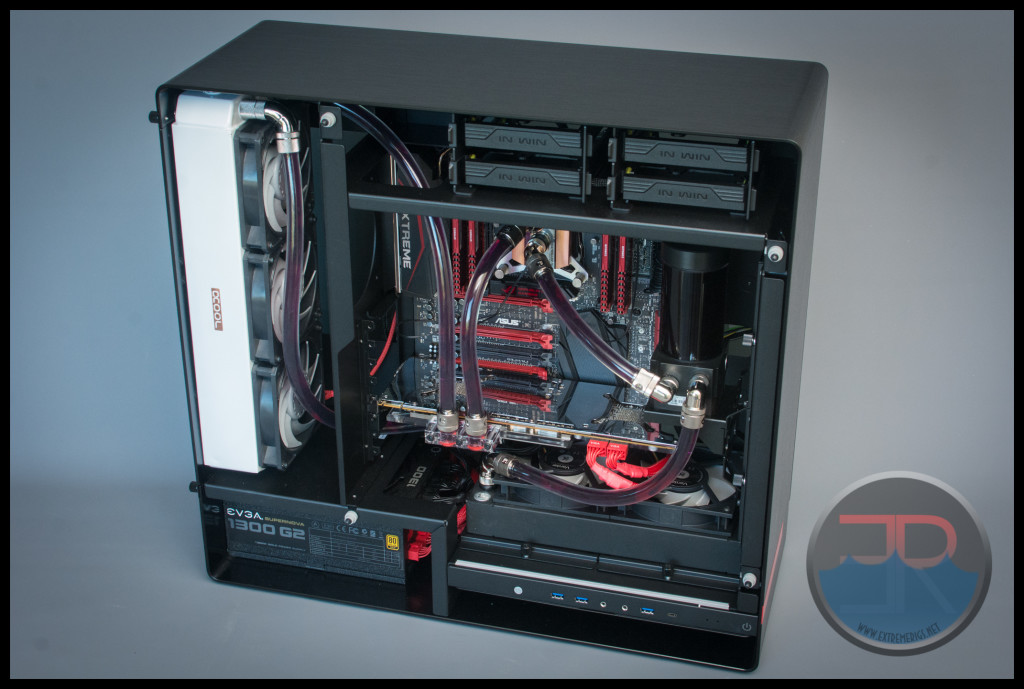
For our “typical” setup we are going to use an overclocked 5820K and a dual graphic card all in one loop. We are using the same DDC pump/reservoir. The 240 we use is the same EK PE series – this only just fitted in the bottom of the case and we would recommend something slimmer. Indeed if you use both of the quick release fan mounts then the radiator will not fit:
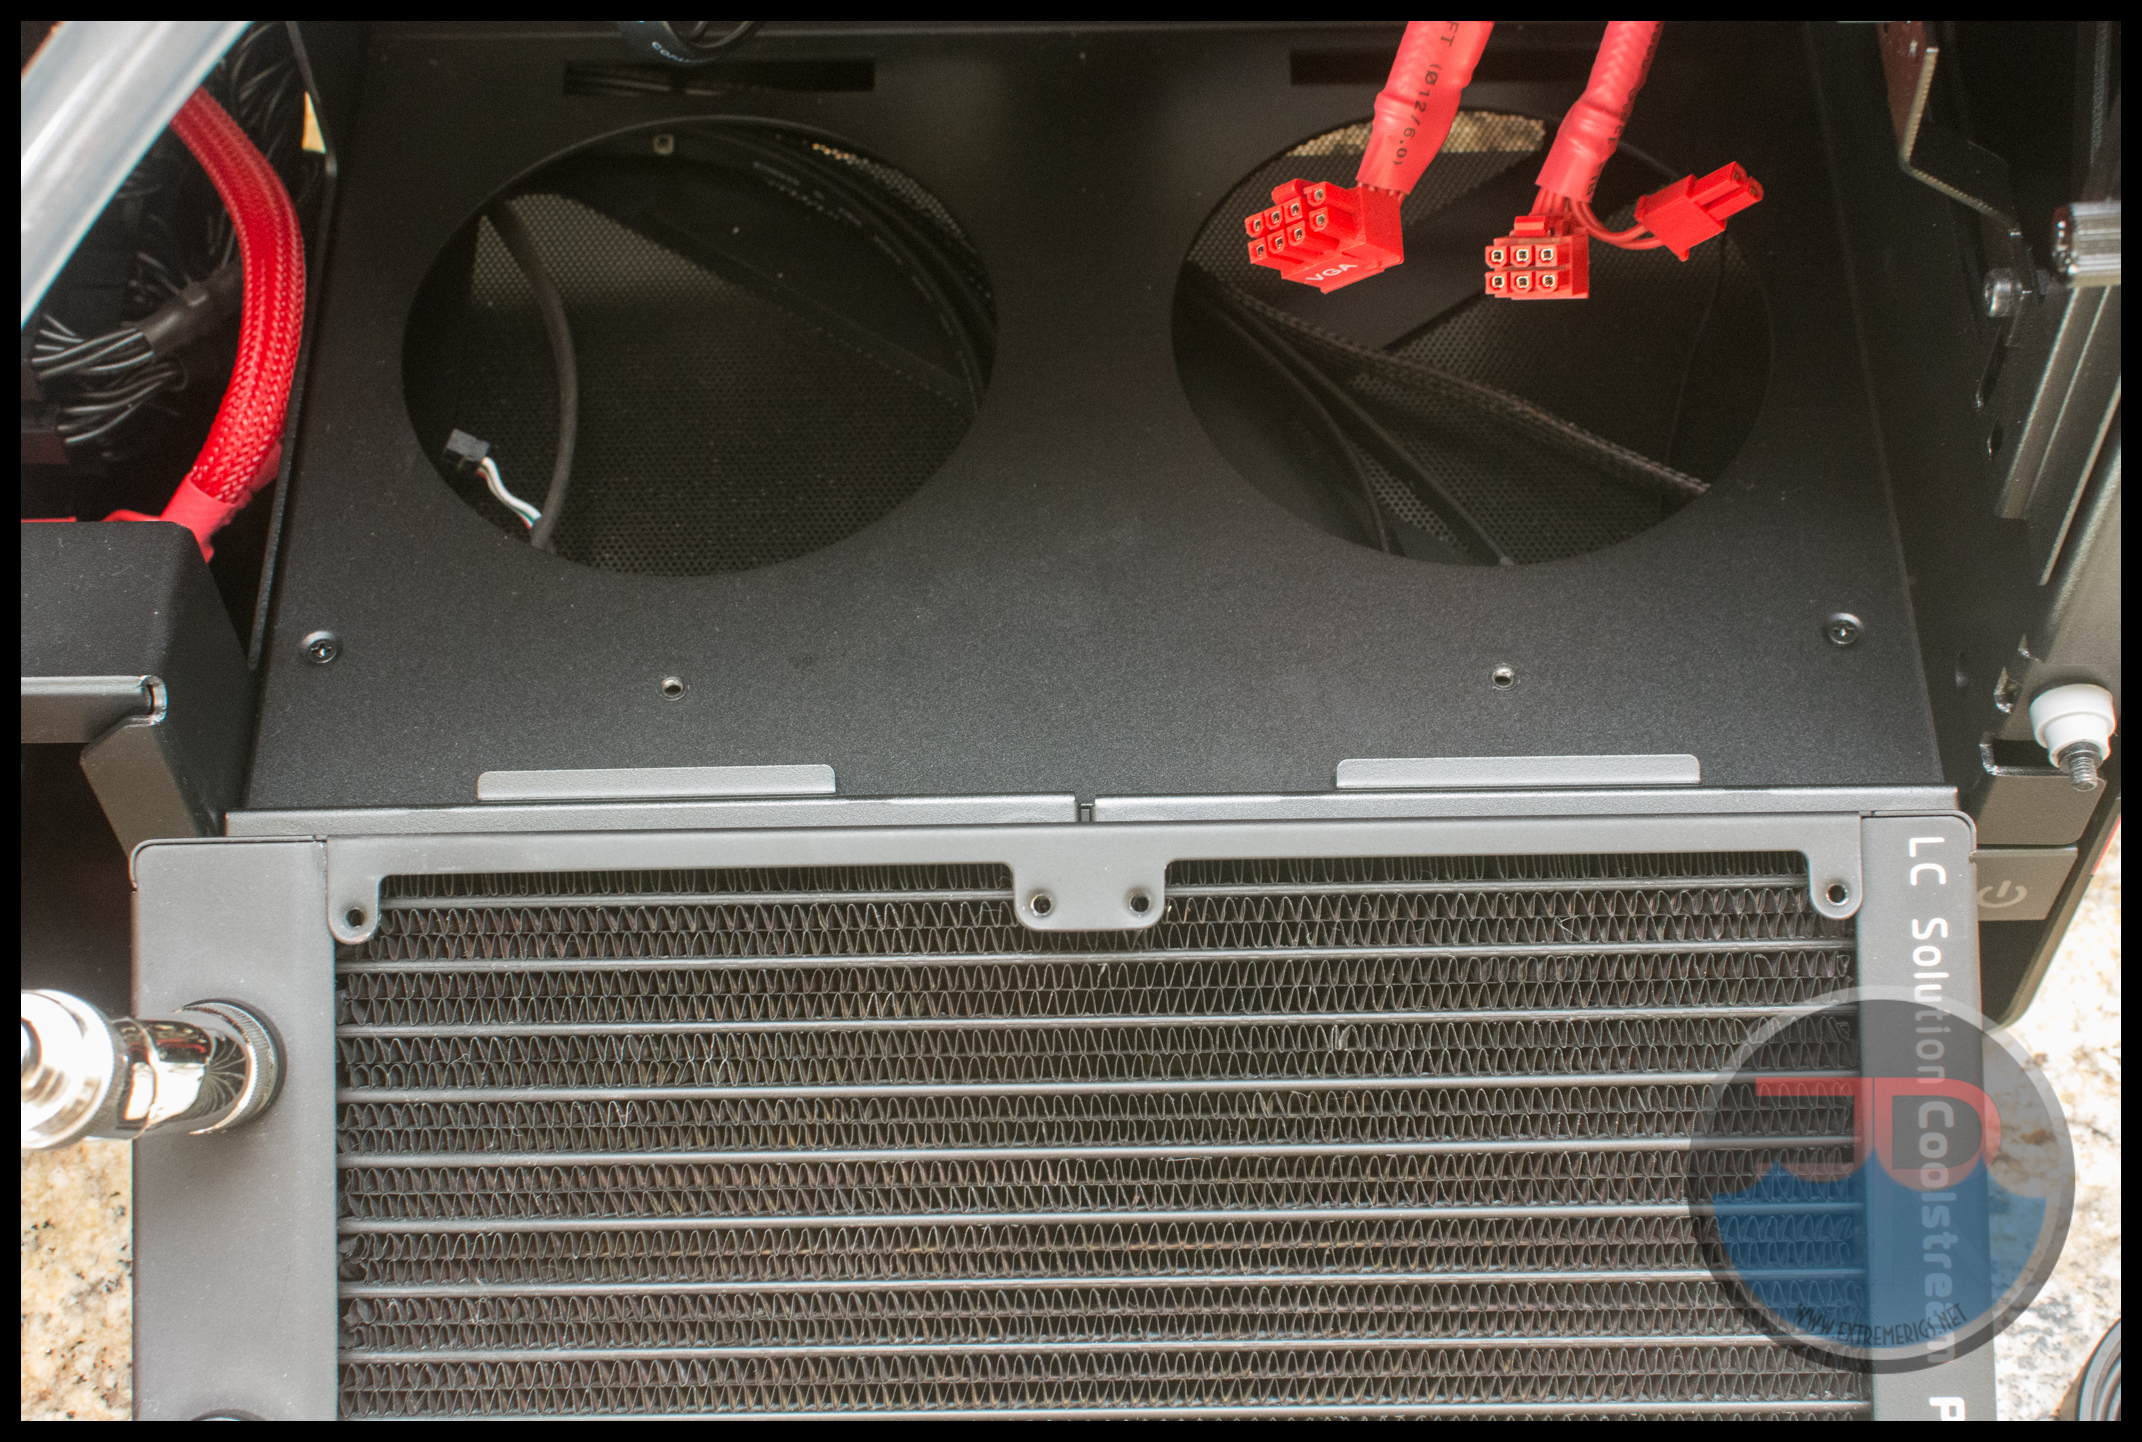
Instead you have to only use one of the mounts and offset the radiator to fit. The PE only just fits in the space and there is zero space between the motherboard and the fans.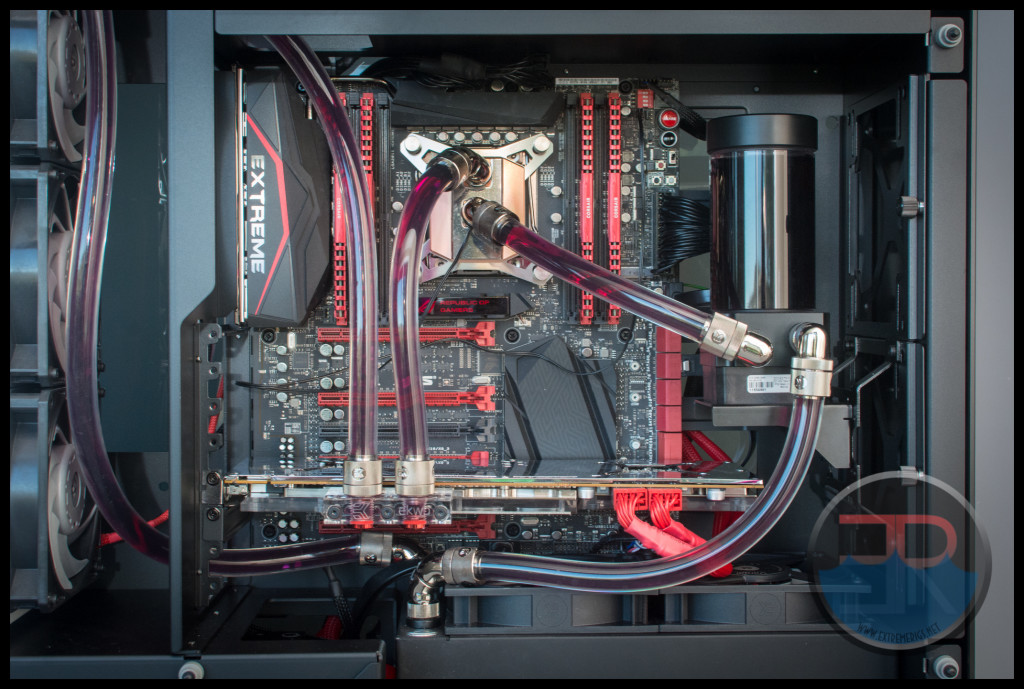
For the rear radiator we used a thicker 60mm Alphacool UT60 radiator. The white UT60 was chosen so as to see how black vs white components looked differently behind the smoked glass.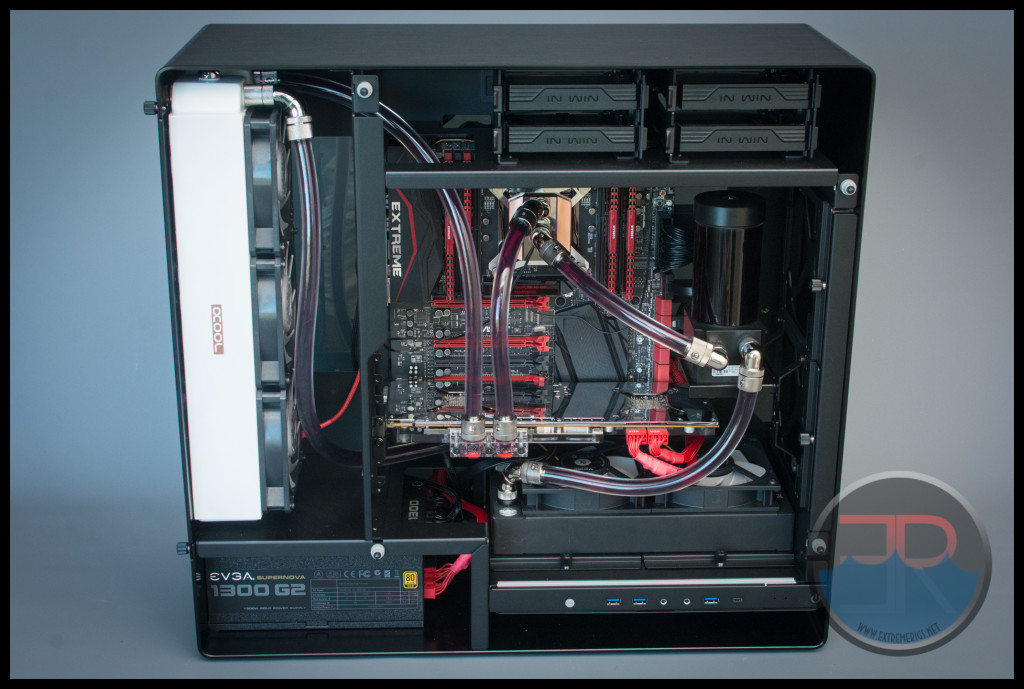
There are plenty of tubing routing options so the case is really quite easy to build in. The hardest part was trying to fit the 240 in the front mount.
Note that the long 7990 card had to be put in PCI slot 3 in order to avoid hitting the pump.
For thermal loading we decided to try something we thought would be representative of a typical “gaming” load. We ran the Unigine Valley benchmark on the GPU, and in order to increase CPU loading we ran a 2 core prime95 run on the CPU simultaneously. We then measured the coolant temperature relative to ambient air temperatures. For fans we used a mix of 1850RPM Gentle Typhoons and EK’s 1850RPM Vardar fans at maximum speed.
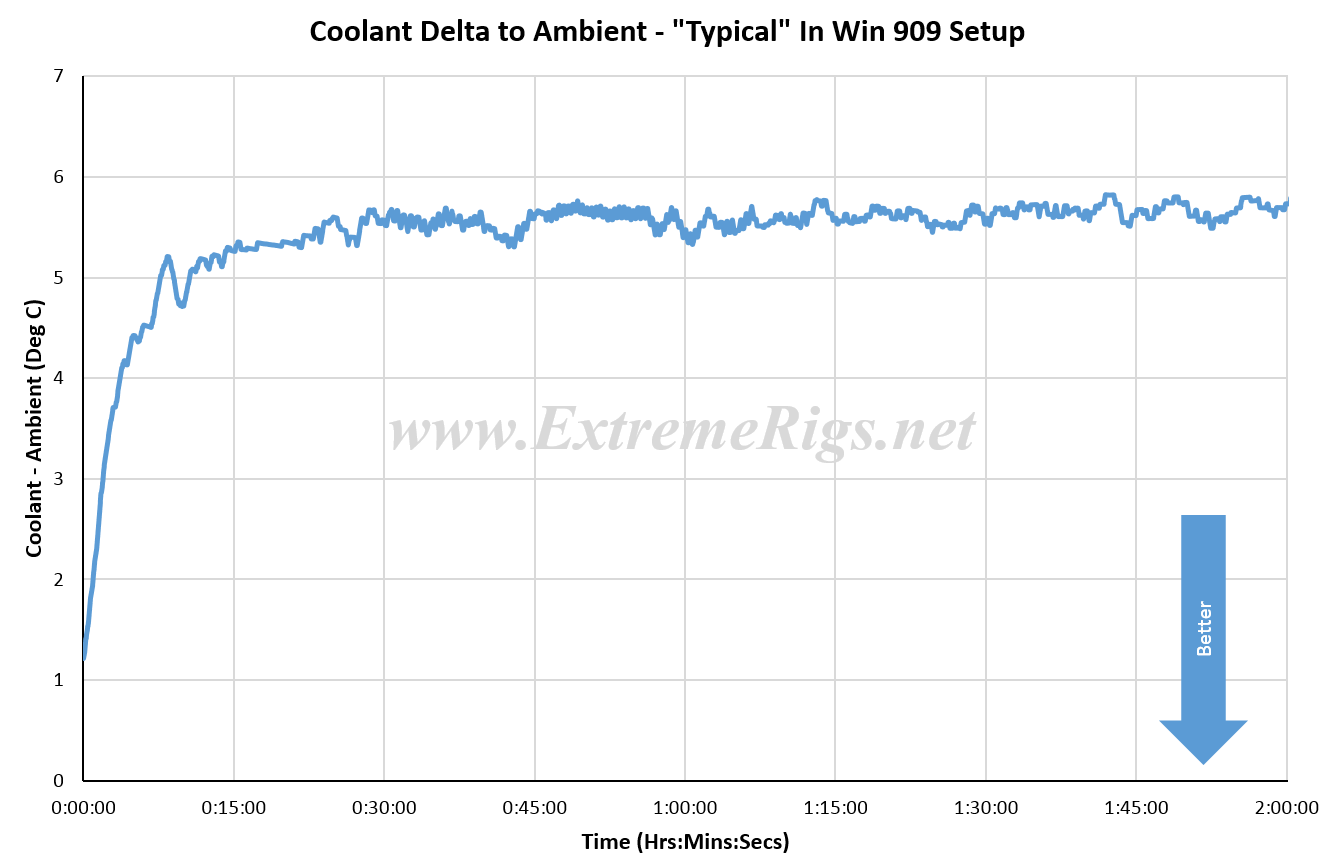
A coolant delta of under 6 degrees for a typical “gaming” load with 2 gpus is great. Even if we doubled the power load the coolant delta wouldn’t be too high. Therefore despite our skepticism the case seems to cool well enough and can be considered good enough for real water cooling.
Let’s take a look at that white radiator through the glass:
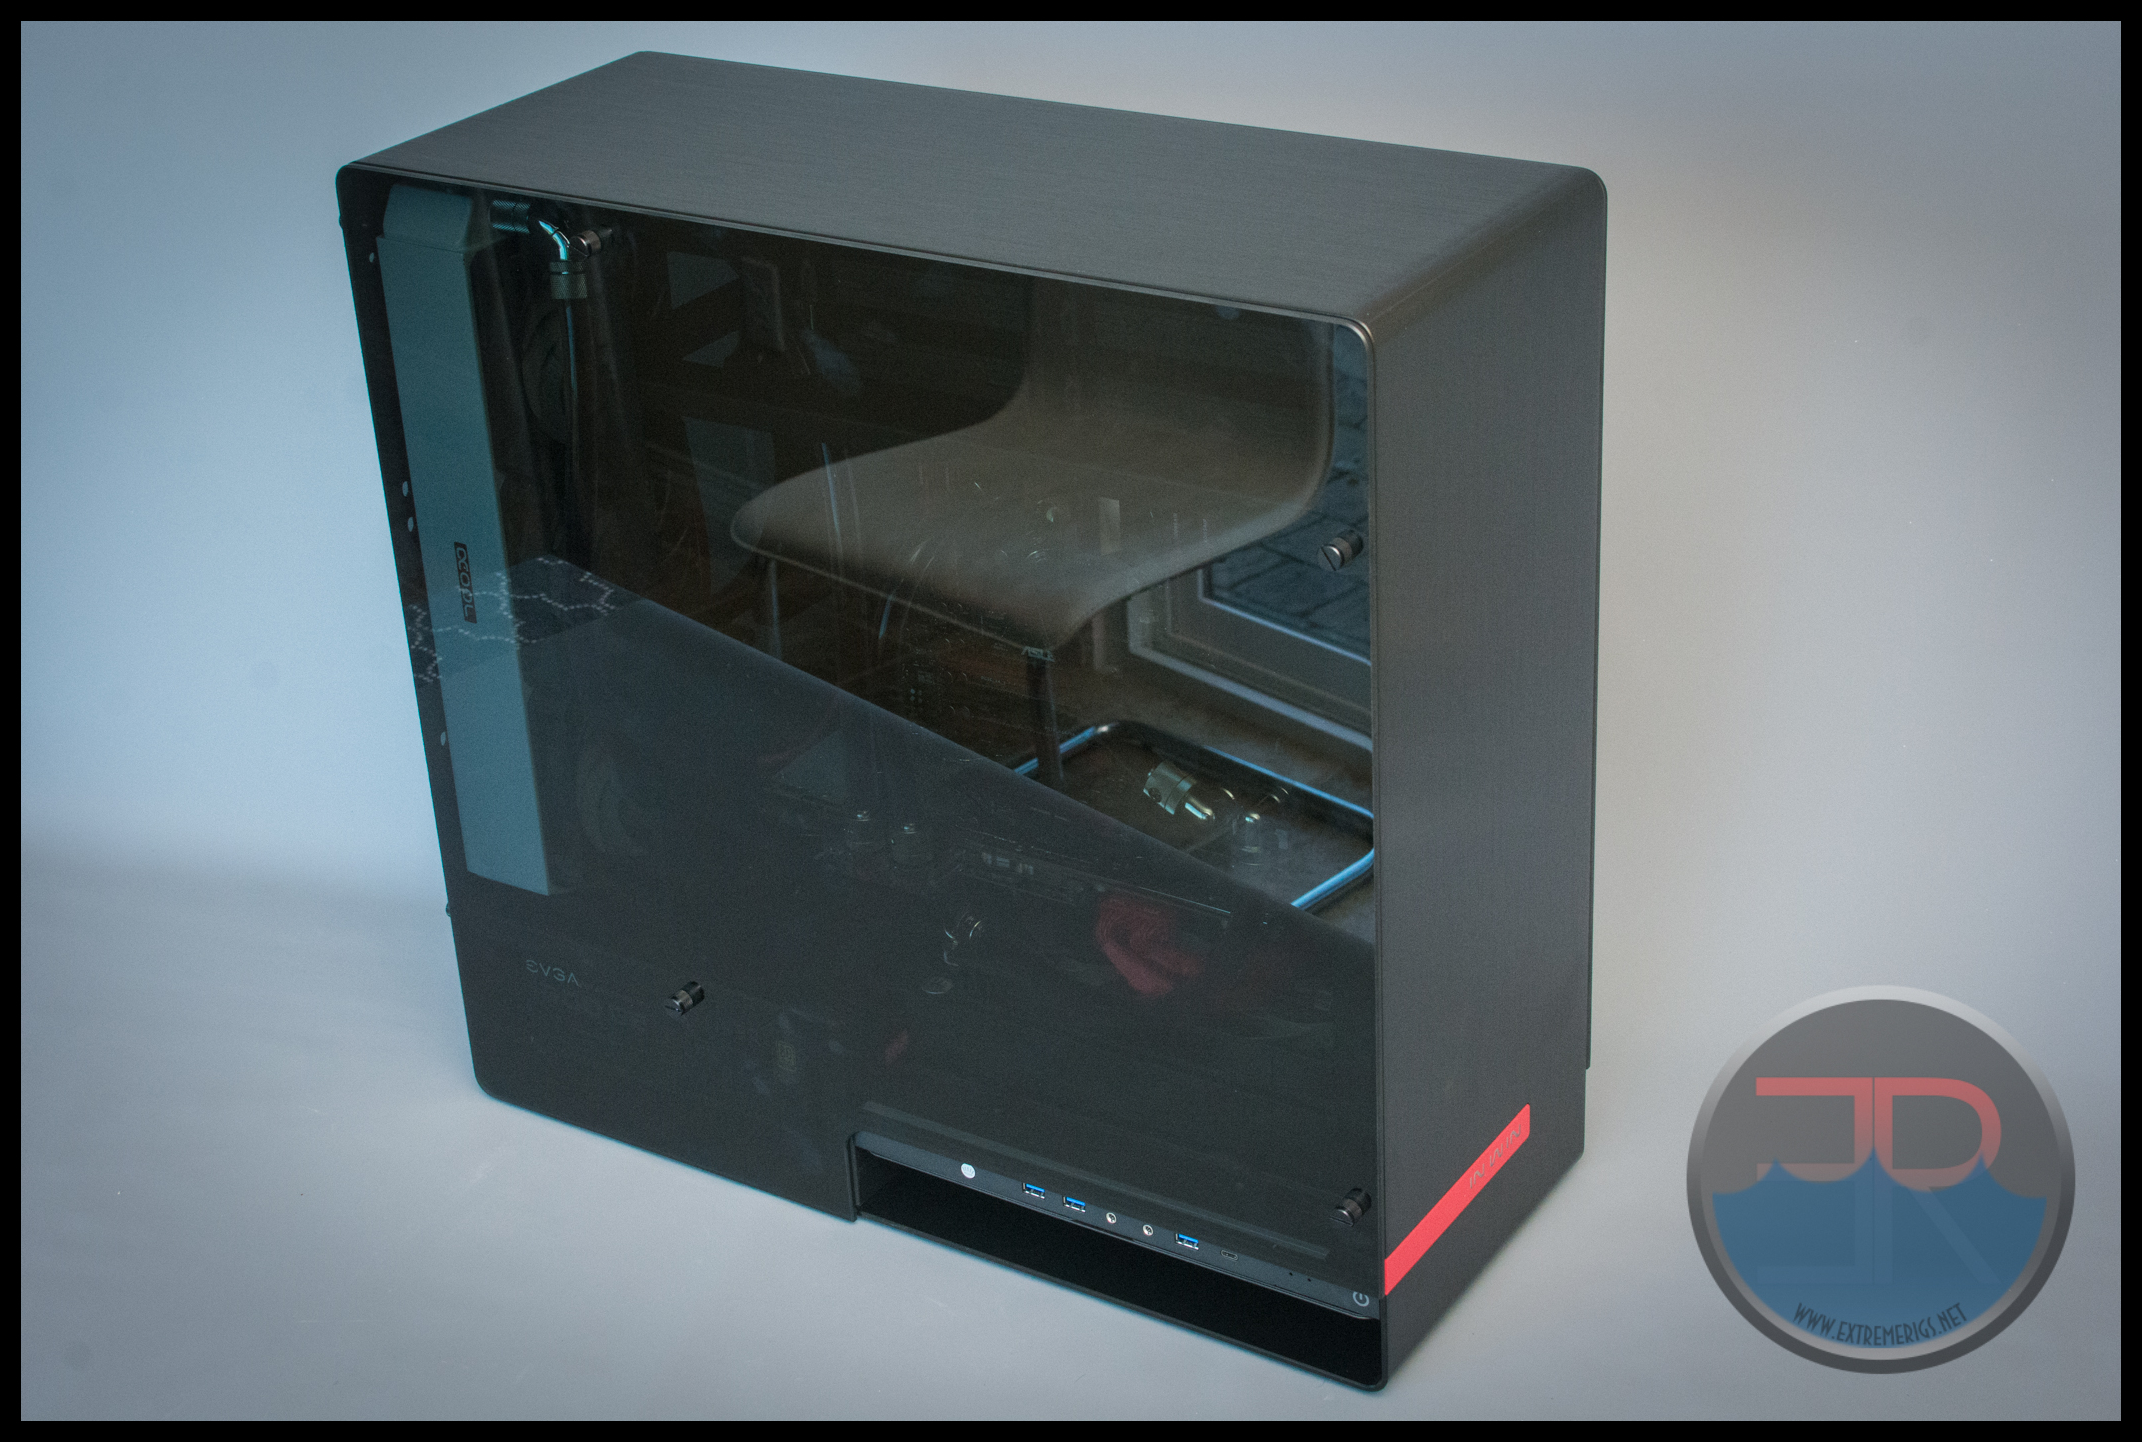
If you can ignore the reflections, then the white radiator can be clearly seen. The main chamber is almost invisible without any lighting though.
Comparing to the black radiator – which almost can’t be seen:
Now let’s take a look at that built in LED lighting. In our case the switch for the lighting was unplugged, however plugging the molex in turned the LED strip on anyway.
However the IO panel is easy to remove as it is held in by four screws:
We were able to find the offending cable and plug it back in:
Then the lights worked. The switch on the front moves between two different modes – the first starts off with a “knight rider” style strobe back and forth before staying on permanently:
The second mode is more of a heartbeat style effect. The entire bar dims up and down slowly:
The light bar is never that bright, particularly when it’s behind the glass. It’s more of a standalone feature than something that can light up the inside of the case effectively.
Lastly let’s take a look at some builds that modders have done with the 909. First off is one from EK’s Derick which packs three radiators in:


Next up – davido_labido’s Project Unity for Asus:

In Win’s own example build is a little strange simply because it’s not using the default rear radiator mount:


Time for the summary!
Summary
Summary
The case is simply beautiful with simple clean lines on the exterior. I didn’t expect the impact that this case has in person. The quality of the materials really stands out. The thickness of the glass and aluminum really impress. The brushed aluminum is gorgeous and the fact that it’s a single piece bent around 80% of the case really takes it to the next level.
Unlike some of In Win’s other designs – this beautiful form hasn’t impacted the function of the case. It still has easy access to i/o ports and power switches. The support for custom water cooling is great and there is adequate radiator space provided. All the quick release mounts are really useful – our only real complaint is that the top chamber is “wasted” on HDDs.
In addition, if you are someone who often plugs and unplugs cables, you’re going to hate sticking your hand through the rear panel and trying to locate the right port:
The other minor annoyances are really about the cables – the provided atx extensions are the cheapest you can get with no sleeving. In addition the internal wiring, although sleeved, do not fully hide the colored wires underneath.
So this is a beautiful, functional case. However it’s heavy and it’s expensive. $450 is not cheap, but neither are the materials used for this. Given the premium quality of the case I feel like the price is fair. This is a case that will look like you spent money on it. Think of it like a BMW 6 series, it might not be the lightest or fastest or the most functional; but you’ll enjoy the ride while knowing the experience is not cheap. For some, it’ll be worth the money.
Therefore despite our niggles we really love this case and think that end users will not be disappointed. Therefore it wins the coveted gold award!
Where to buy:


That’s a very nice case and I’m probably going to build by next computer with that. But I have 2 questions.
I’m going to have 2xMSI 980 Ti LIGHTENING SLI in the computer, which is a tri slot card. What exactly is the problem that I will run into if I mount one of them at the lowest 2 slots? Is is possible to stuck it in there with some slight mods?
Also, is it possible for me to mount the PSU in the HDD compartment at the top? Thanks
If they are a full three slots then no, if they are 2.5x then they might work 🙂
PSU, haven’t measured, but yes maybe, worst case you might have to mod it a bit 🙂
Thank you for this review. I actually ordered this case prior to reading but you gave me some ideas for designing my loop. Question – how would I remove the HD bays – they take up space (as you noted) and it would be great for the reservior.
I believe they screw in from the underside, i.e. the top panel of the motherboard chamber 🙂 I’m out of the country right now so can’t check sadly.
I am actually building on one of these cases now. I have two questions;
1. Is the IN WIN front logo supposed to light up? I can’t figure out if I have one of the LED plugs plugged in wrong or if it doesn’t come on until after post or… not at all. My Side LED works with all of its flashing glory.
2. What are the clearances on the top and bottom of the Main Motherboard Bay with a 280mm radiator? I’m attempting to put a custom water reservoir on the bottom that comes flush with the PSU cover.
1. – Yes – although my side LED strip had managed to unplug itself in shipping, so you may want to poke around where all the wires come out to see if you have a loose cable in there.
2. top and bottom? Do you mean the side of the board? The bottom I think you’d be best off with a very slim/narrow 240 at the bottom. I was able to fit an EK PE radiator in there, but that’s really the limit and it was already causing some interference getting in the bottom cables to the motherboard. If you want an easy life I’d suggest something like an EK SE radiator (narrow/slim) or a Hardware Labs Nemesis GTS N series (narrower version than regular GTS – Same as Bitspower Leviathan Slim). For the front mounted 280 – you won’t get a lot of air to the rad so the size isn’t critical and the space you have for it also depends on if you’re getting a super long GPU or also trying to mount a Pump in there. If you’re not running a super long GPU or pump in that area then my guess would be that a 60mm with push only fans would be ok. Let us know how your build goes!
Hi, am in the processing of designing my own 909 build, and I was wondering -> is there room for a push/pull configuration in the back radiator block with a 60mm thickness radiator?
I was thinking it looks quite tight, but if you abandoned the bottom fan (where the gpu might be), you might be able to get away with it… thoughts?
I haven’t measured it but yes I’m pretty sure you can do 60mm with push/pull 🙂 The review has a 60mm UT60 in there and there’s definitely space for a 2nd row of fans. Worse case you might need some cable adapters I suppose 🙂
I appreciate the response; I’ve since put in my radiators/reservoirs into my build. I’ve got an ek-xres 100 mounted horizontally in the empty space near the drive cages. My Msi gtx 1080 Seahawk ek x has about a 25mm clearance from CE 280 front mounted rad and fans. I’m in the process of custom making a reservoir that will sit in the 185mm space over the USB ports. I am very interested in seeing the results of the restricted airflow in the front of the case; in waiting on the ML140s from corsair to release in the US.
Comments are closed.