


Block Internals and Accessories
Although these photos are shown here before the thermal results, the blocks were not opened until after the testing was complete, this way there was no potential for the performance to be disturbed by user error. To disassemble the block simply remove the four torx head screws using the supplied torx wrench. The purplish residue is from the coolant and is not any kind of corrosion. The wrench was a bit tight for me and I really had to force it into the screw head before I could release the screws.
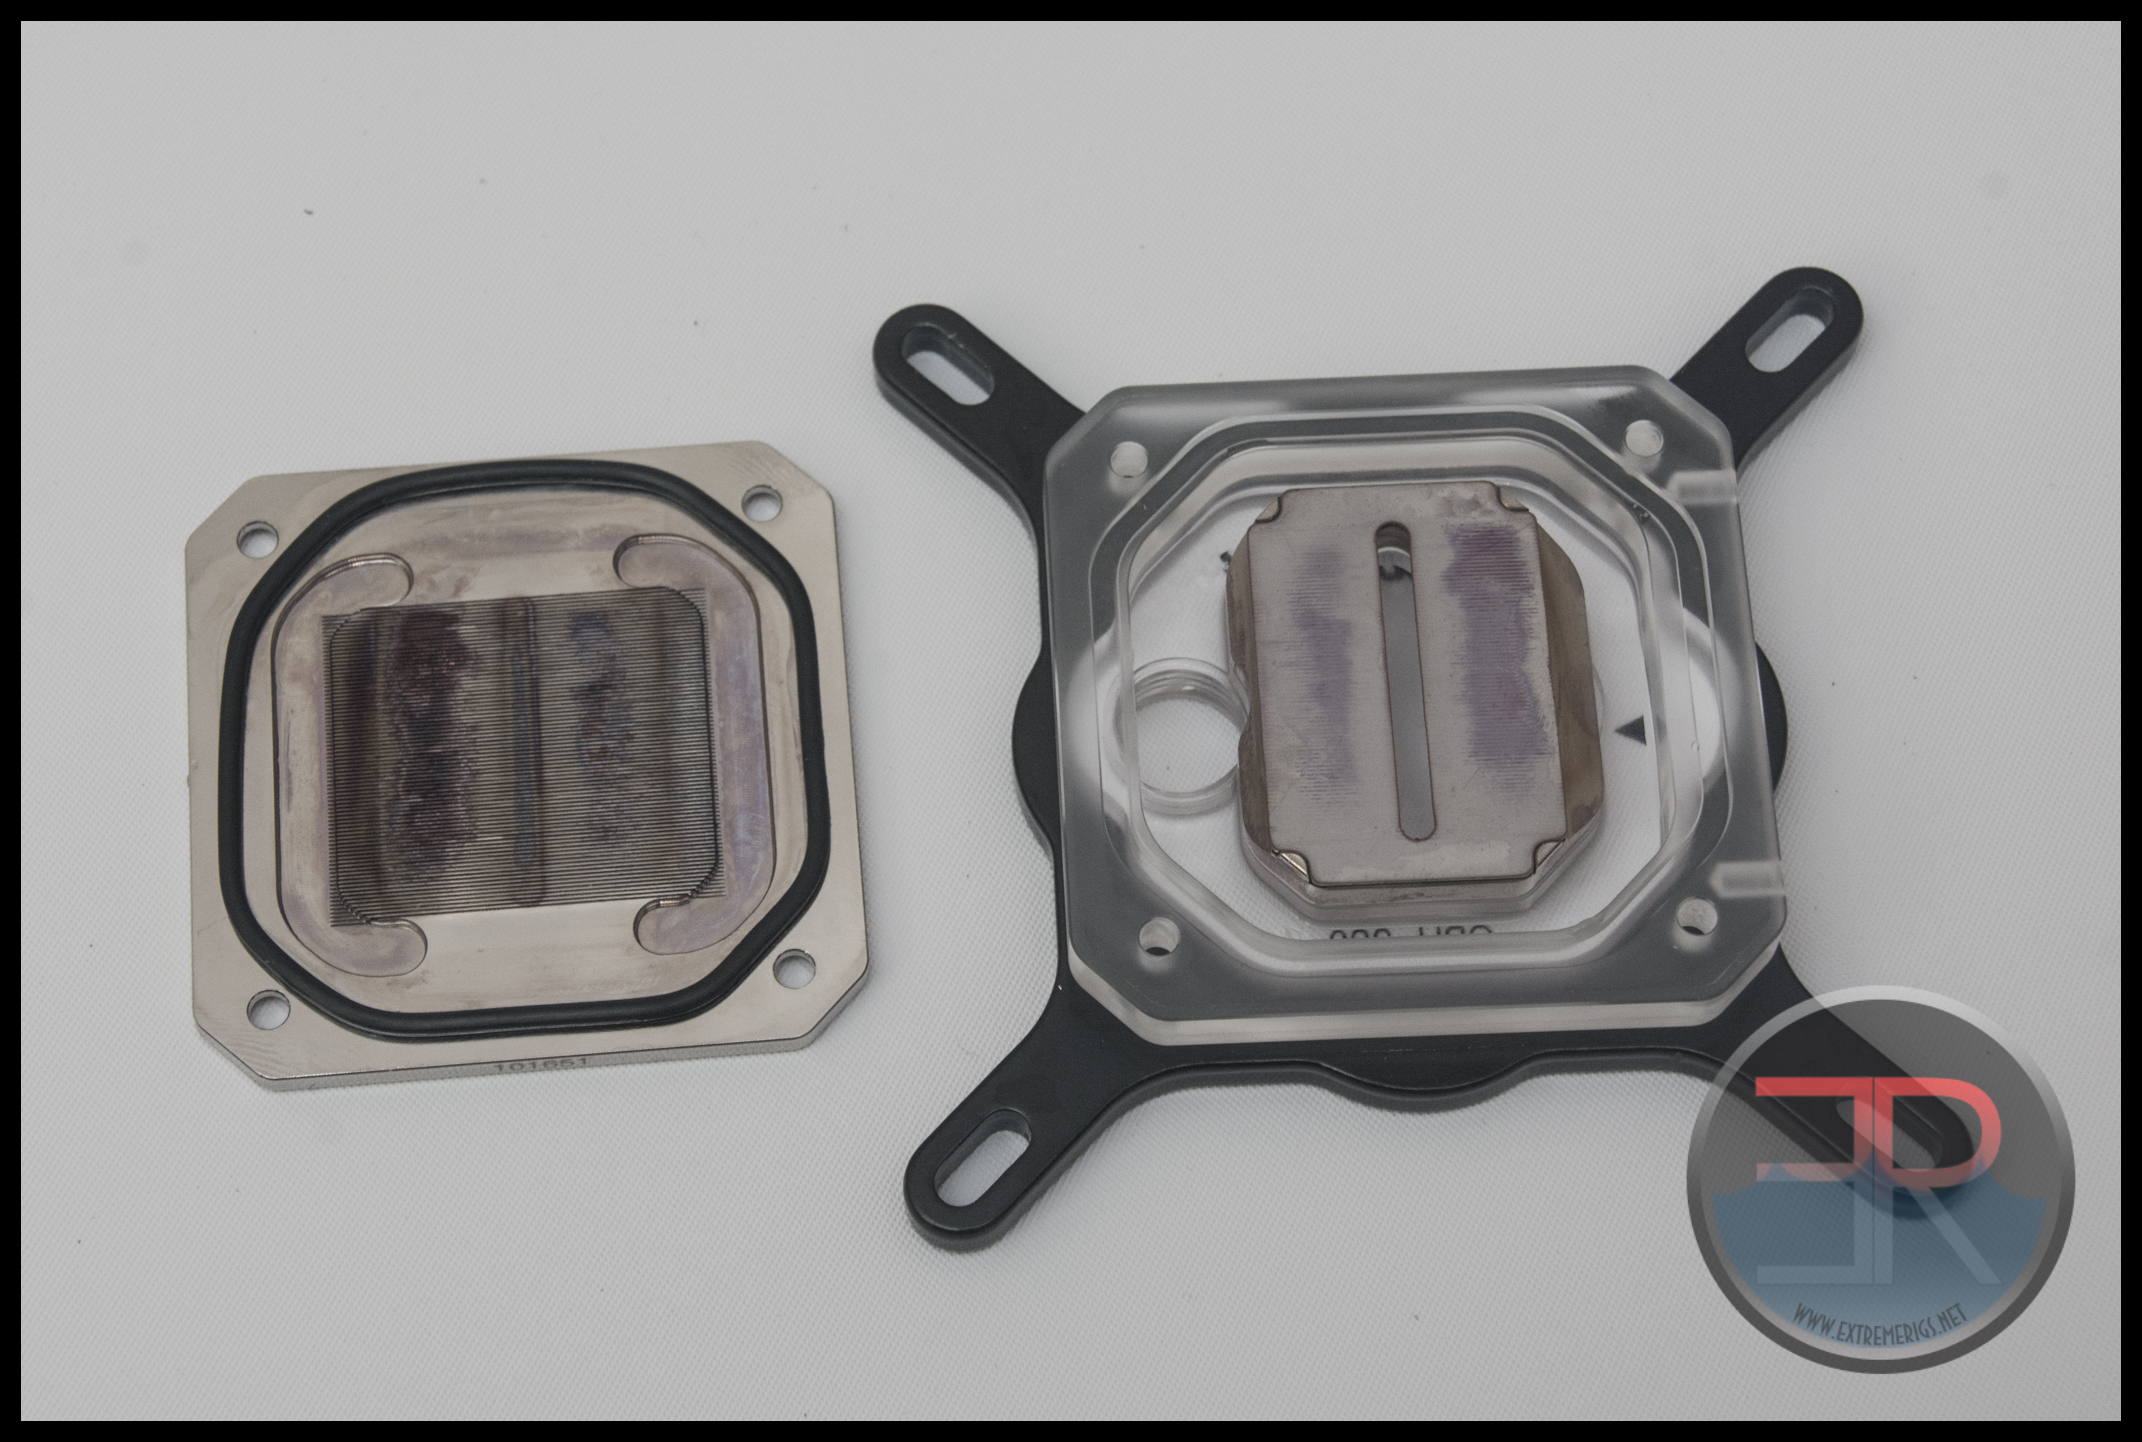
Inside we see the design is similar to most other modern CPU blocks. The base has channels machined into, while the coolant comes into a jetplate placed above it.
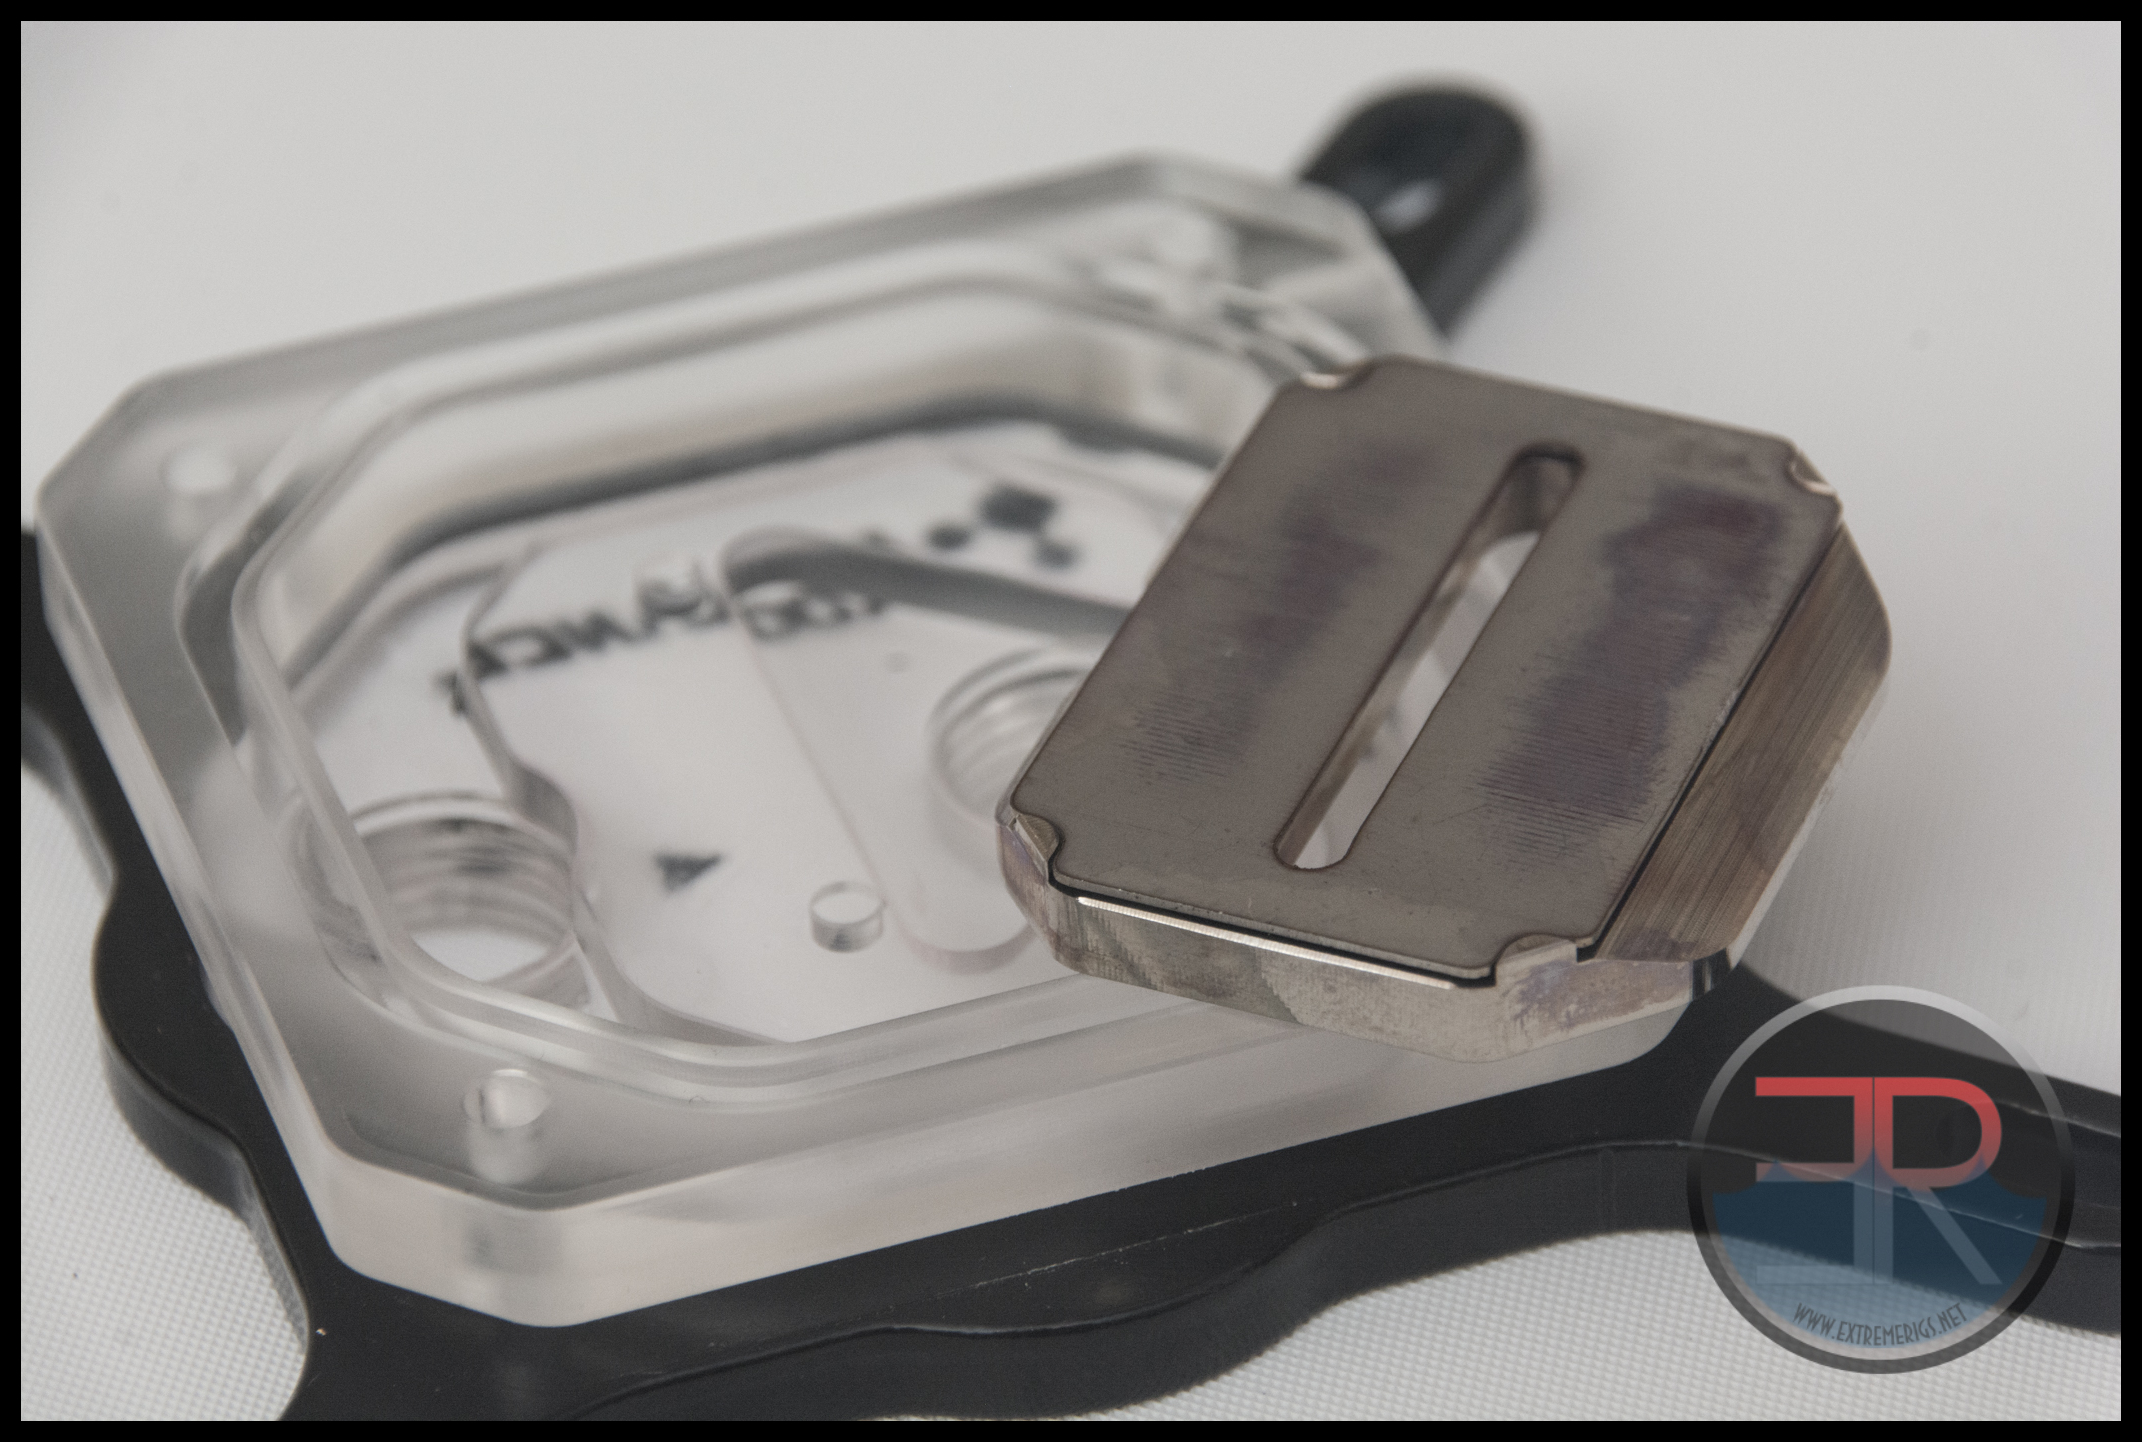
Interestingly the jetplate sits on top of a seperate metal piece.
This is somewhat surprising that it wasn’t carved out of the plexi top, or that a plastic insert wasn’t used as EK do with the Supremacy EVO.
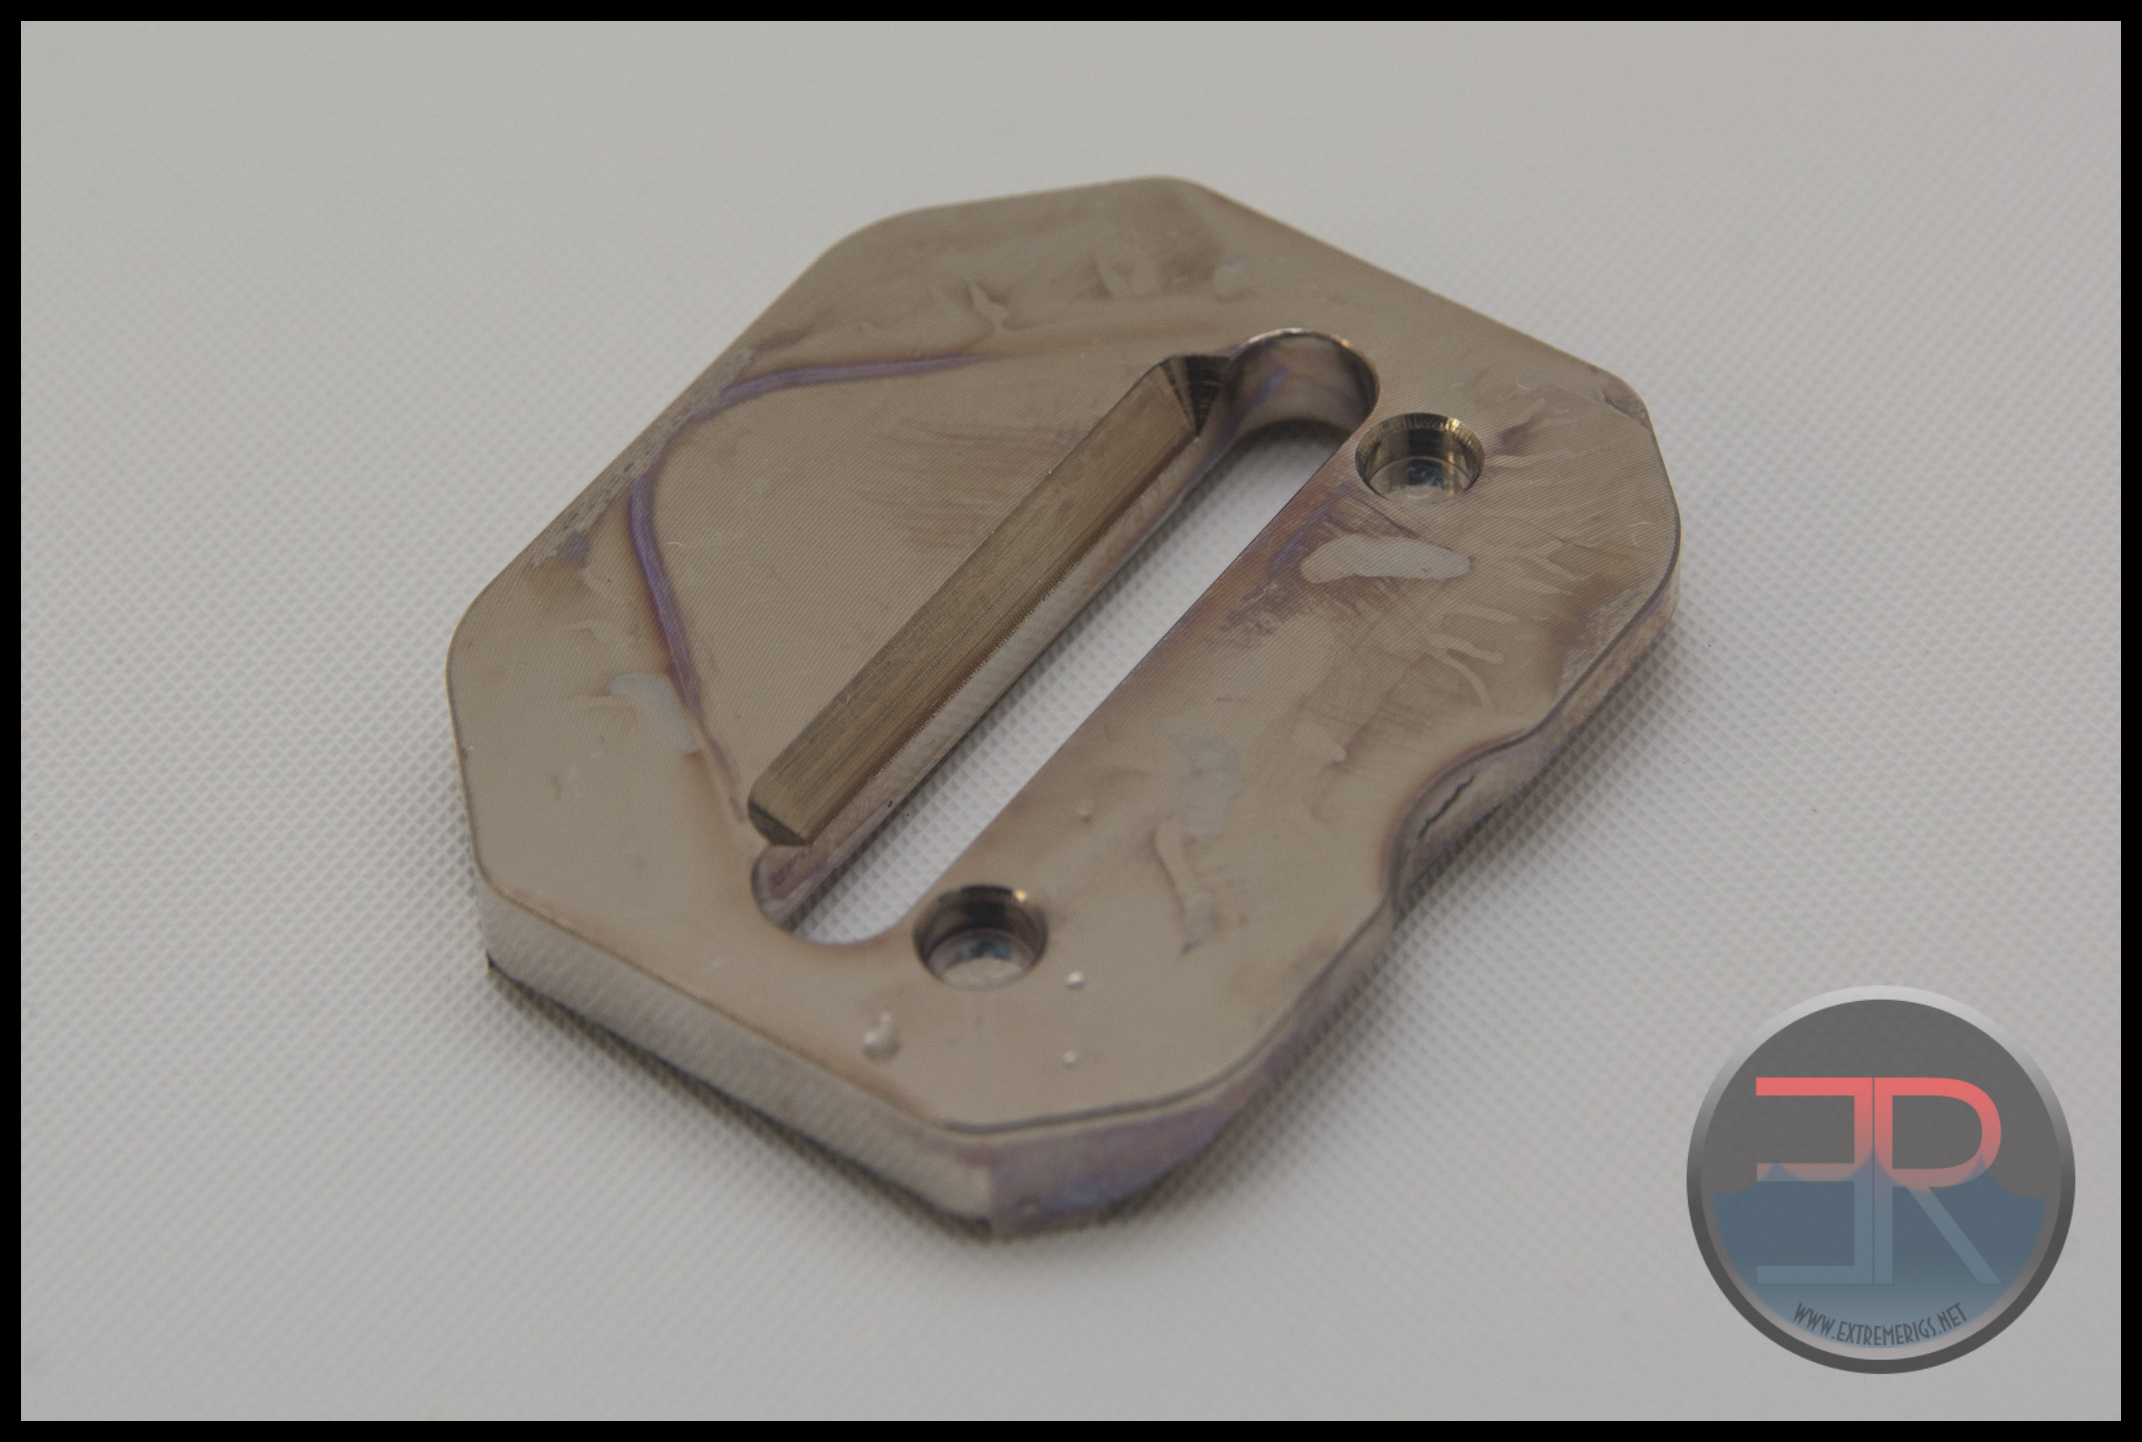
The two small holes are pin locators that match up to pins machined into the plexi top. Interestingly there are no o-rings between this metal piece and the plexi top so a small amount of coolant will leak between the input and output. There is however an o-ring between the metal piece and the jetplate.
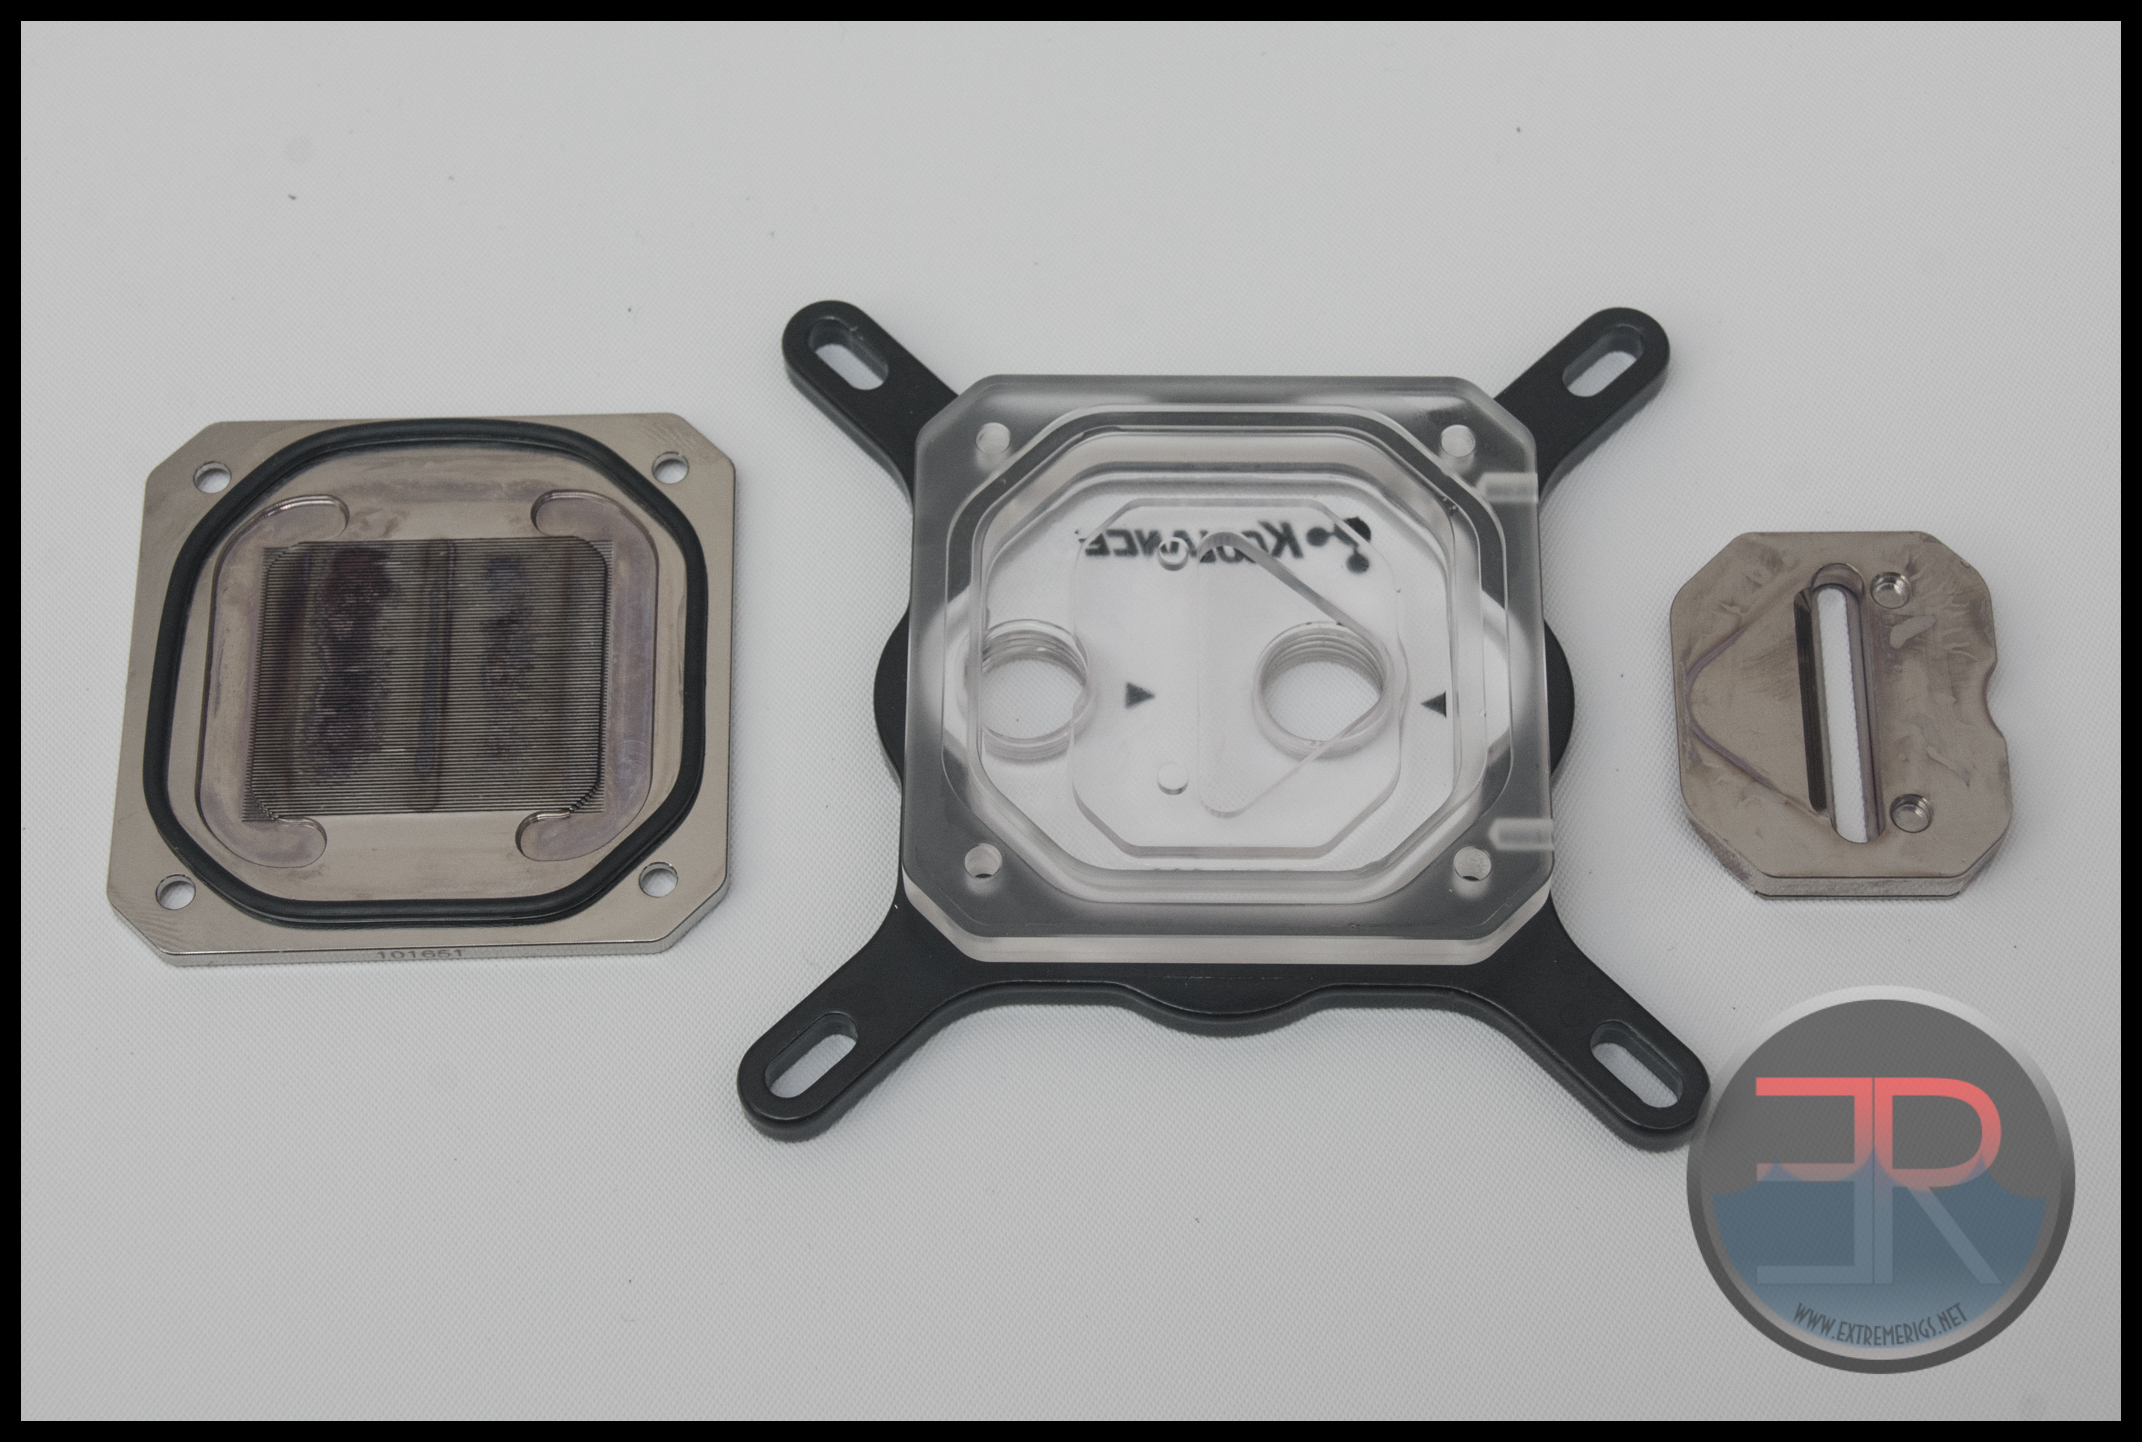
What’s more surprising though is that the metal version does not use this same piece:
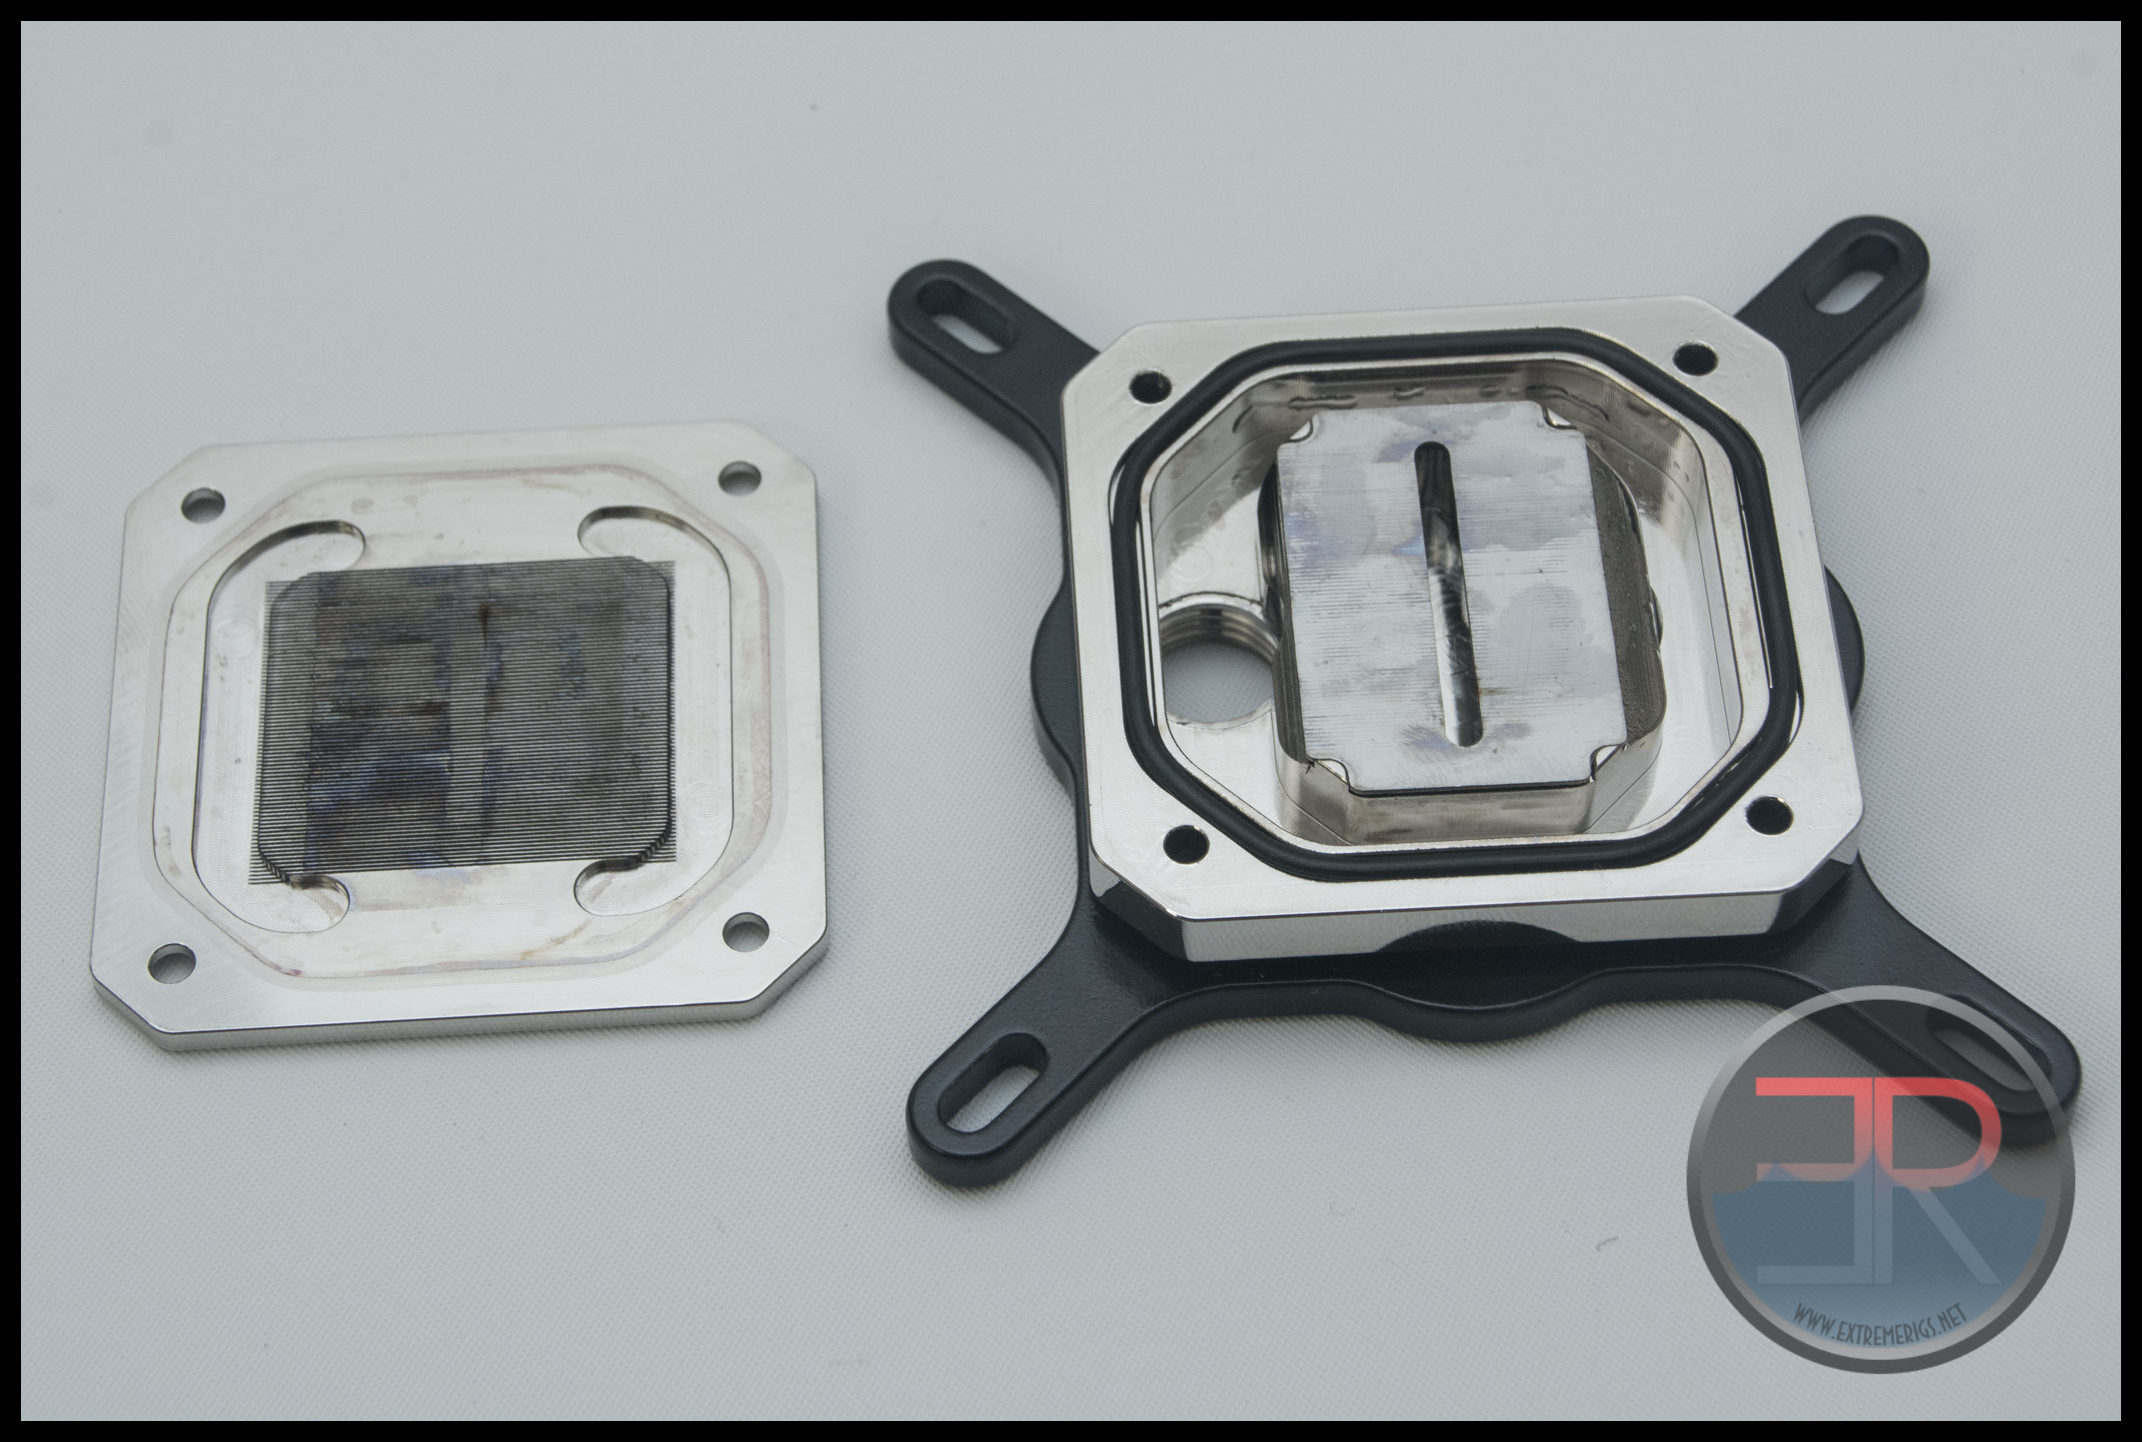
At first glance it seems the same but the jetplate sits directly on the metal top which is machined as a single piece:
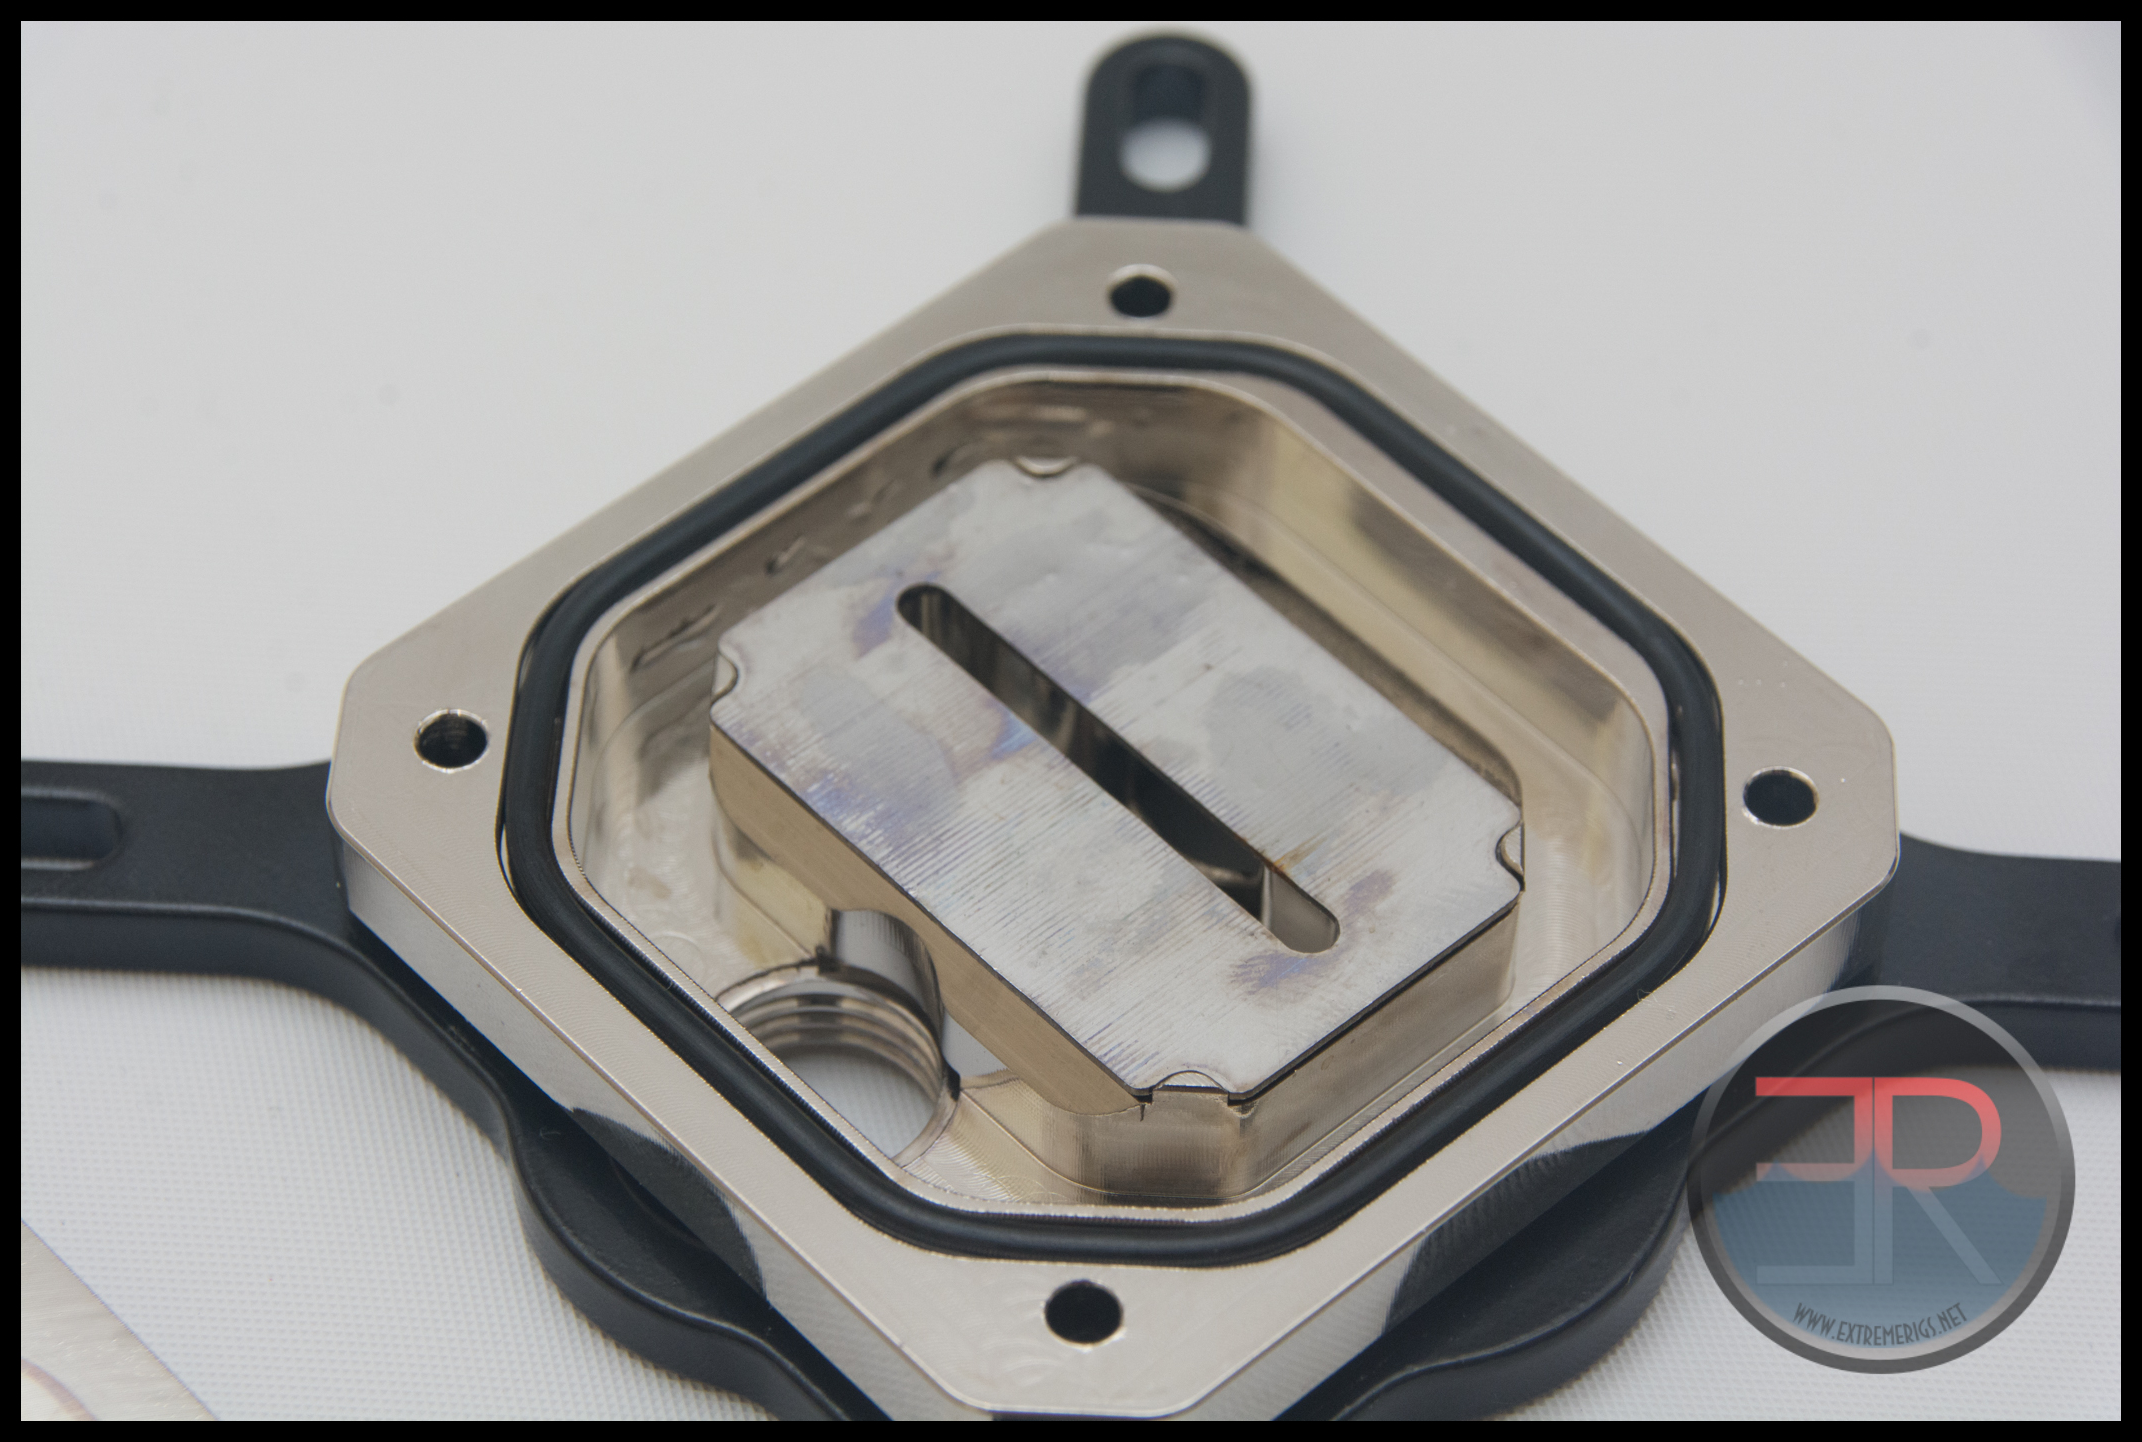
The machining of this area therefore is slightly different to the plexi version as it is not possible to machine the same design into a single piece of metal: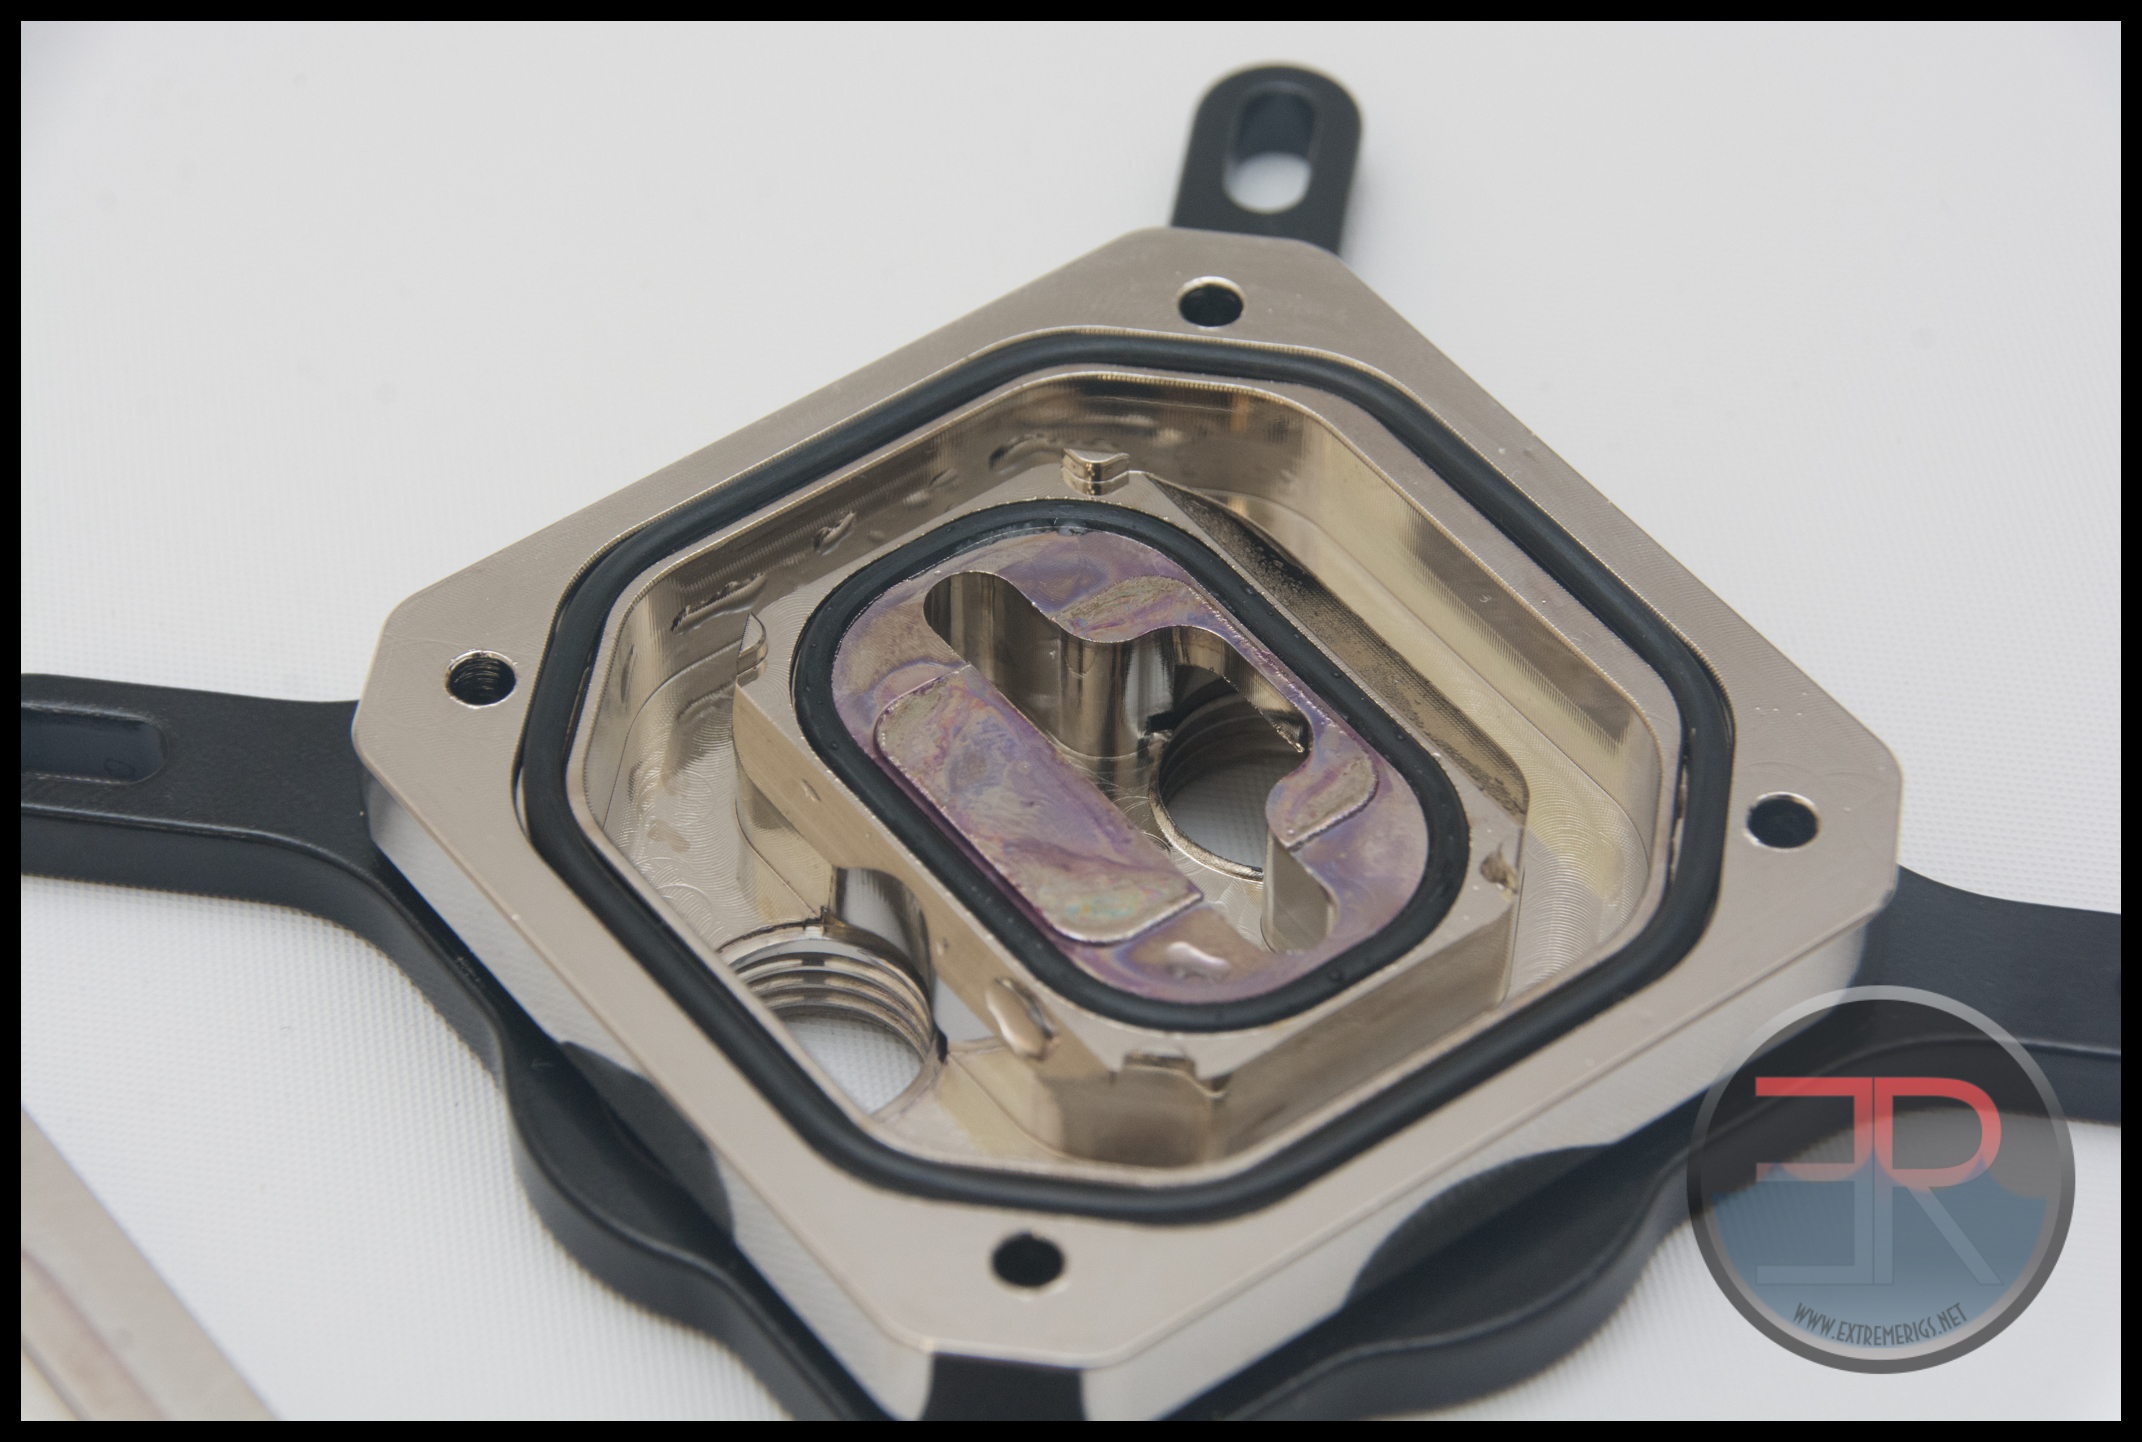
While both jetplates are sealed with an o-ring, because the full copper block is machined out of one piece we can expect the restriction to be slightly higher.
Also noticeable is that the flow path to the jetplate is slightly different. All these things are minor but we will have to see if it impacts performance.
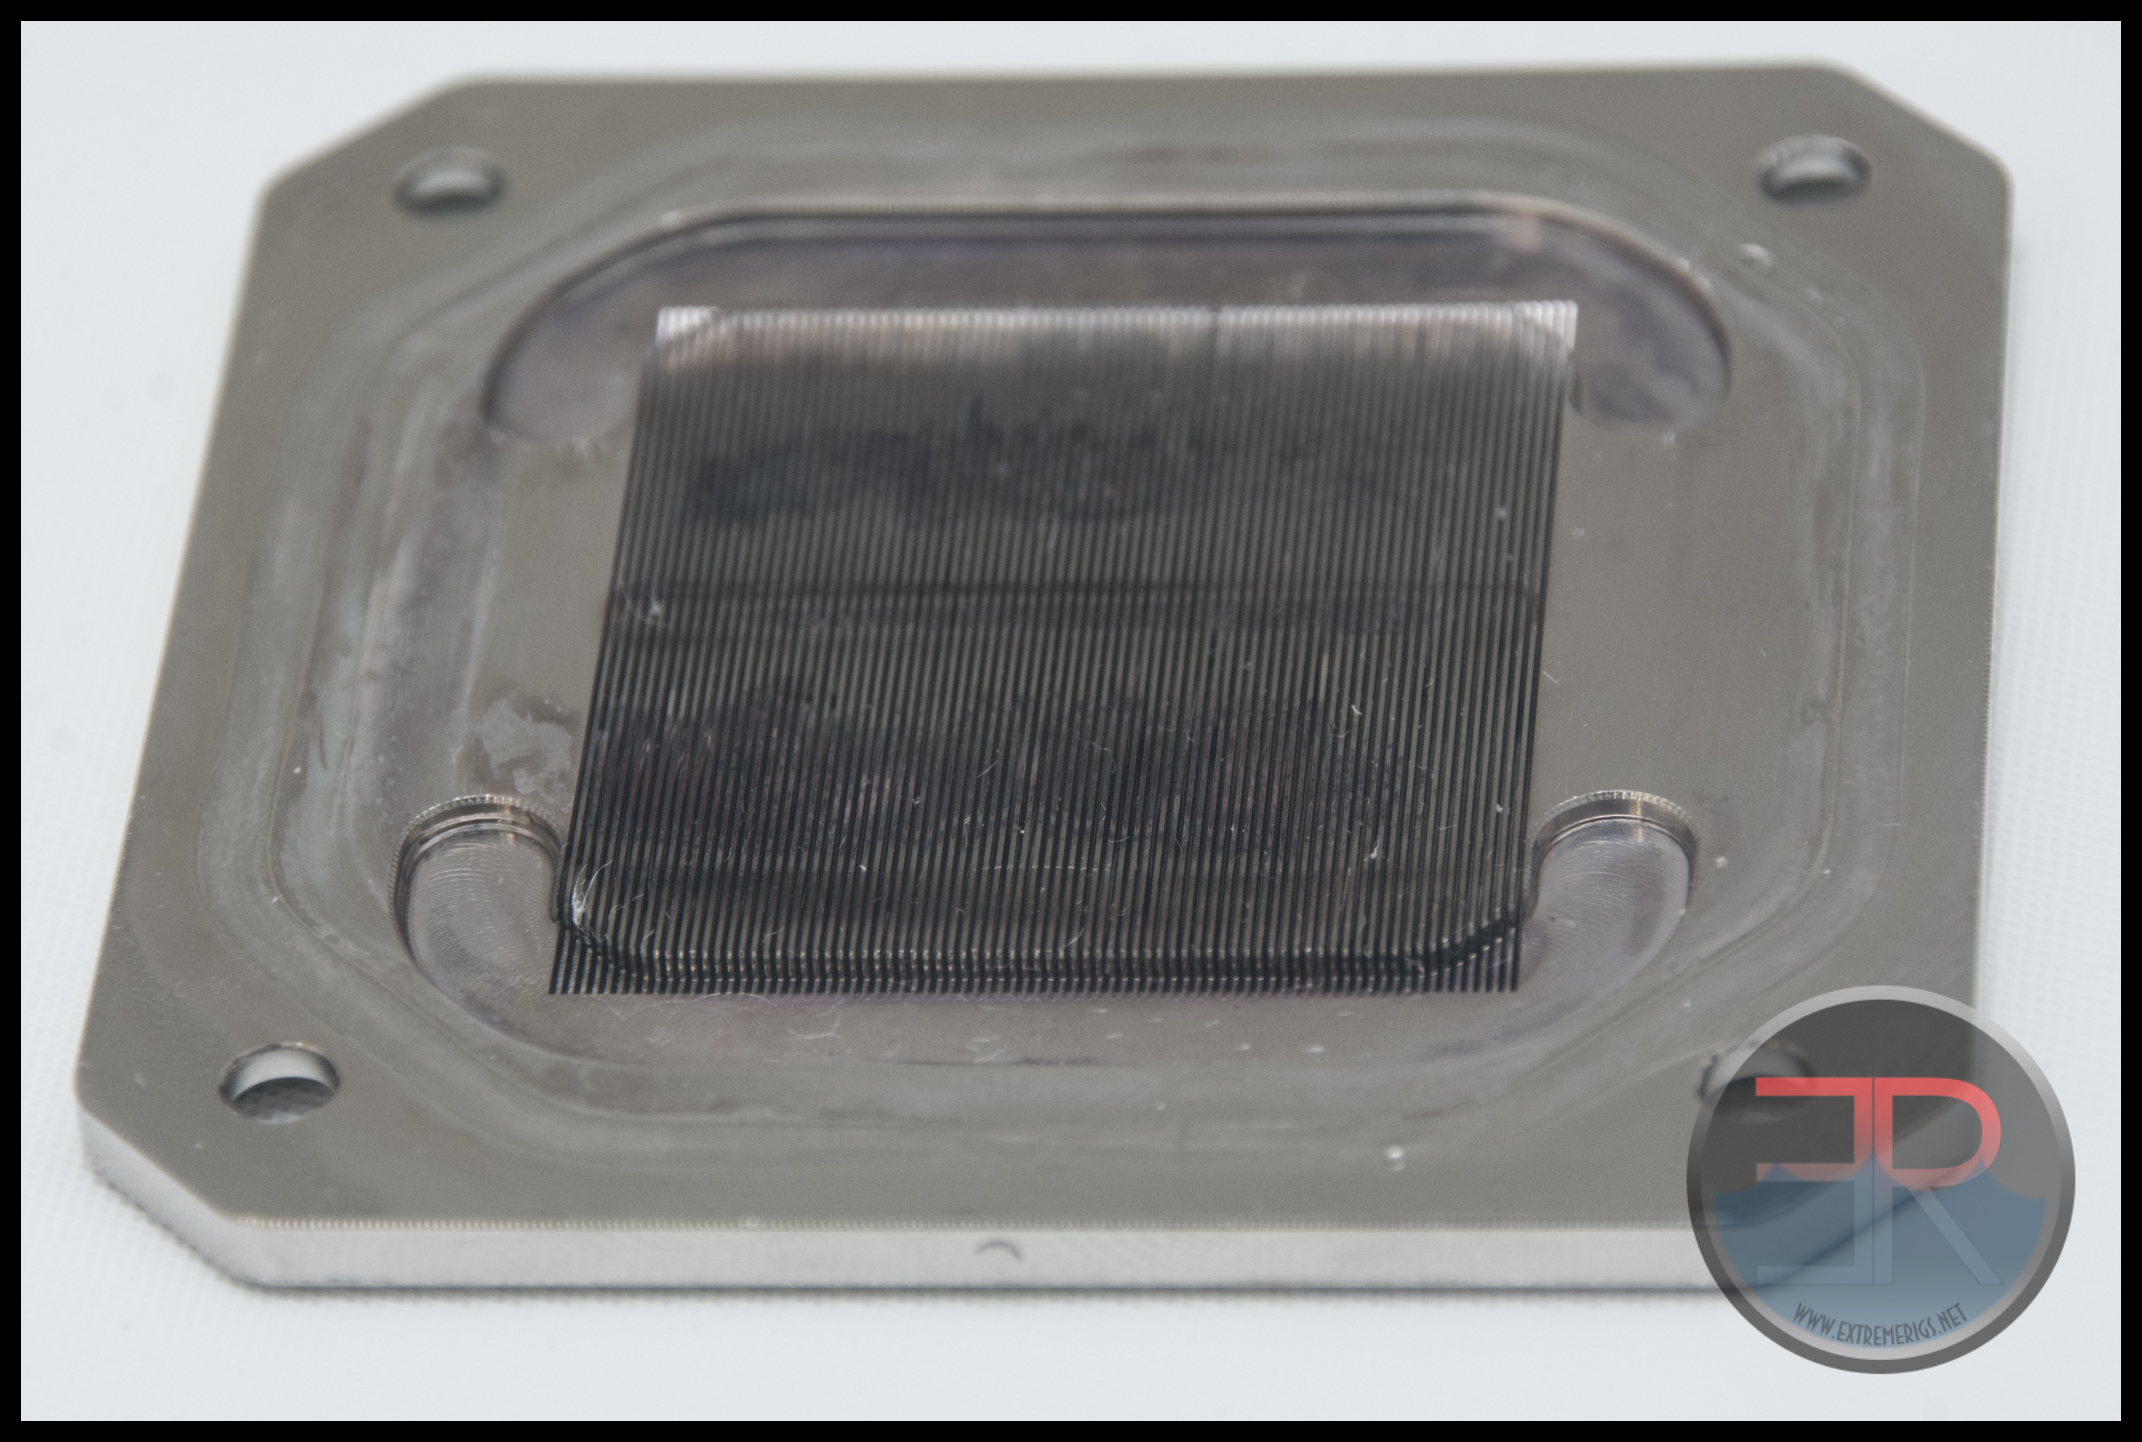
Taking a look at the base we see that the channels are very fine indeed. I’ve been told there are 79 channels ( 0.17mm wide, channels are 0.2mm, fin height is 2mm), but I lost count trying to verify it because they really are so fine. The cooling engine itself is quite large measuring 30mm across:
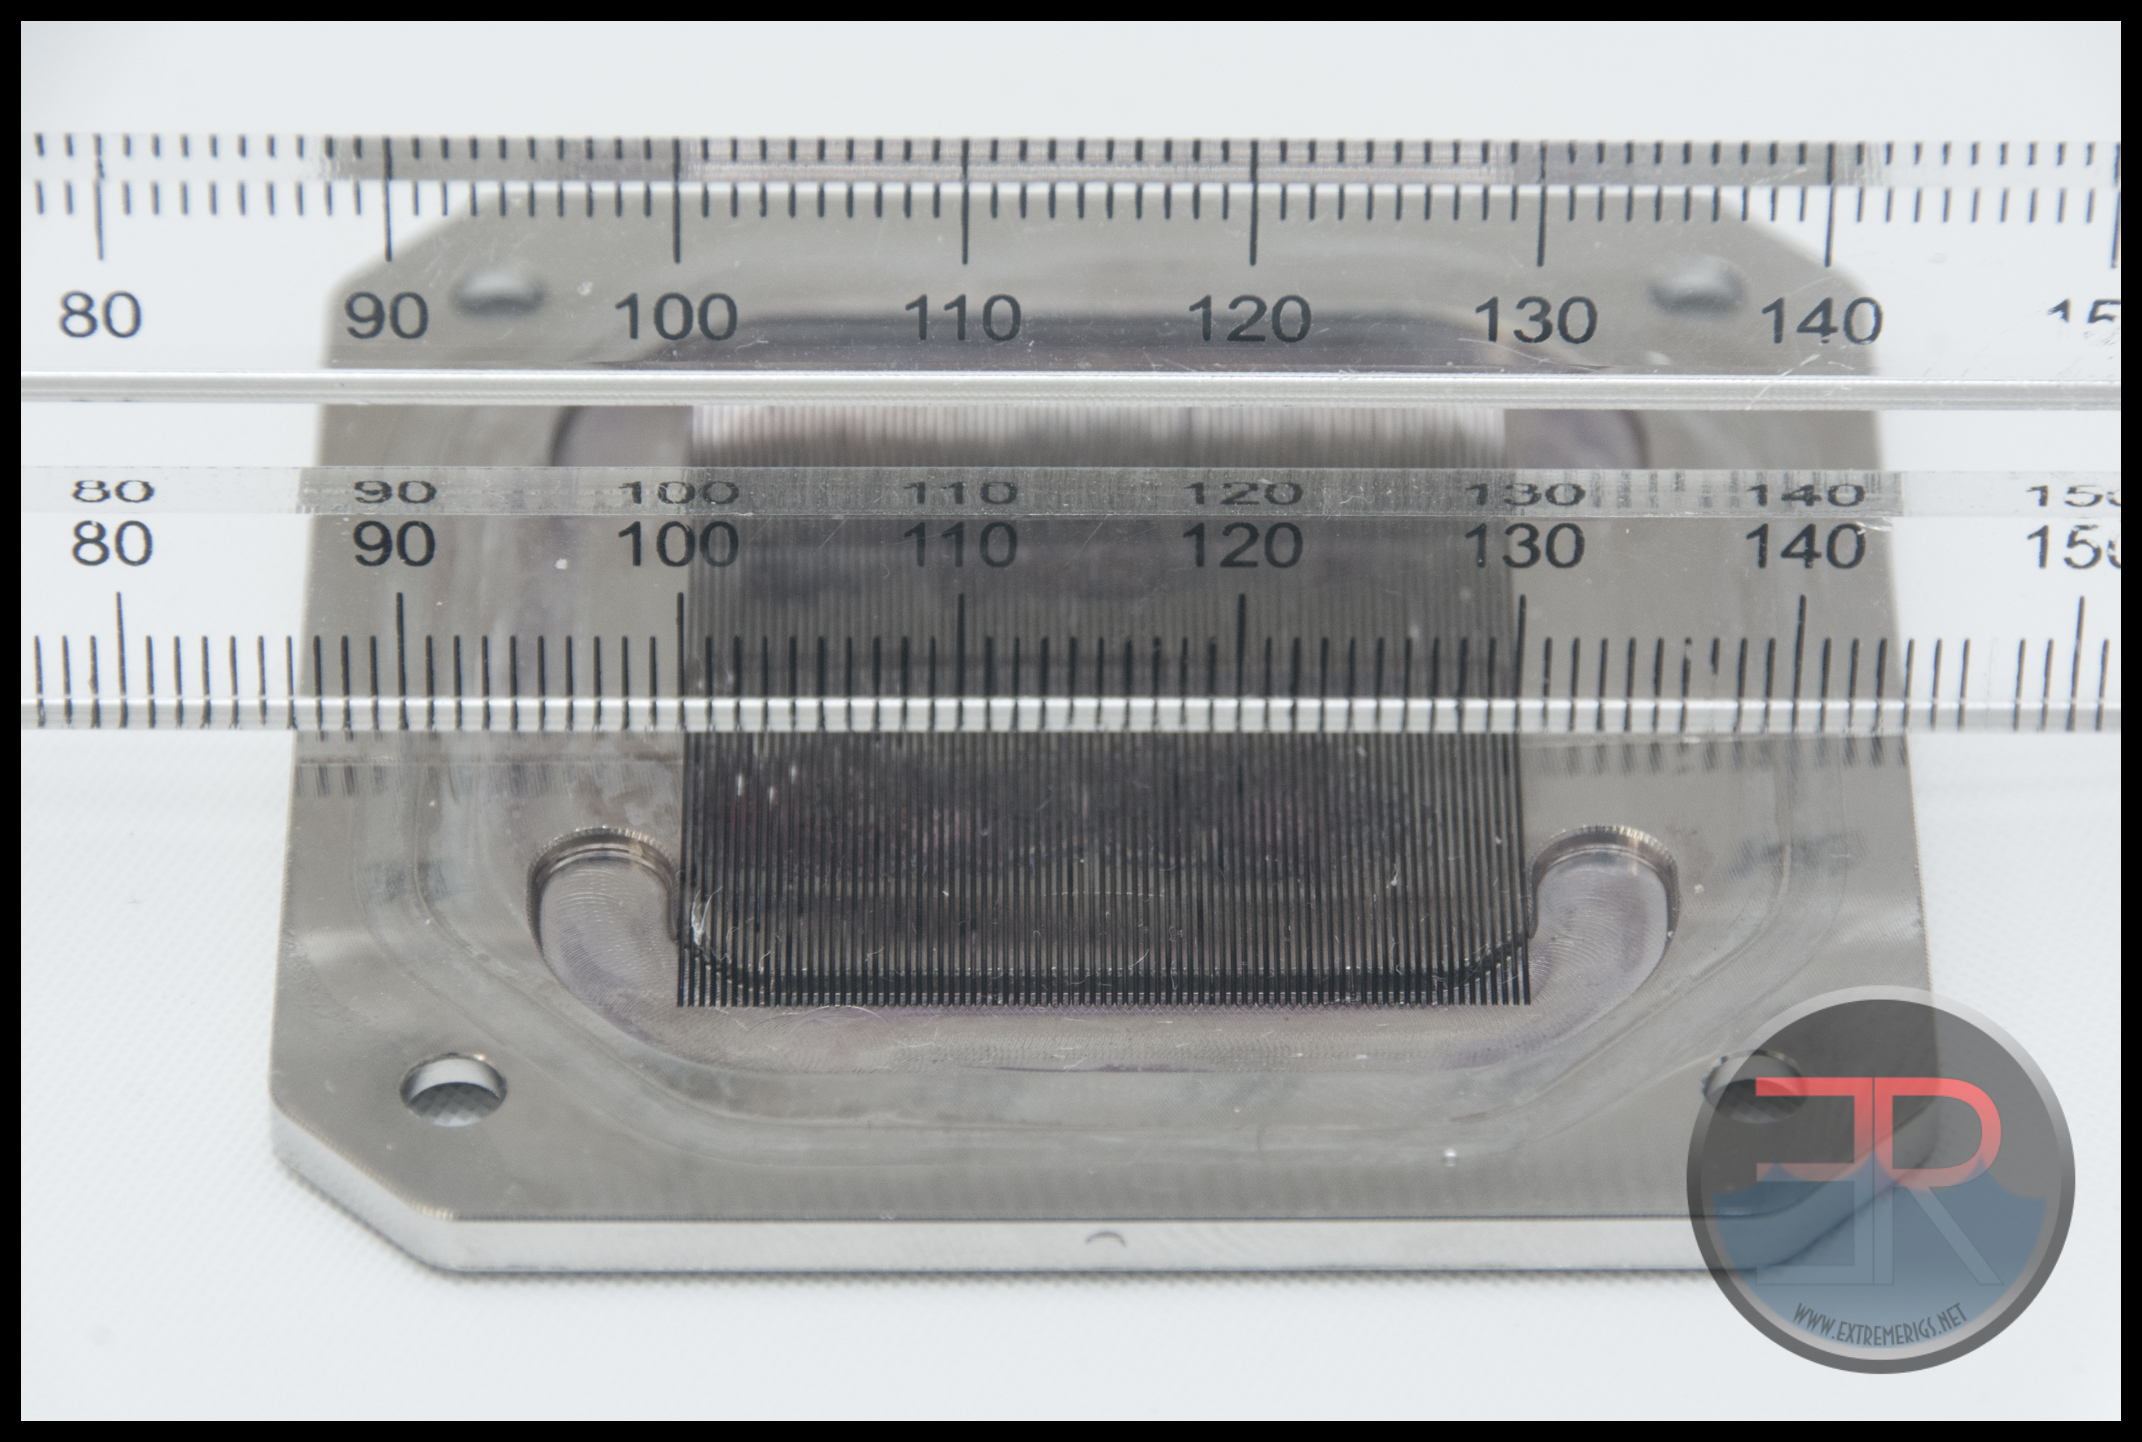
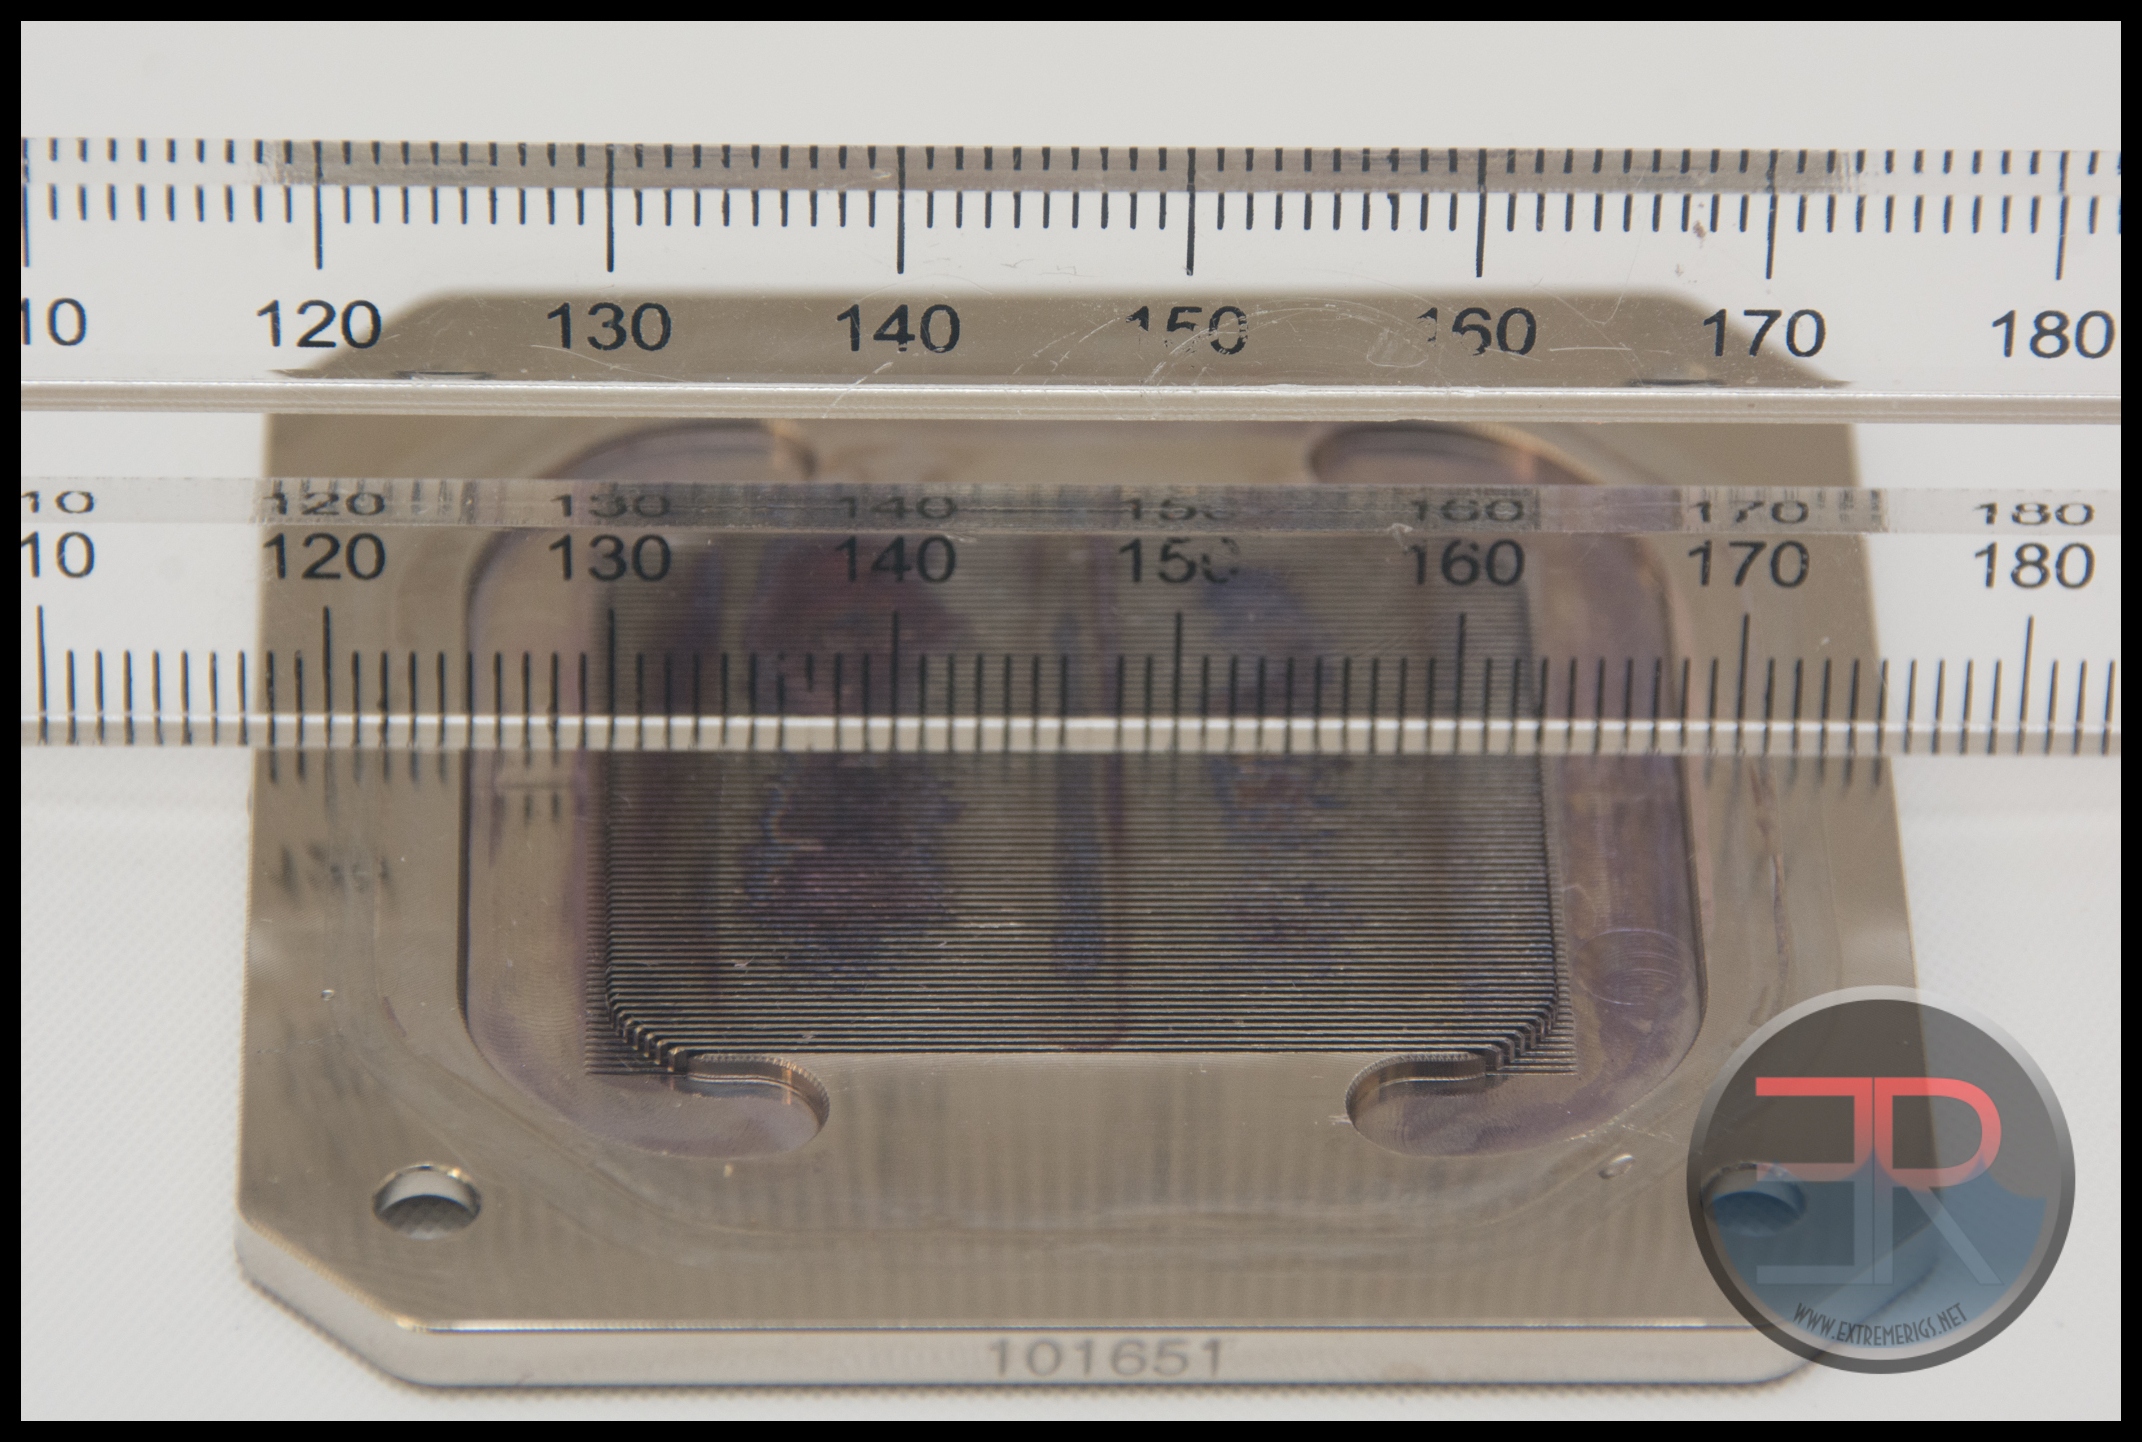
And the channels are 33mm long:
Now let’s take a closer look at the mounting accessories:
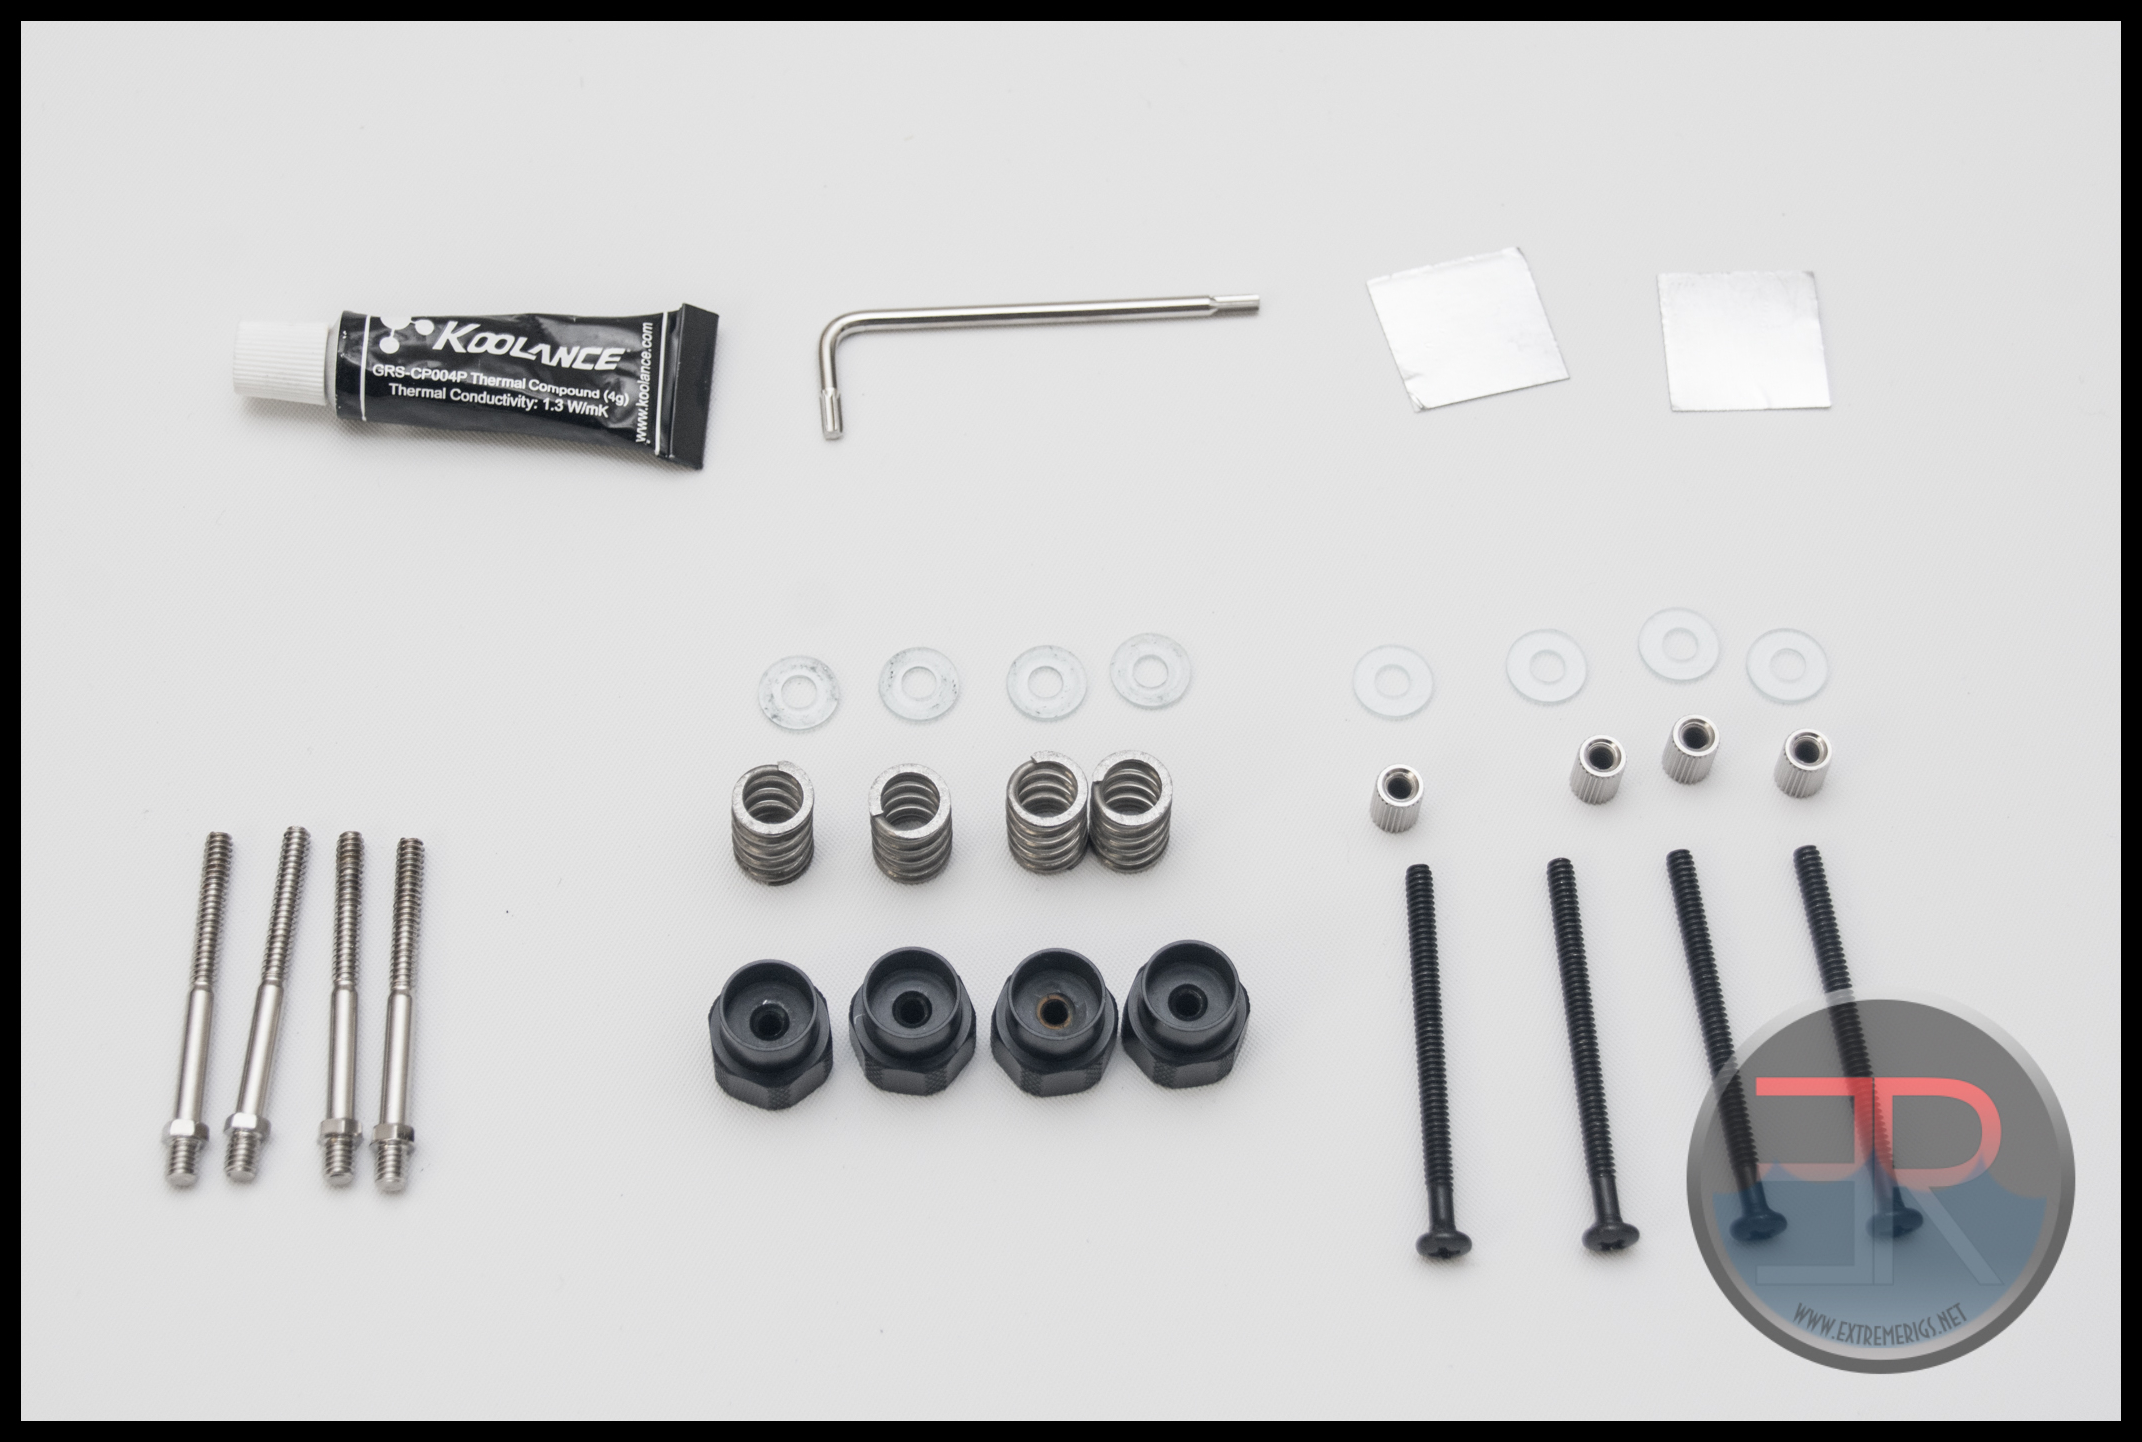
On the top row we can see a tube of TIM. I’m torn on whether it’s a good idea to include it. It’s specced at 1.3W/mk which seems quite poor, so it’s doubtful that you’d want to use it. On the other hand it’s “free” and might be useful to at least practice mounting the block and judging TIM spread before using something better. Also included are two metal pads to help with mounting a flat temperature probe in between the block and the CPU. These have been in the box since the early models however we would heavily recommend not ever doing that. The probe will affect the mount and doesn’t give you a particularly good idea of the real temperature of the CPU. While the internal temperature sensors of the CPU aren’t perfect, they are in a much better location which counts for far more. The only reason to do use a sensor on the IHS is if you don’t have access to CPU temperatures i.e. in a server farm.
Lastly there are the screws, nuts, springs and washers used to actually mount the block.
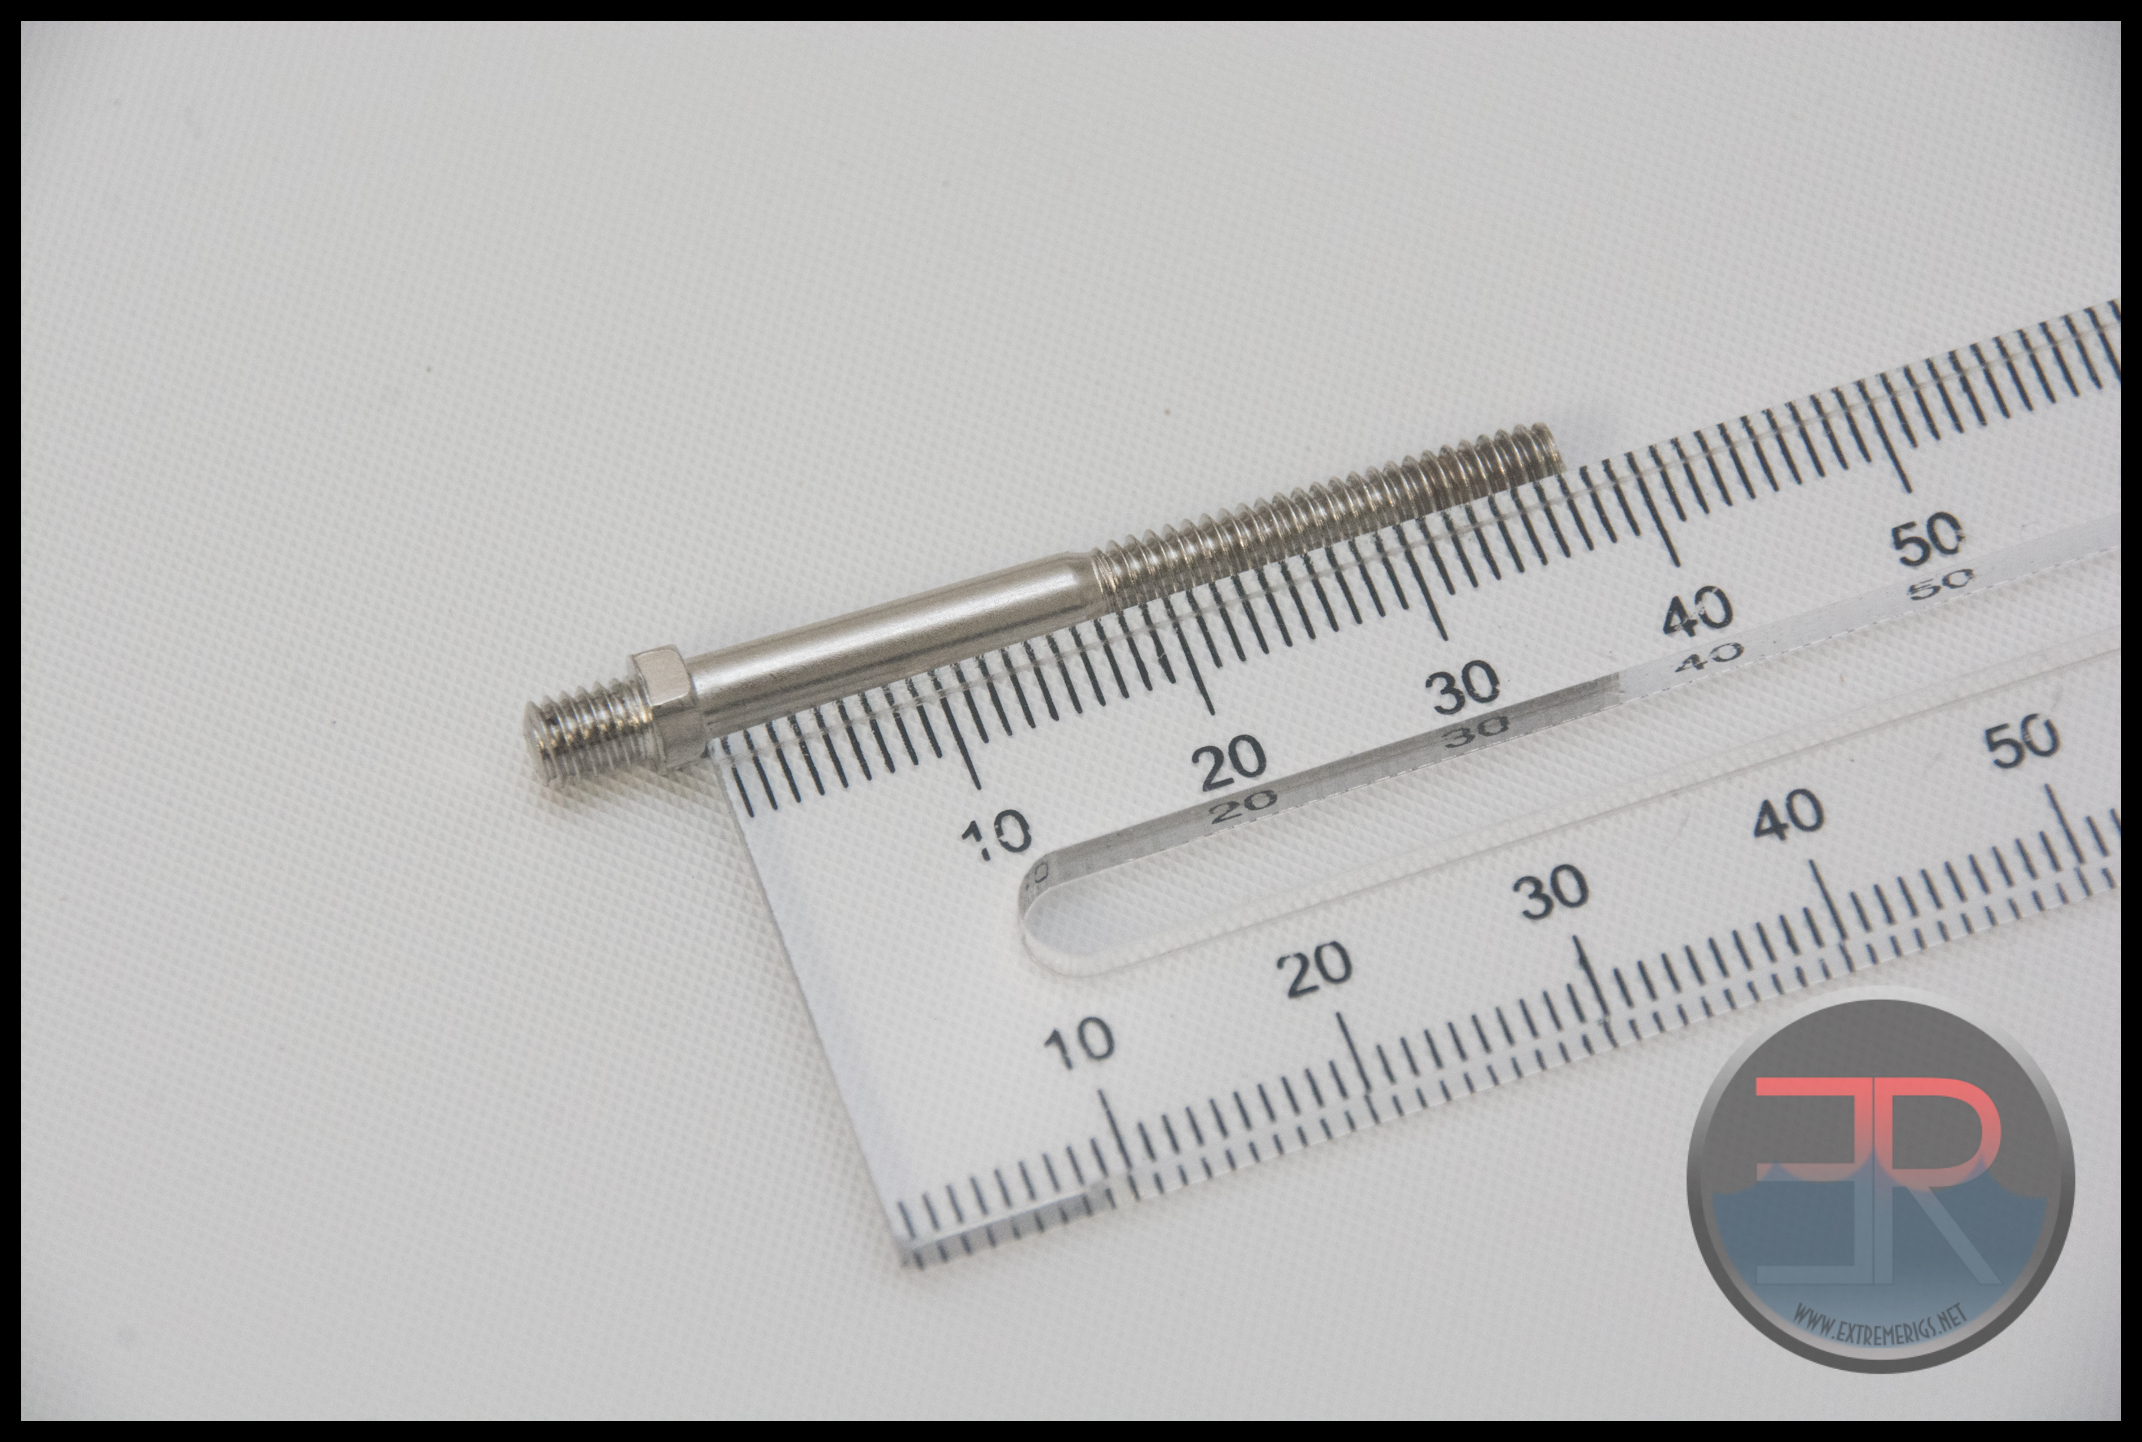
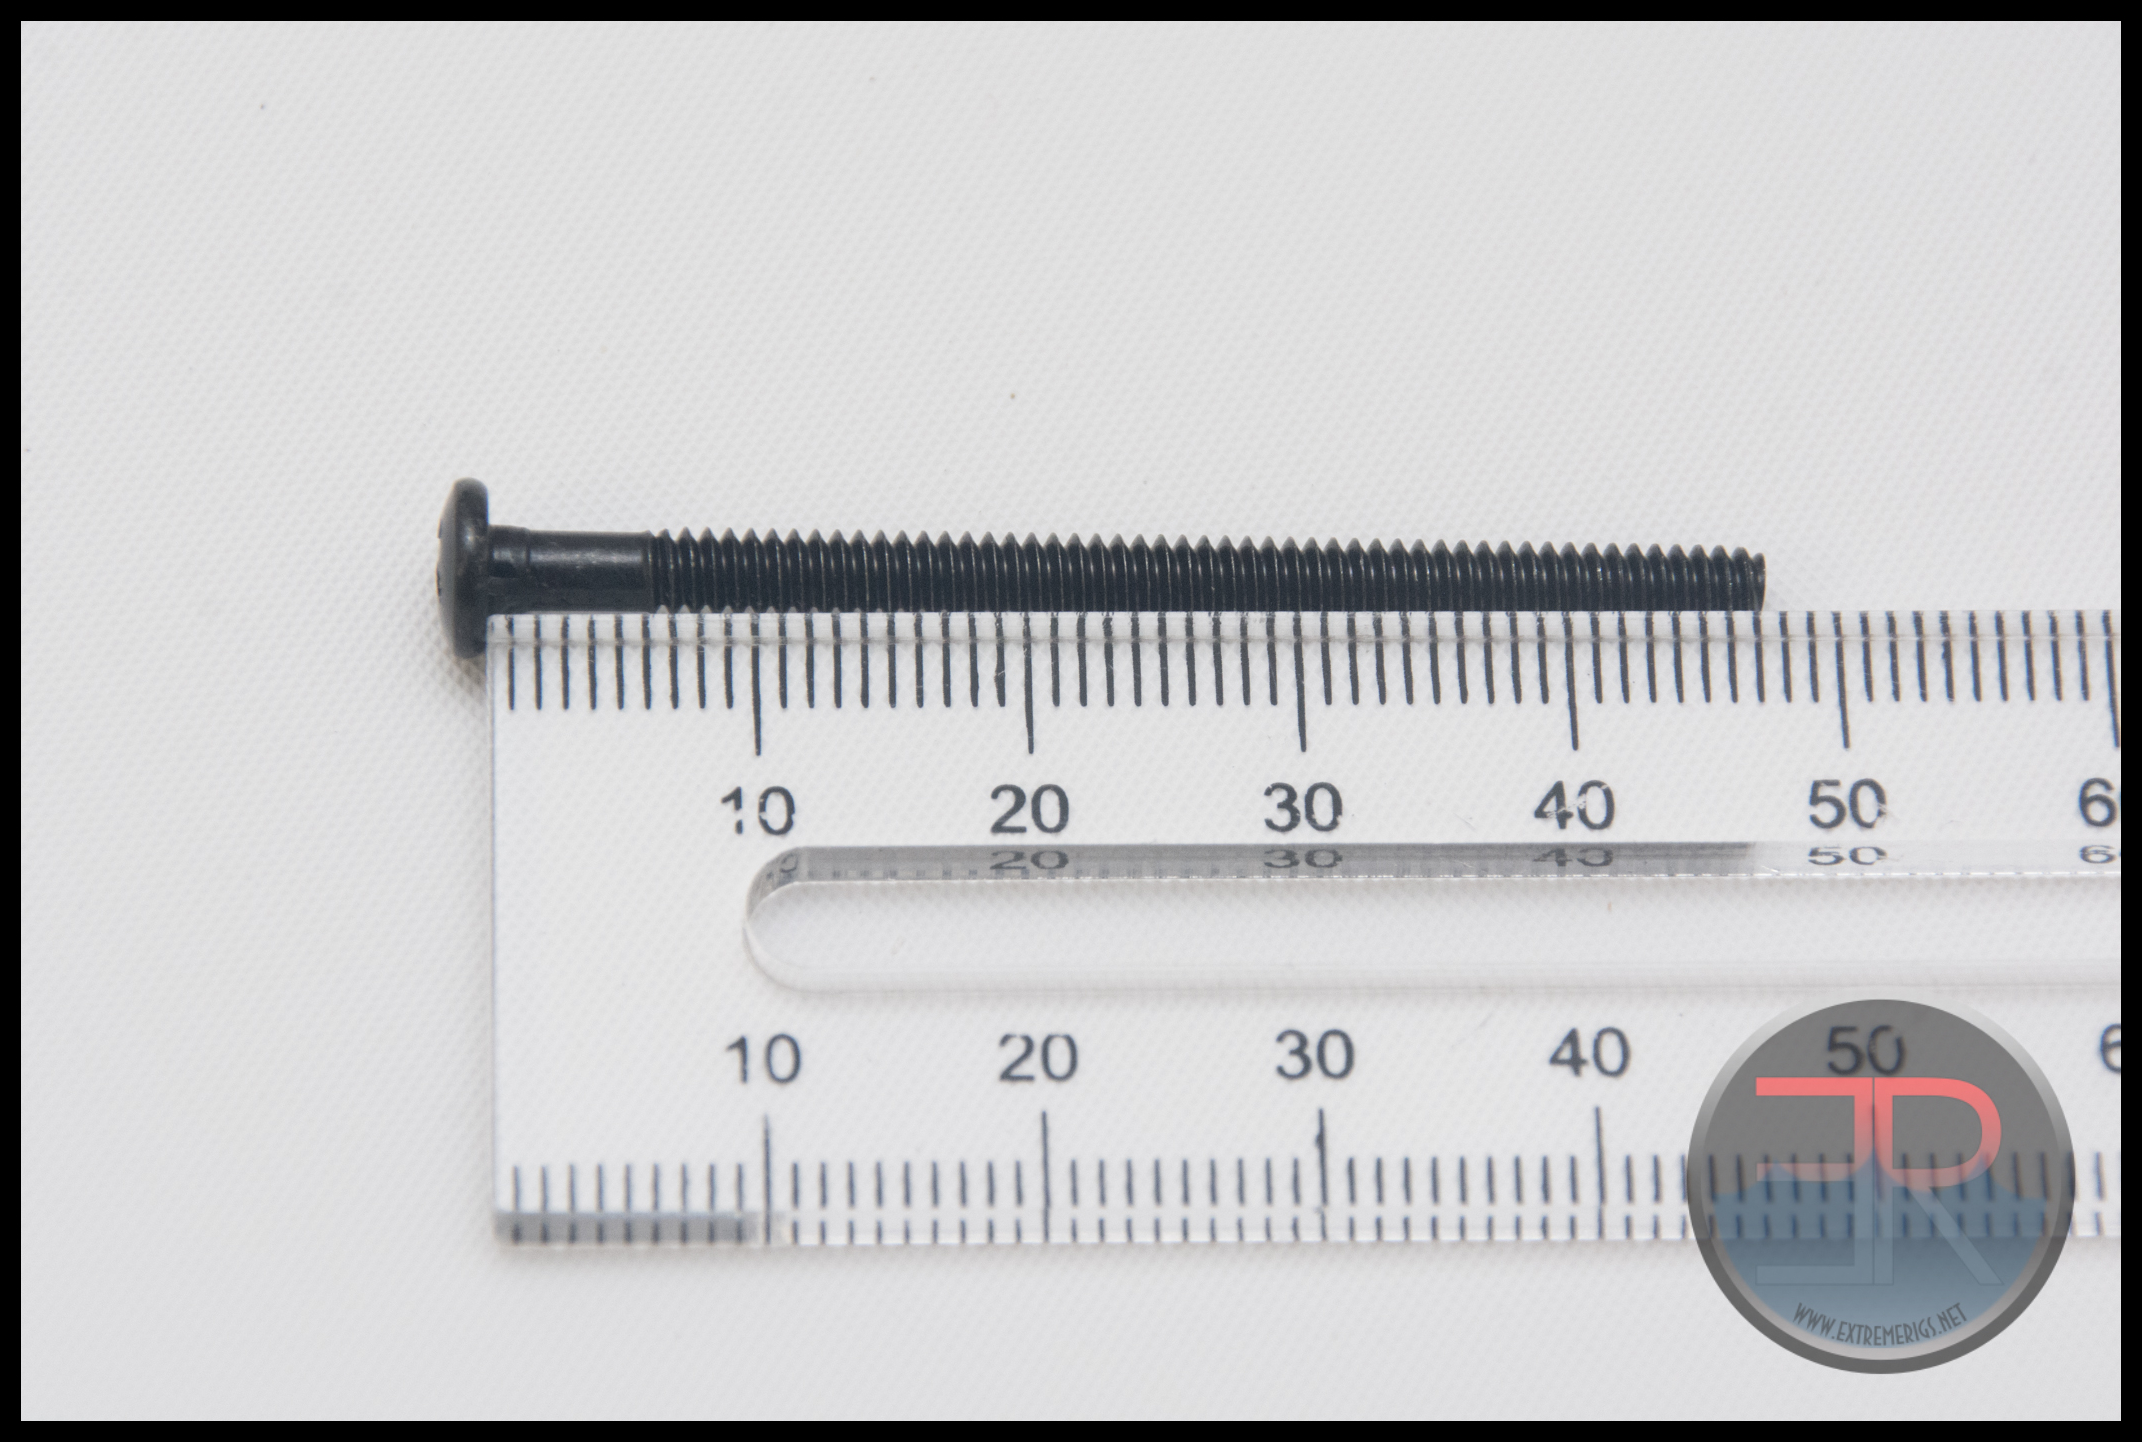
The silver screws with threads on both ends are the ones used to mount on socket 2011. The black screws that only have a single thread are used for 775/115x. They include a notch which locks into the backplate to help tighten down the thumb nuts without simply spinning the screws.
The thumb nuts used to secure both socket’s mounts are the large black ones:
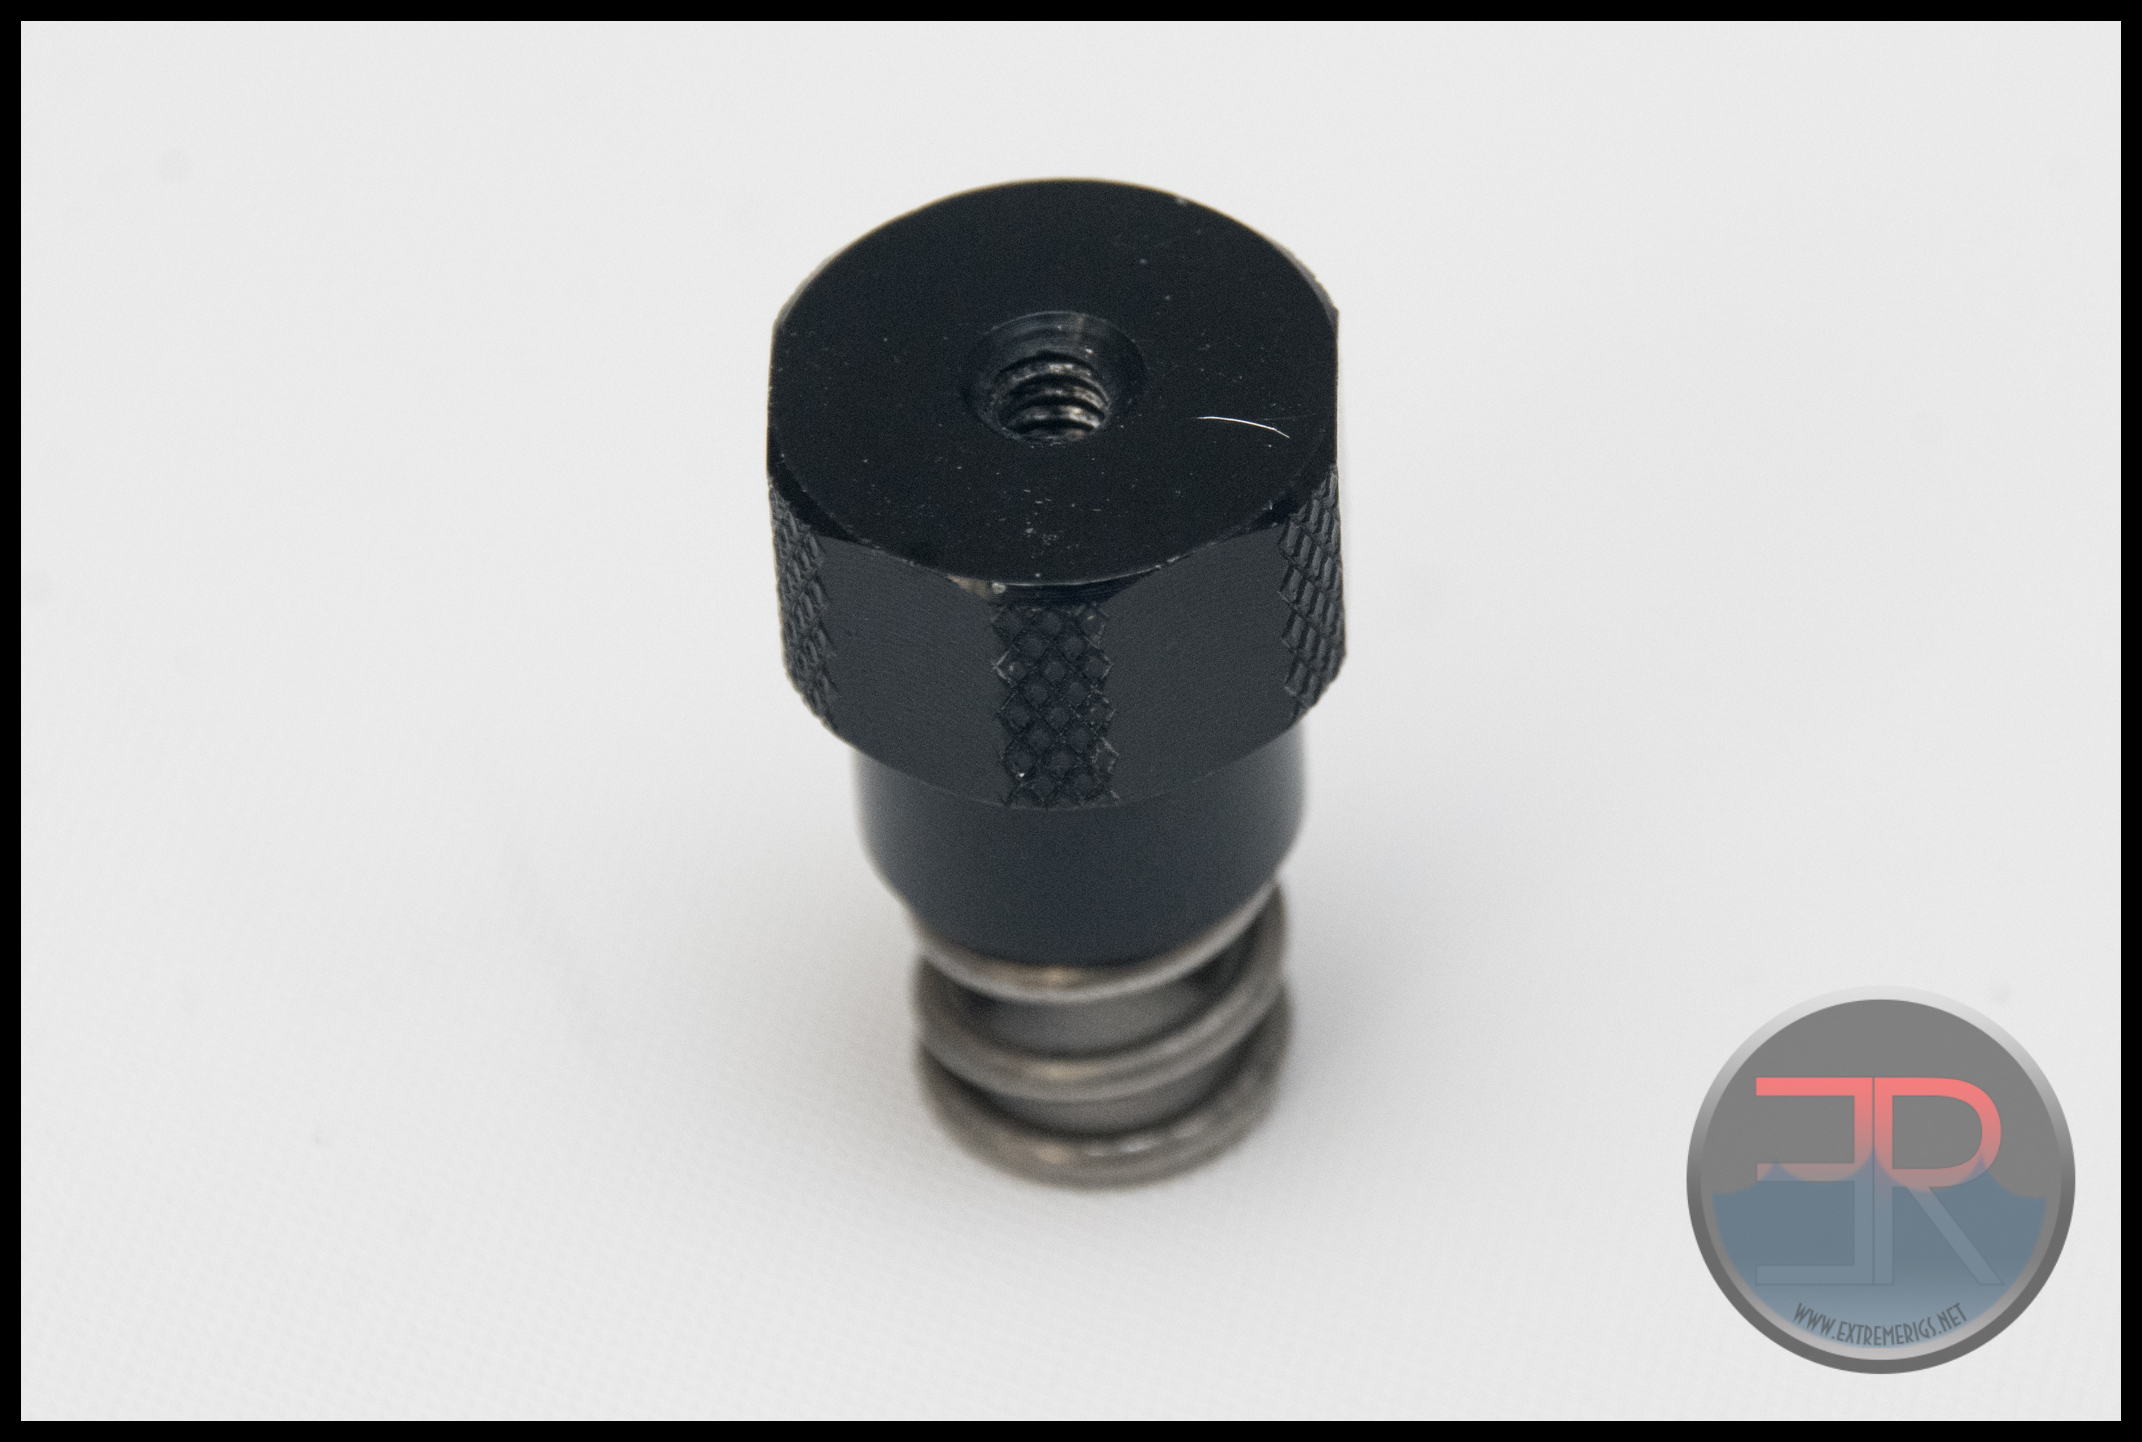
They are flattened off so that they can be tightened with a wrench, but due to the knurling pattern are also very easy and comfortable to finger tighten which would be our suggestion. A nice touch is that the spring is recessed into the base of the nut so that it does not buckle sideways under pressure.
Now let’s show some examples of the mounting process.


#1. I use water blocks without jet plate…
You should tests without jetplate. ¿Makes pump last longer? Do I sacrifice 10°C ?
For non critical applications I think is better… I’m I wrong?
#2. Koolance is getting cheaper by the minute….
CPU-390AMD has removed support for G34 socket “server” like my Tyan S8232,
Is just 1 centimeter of metal.. 2 small coins. How cheap is that?
#3. CPU-390intel does not have 2011-v3 Narrow ILM, I want to buy a new server, but I’m stuck with Supermicro SNK-P0050AP4.
¿How cheap is not having an optional Narrow ILM?
Square ILM is 80x80mm
Narrow ILM 56x94mm (similar to AMD, but not compatible WTF?) Intel finally realized AMD mount is not that bad, if want to make board small.
But intel decided not to make a compatible mount? ¿Why there is not an Universal Mount?
Why does a few milimeters hurt so much to a billion dollar company?
Cheap bastards. LOL. Jajajajajajaja
…
Koolance should not include thermal paste, if want to save costs, instead of cutting features, nobody use it anyway…
How good is it anyway? I use Antec formula 7 or 6, I’m happy. Won’t change for another brand.
not electric conductive…
Diamonds dust is cheap.
very thermal conductive.
Does not dry and crack like OCZ freeze…
Is not as hard as “the other diamond thermal paste brand.” = Does not need as much pressure.
Can be reused.
Is like diamond glue… if board is horizontal, heatsink does not need screws. Feels like a magnet.
Another thing I don’t like about the 390 are the arrows, the 380 arrows are smarter, less confusing…
390 is crazy.
I currently have a CPU 380i, with only 1C improvement in temps on this benchmark, I’m not about to dump $80 on the 390i. Very nice review though, very thorough.
It’s worth noting that no other reviewer or manufacturer had a CPU-380 as good as mine – other’s (e.g. thermalbench) have shown a bigger increase between the two. So if my 380 was just a lucky golden sample and yours wasn’t then you may see more of a difference. However all I can do is test what I have as best I can 🙂
Comments are closed.