


Introduction
Watercool Heatkiller IV CPU Water Block Review
The Watercool Heatkiller III has been around for a long long time. In fact it was an older design when we first tested it in our 2012 CPU water block roundup. It did respectably in that roundup given that it was an older design and as newer blocks launched it seemed to become less popular. Watercool is finally back with a new design that they’ve been working on for years now – the Heatkiller IV. While the name is hardly surprising let’s see if it lives up to the hype!
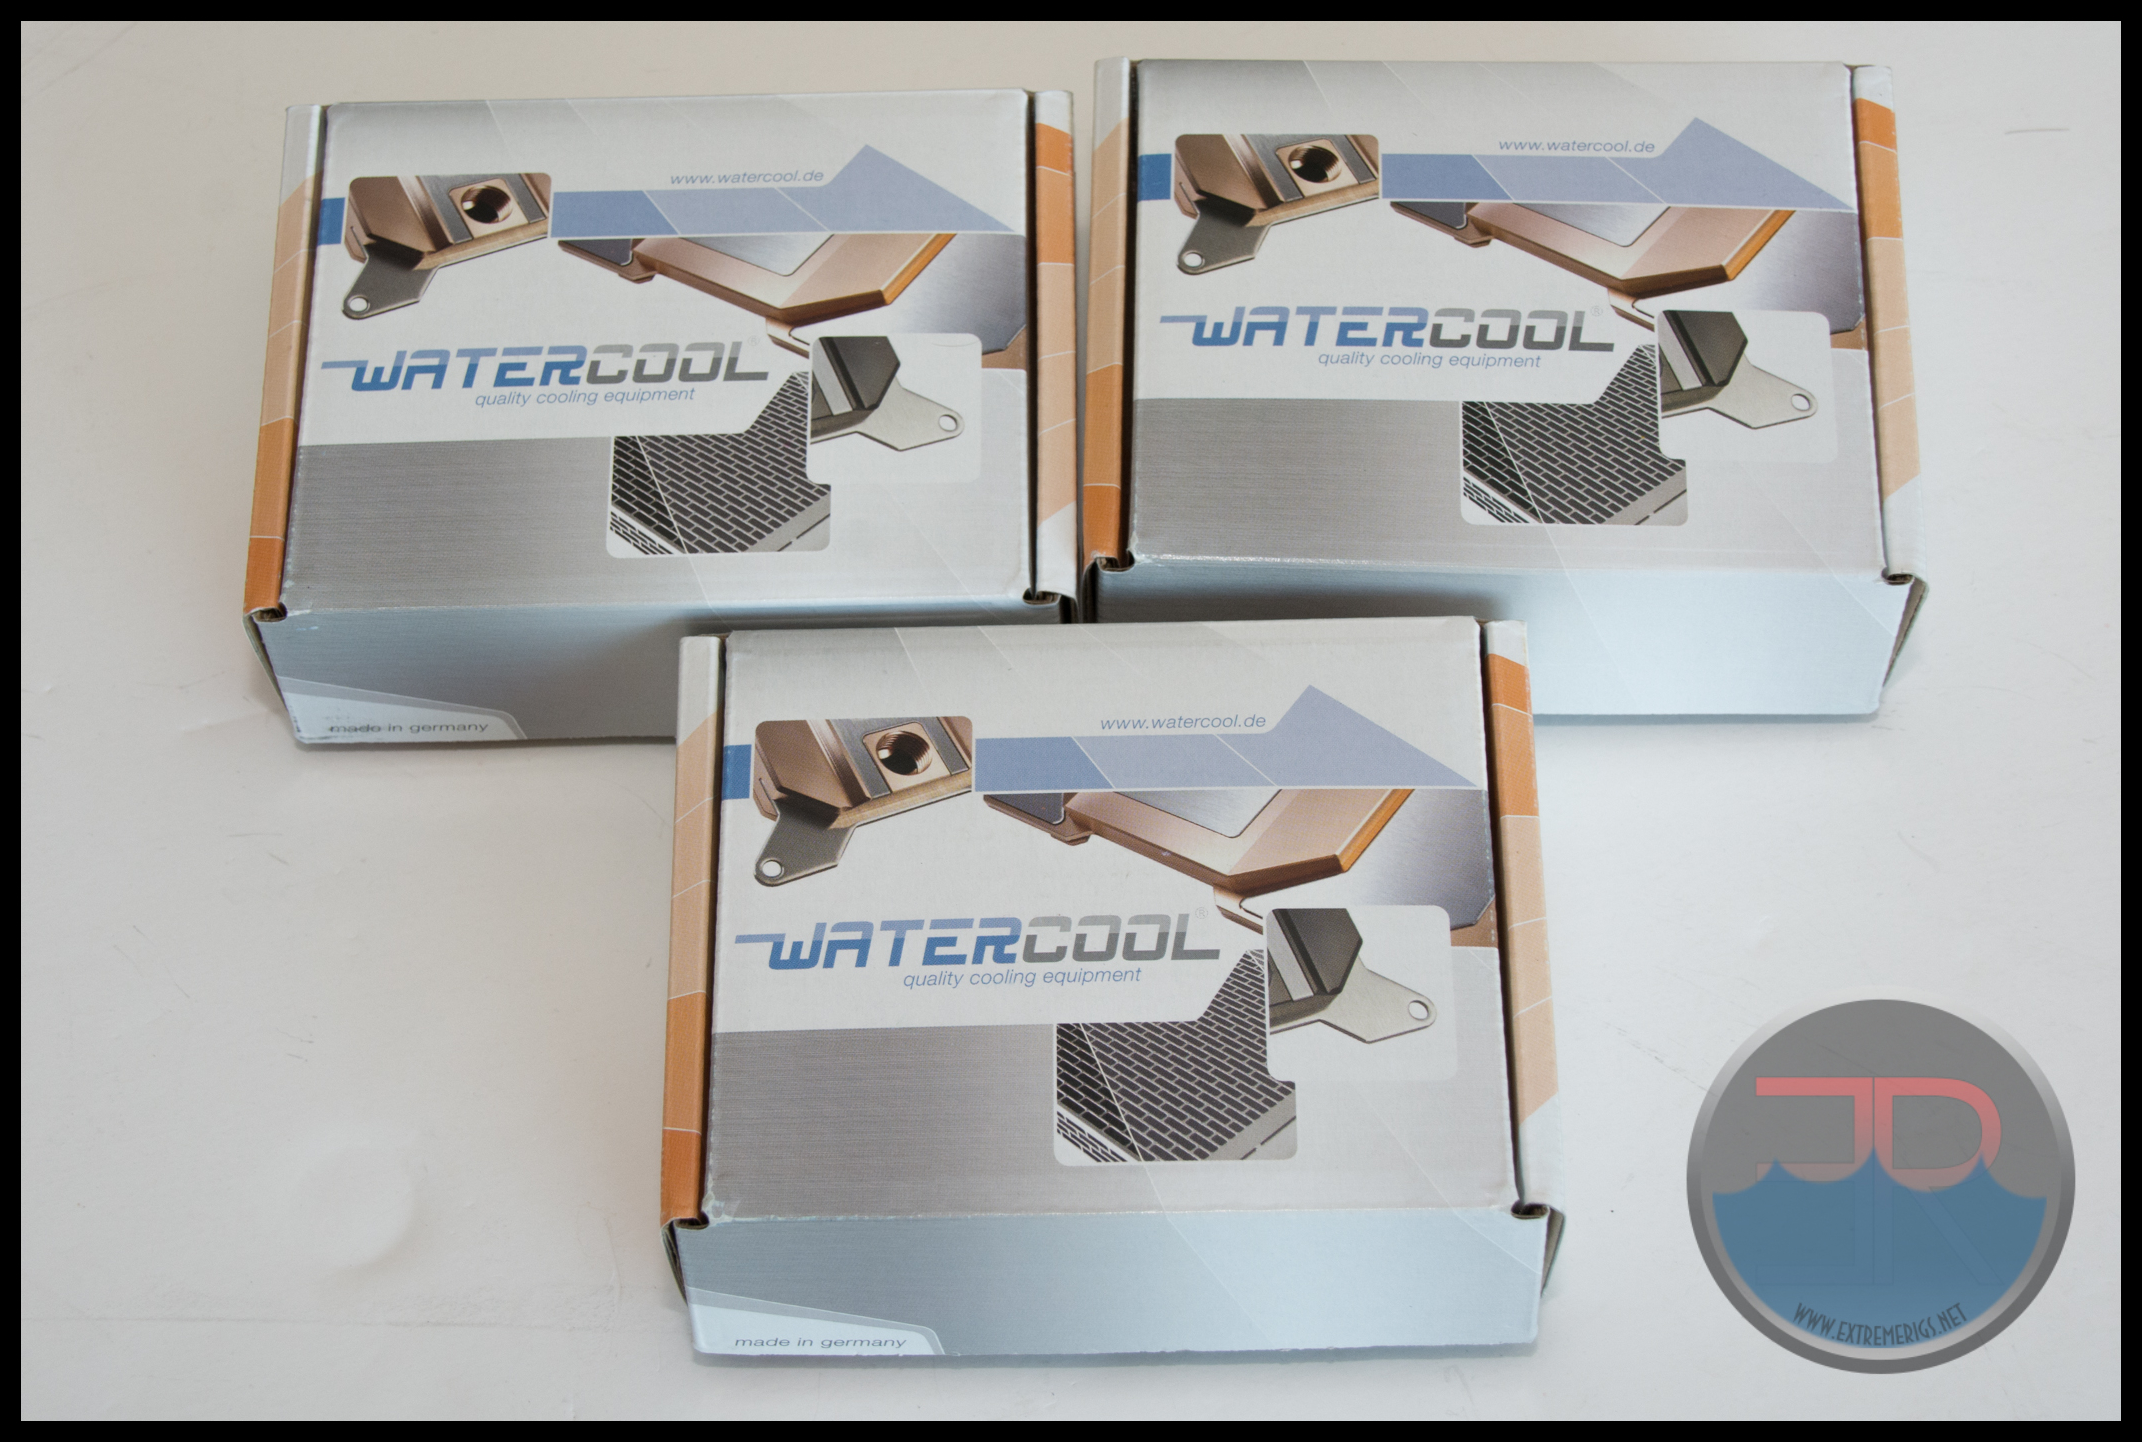 While we’d love to think that Watercool were so cocky we’d that they sent three versions of it the reality is somewhat different. The Heatkiller IV comes in Pro and Basic versions. While they look very similar, the internals are not and so that’s the real reason Watercool sent us a variety to test.
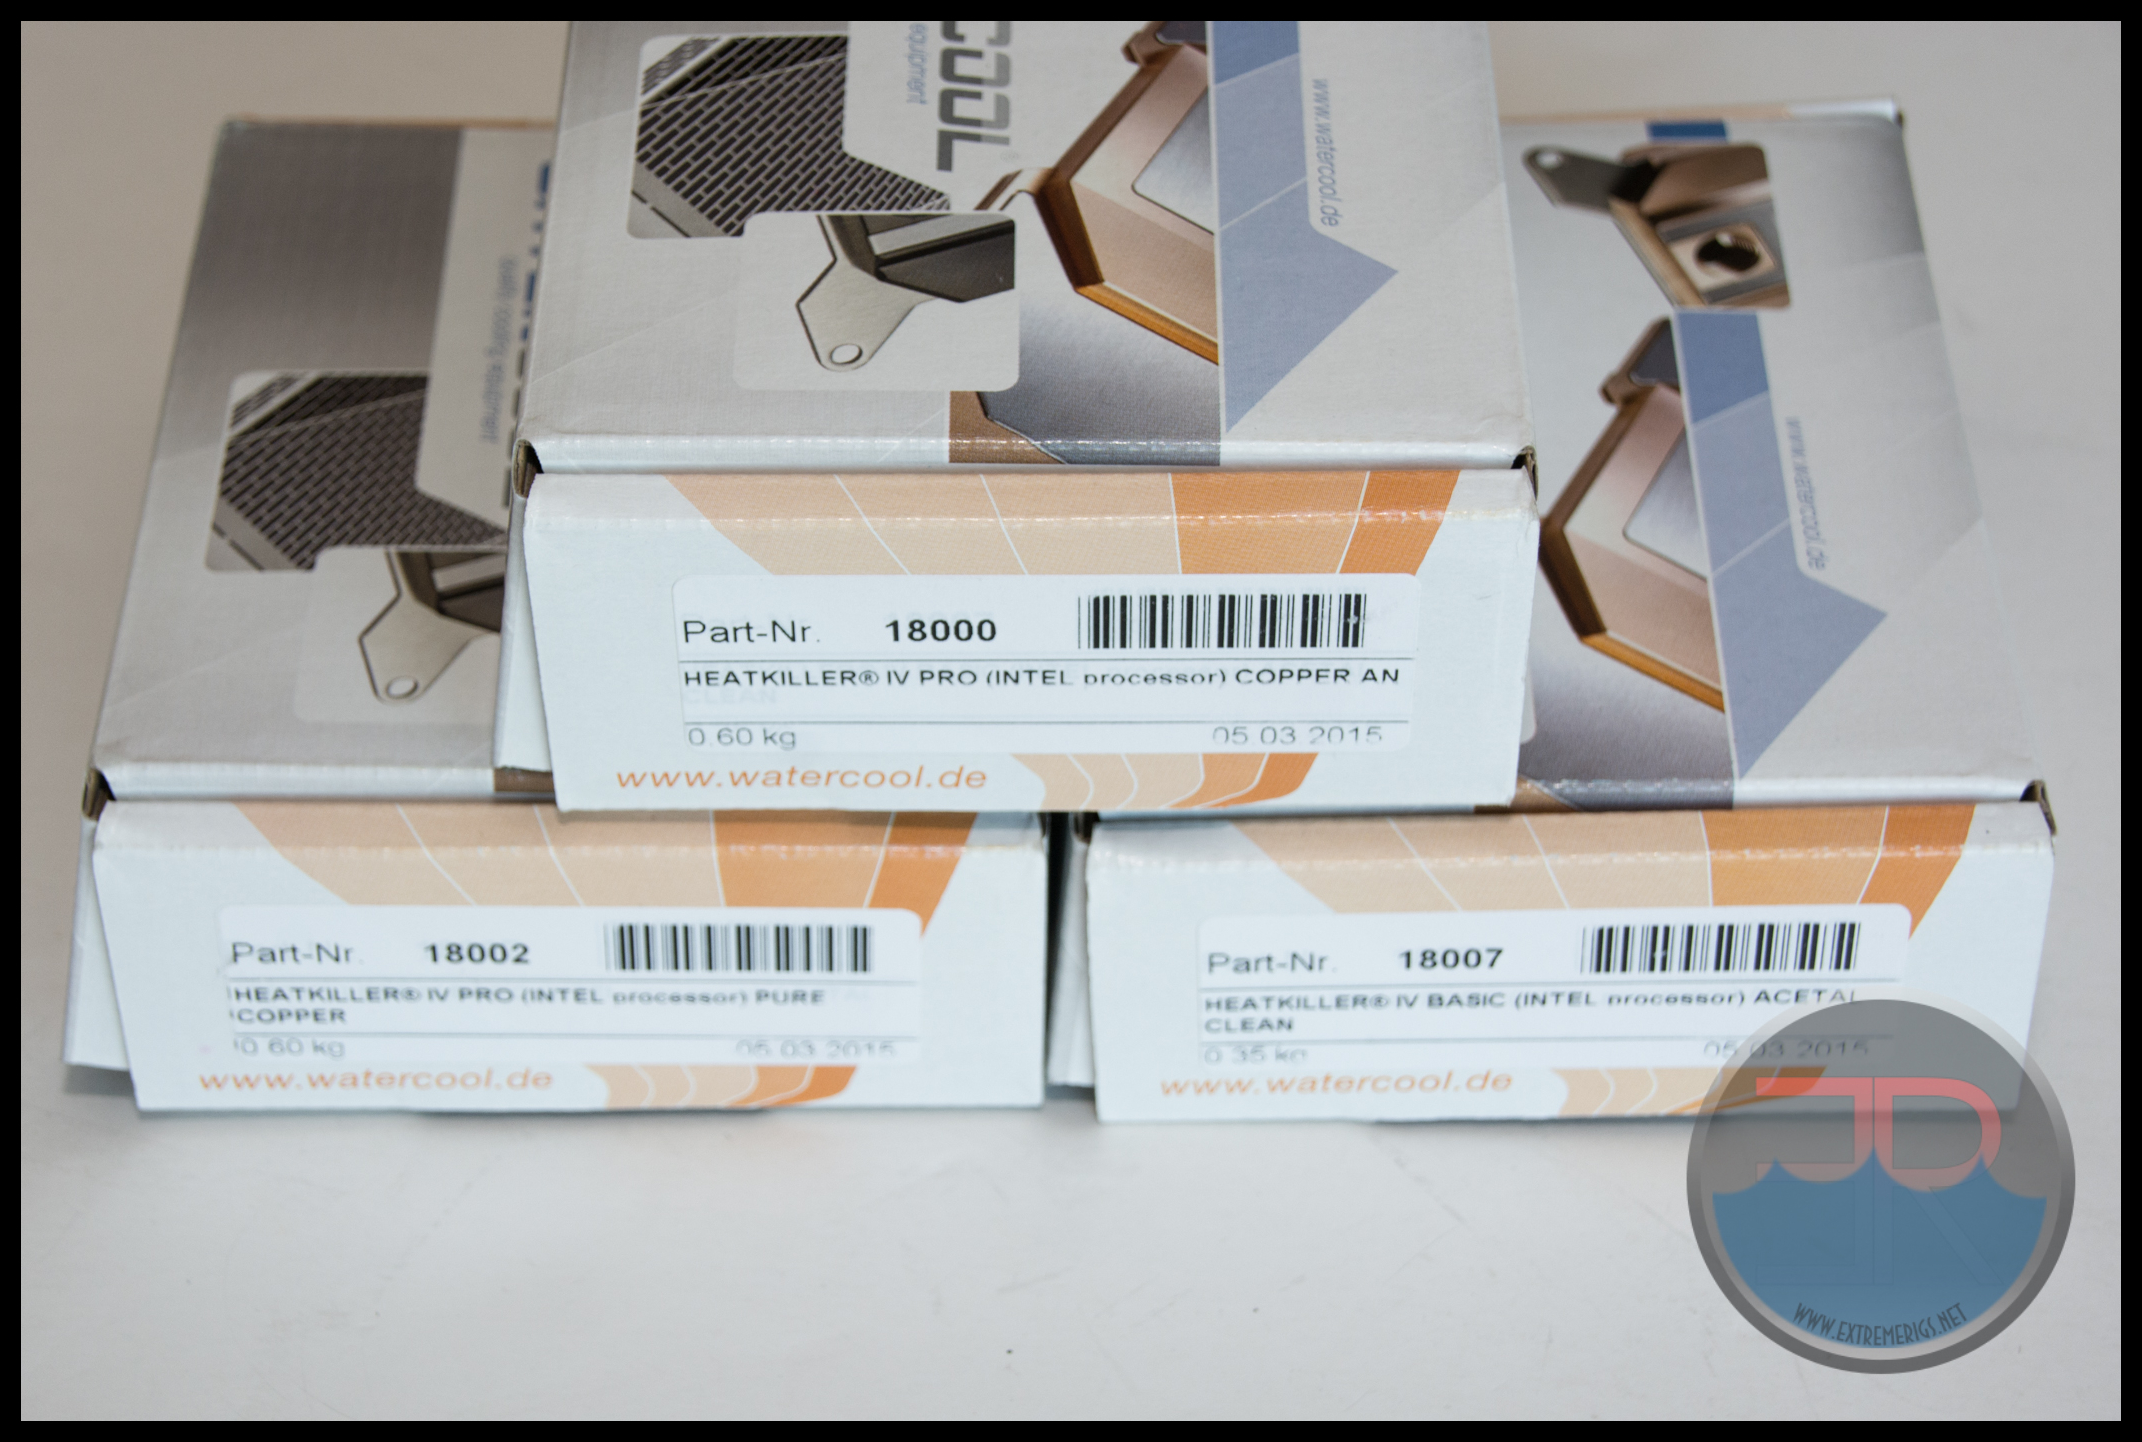
While we got to test two “Pro” versions and one “Basic” edition there are plenty of choices. The pro comes in Nickel Copper, “Copper An”, Pure Copper, Acrylic, Acrylic Clean and Acetal versions while the basic comes in Acetal and Acrylic only. “Copper An” stands for Anthracite Nickel Plated Copper – in other words a darker nickel.
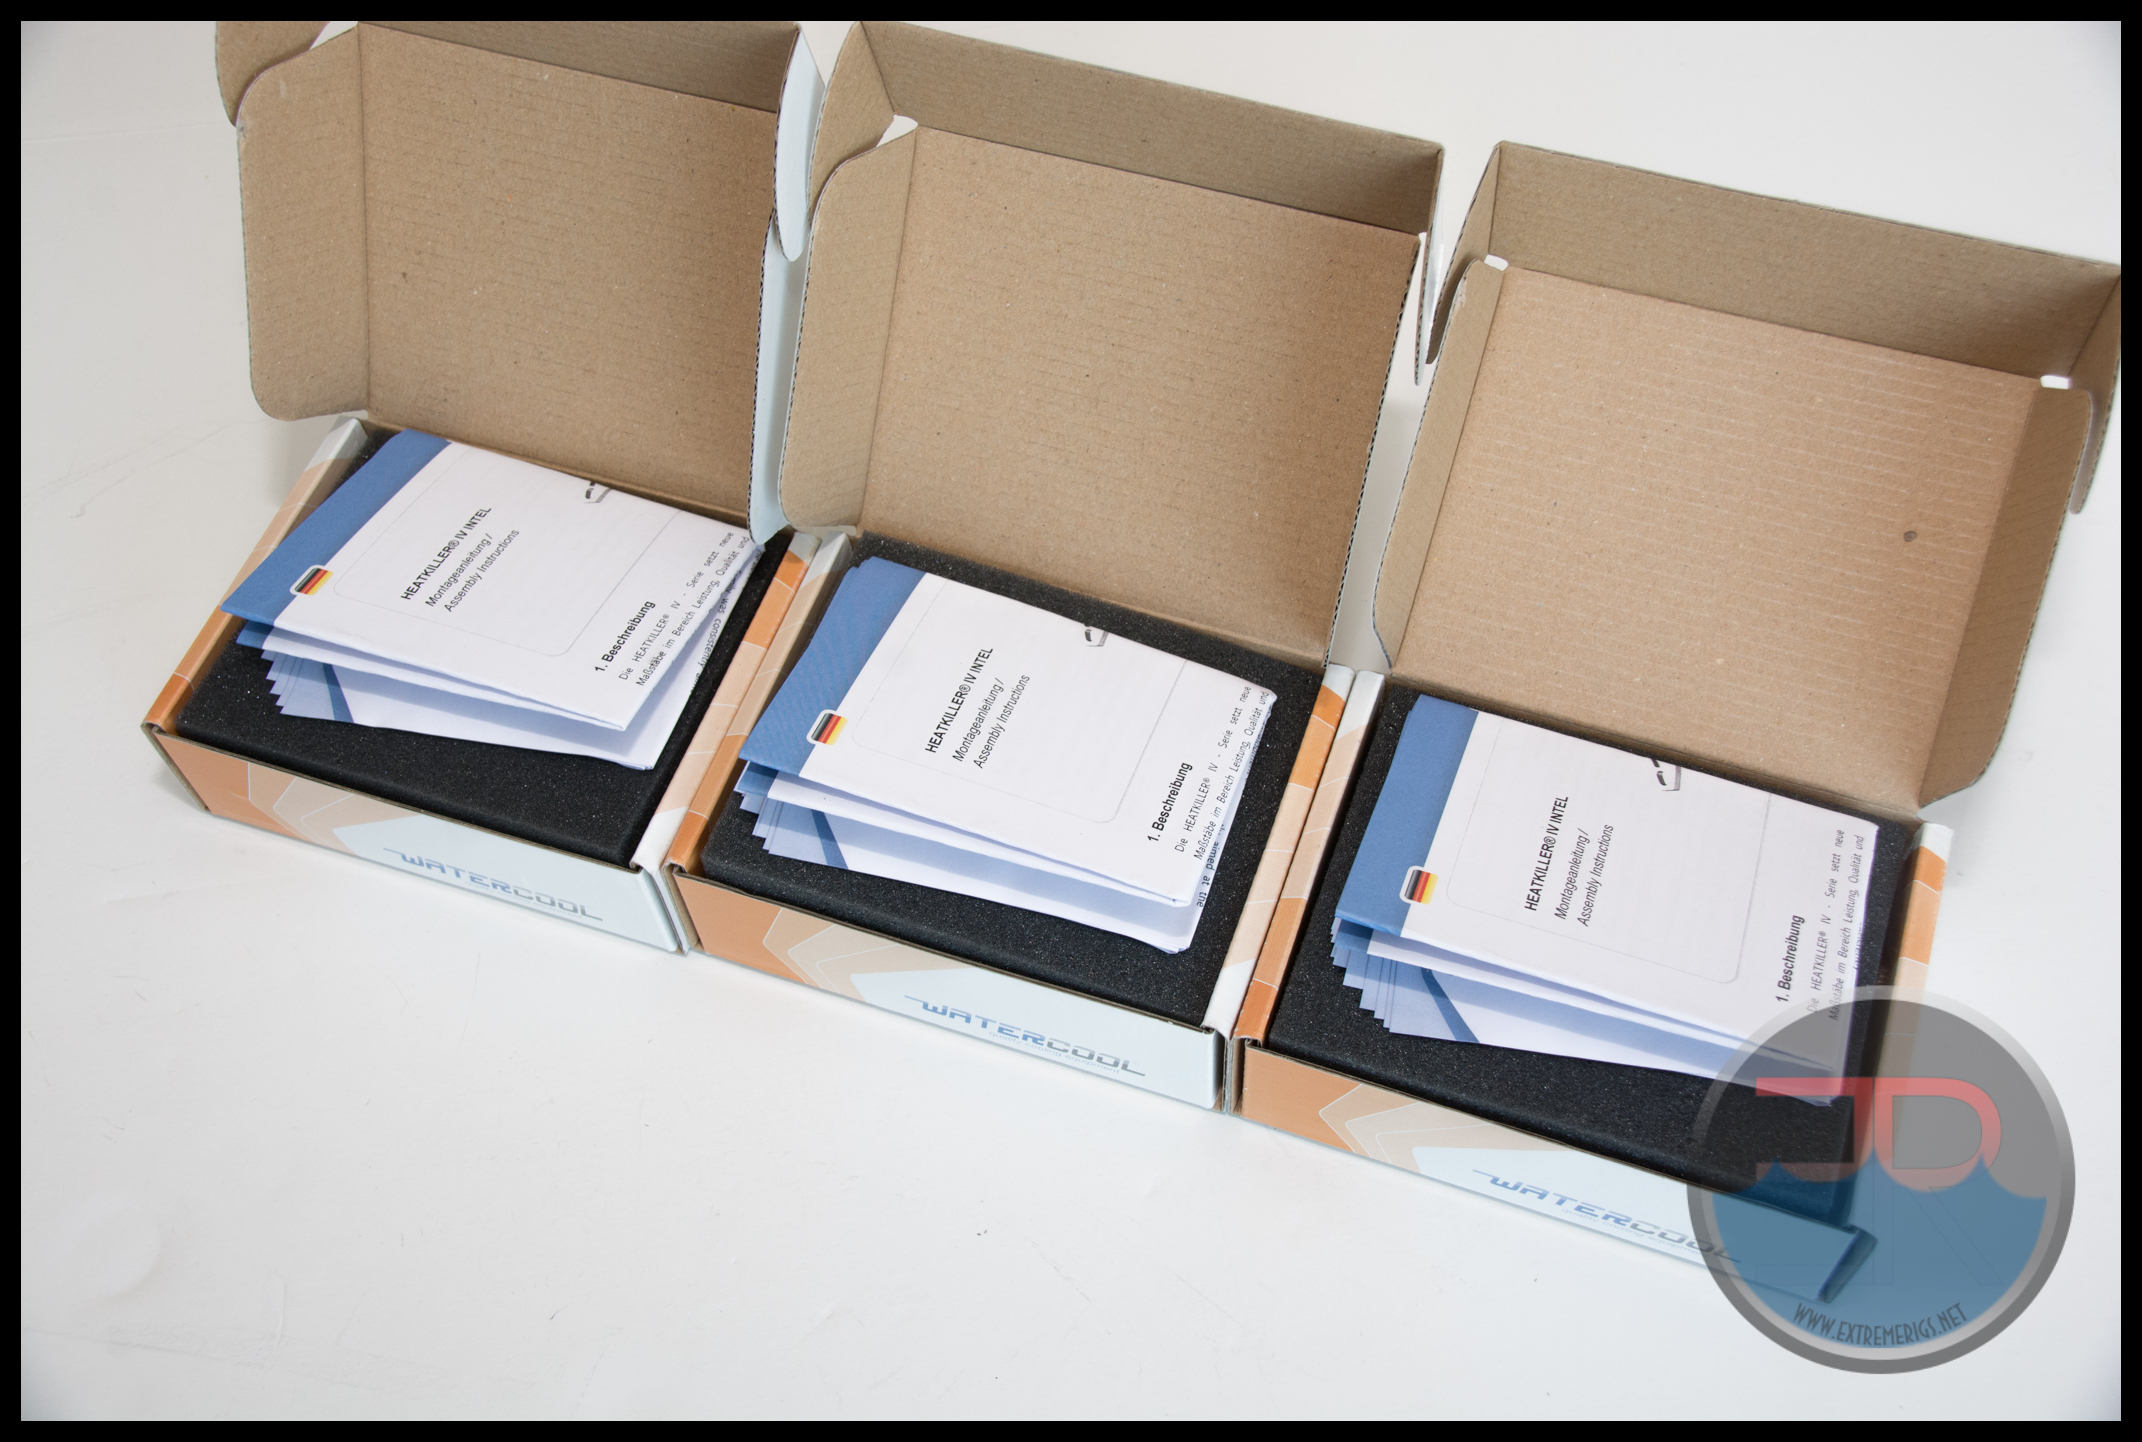
All the packages came with the same box and instructions:
This one is the Pro Copper Anthracite:
 In addition to the bilingual and very thorough instructions accessories to mount the block were included for Intel sockets:
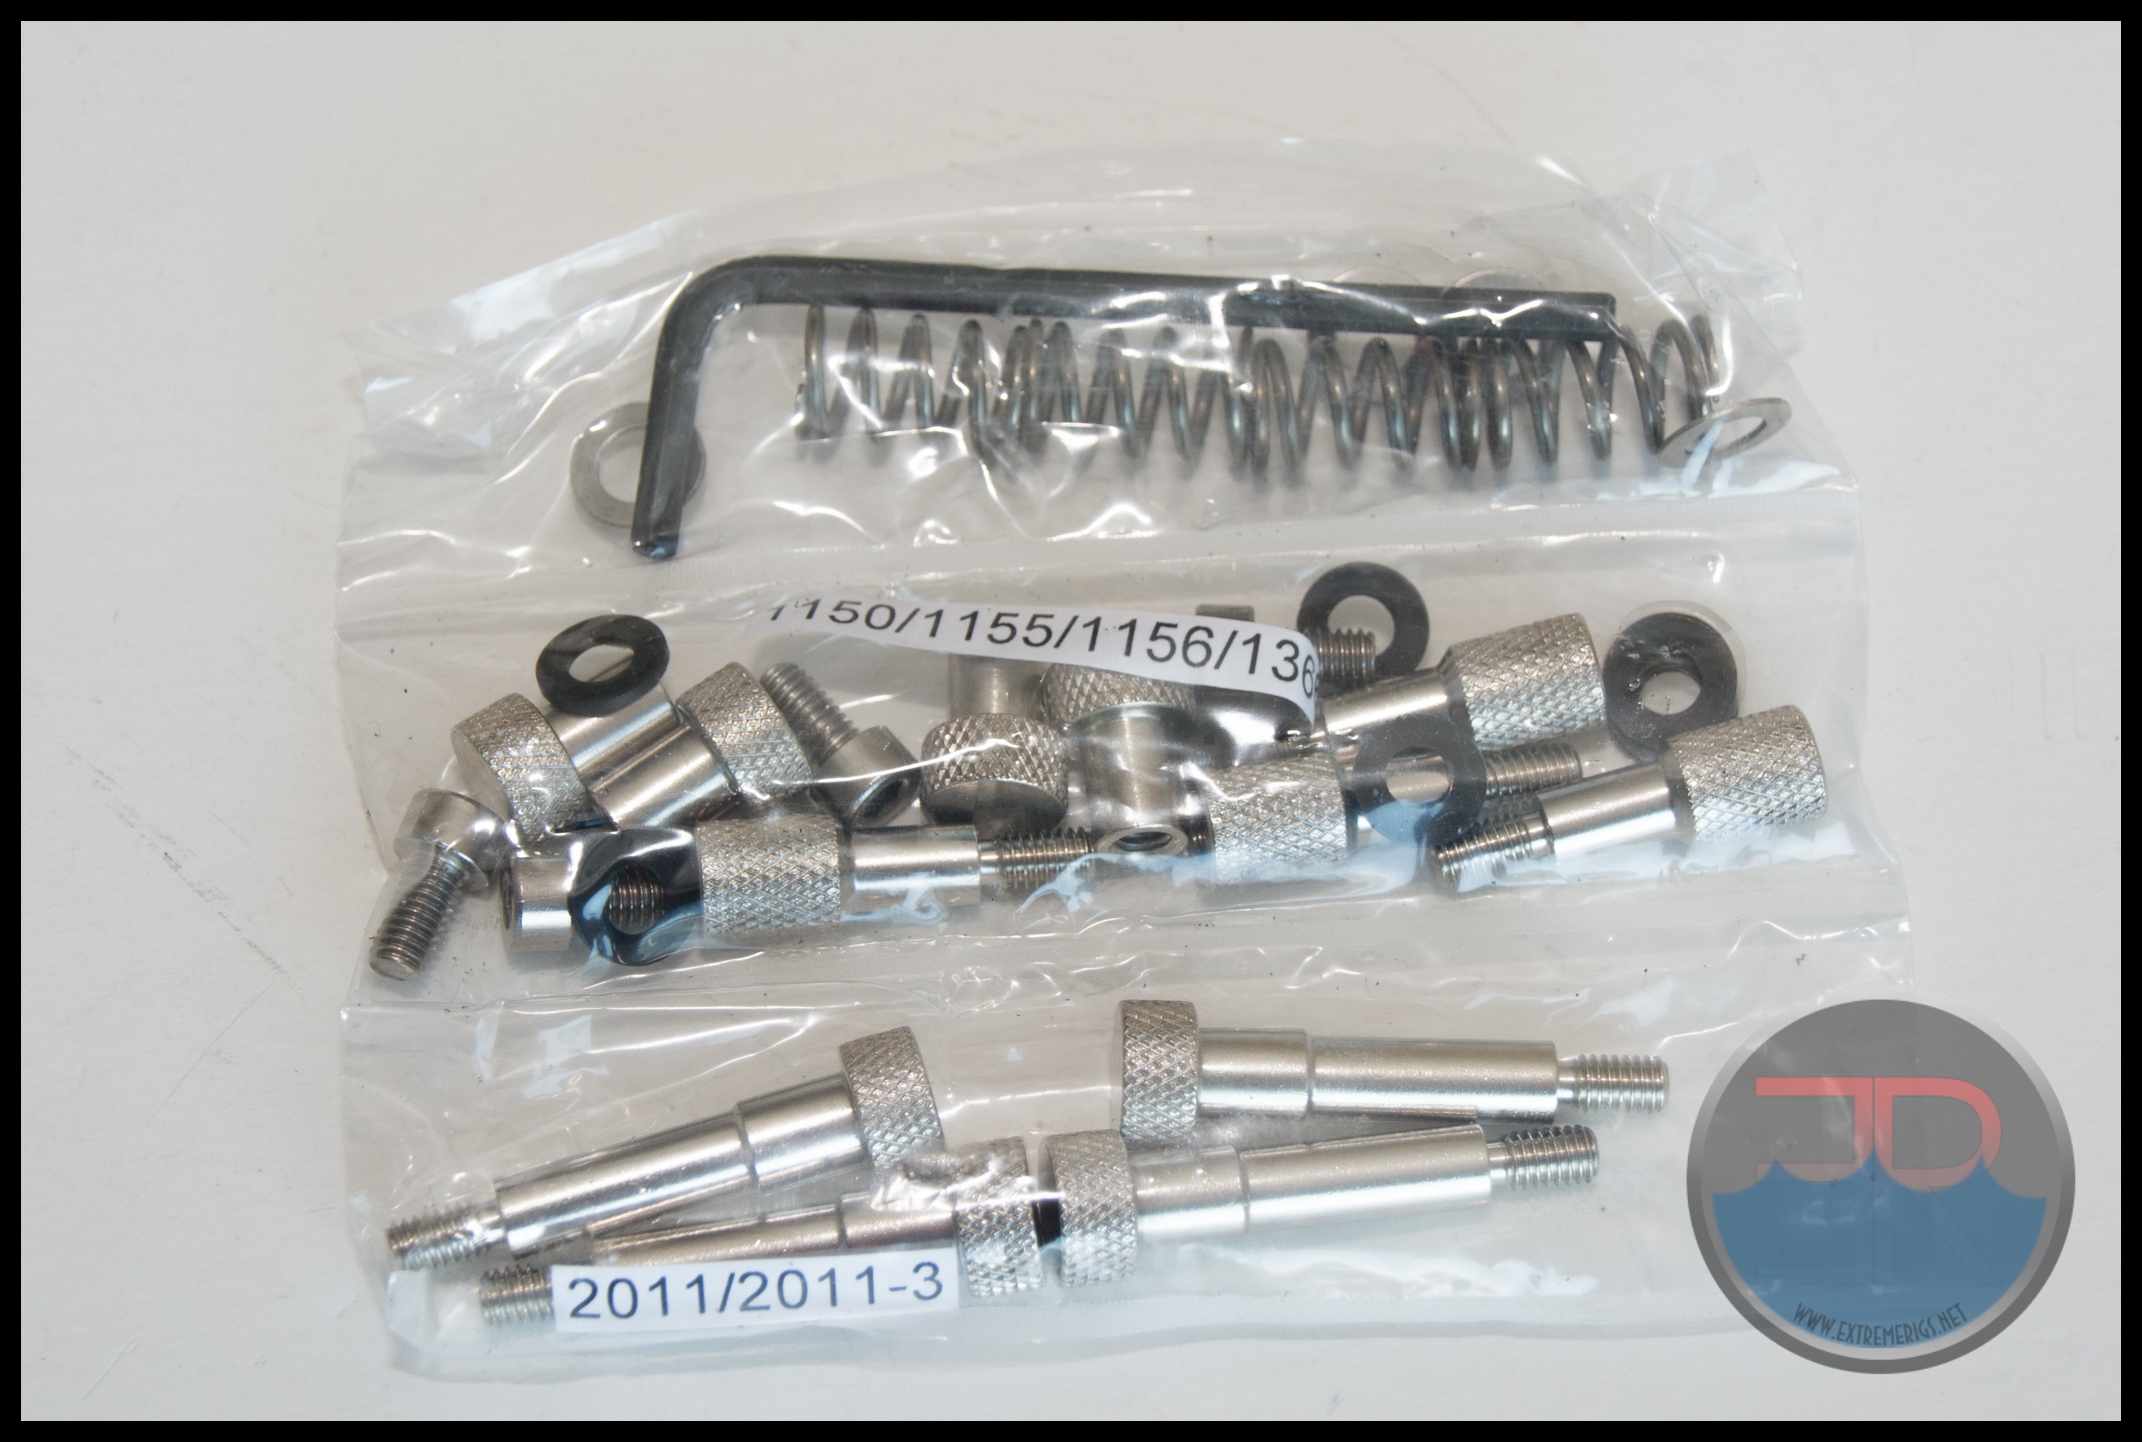 It should be noted that for 1150/1155/1156 sockets there is an optional backplate you can also buy in addition.
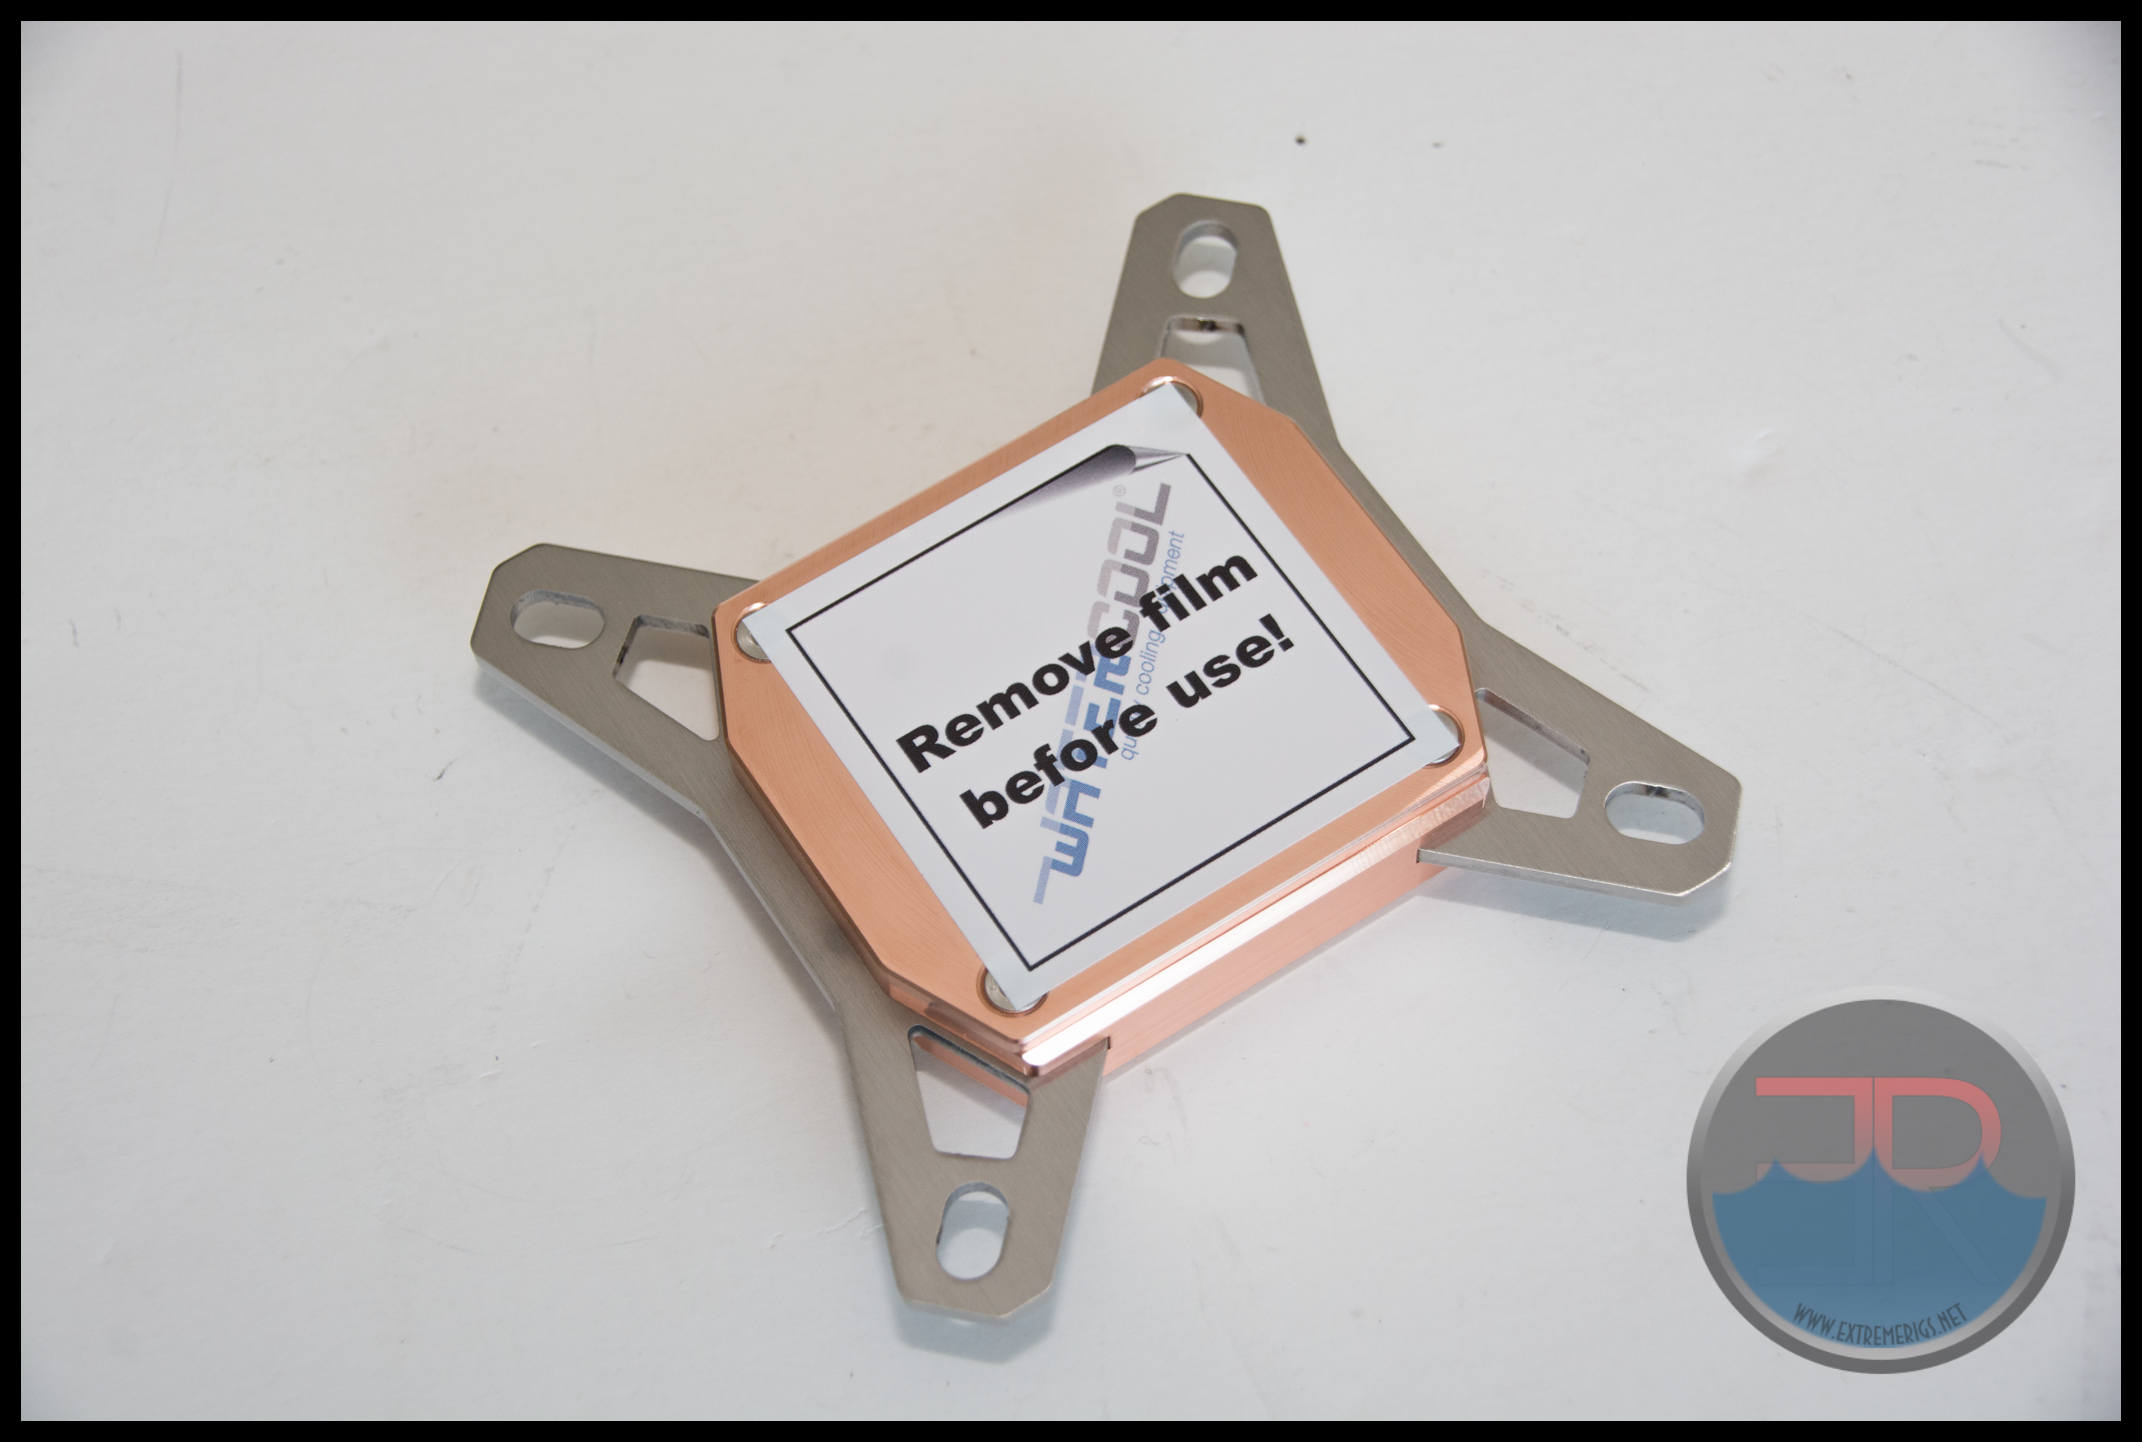
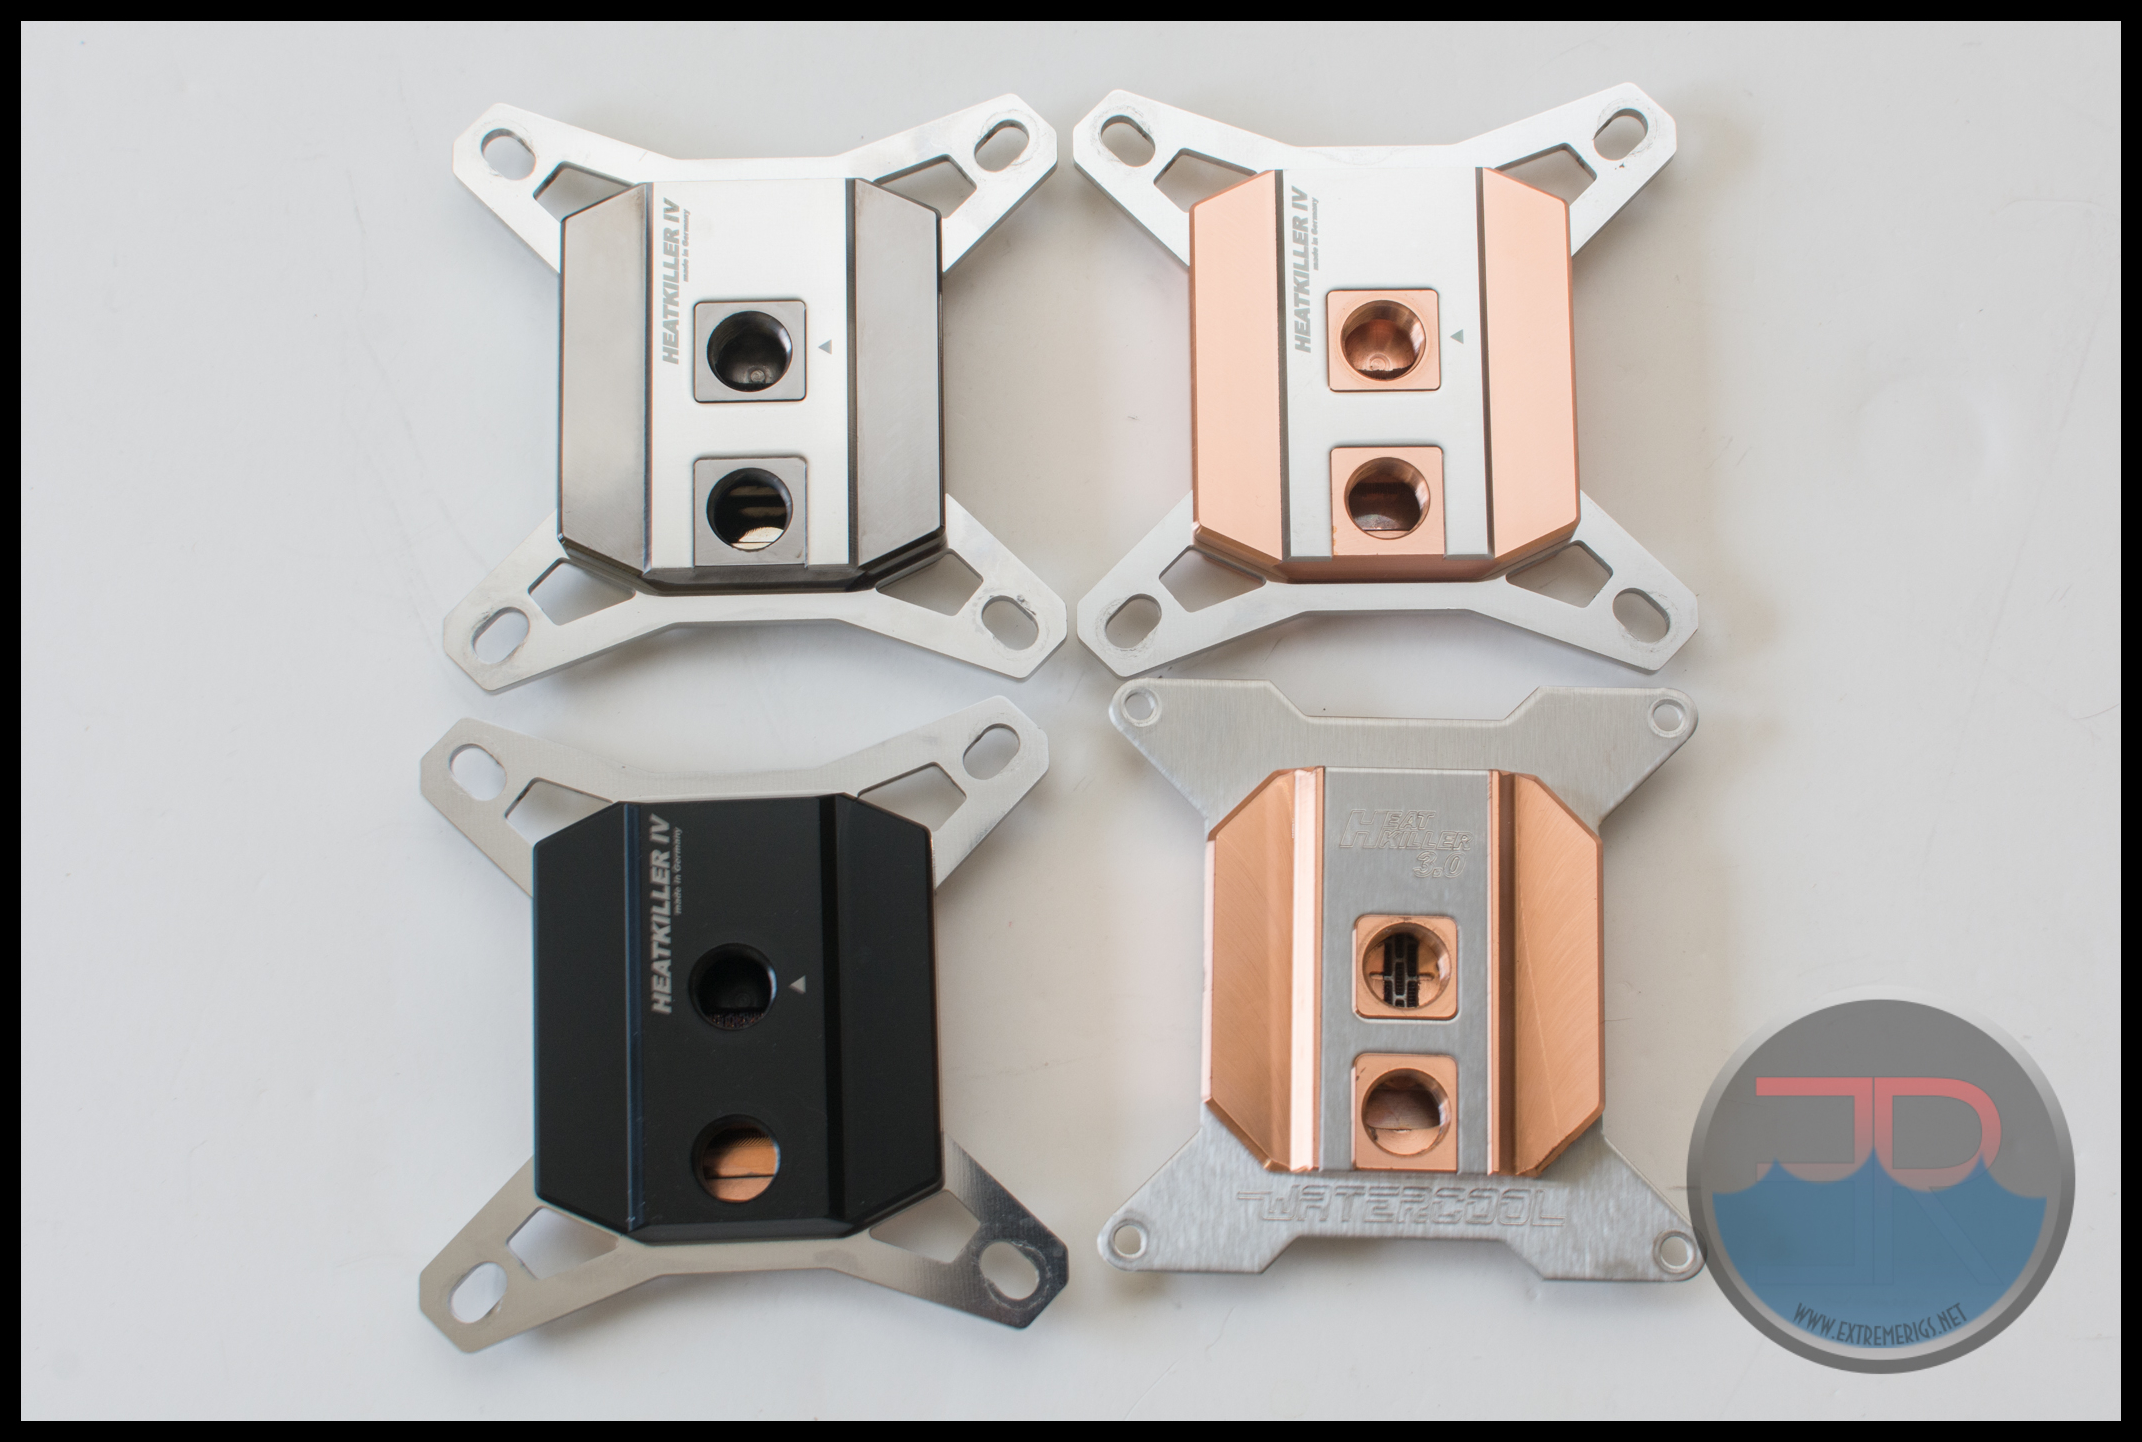
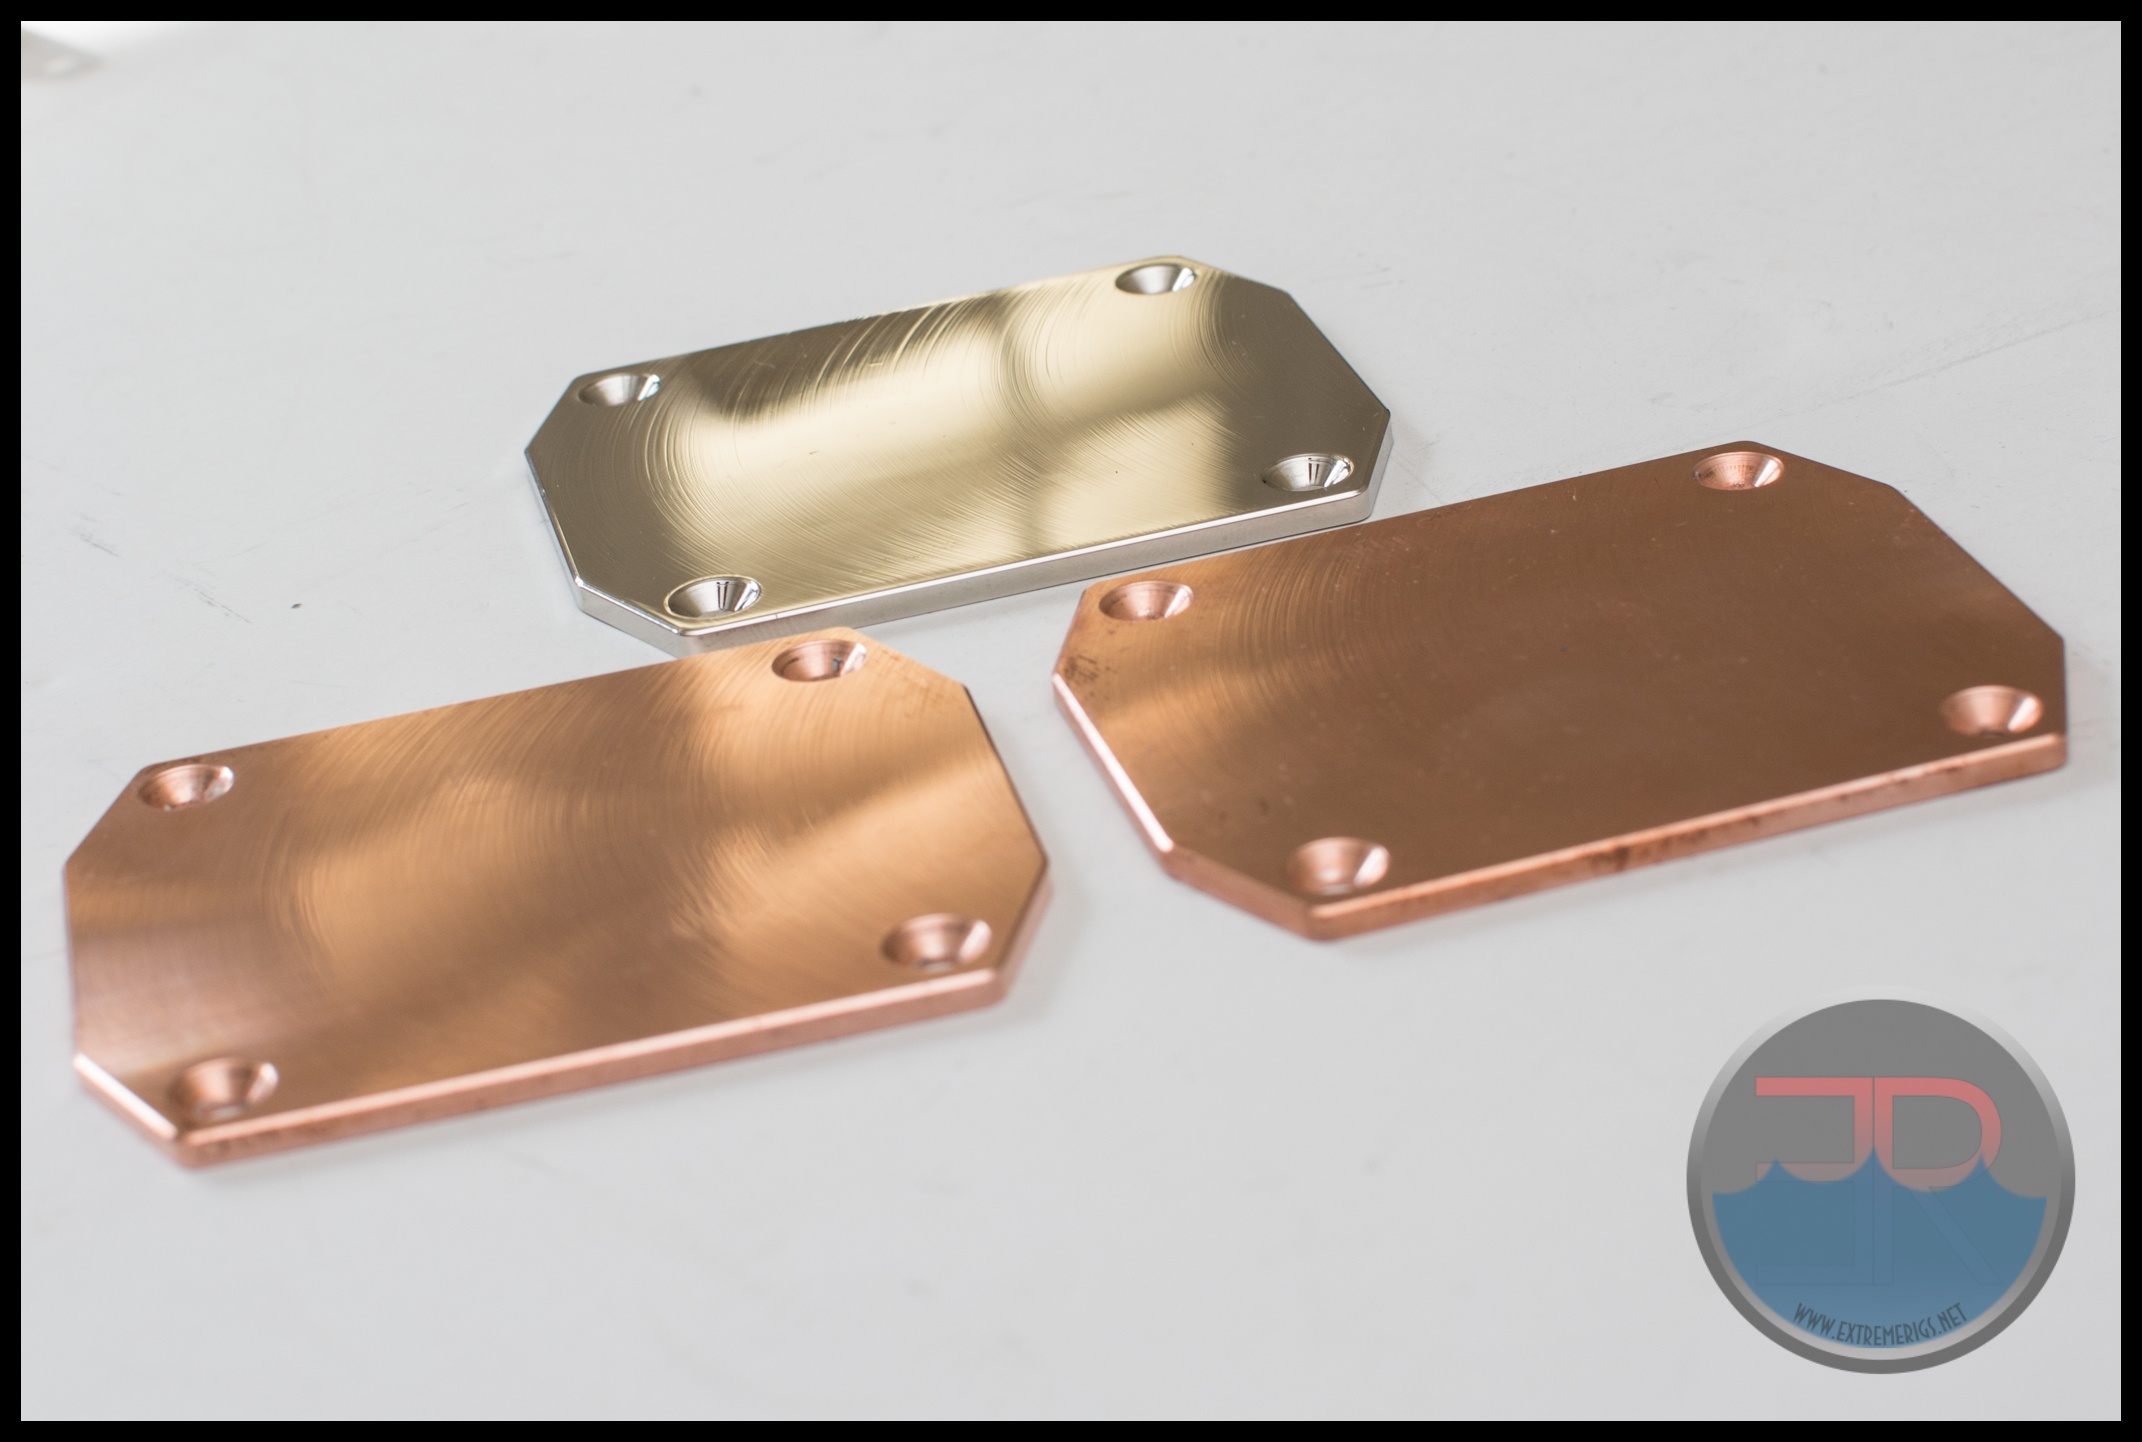
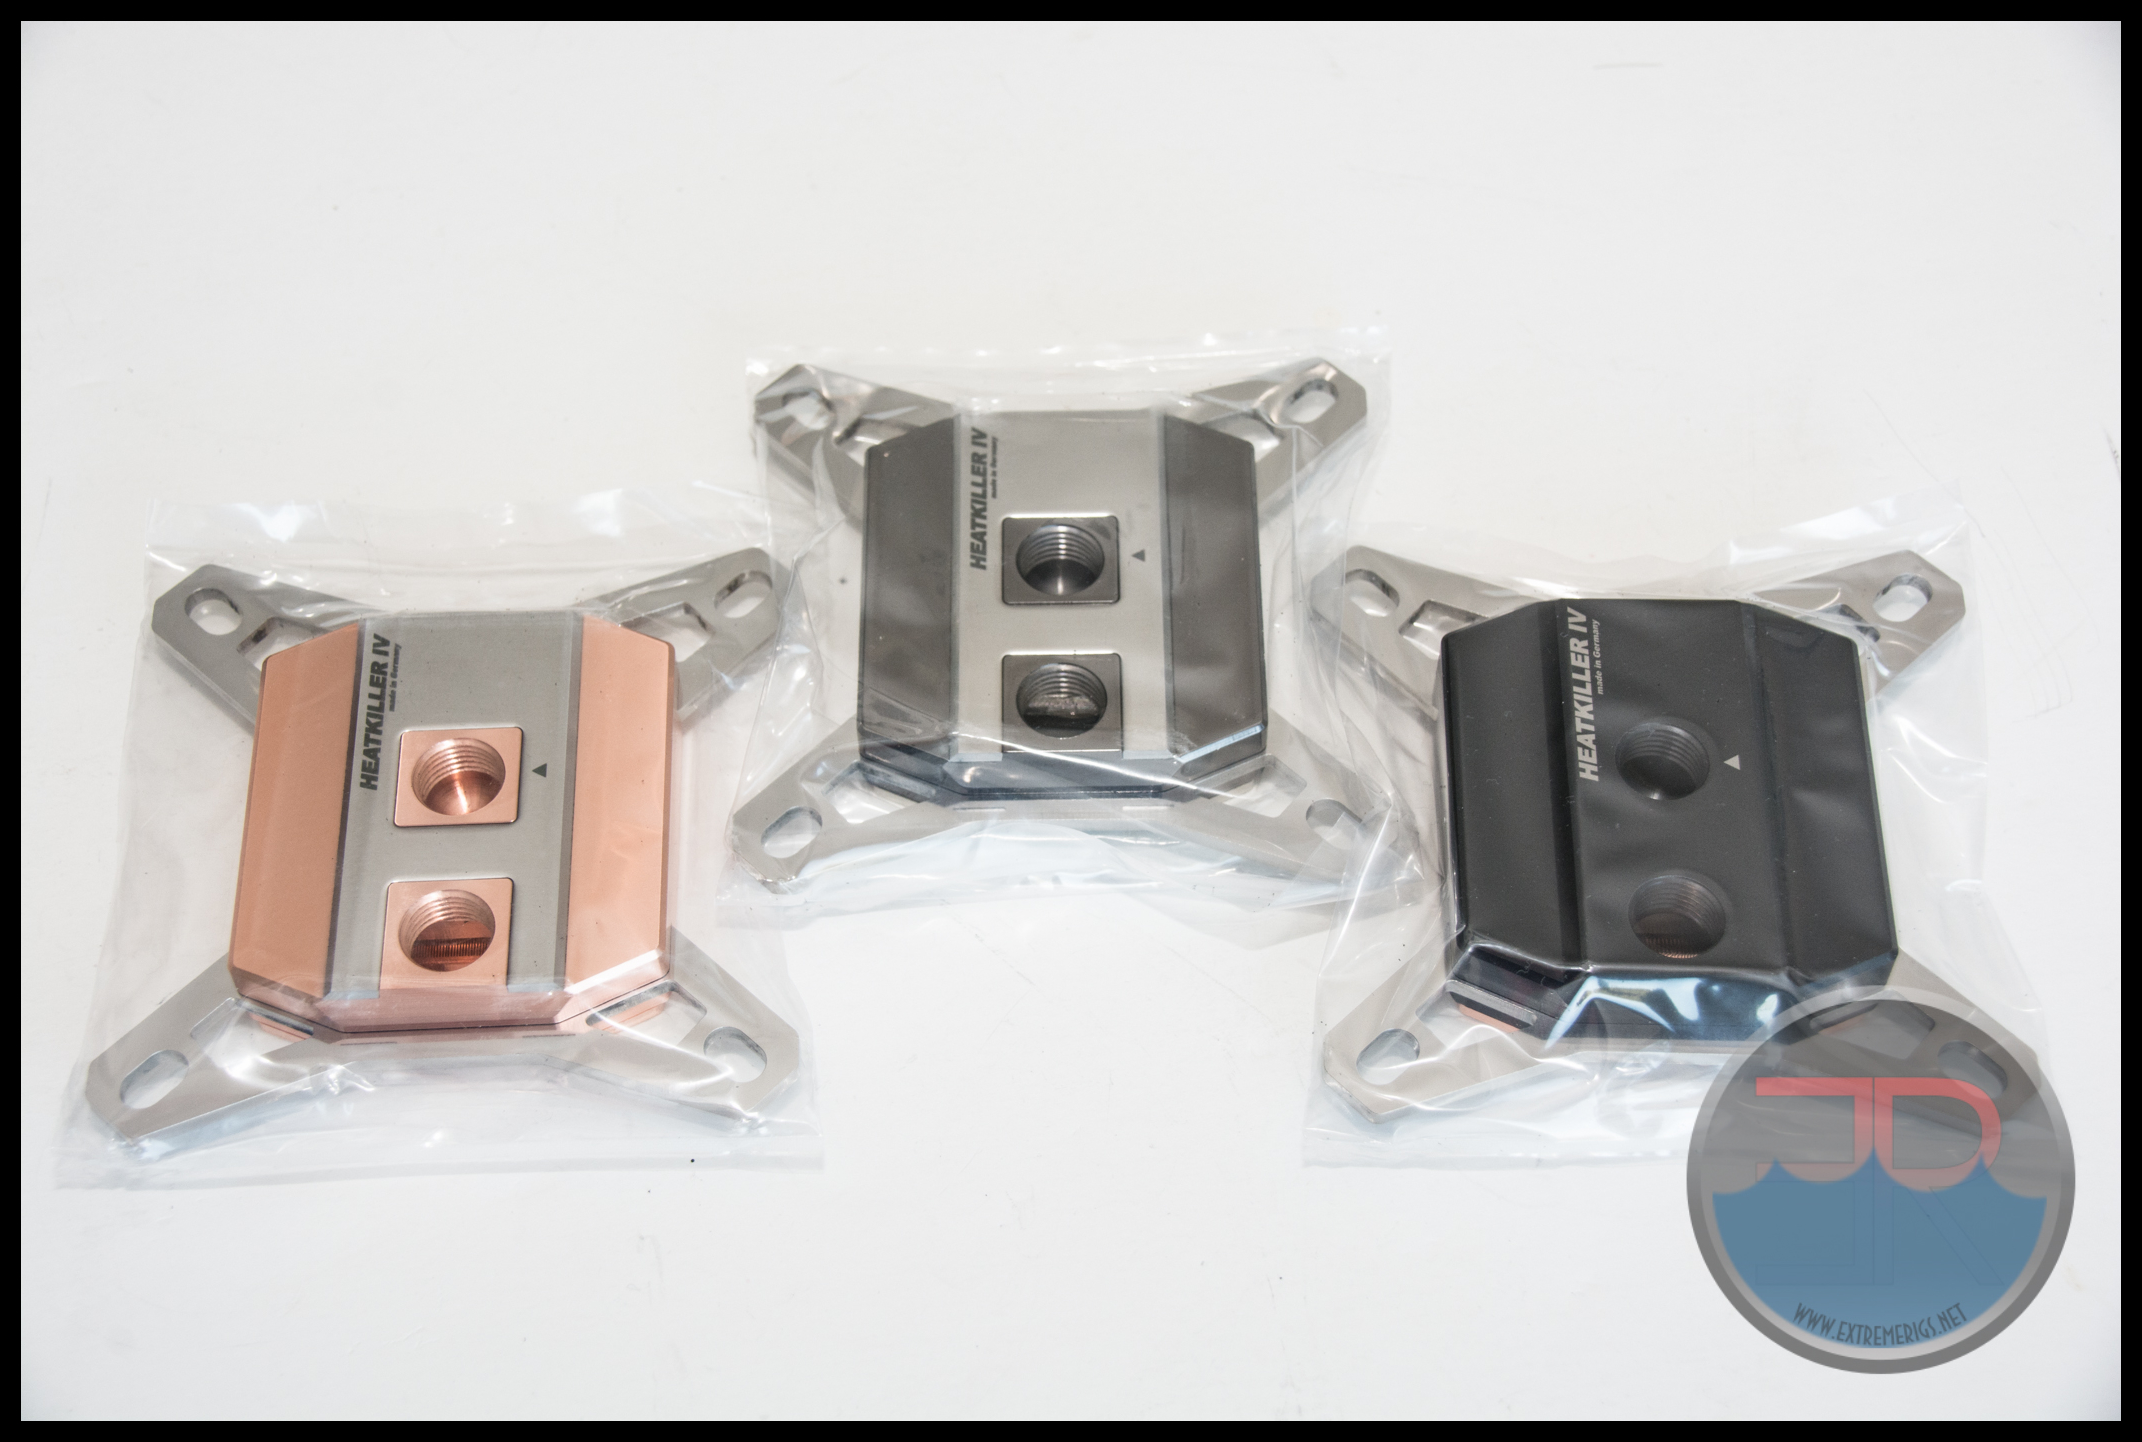 From left to right: Pro Pure Copper, Pro Copper Anthracite, Basic Acetal. In addition to the packaging materials and the plastic wrap the base of each block was protected also:
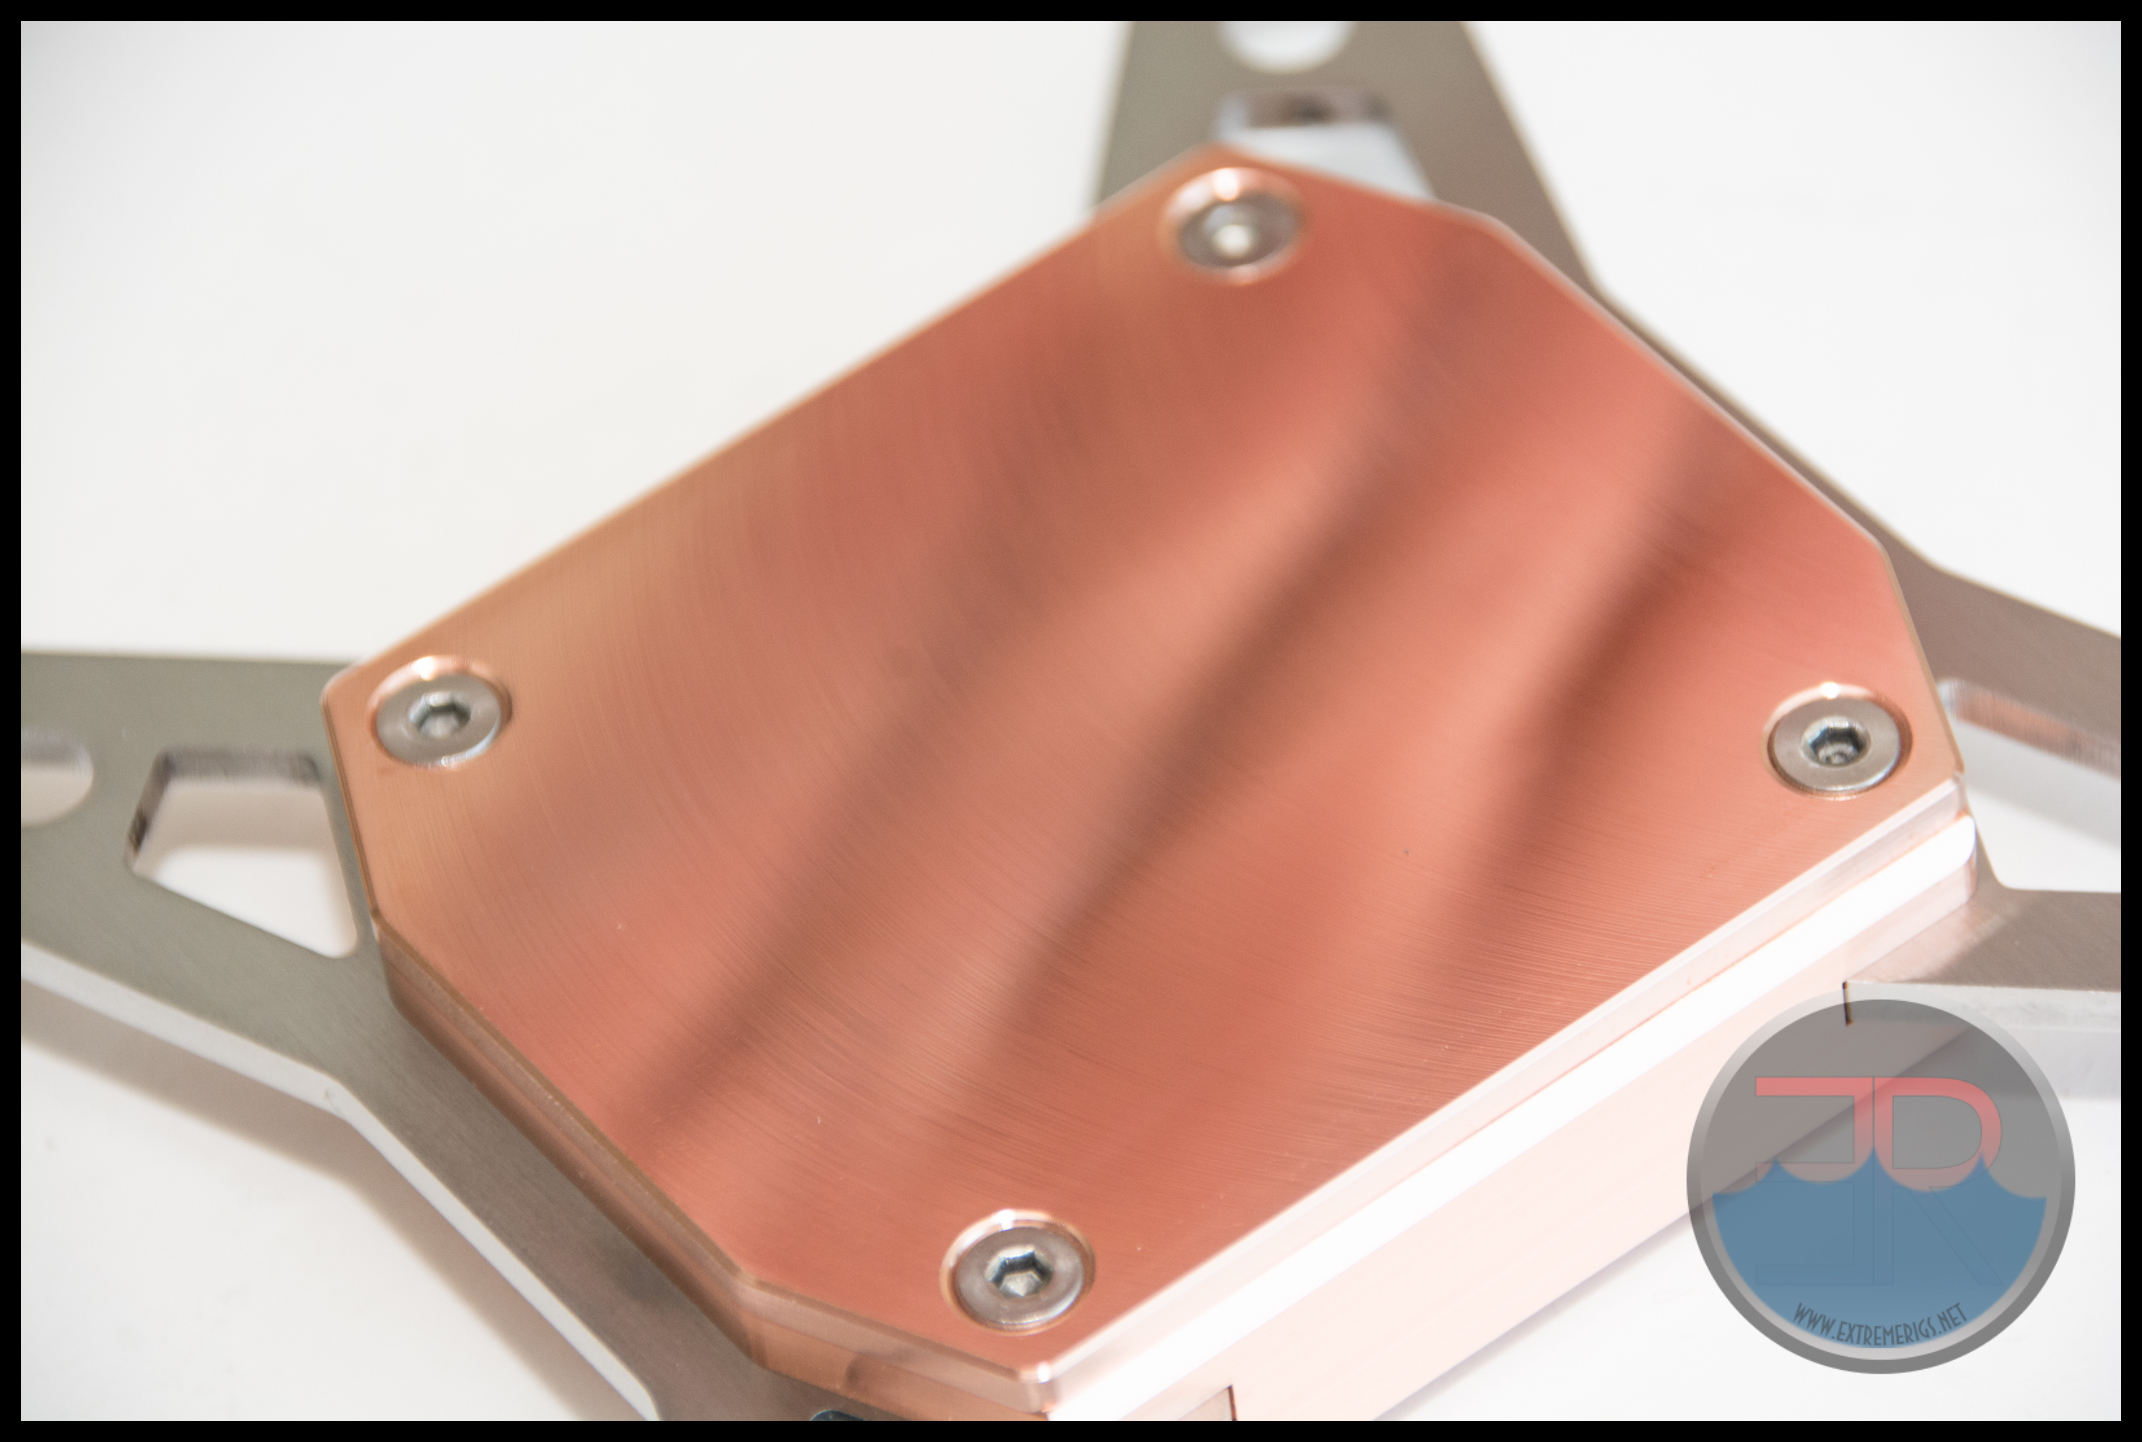
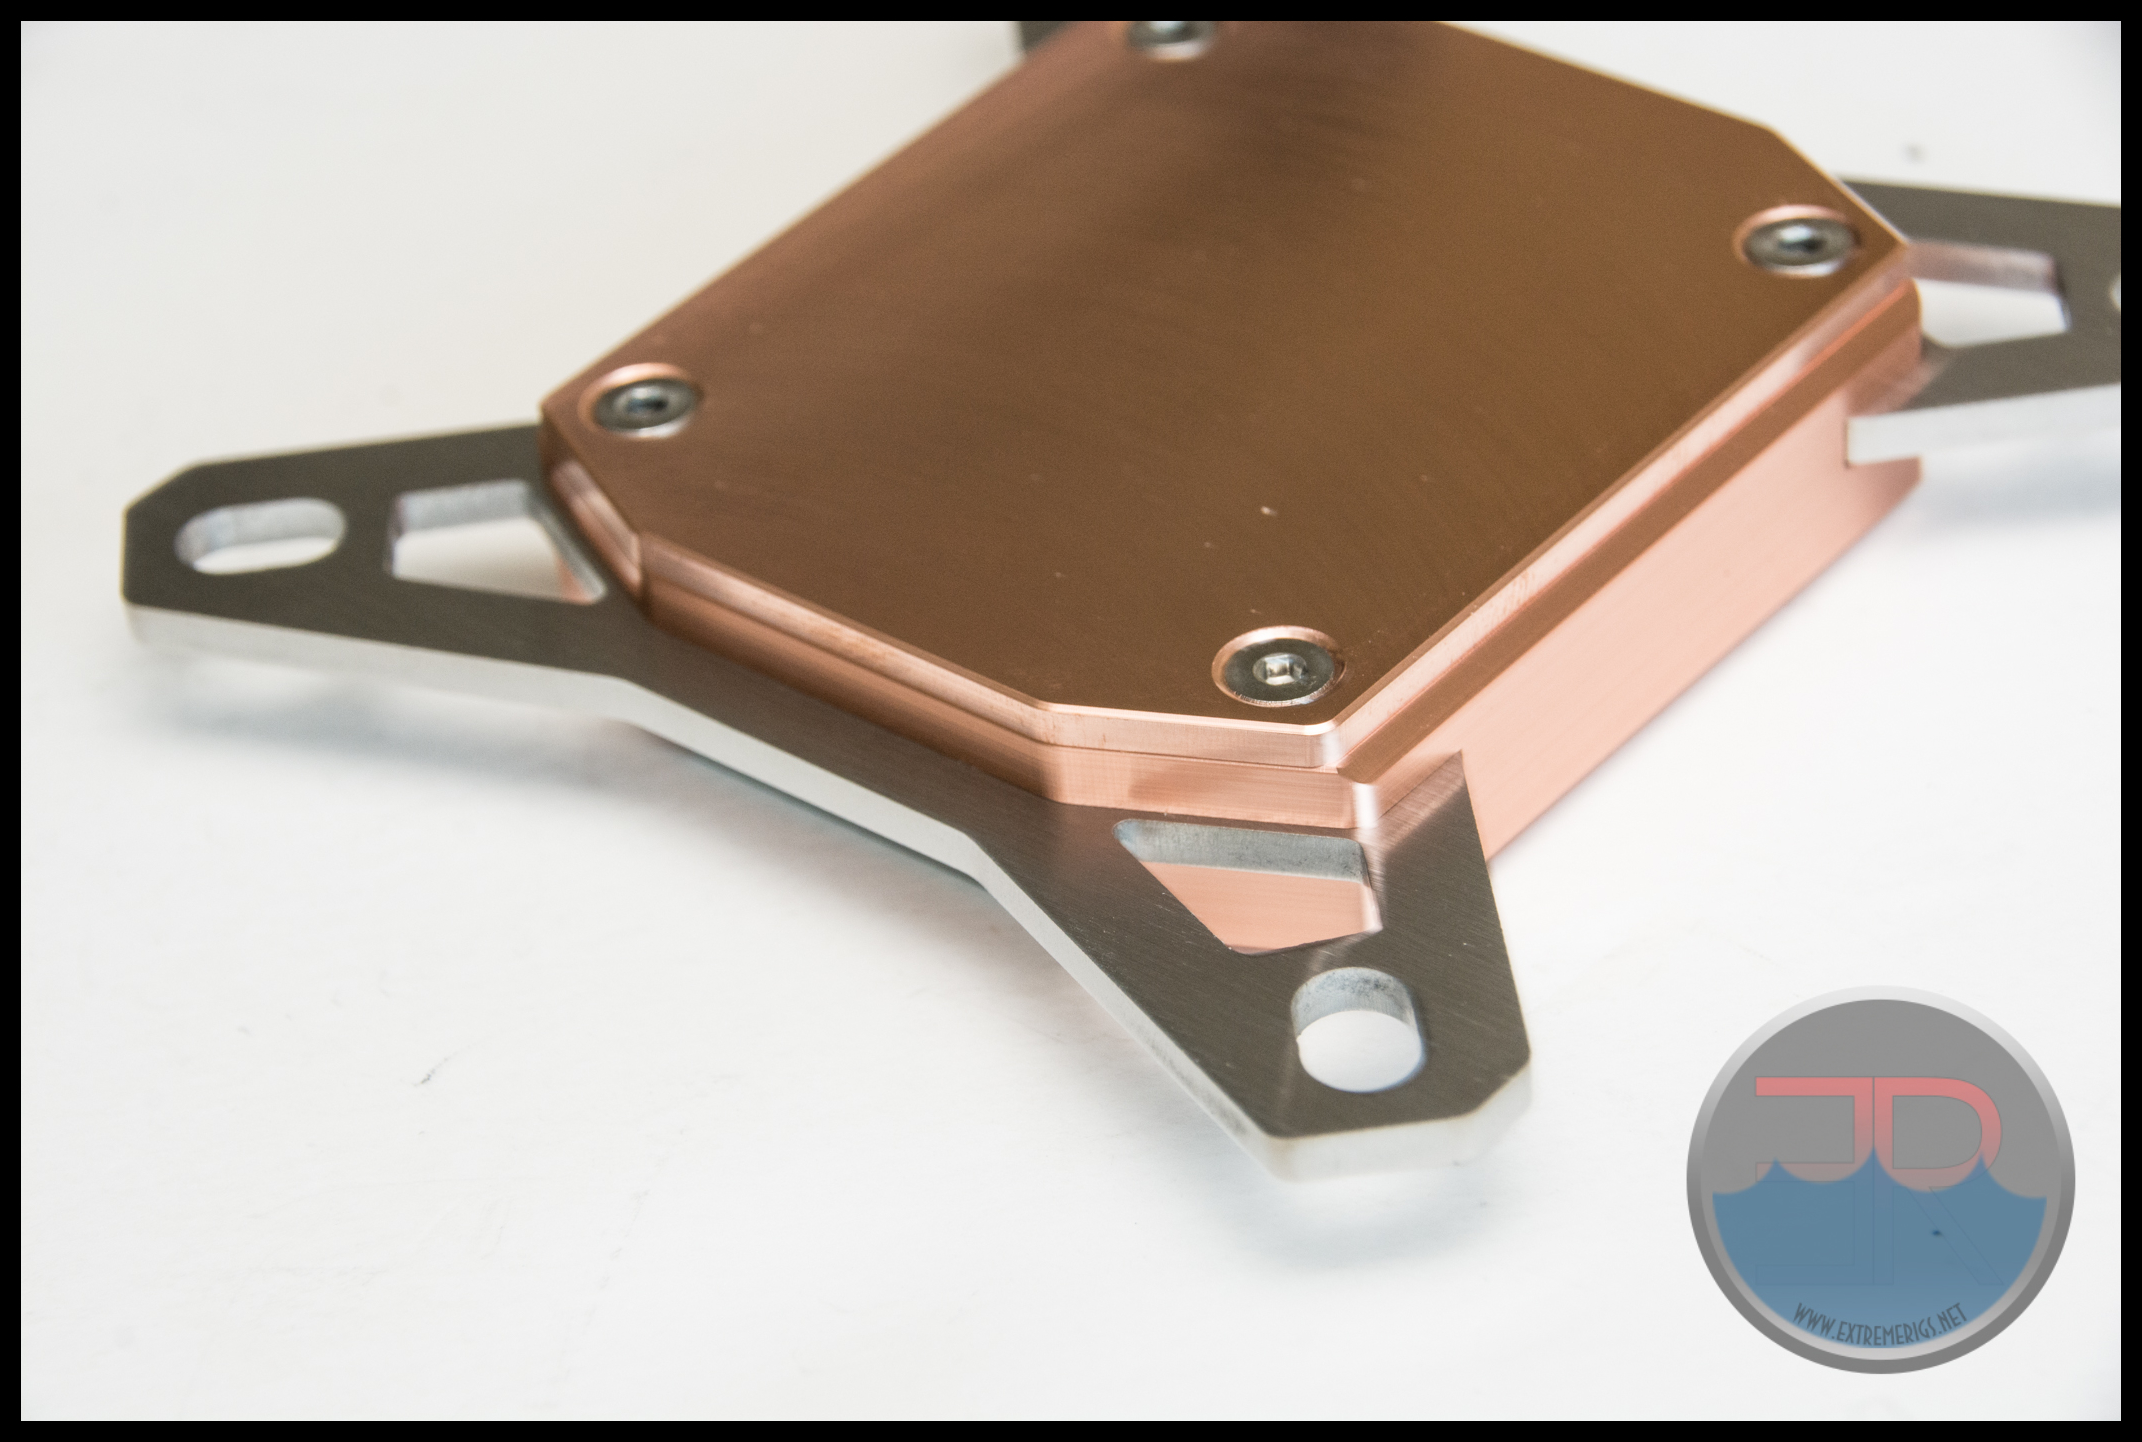
The base was not polished and so machining marks visible but they followed a nice arc
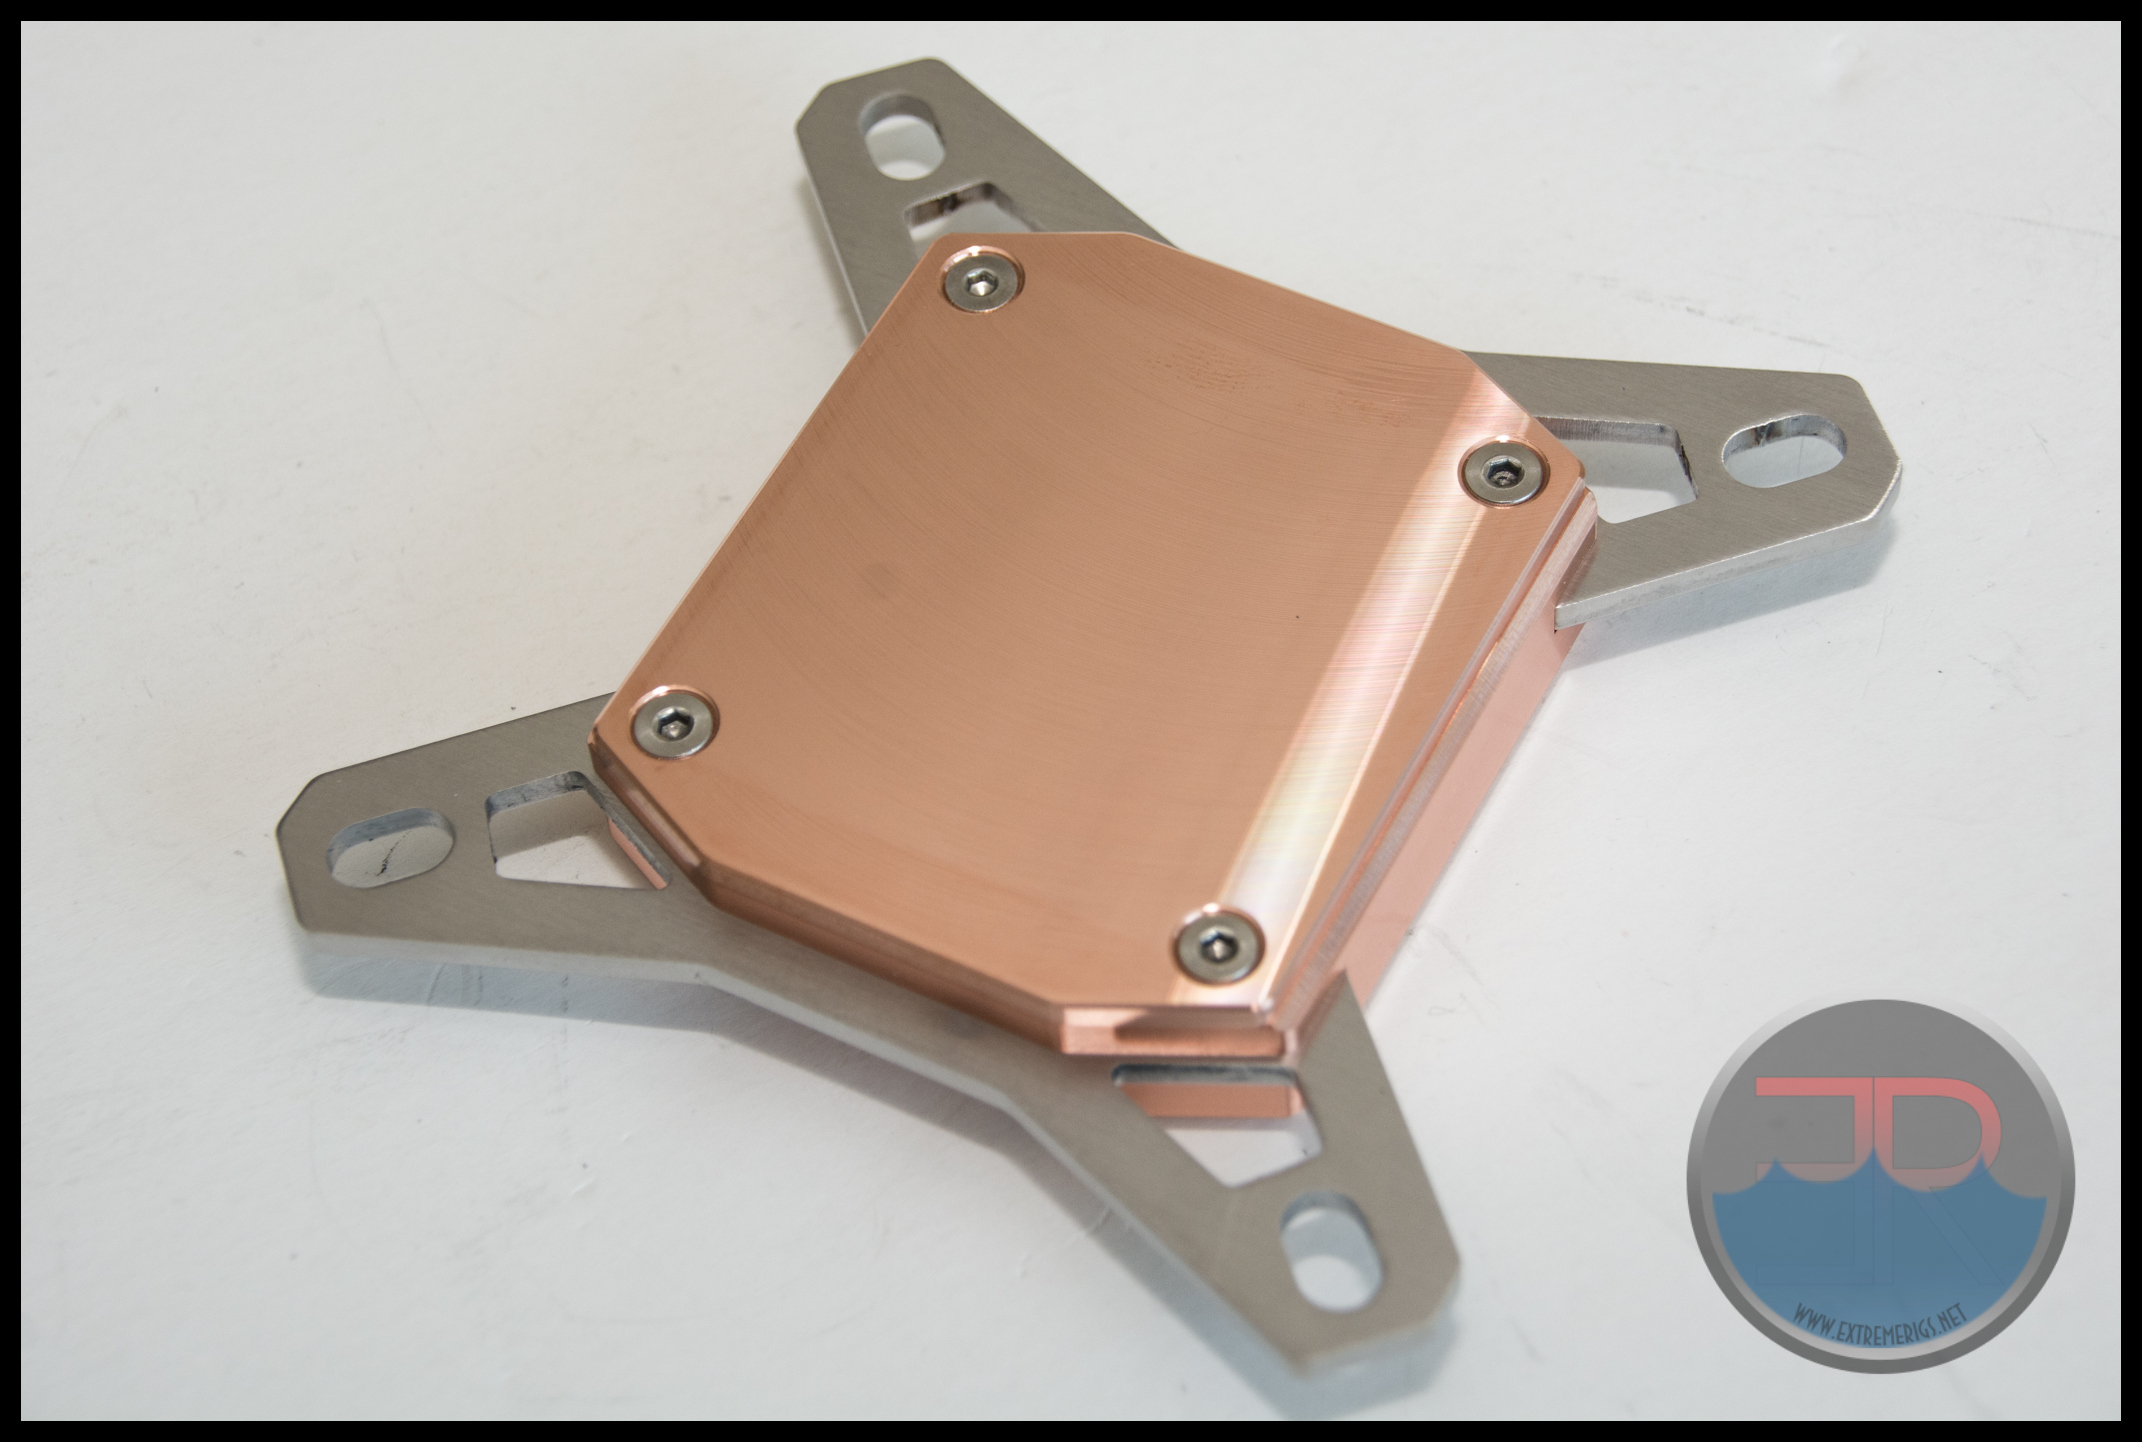
This gave the impression of quality machining rather than a sloppy finish:
The mounting plates also have a similar machined finish, in fact the edges are so crisply cut that they aren’t far from being sharp!
All three blocks had a pleasing high quality feel:
 The Basic edition with it’s plain acetal top looked the cheapest, and it’s light weight reinforced this notion:
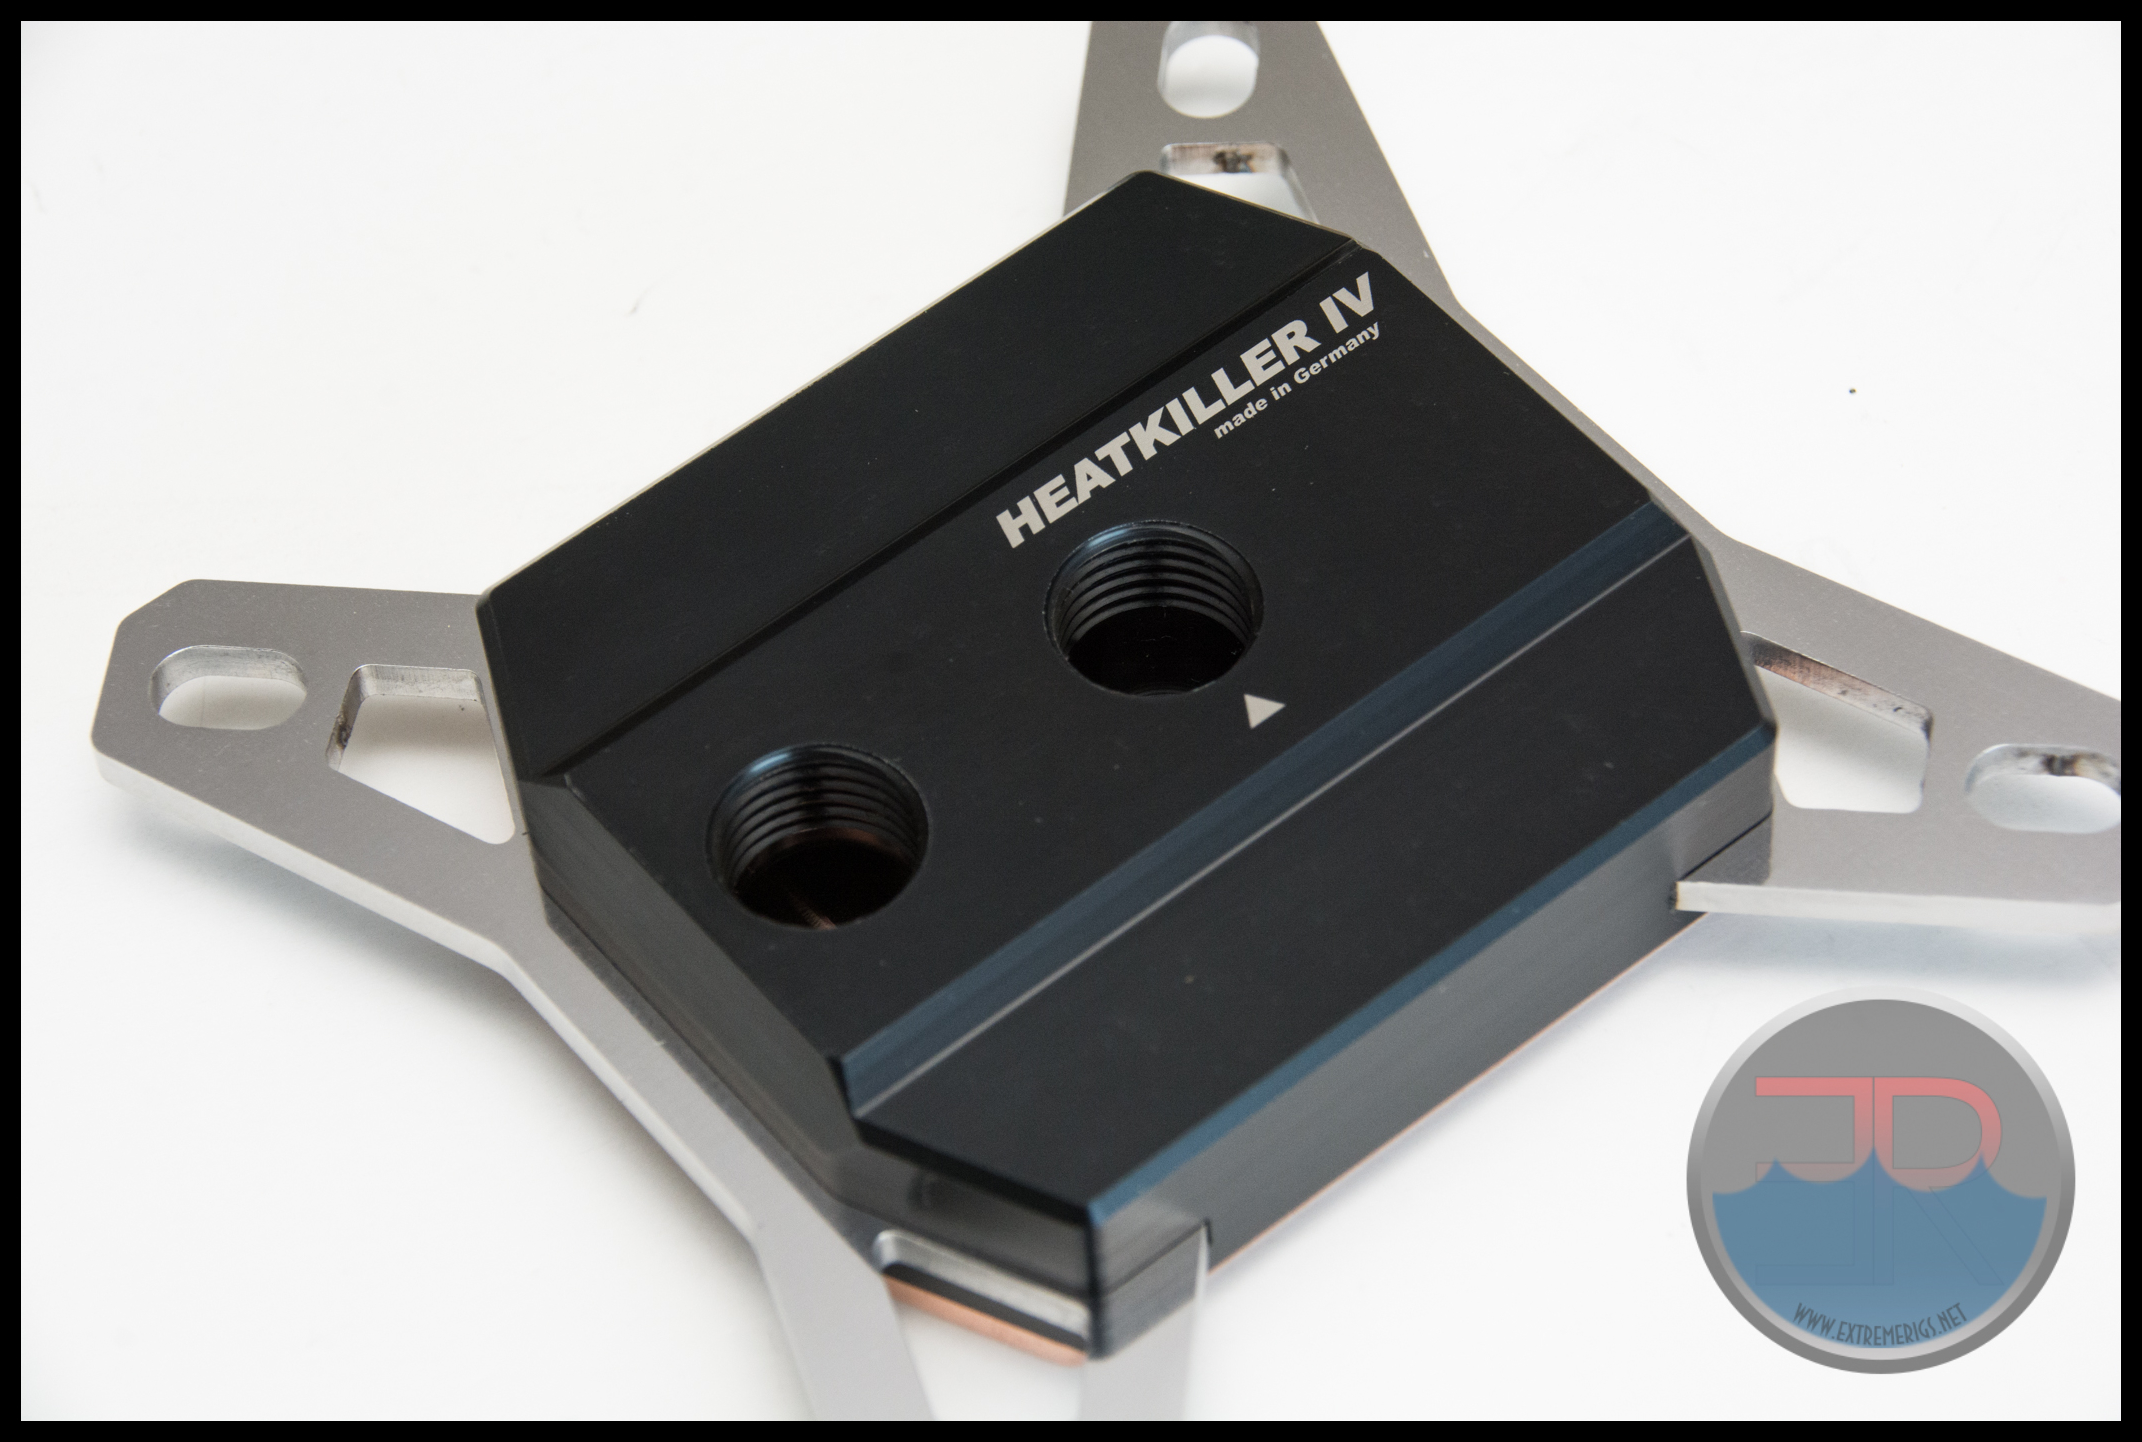 This is not to say it feels cheap though because it is far from that. However the Pro editions just really feel very high quality indeed:
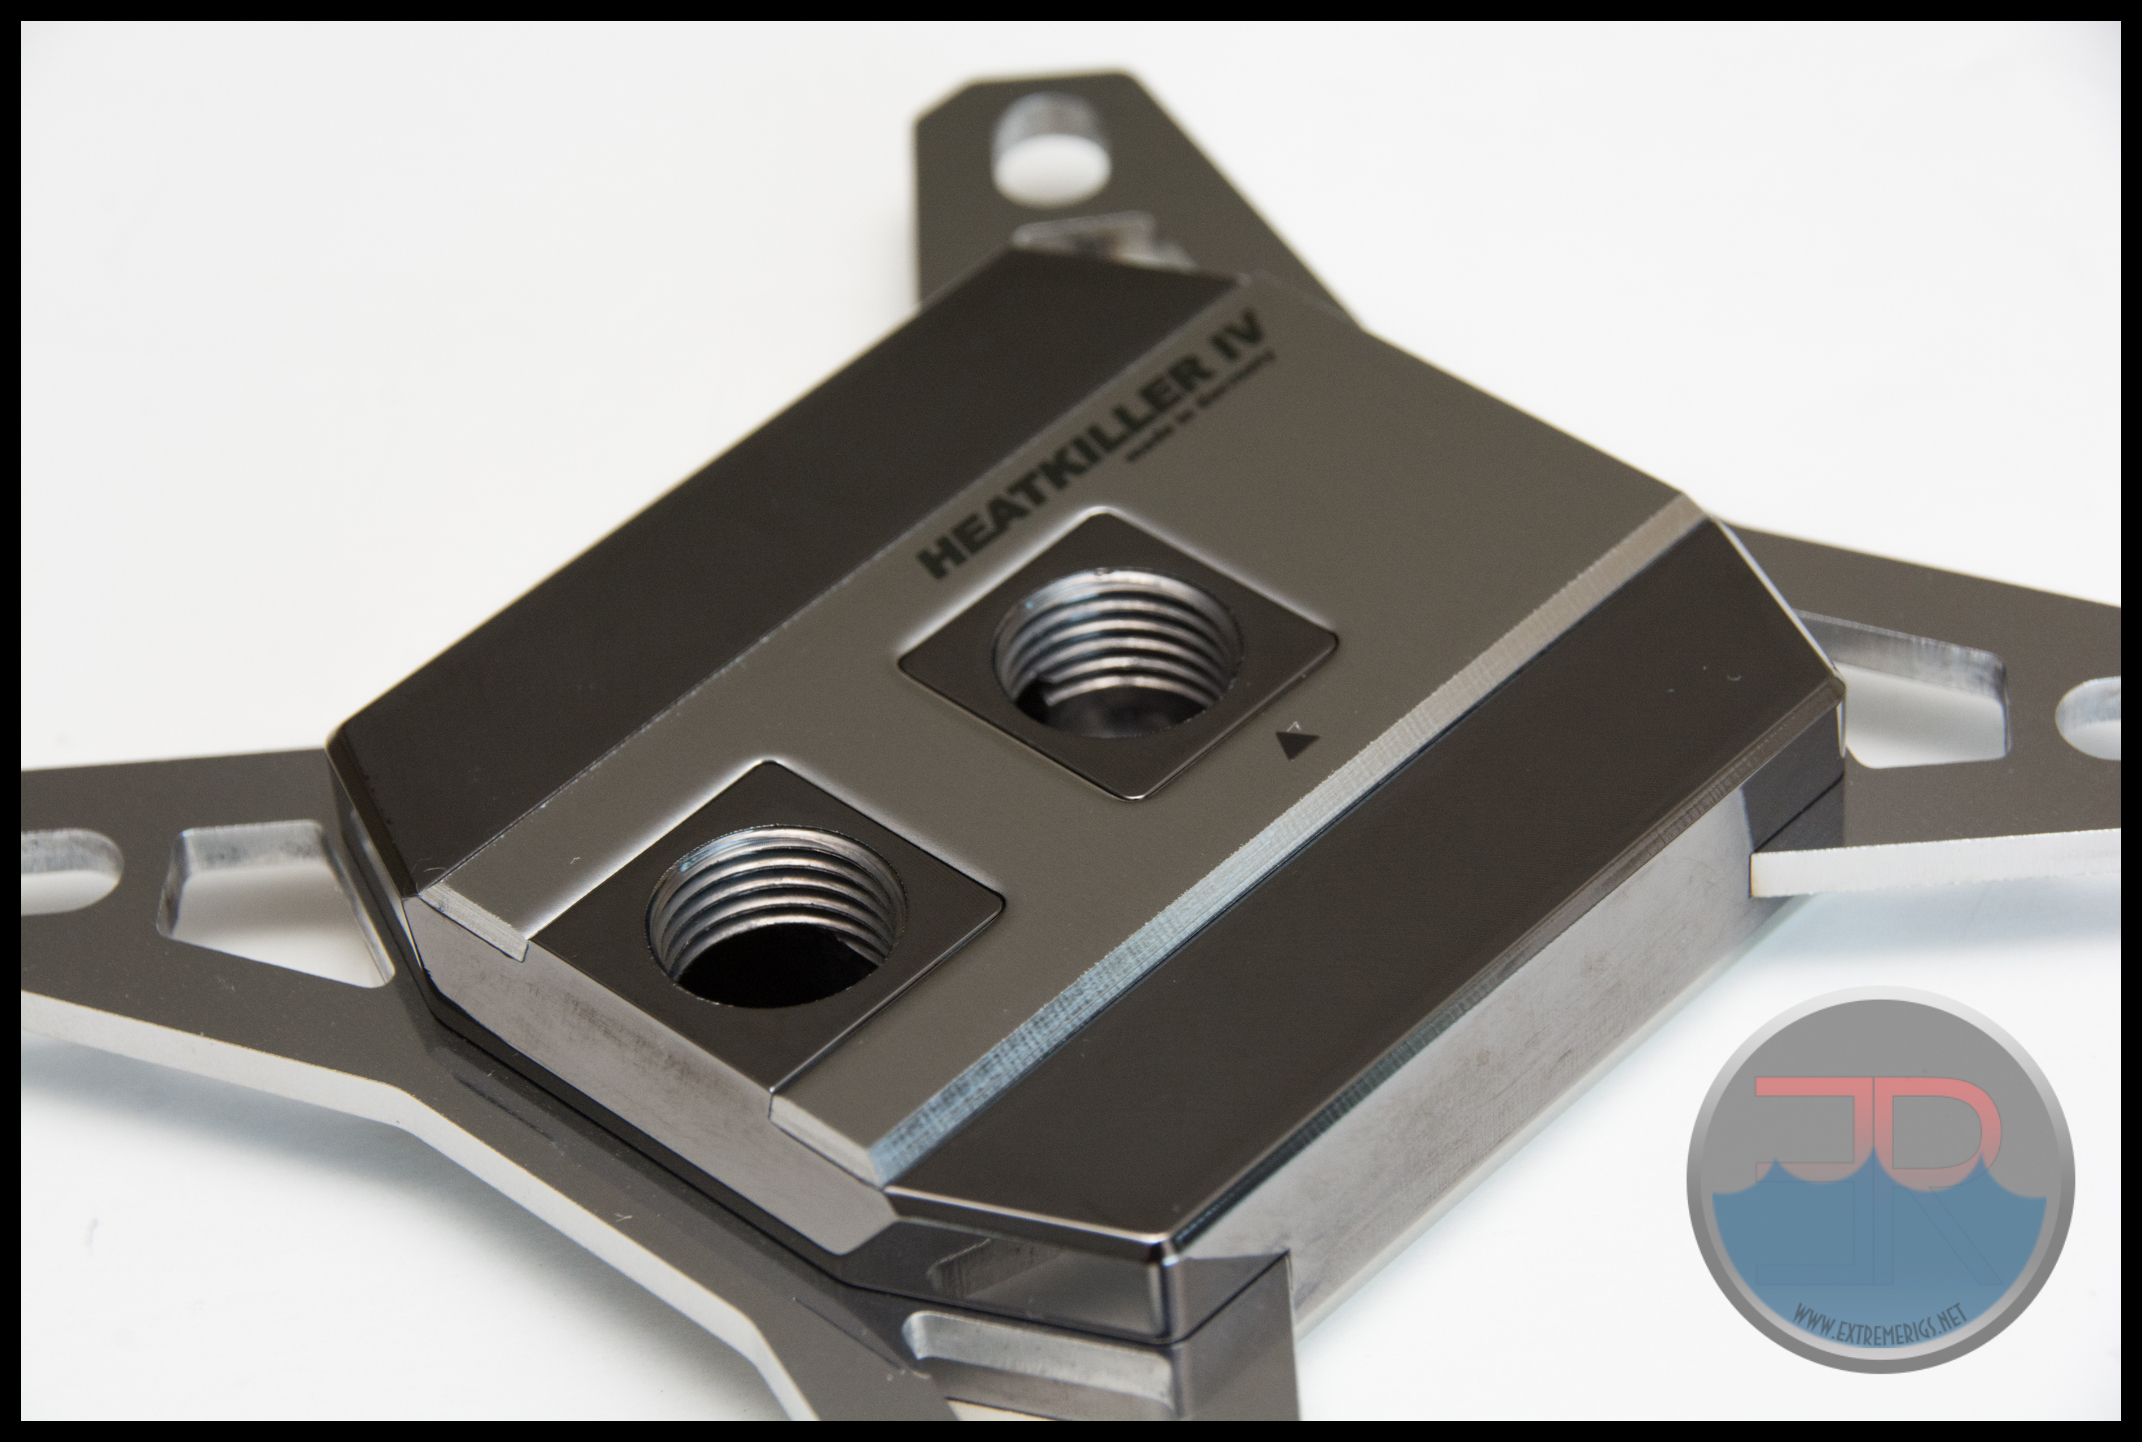
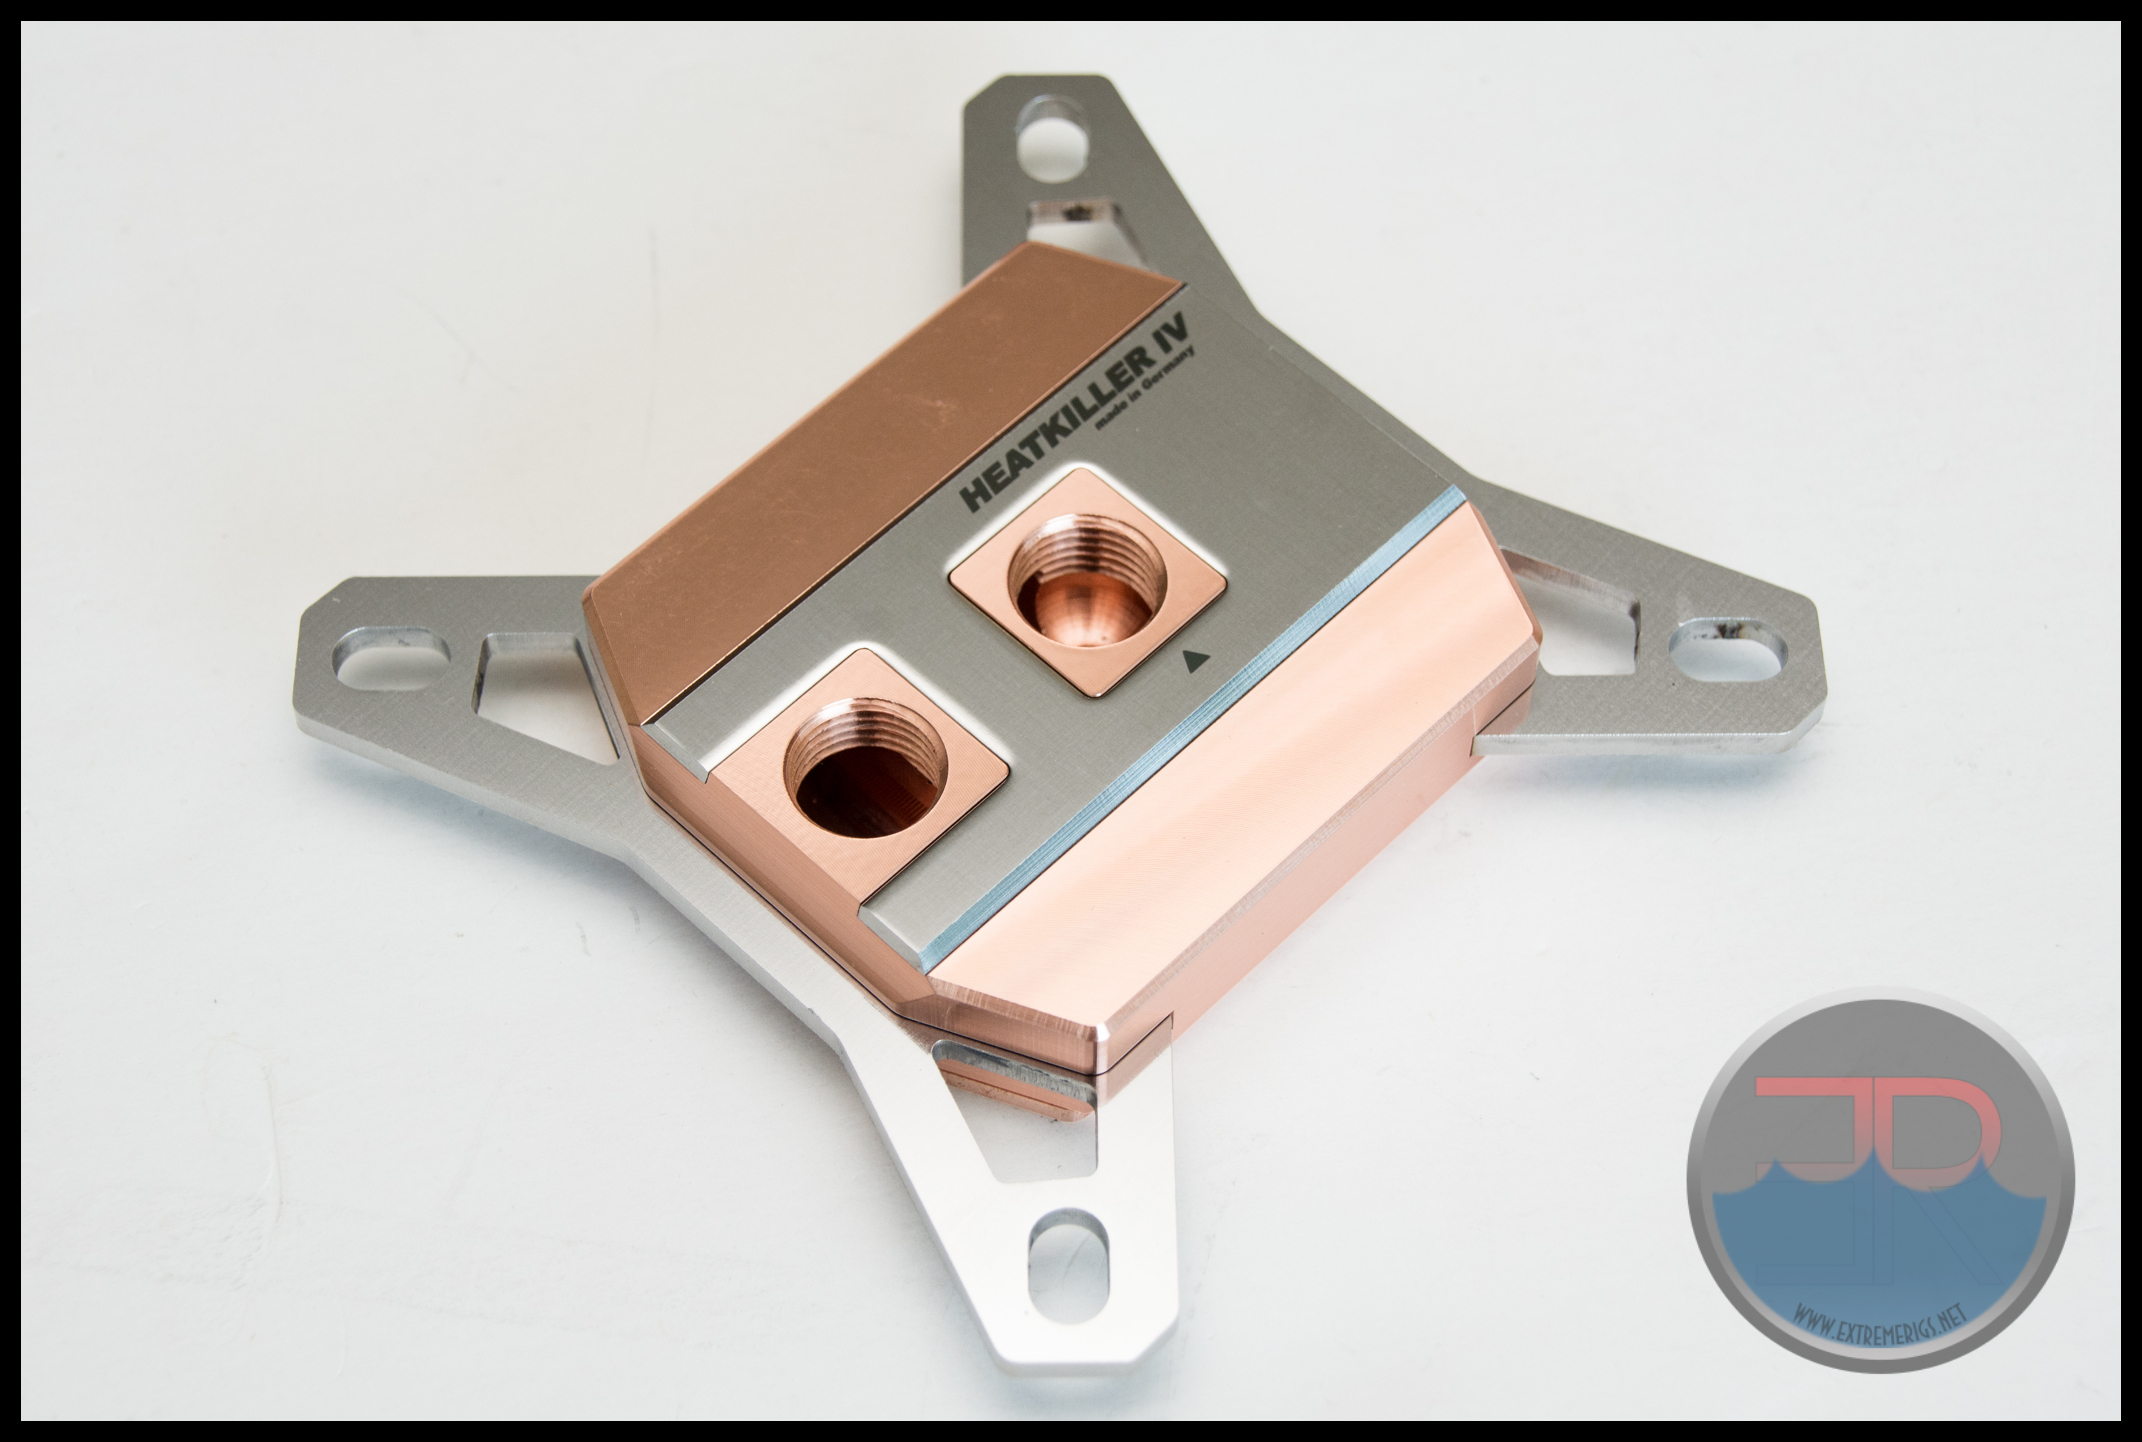 While the Pure Copper has a copper top and base the Copper Anthracite has a nickel plated base which we will see better when we take it apart:
Just for reference – the Heatkiller III alongside:
So overall great looking and solid blocks with a sturdy looking mount. Let’s poke around at the insides next!
Block Internals
Block Internals
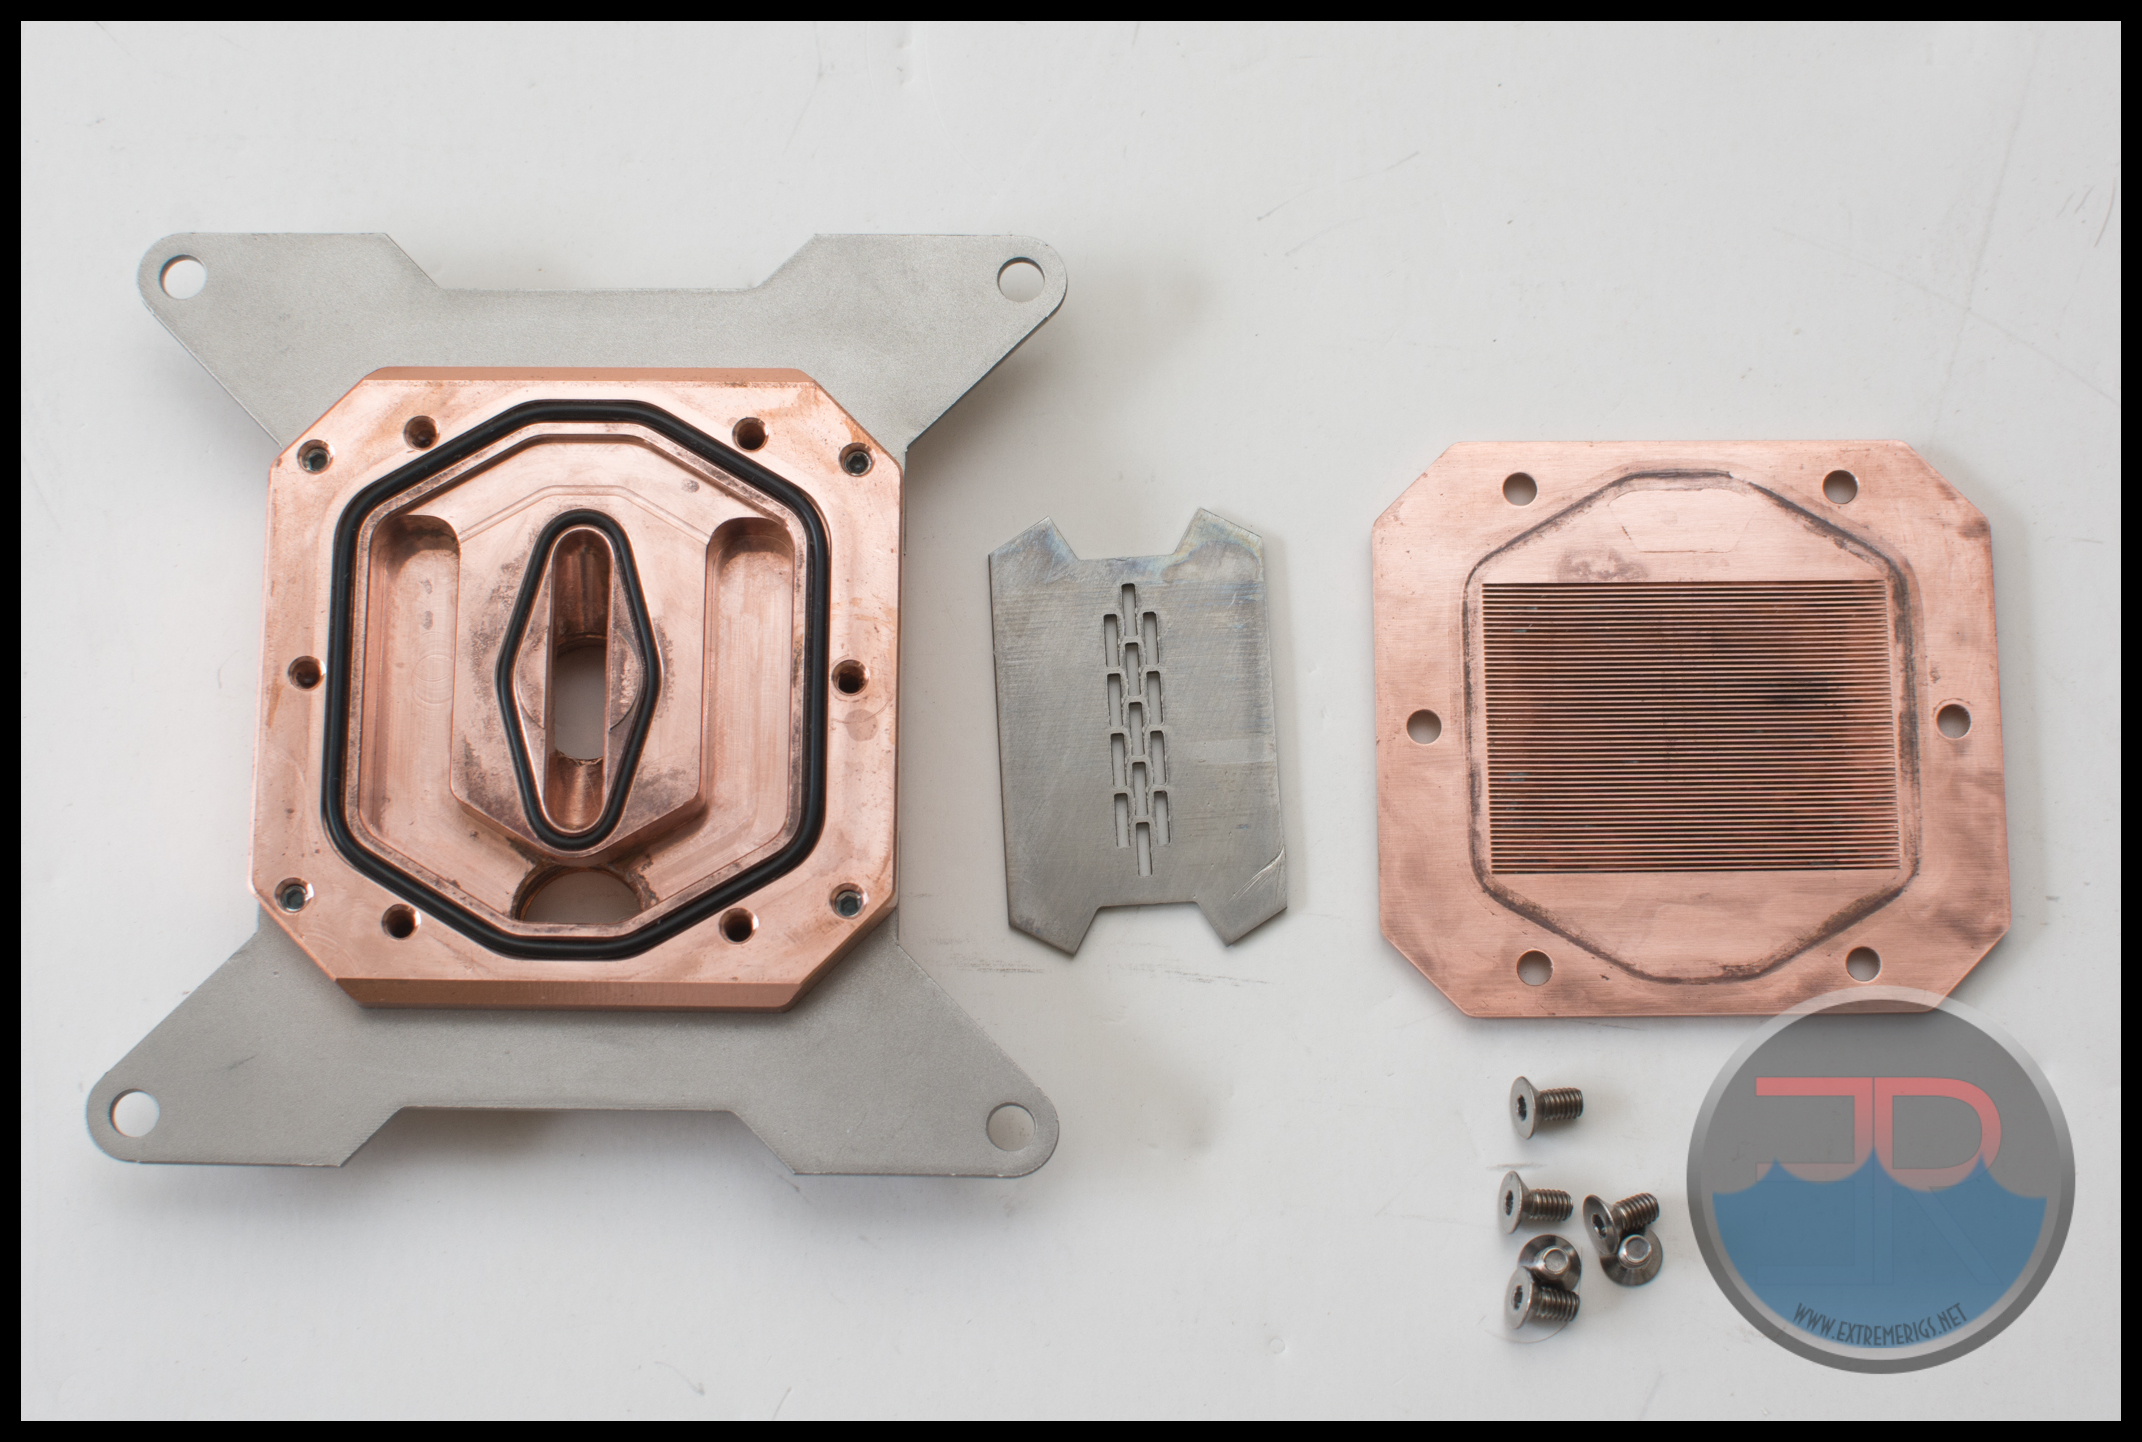
All these photos were taken after testing hence there will be some discoloration due to tarnish.
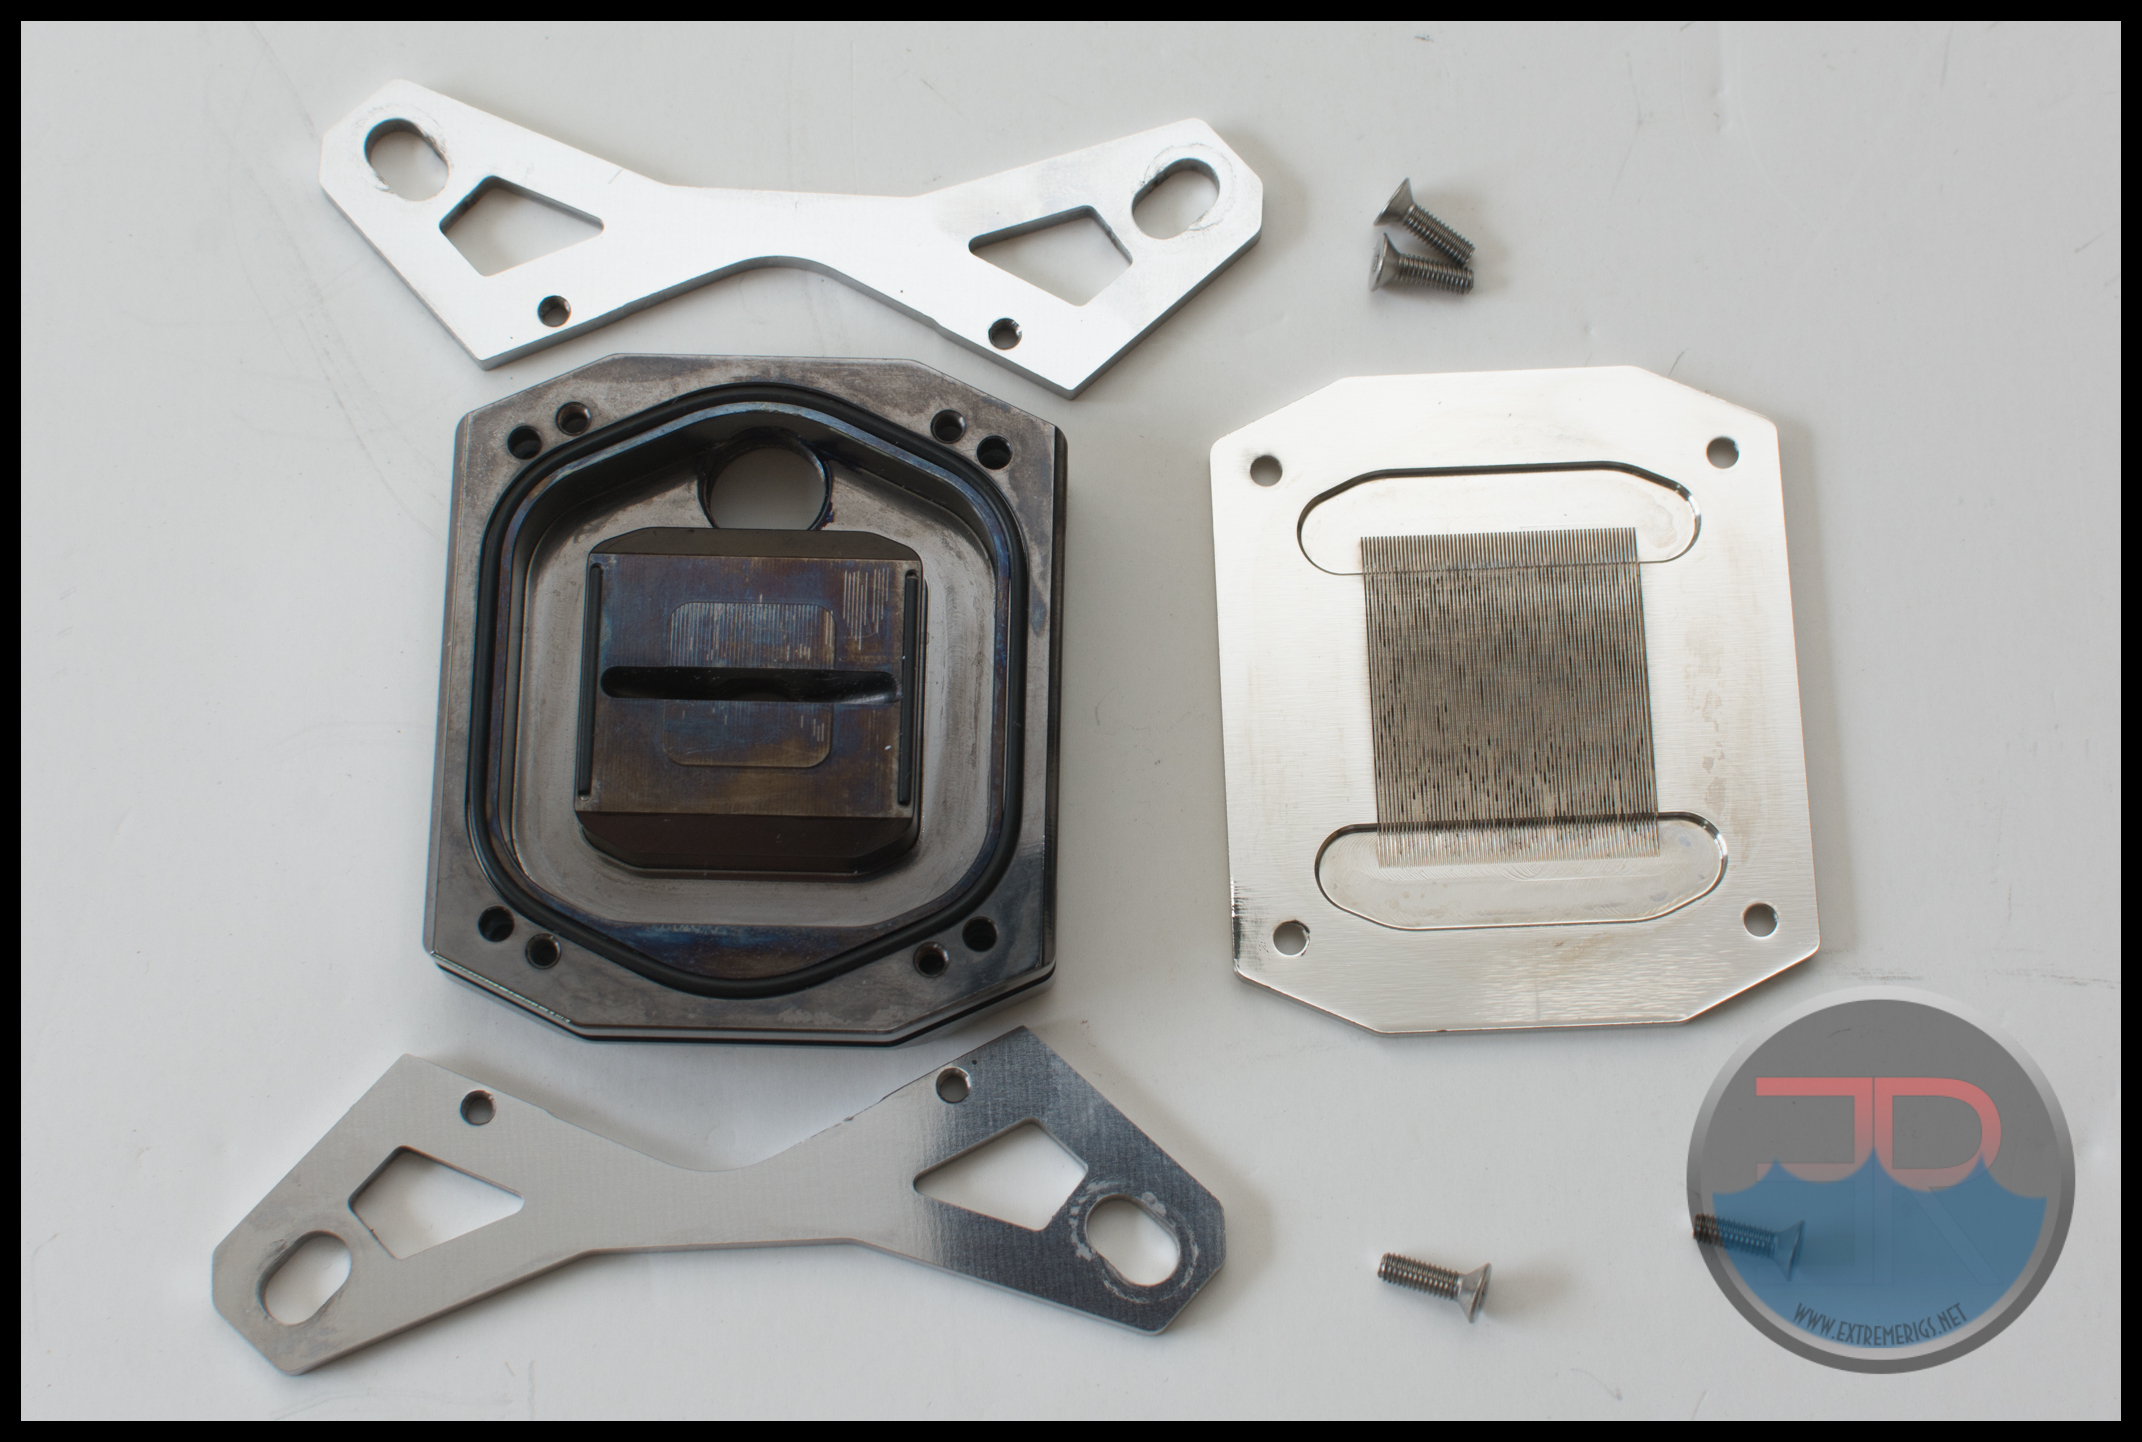
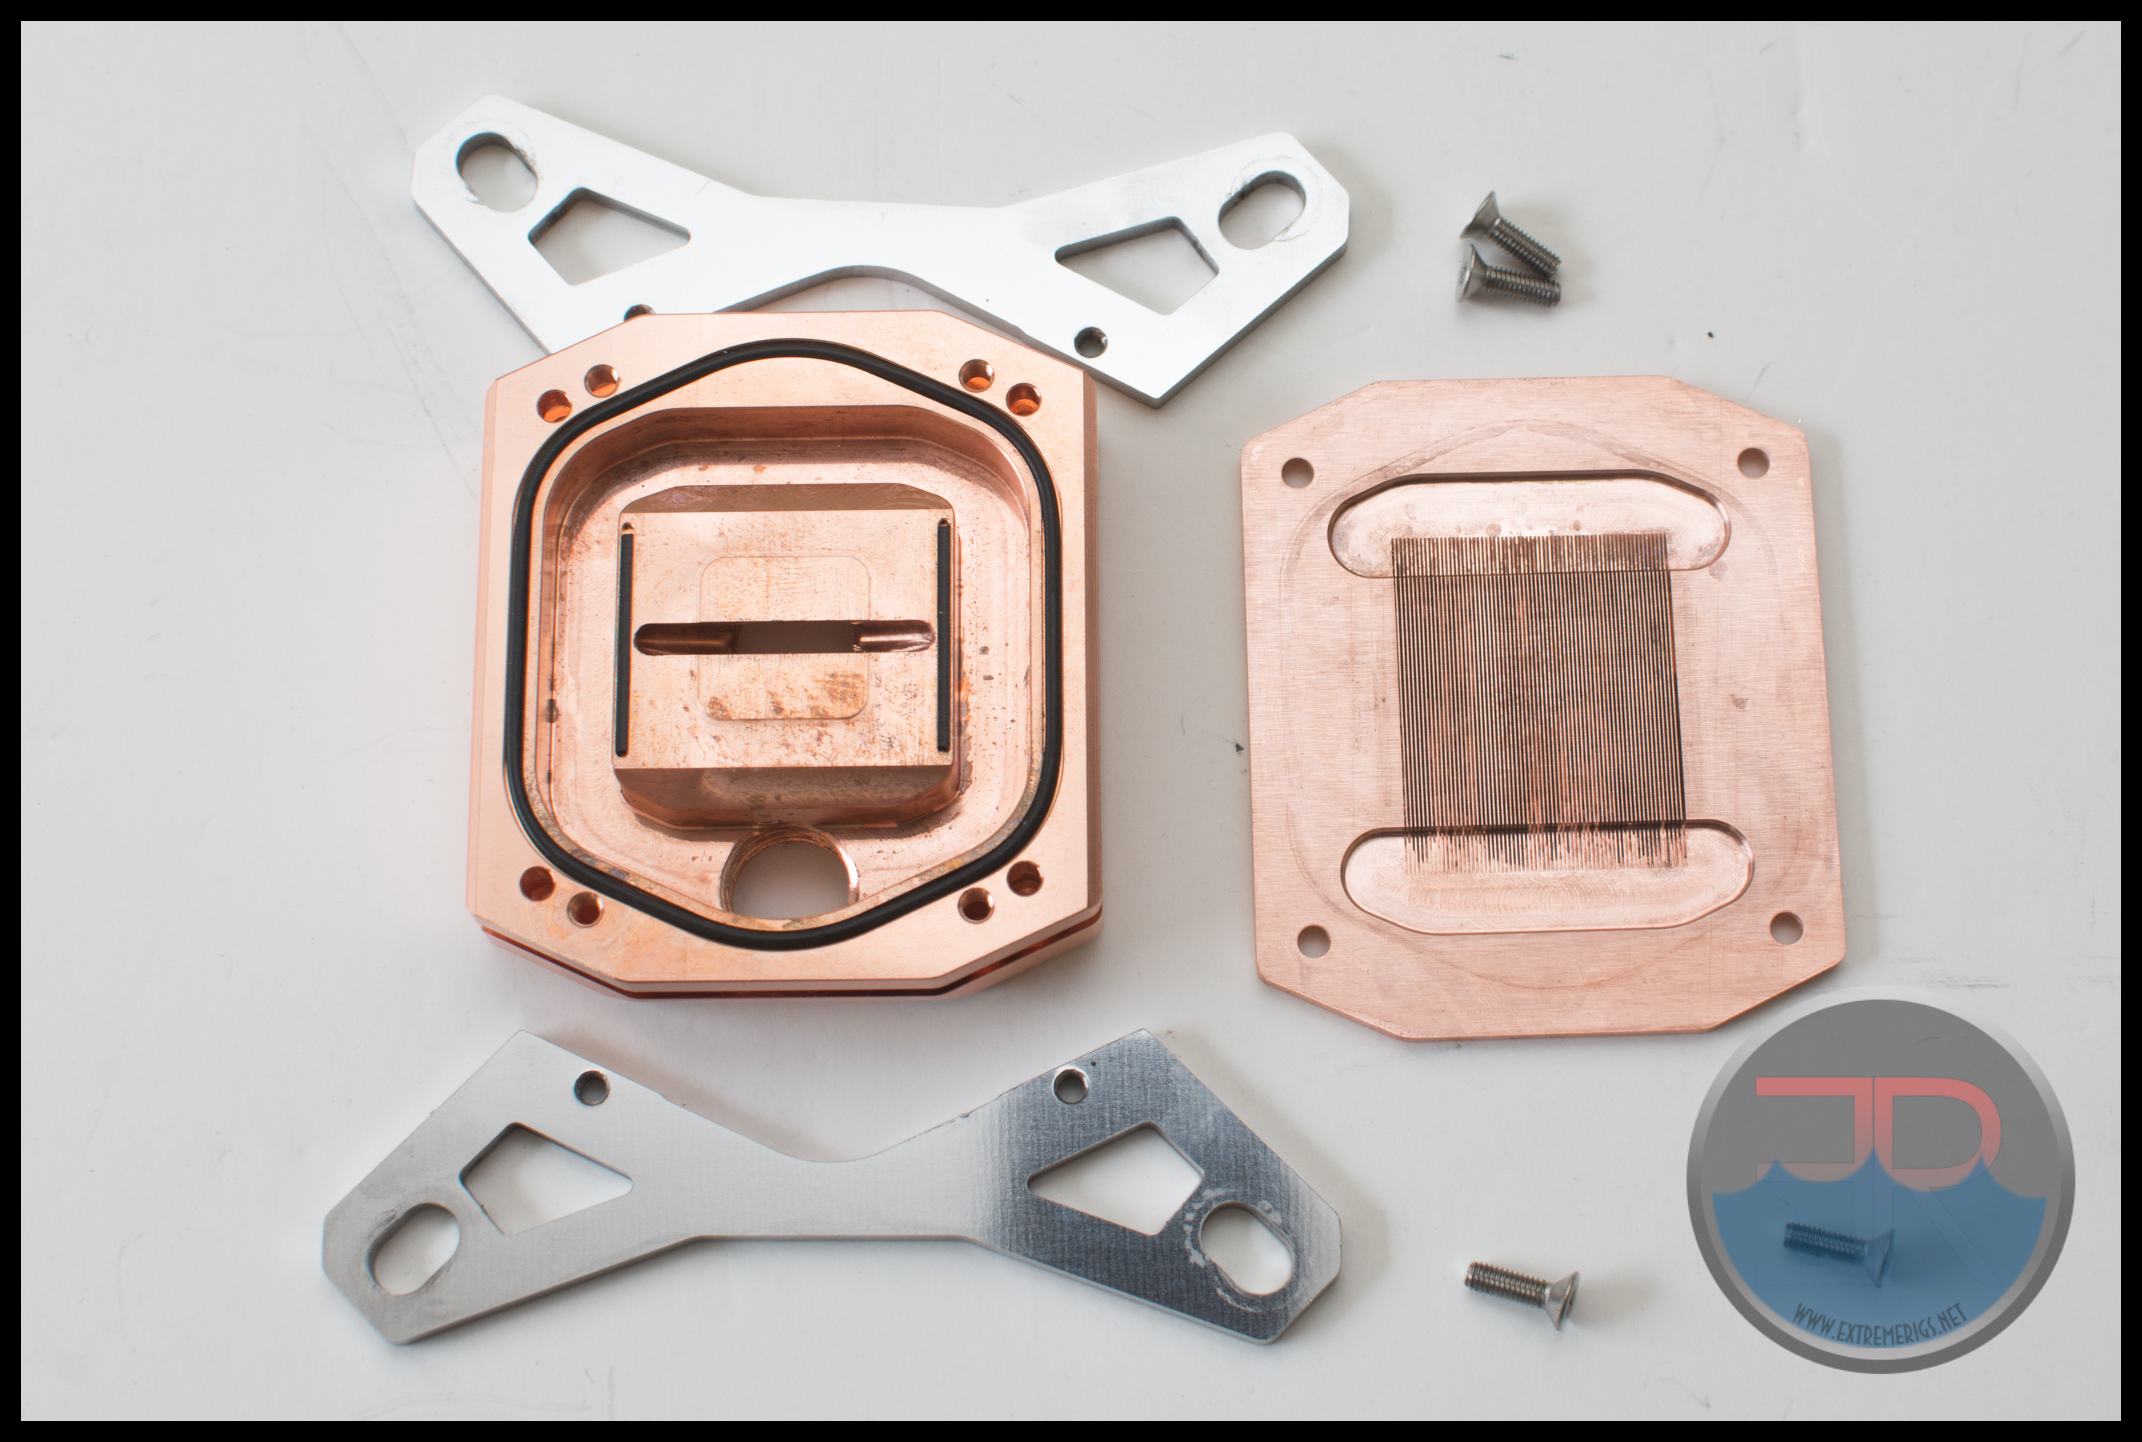
All four blocks have very similar internals. They can be taken apart by removing the four countersunk screws in the base. These screws also secure the mounting brackets. This is the Pro version and you can see just how fine the channels are in the base. There is no detachable jetplate, however the function is provided by the top itself. The full copper has a similar base but is of course not plated:
 The basic has the exact same layout but the difference is in the base itself which has much wider channels:
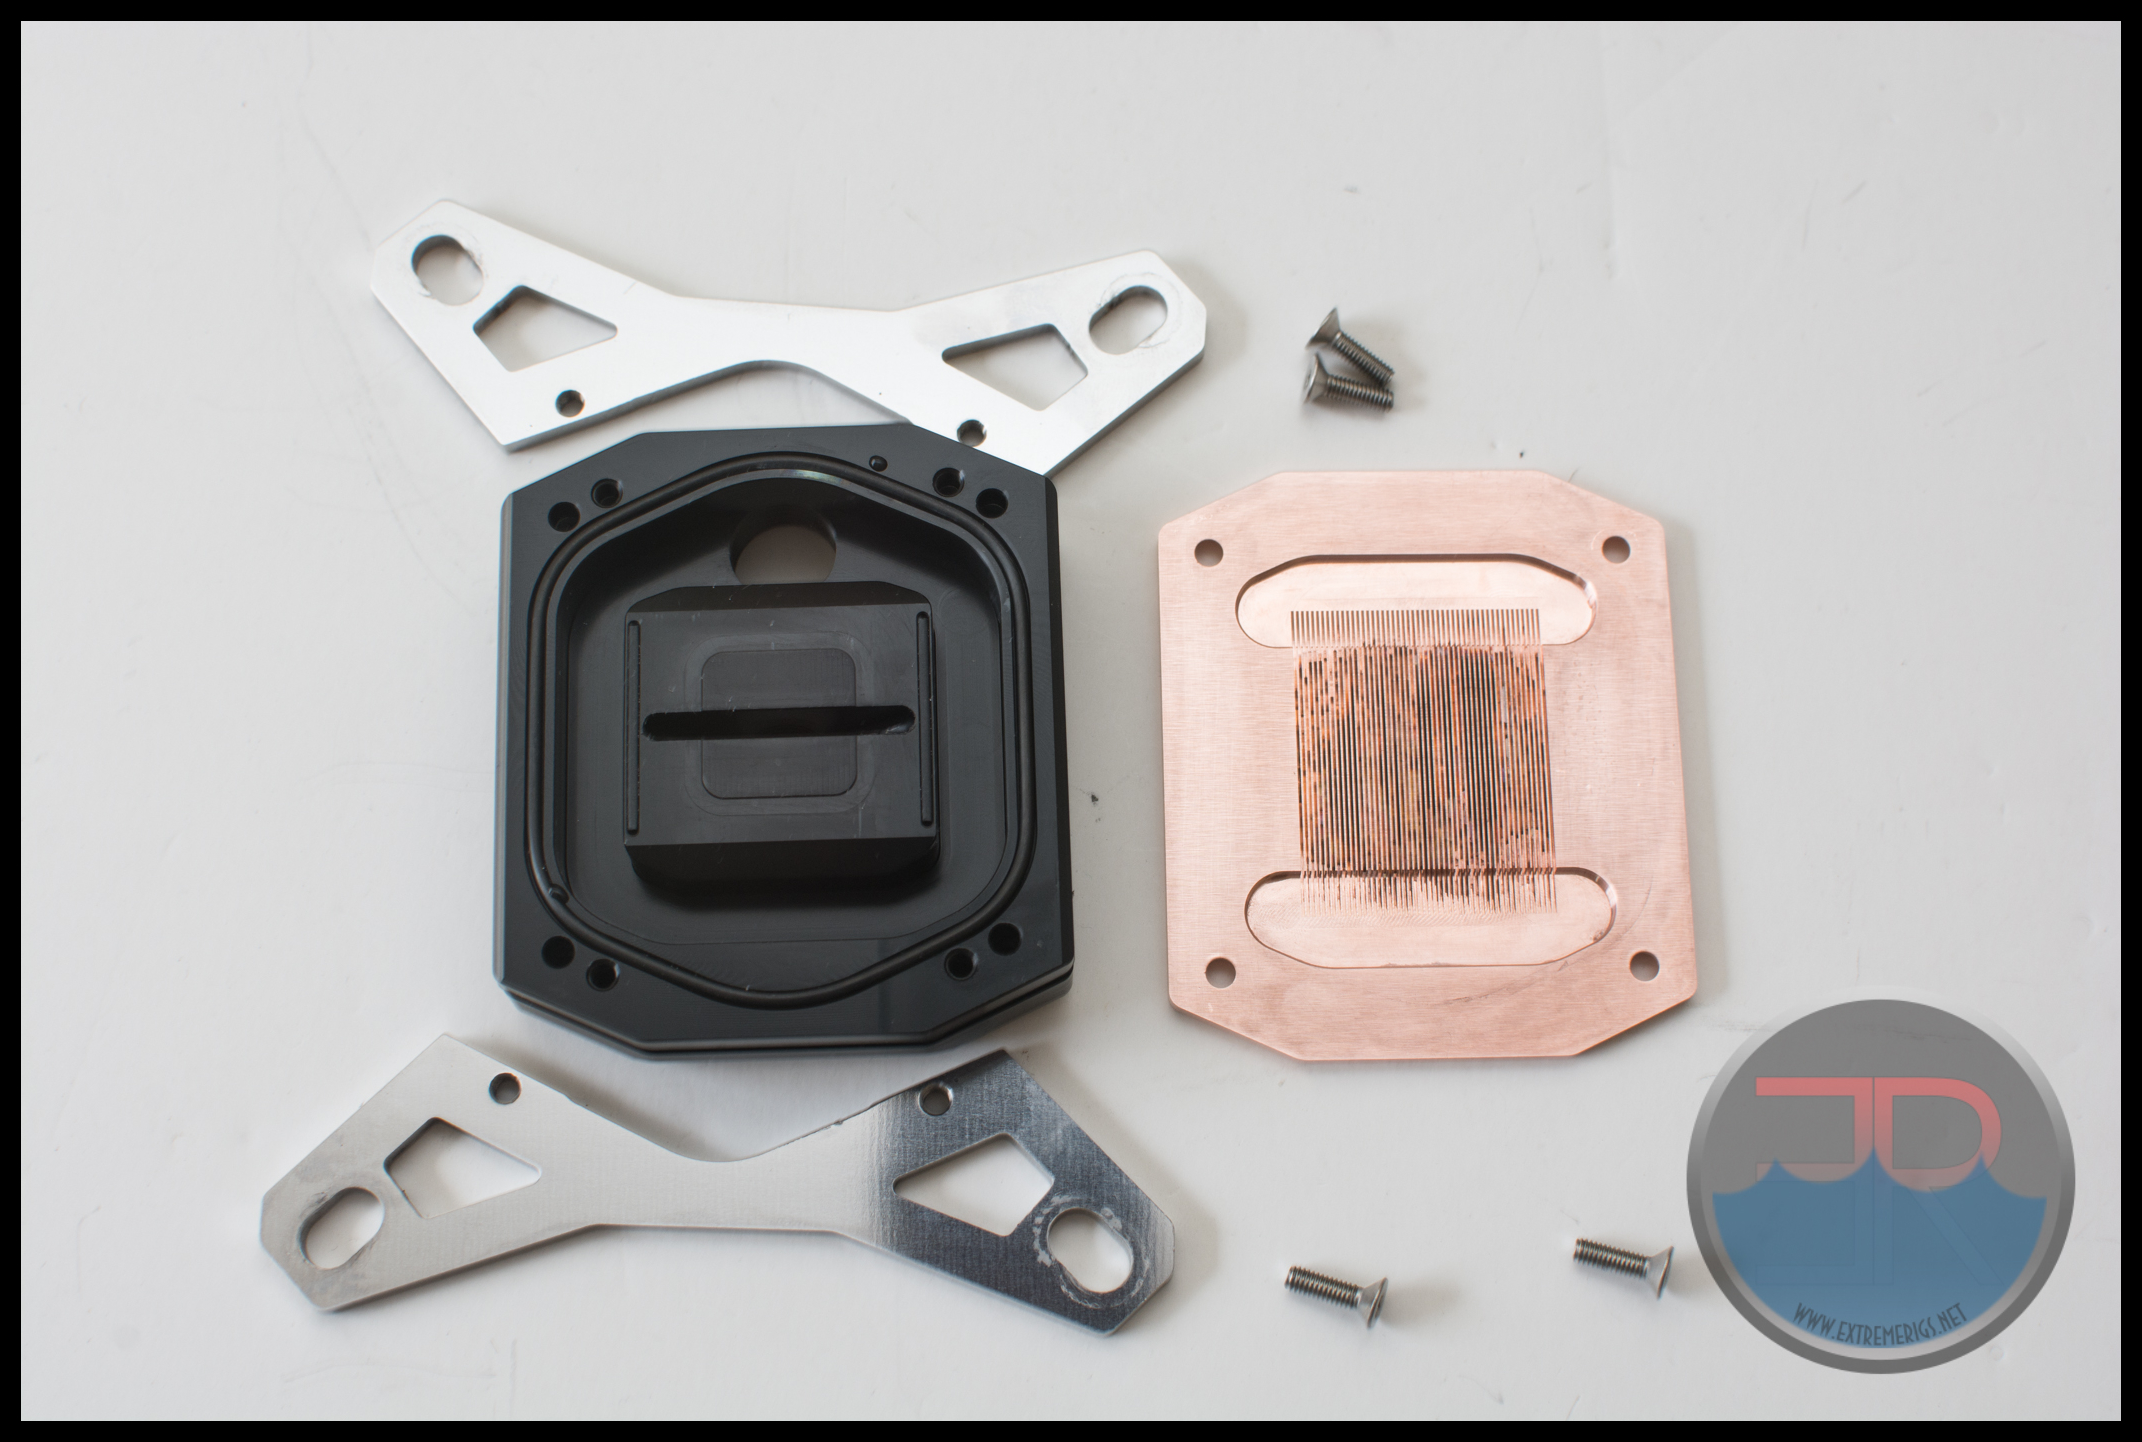 The Pro allegedly has 78 channels while the Basic has 49. If you compare to the original HeatKiller III the orientation of the channels with respect to the ports has changed, and there is a removable jetplate:
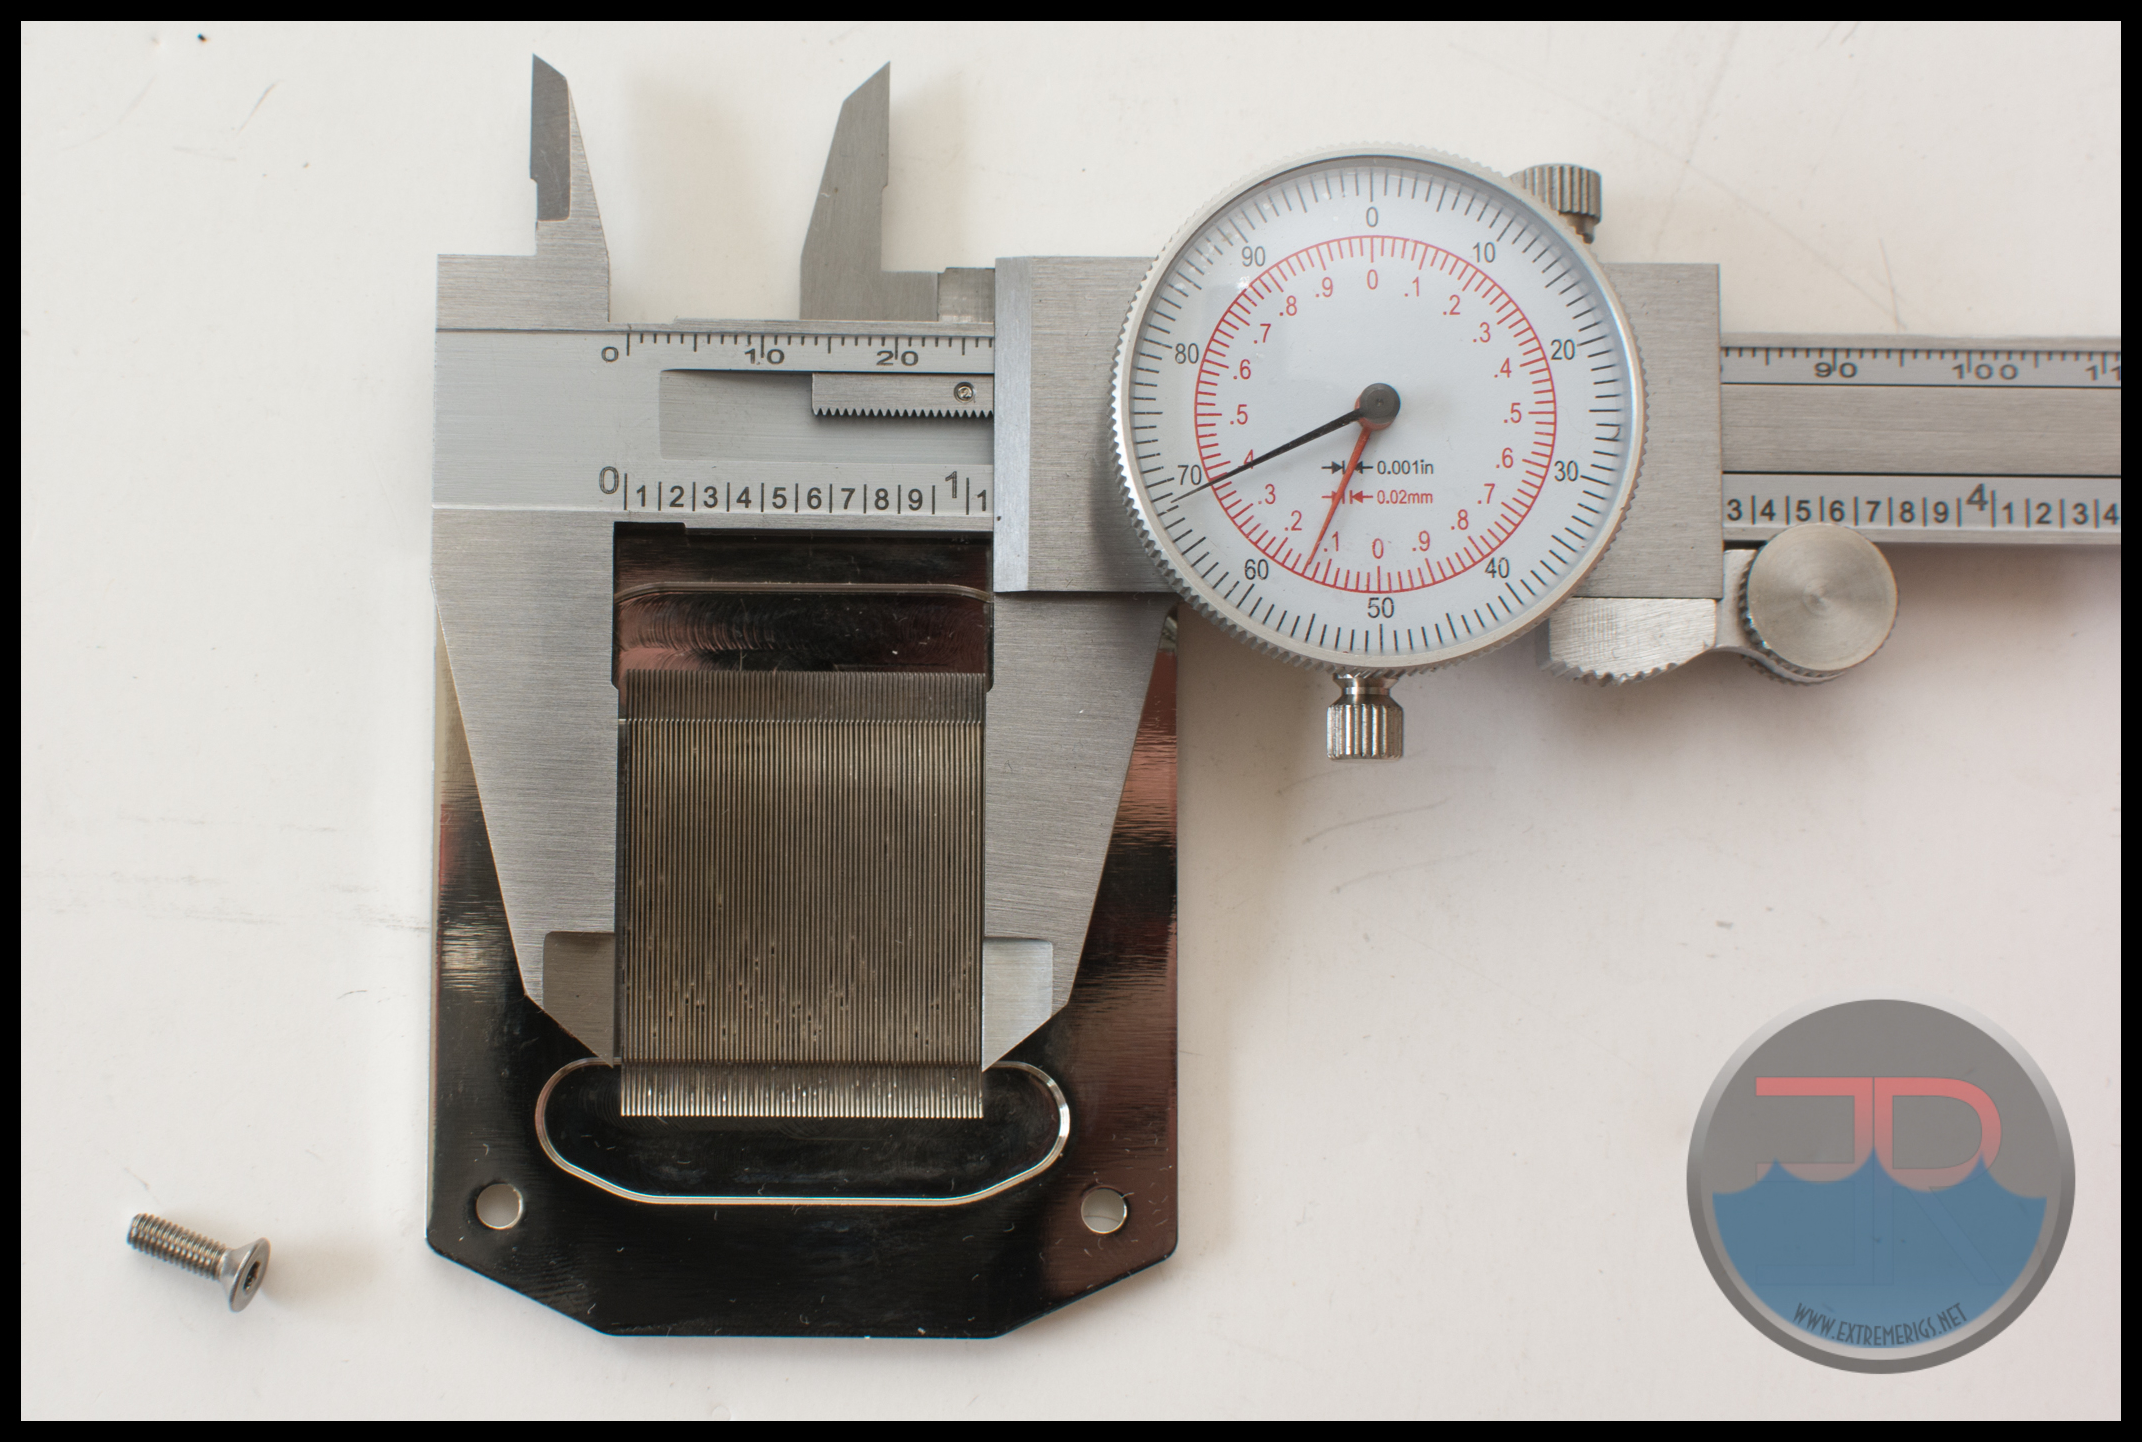
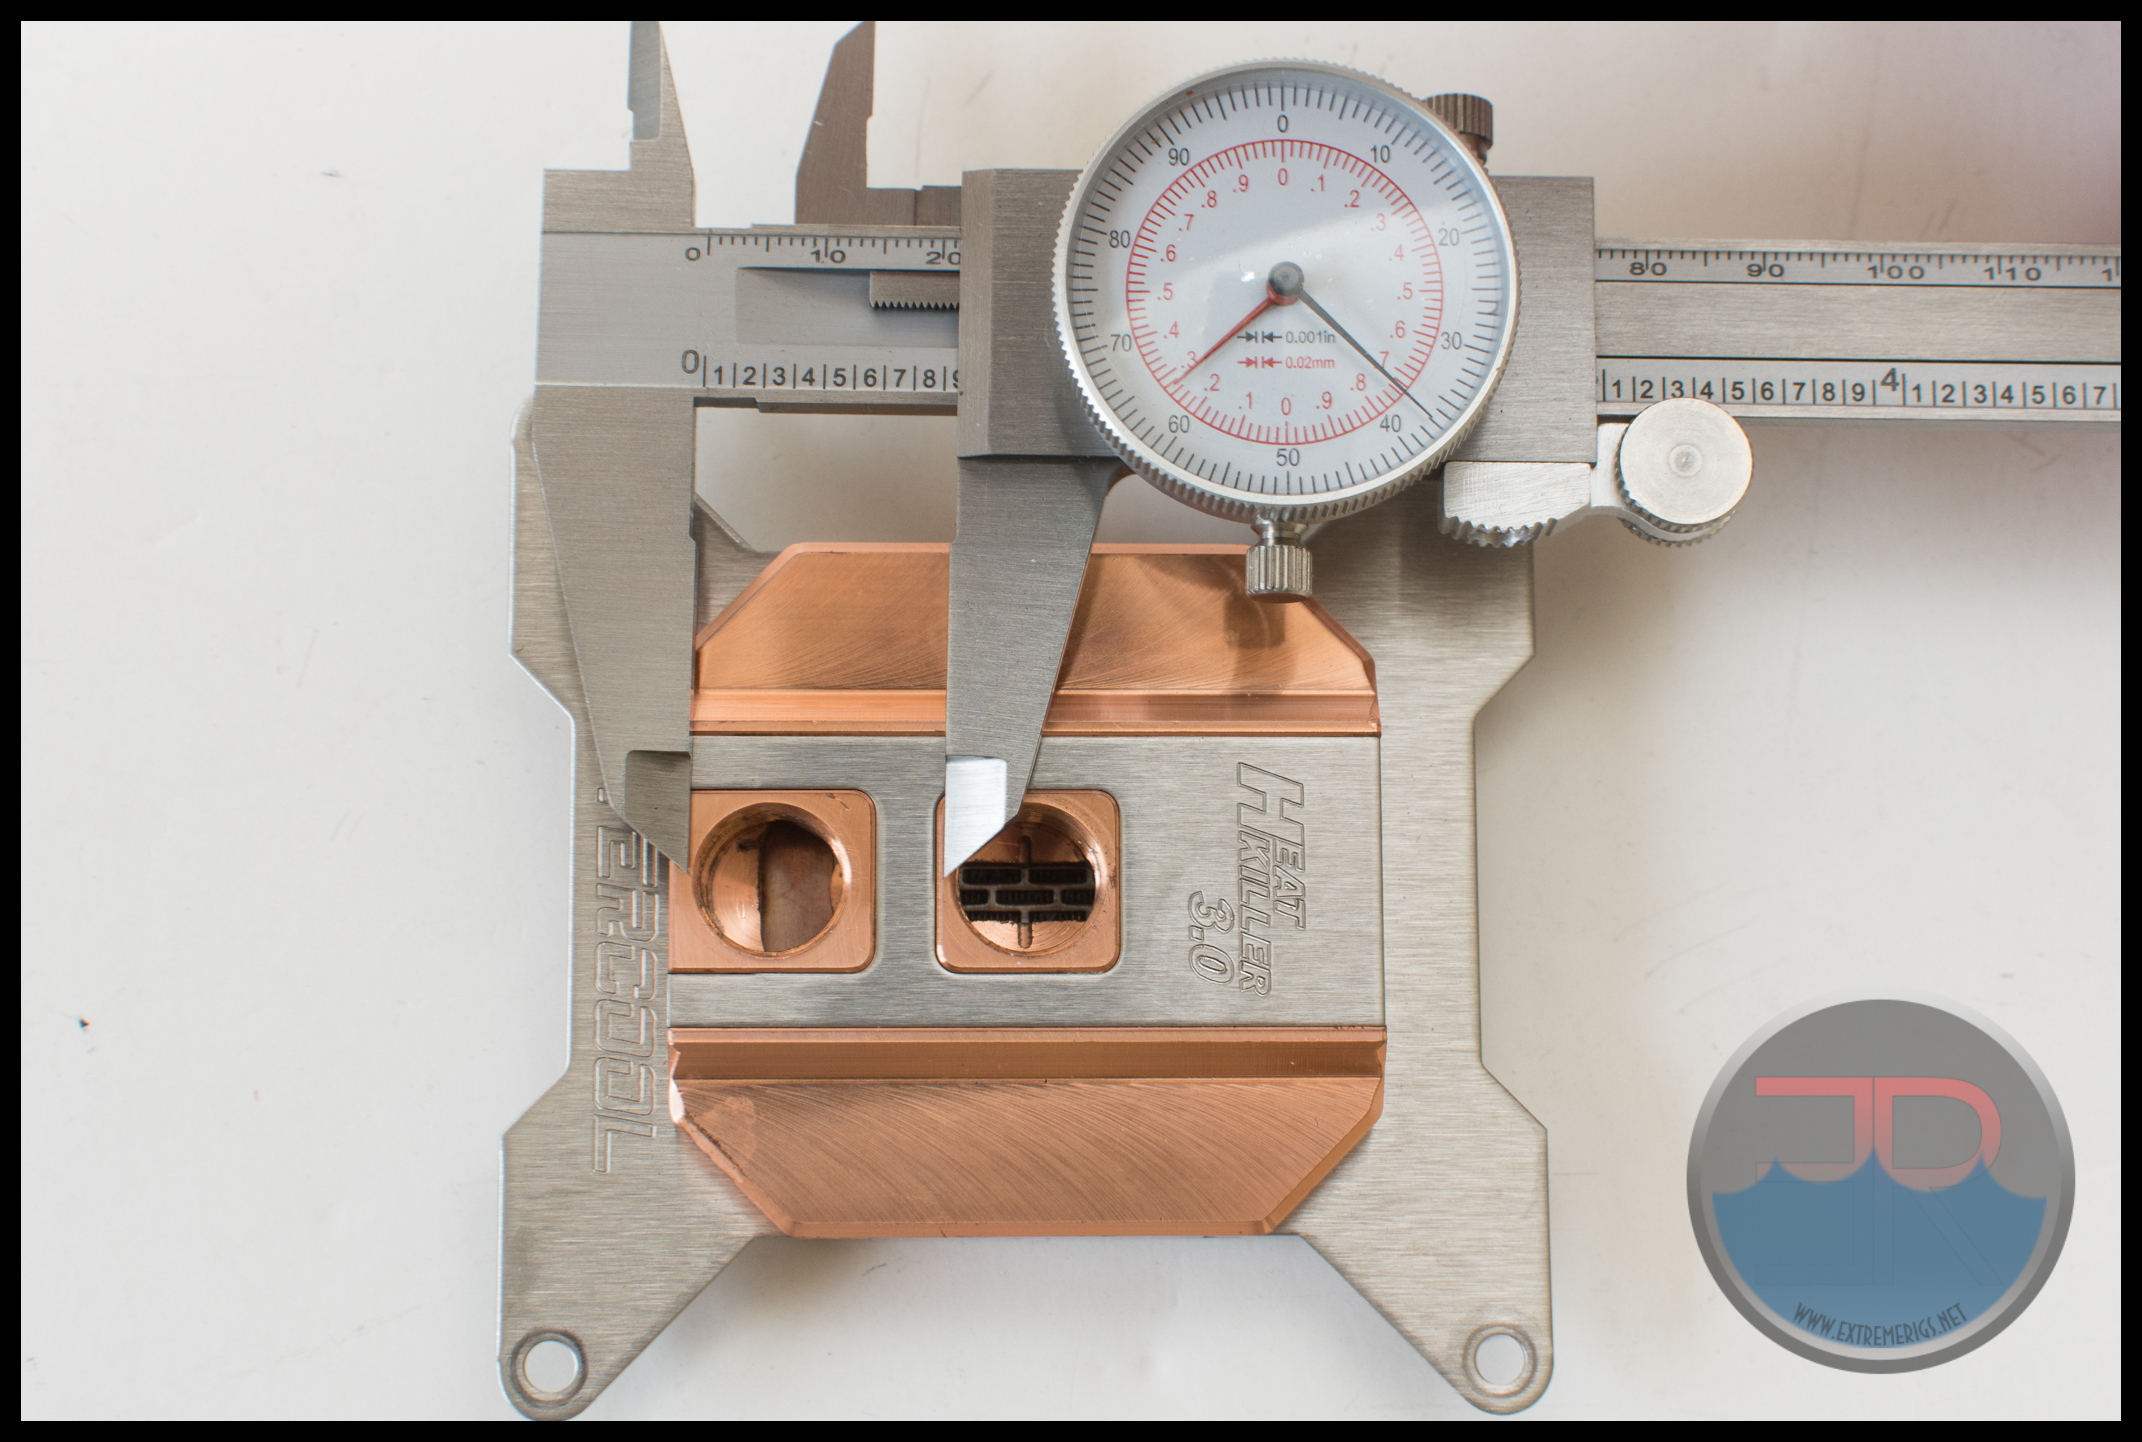
 The area milled in the copper base is much larger, but the channels are not as fine. If we measure the Pro cooling engine area we see the channels are 25.67mm long i.e. almost exactly an inch. Unusual for Germans to design in non metric units!
 The width of the engine is about 27mm:
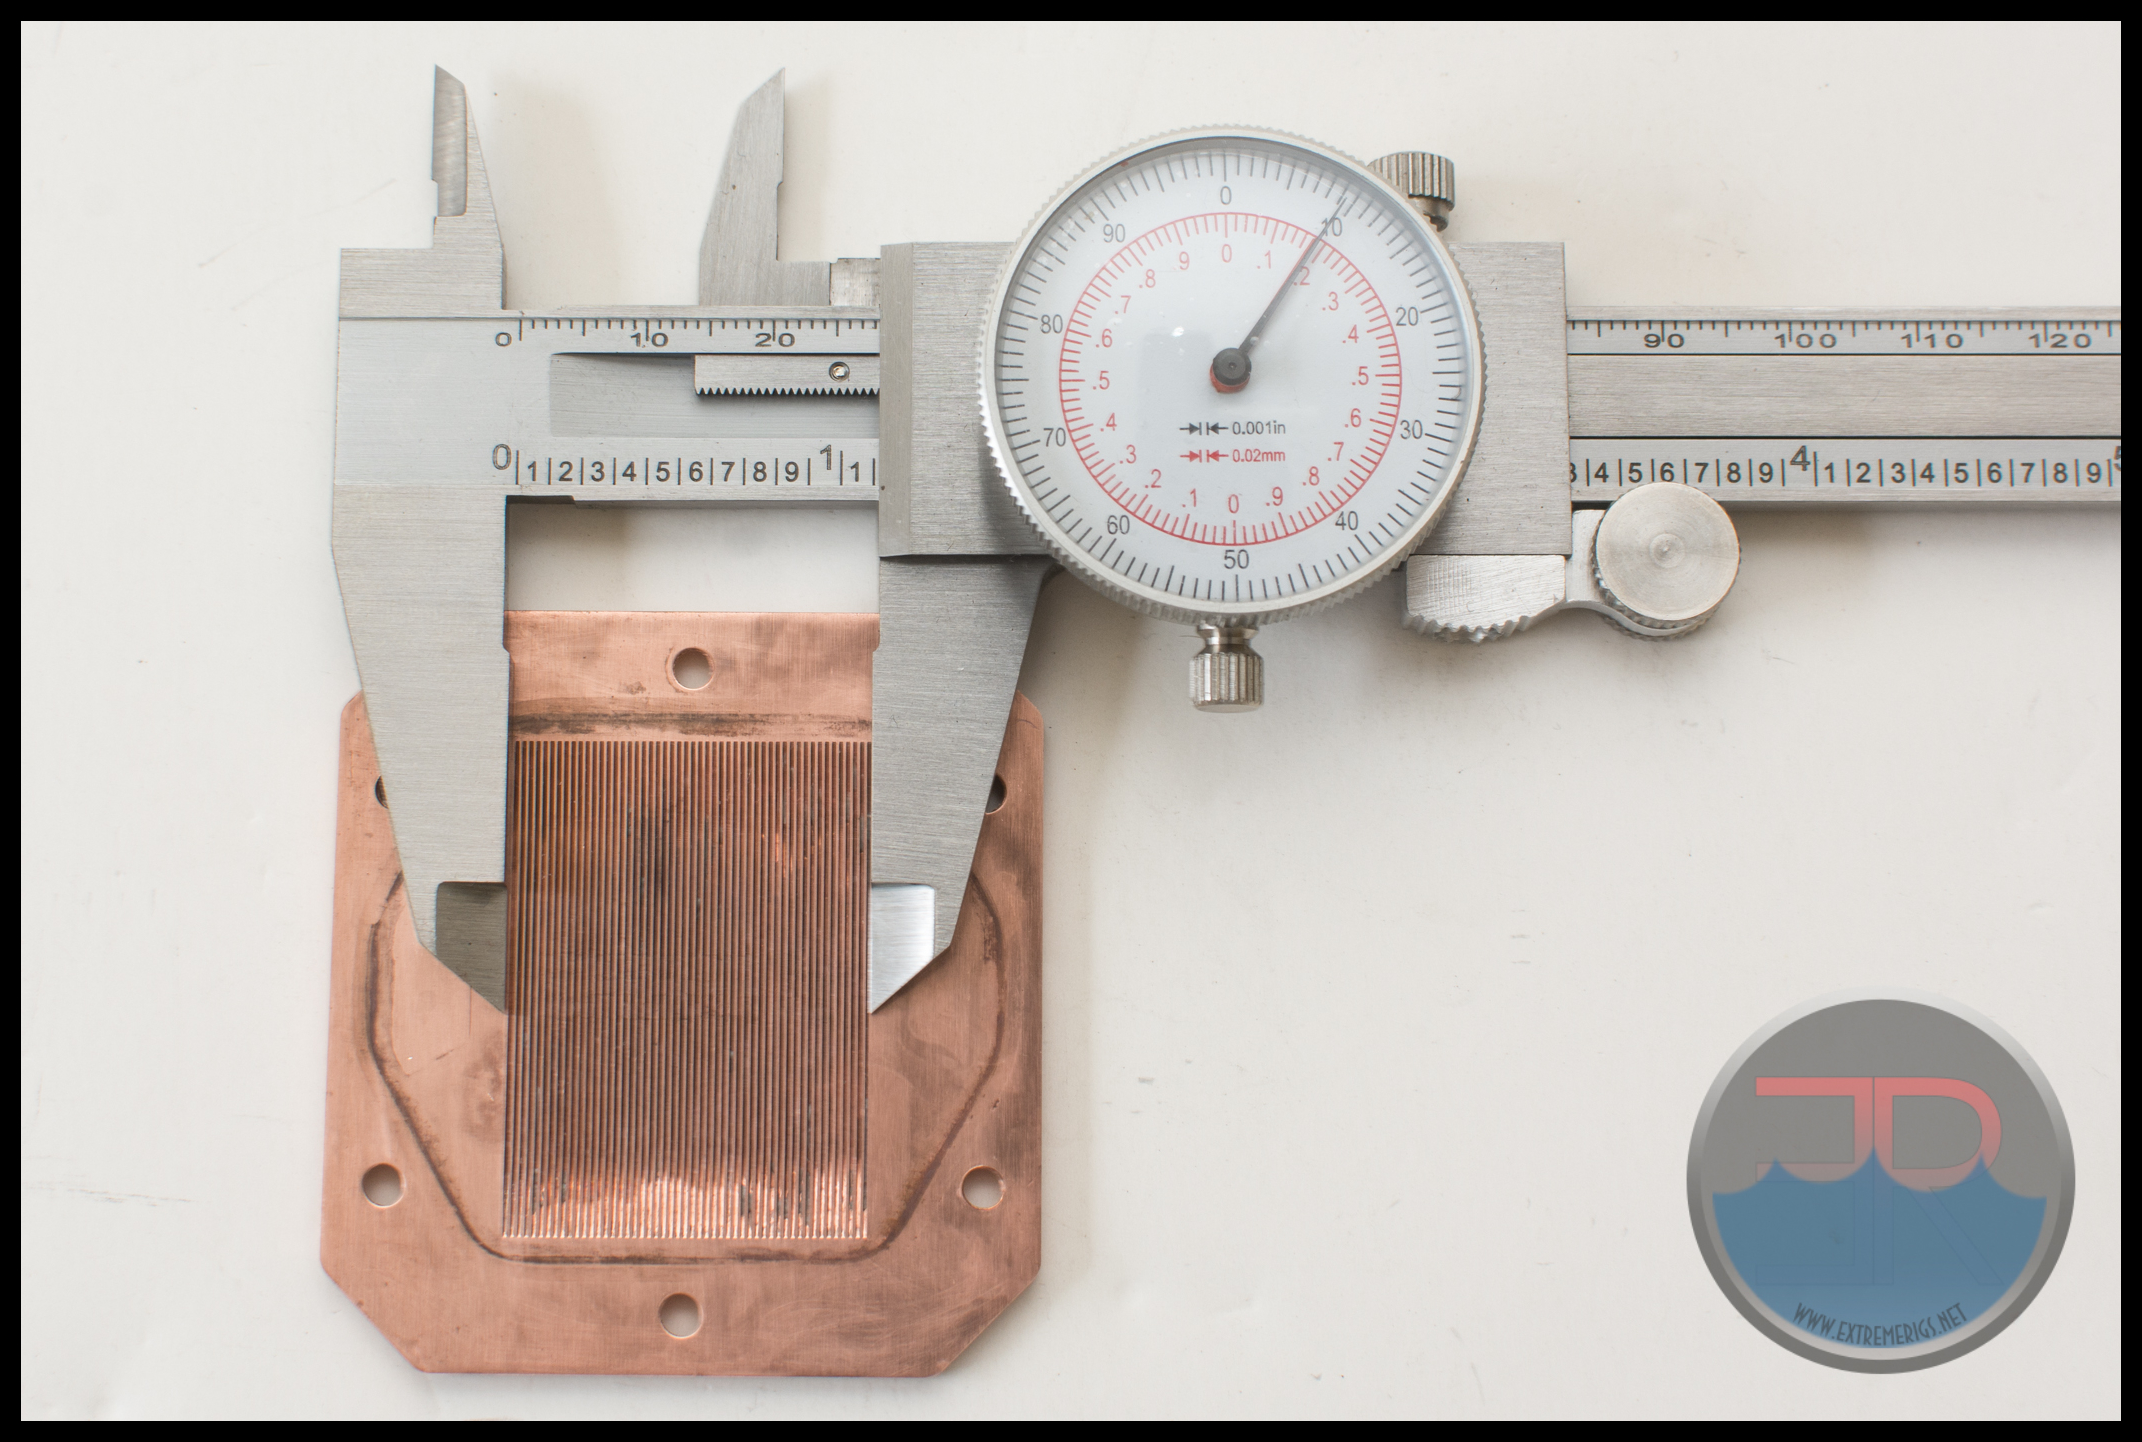
 The Basic has the exact same measurements the only difference is the number of channels. In comparison the HK III is 38.4mm long:
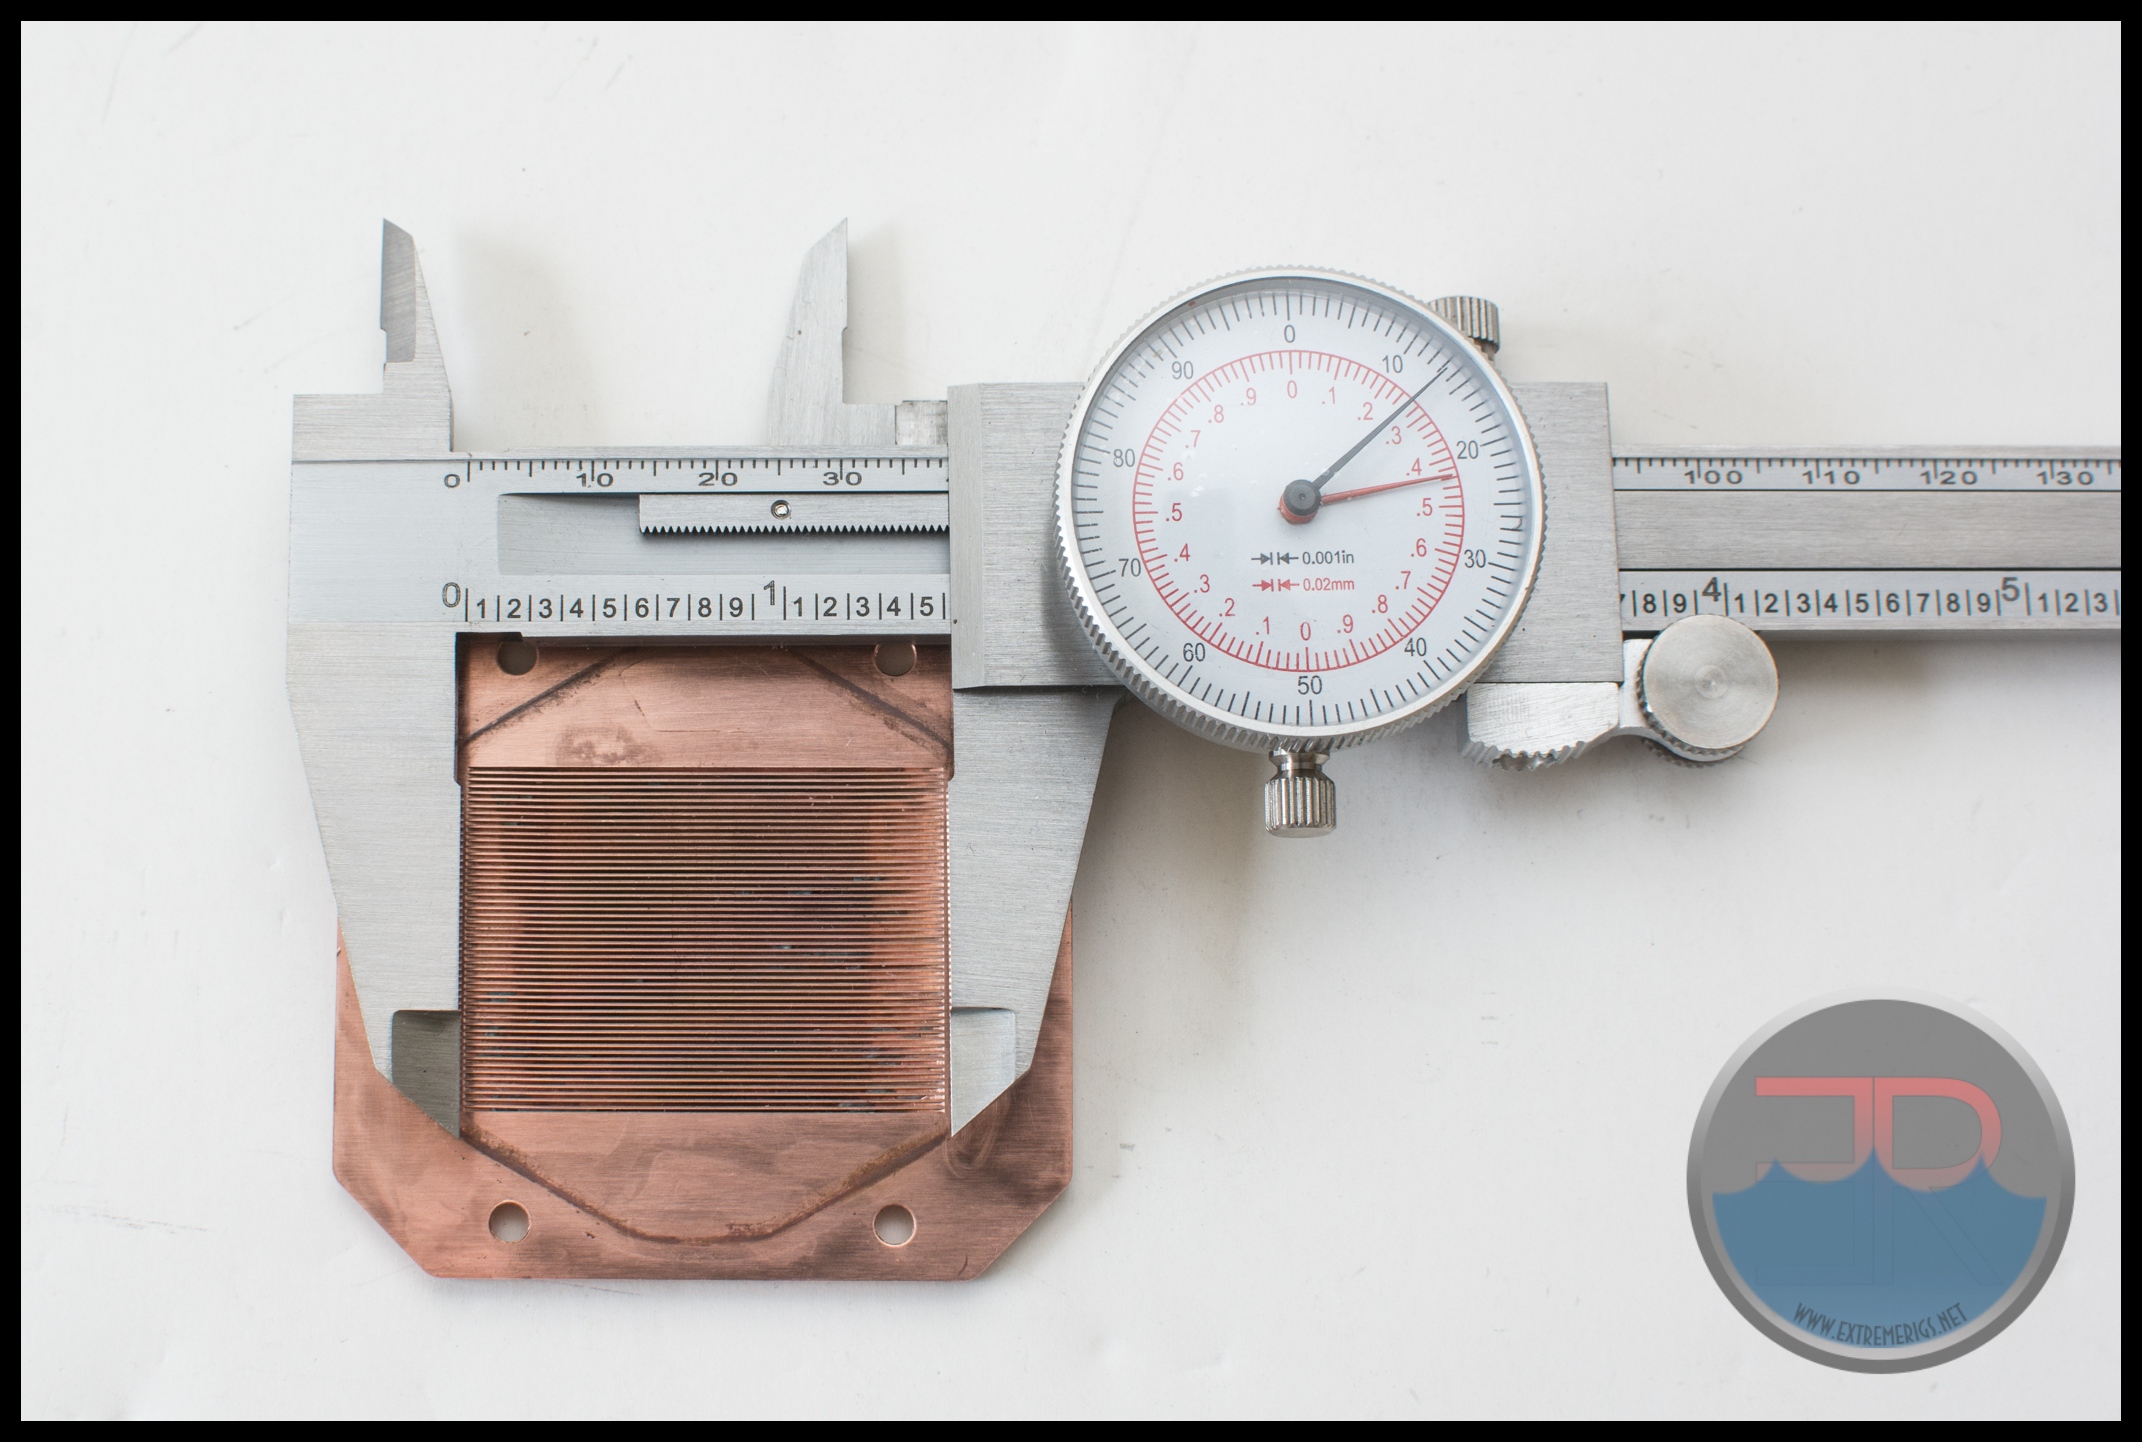 And a very similar 28.2mm wide:
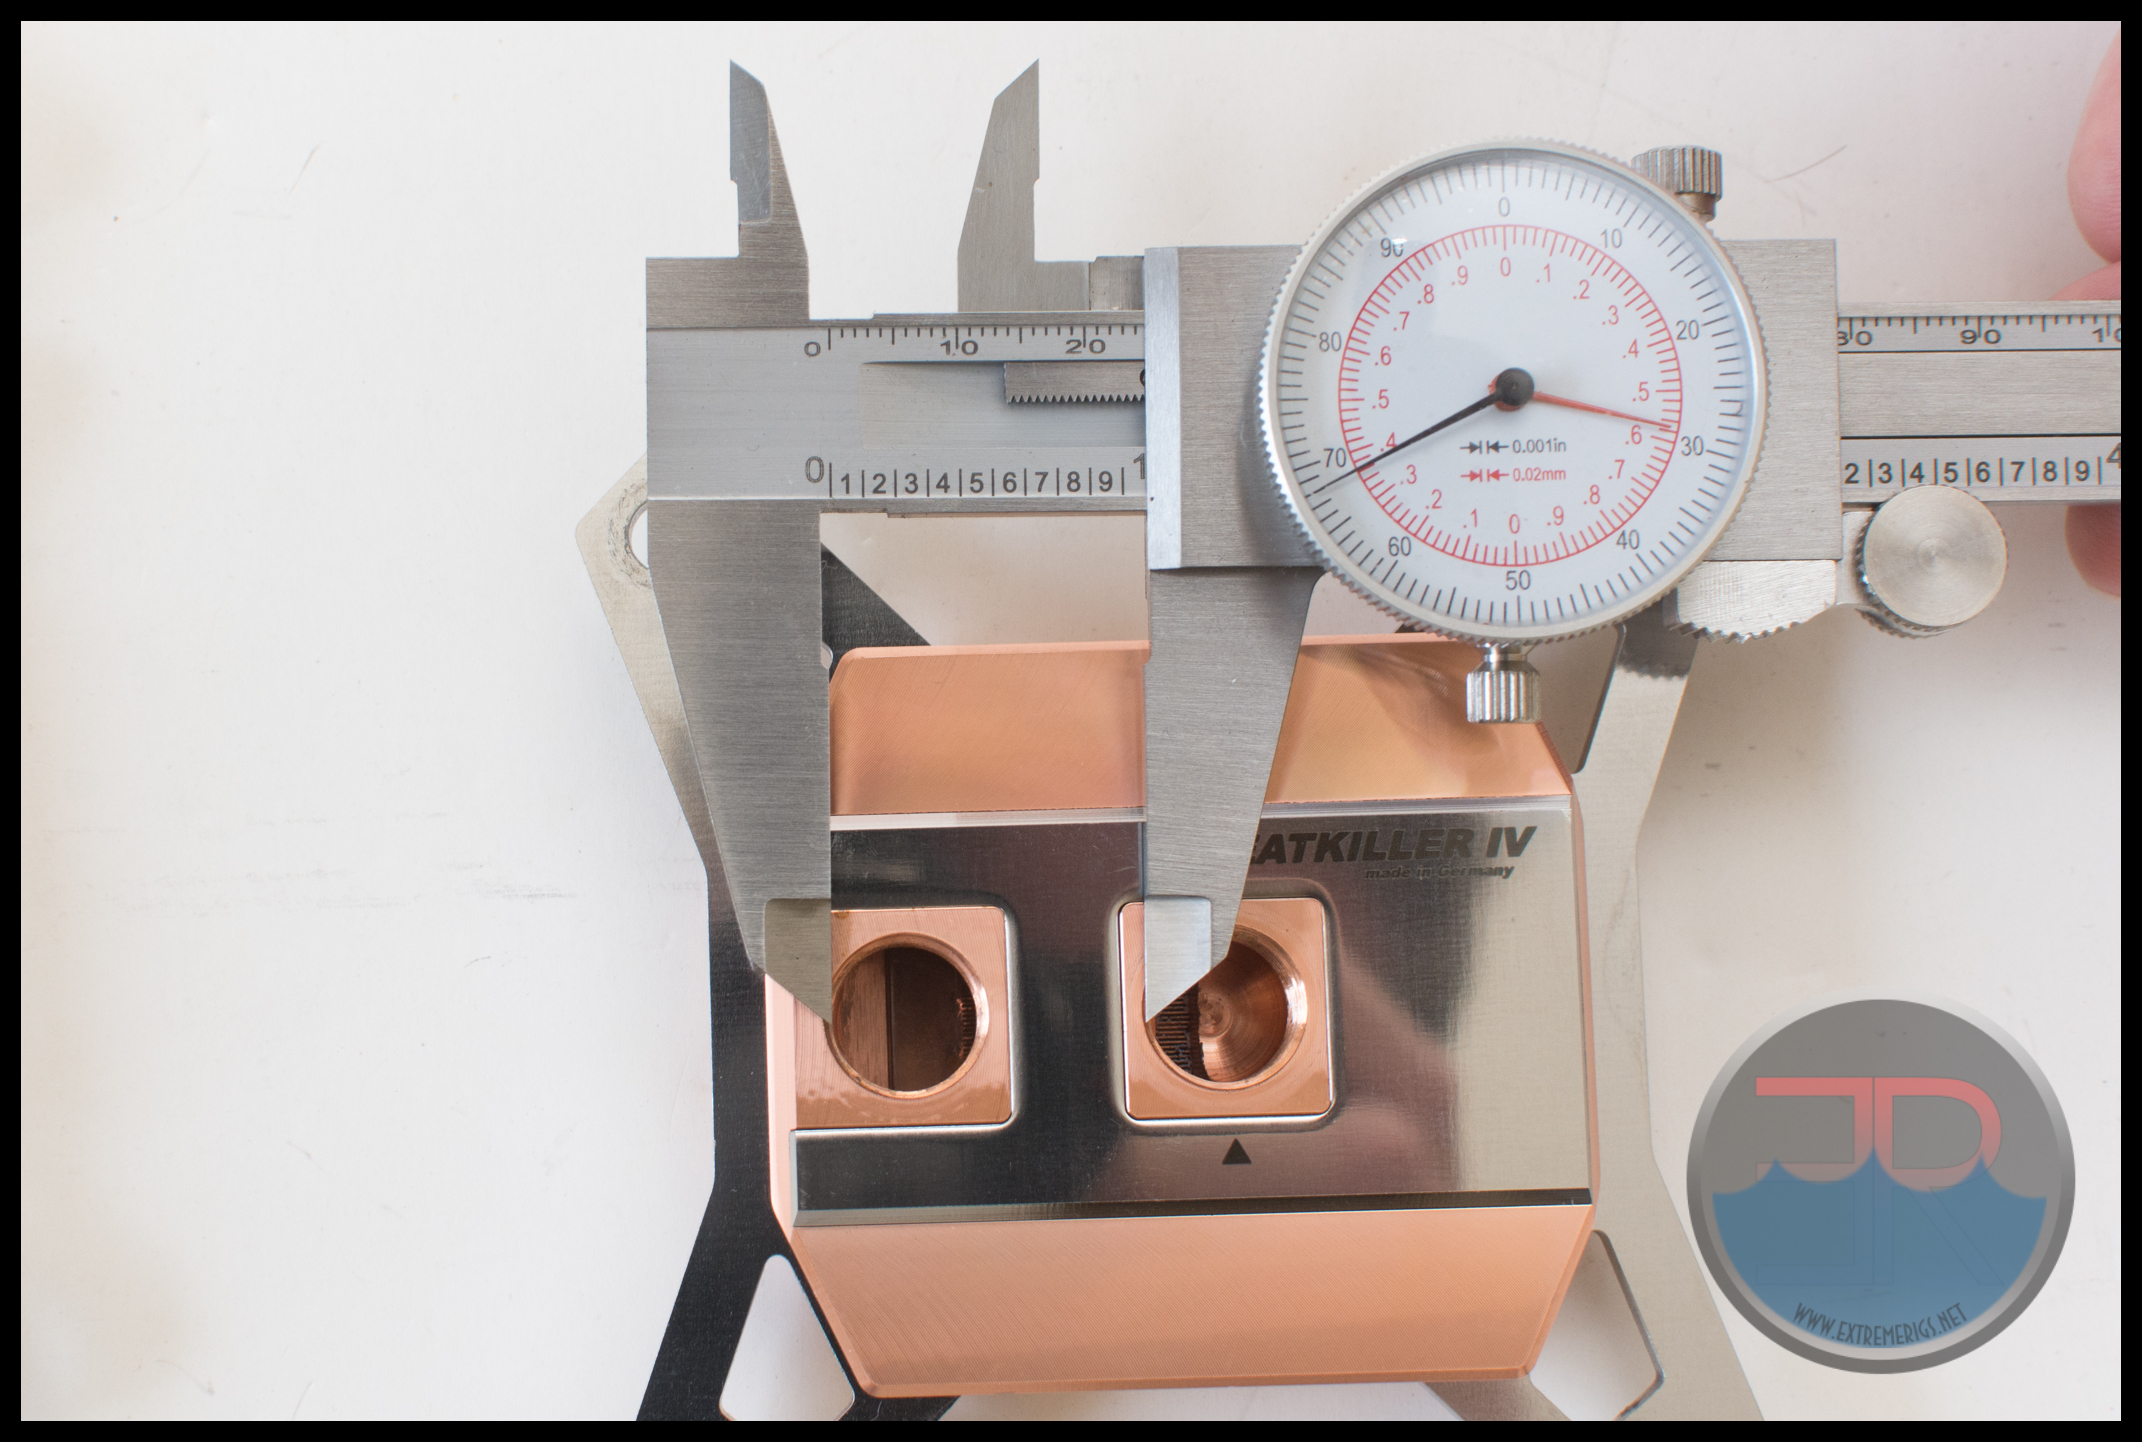
The cooling engine is not the only thing to have changed – the HK III had ports that were really close together:
 At only 21.7mm (center to center) the ports could not accept larger fittings. The HK IV improves on this by about 3mm to 24.6mm while still retaining Watercool’s idea to have the inlet always in the center of the block:
Now let’s take a look at how the blocks mount
Block Mounting
Block Mounting
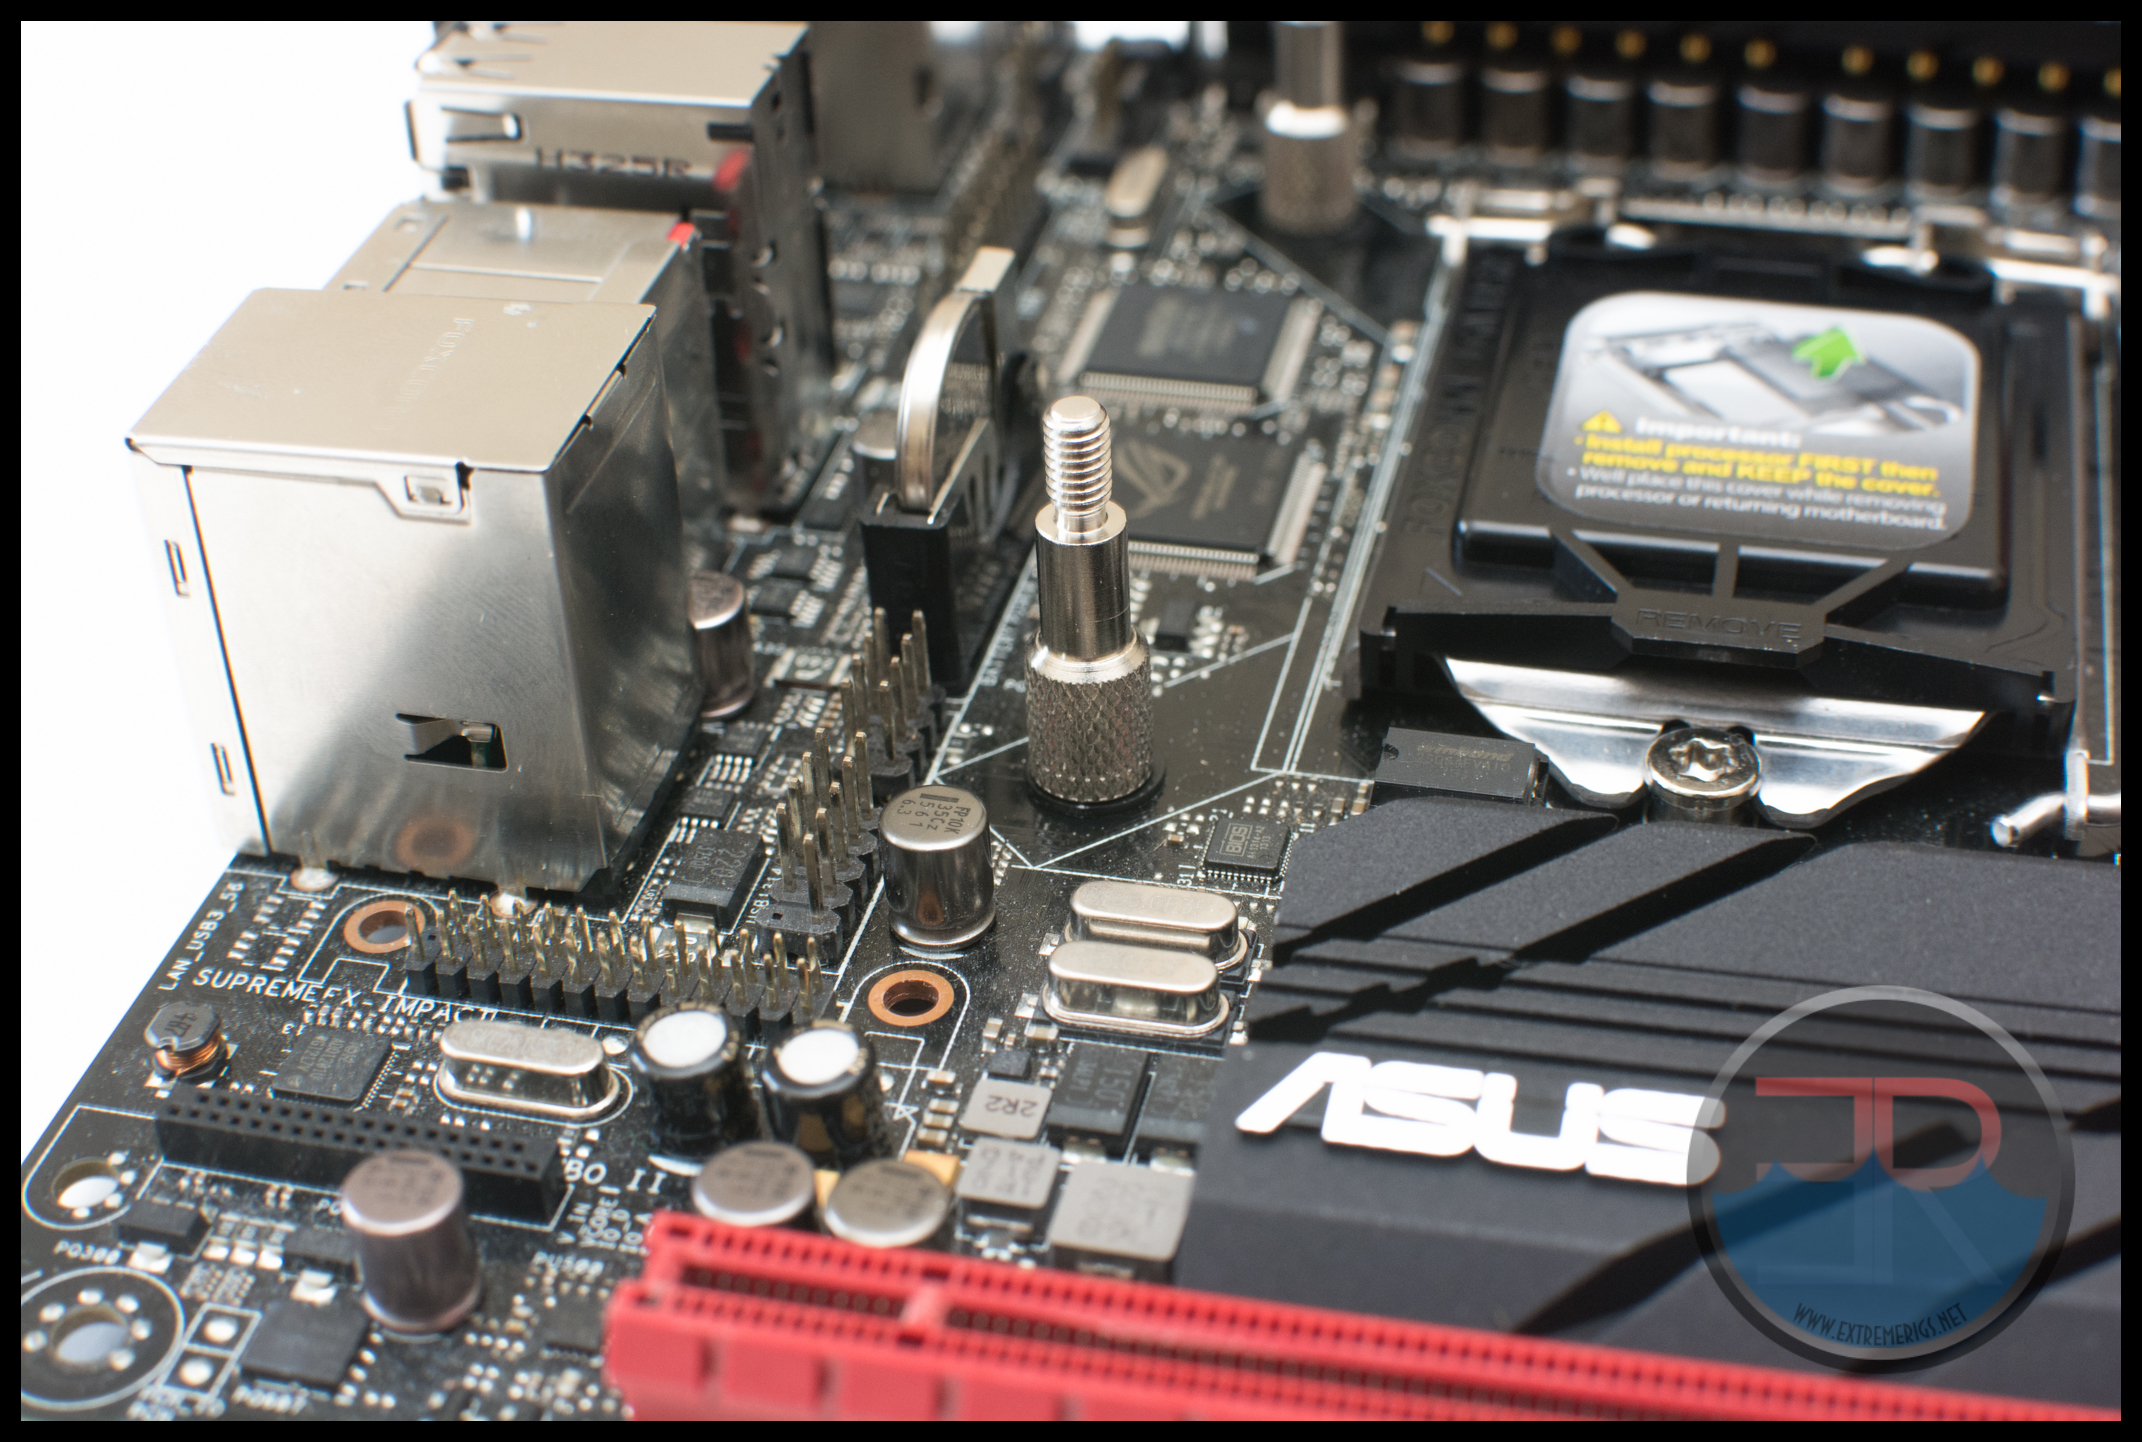
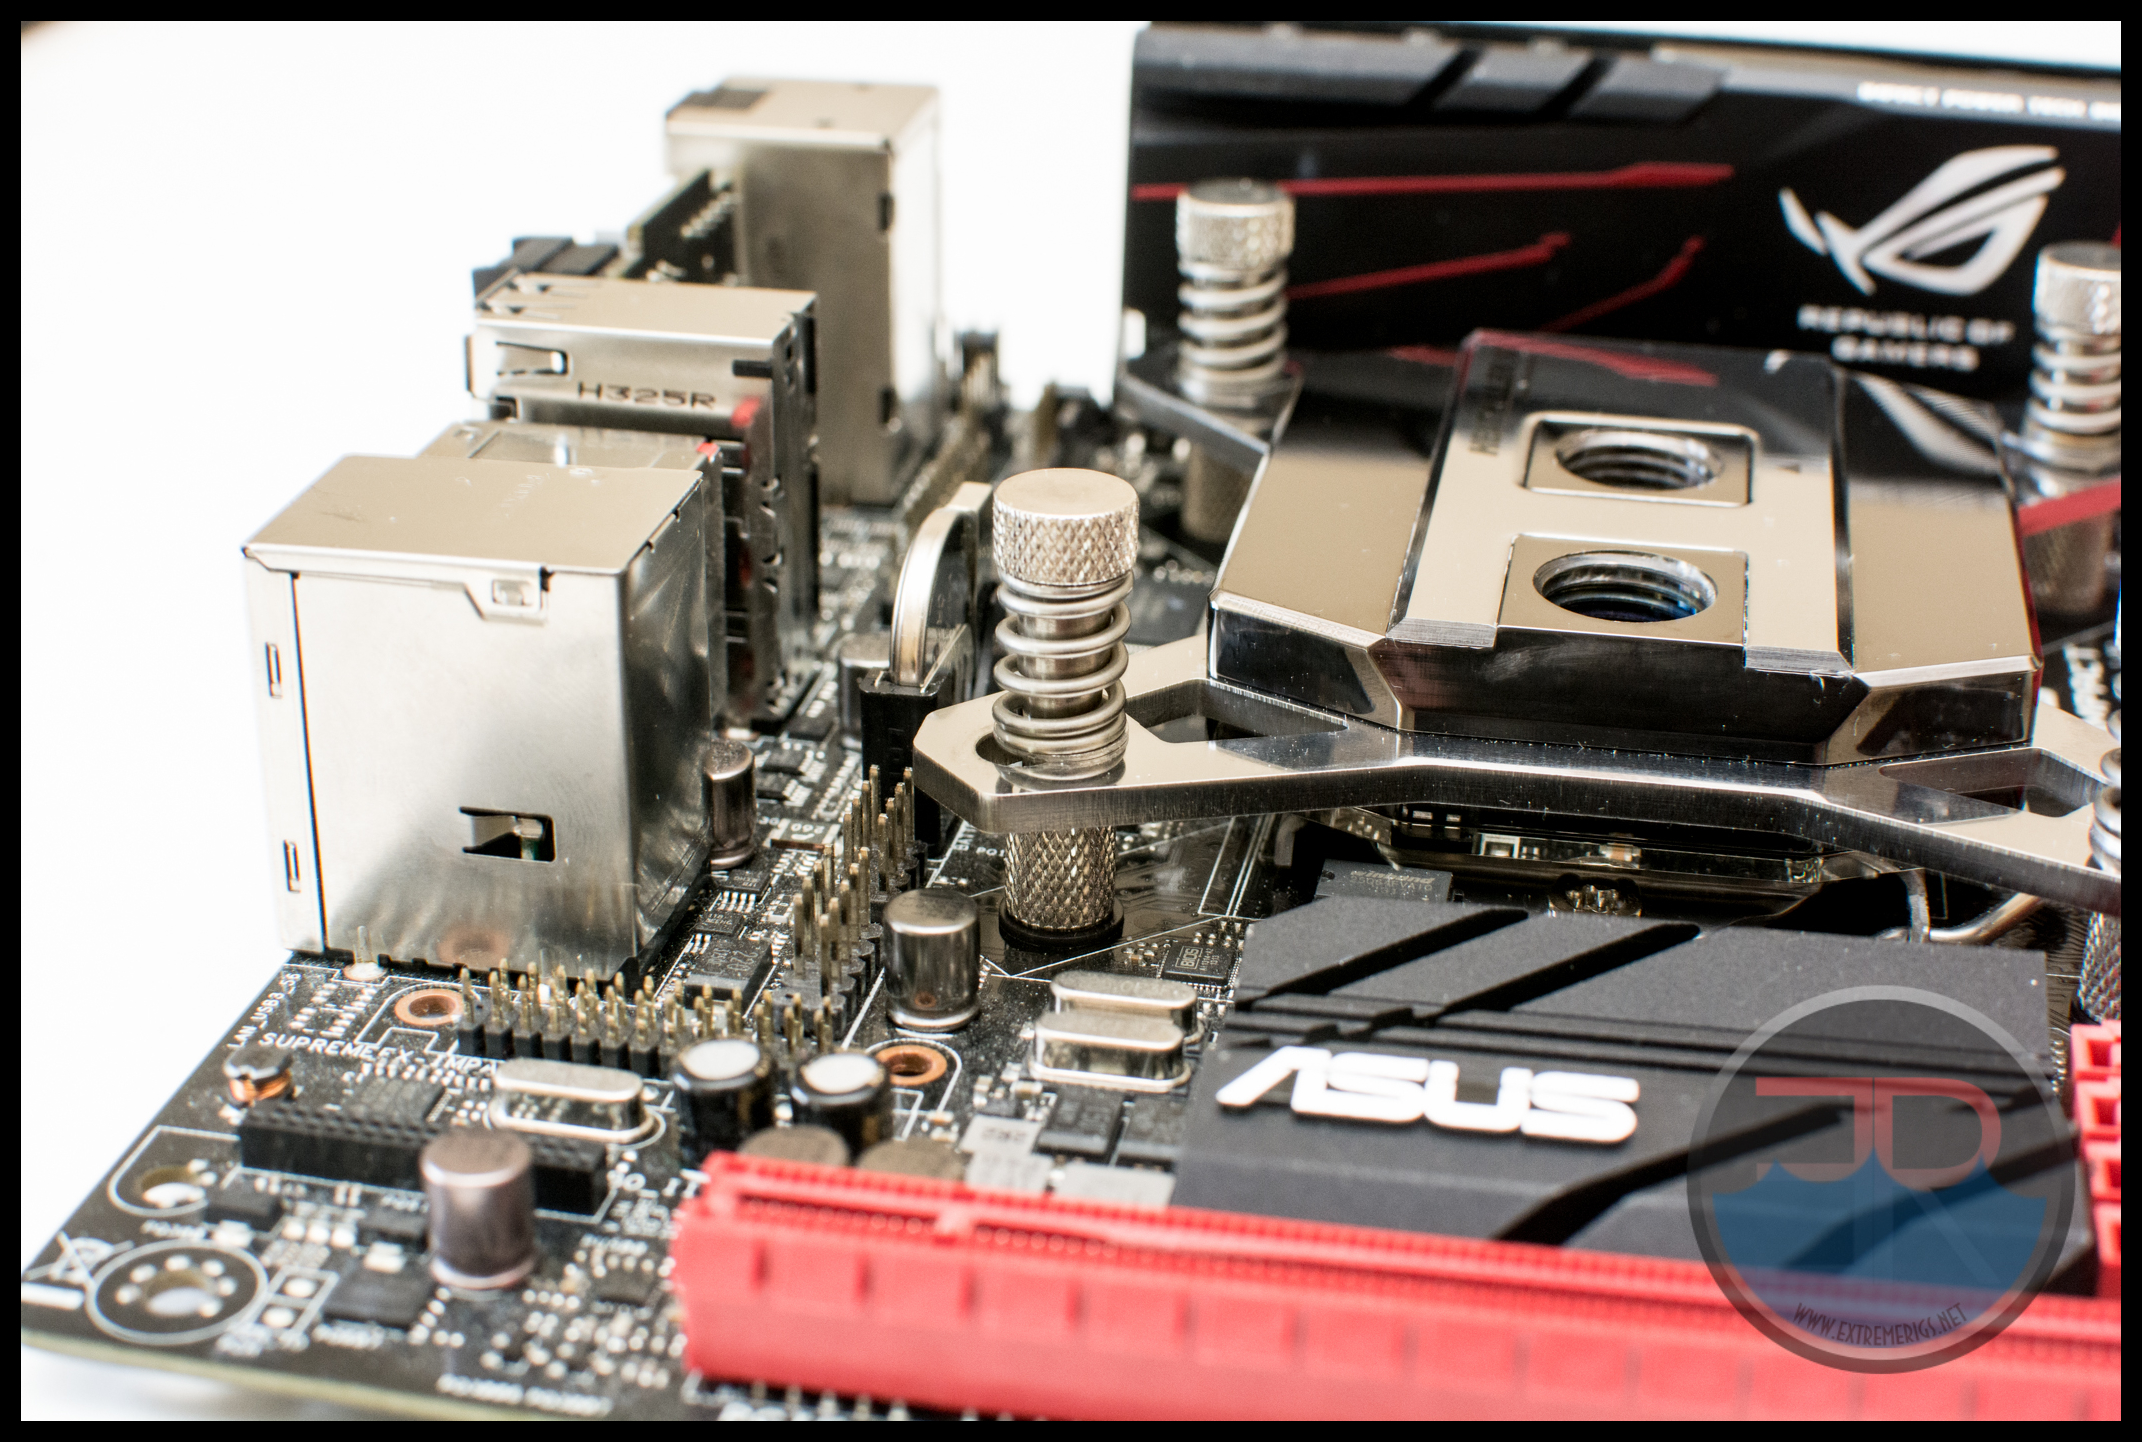
One of the weaknesses of the HK III was that it’s mount required tightening screws with an allen key. The screws were skinny and tall and the inability to tighten with your hands meant if you ever lost the correct sized allen key, you’d need to buy another. For socket 2011 the mount is very simple. The thumbscrews combine with a spring and a washer and screw directly into the socket. The thumbscrews are a good size – not so small to be fiddly, but not so large that they distract from a clean and simple look:
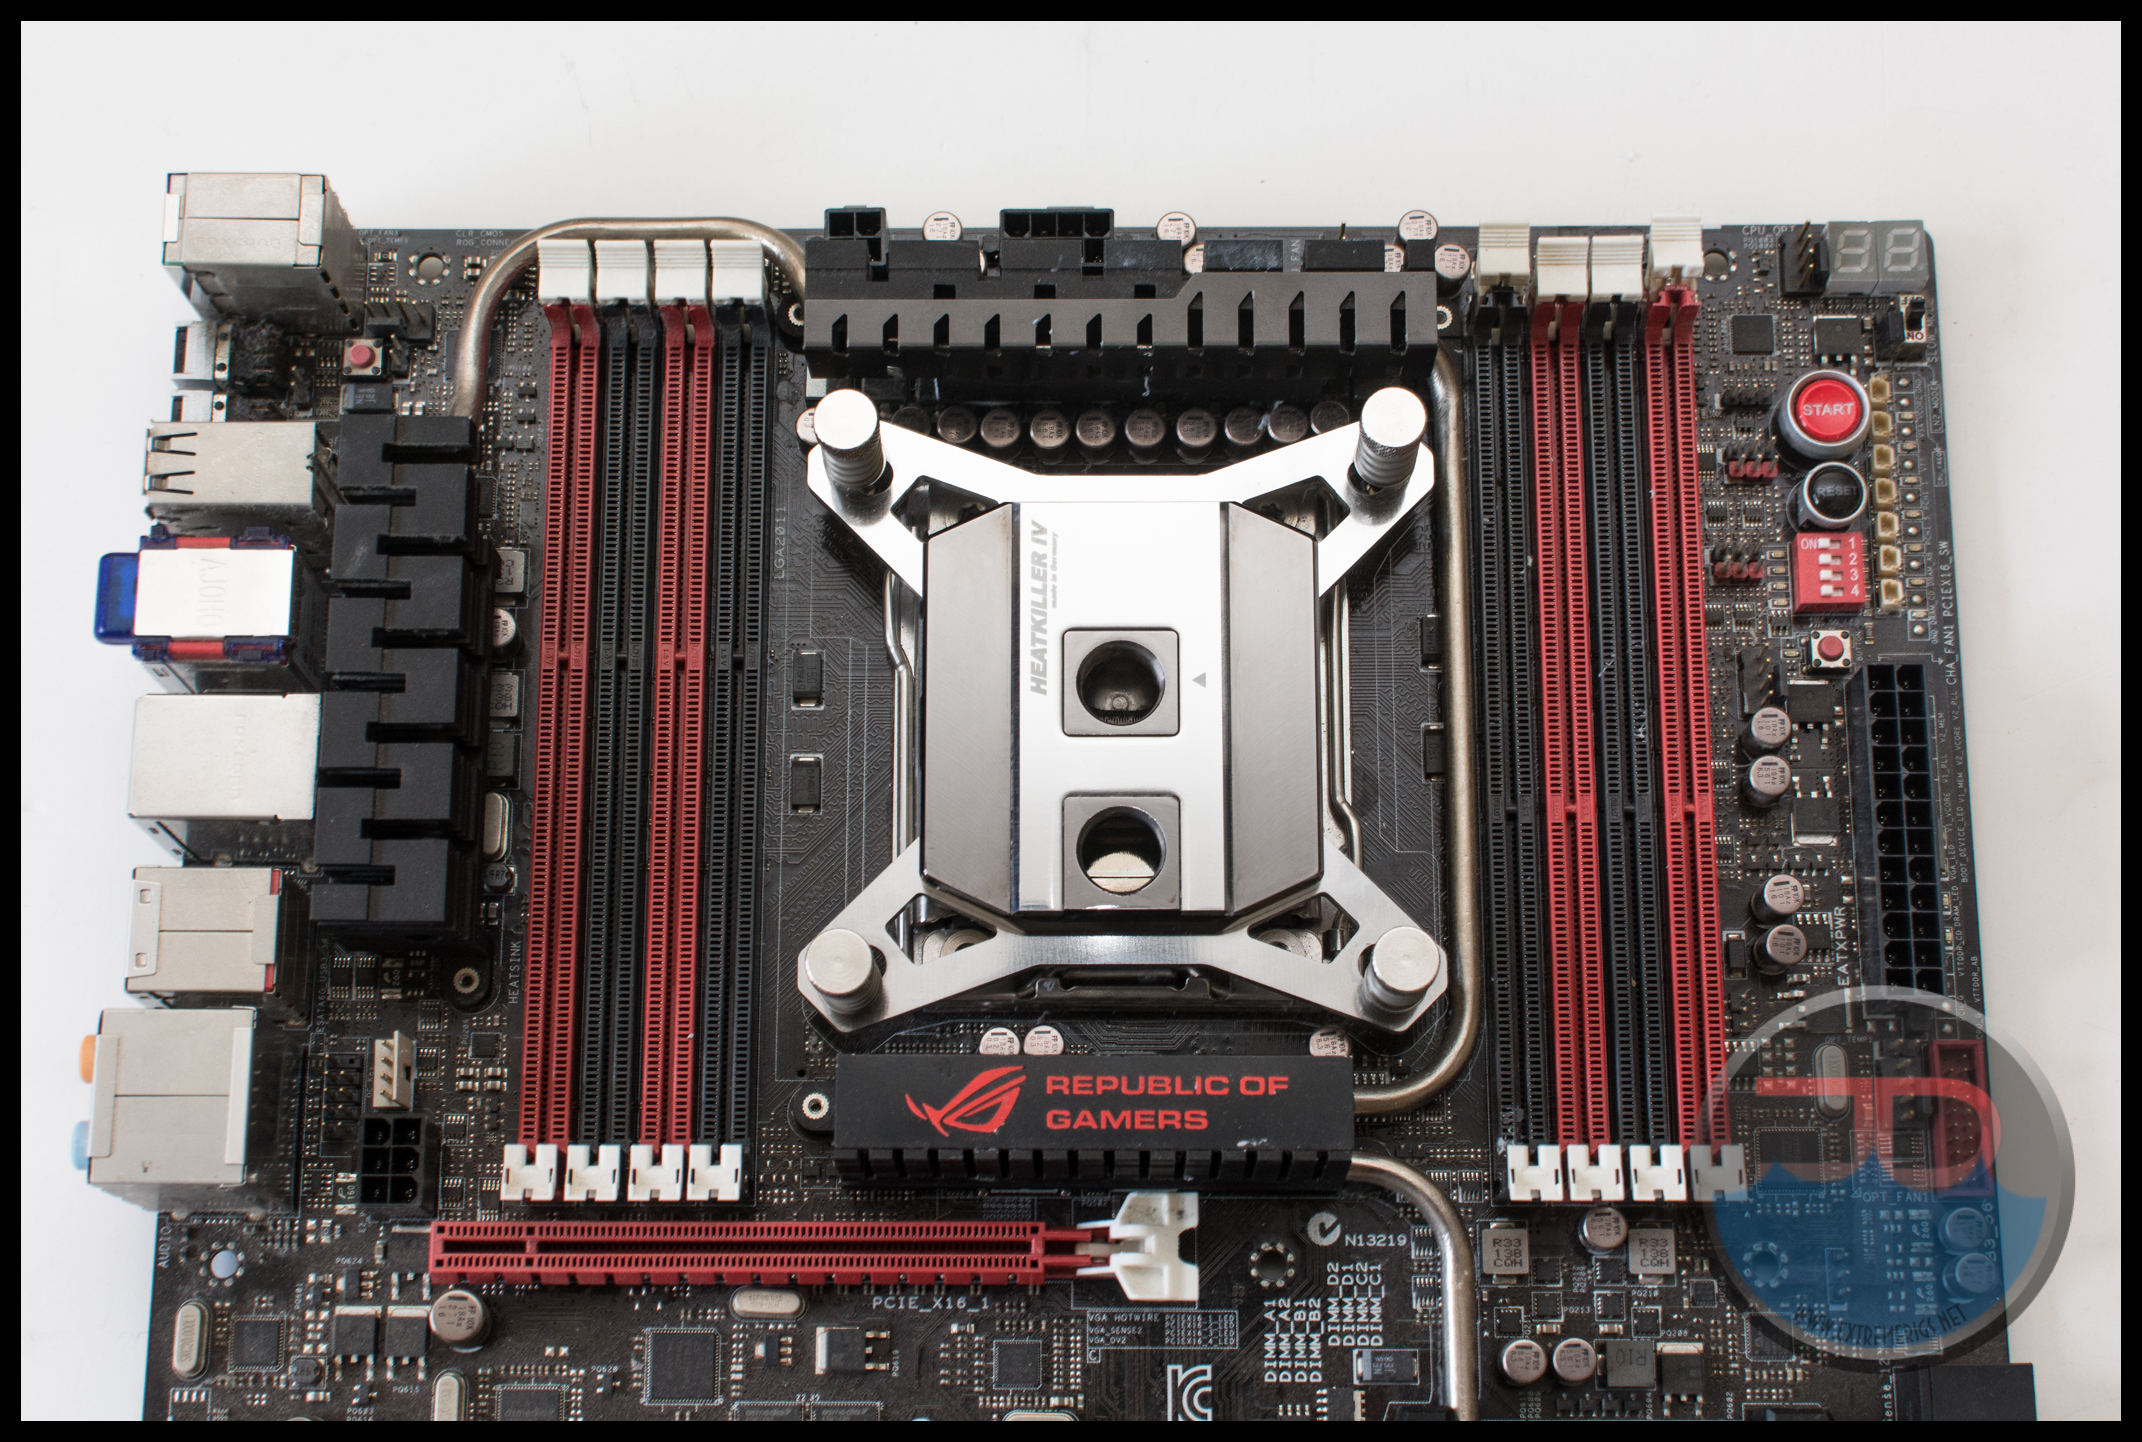
For reference this is the better performing “goofy” orientation that we reference later.
On socket 1150/1155/1156 there is no backplate supplied, but there is an optional one for a few bucks more. Instead screws and washers on the underside of the board are used to secure standoffs:
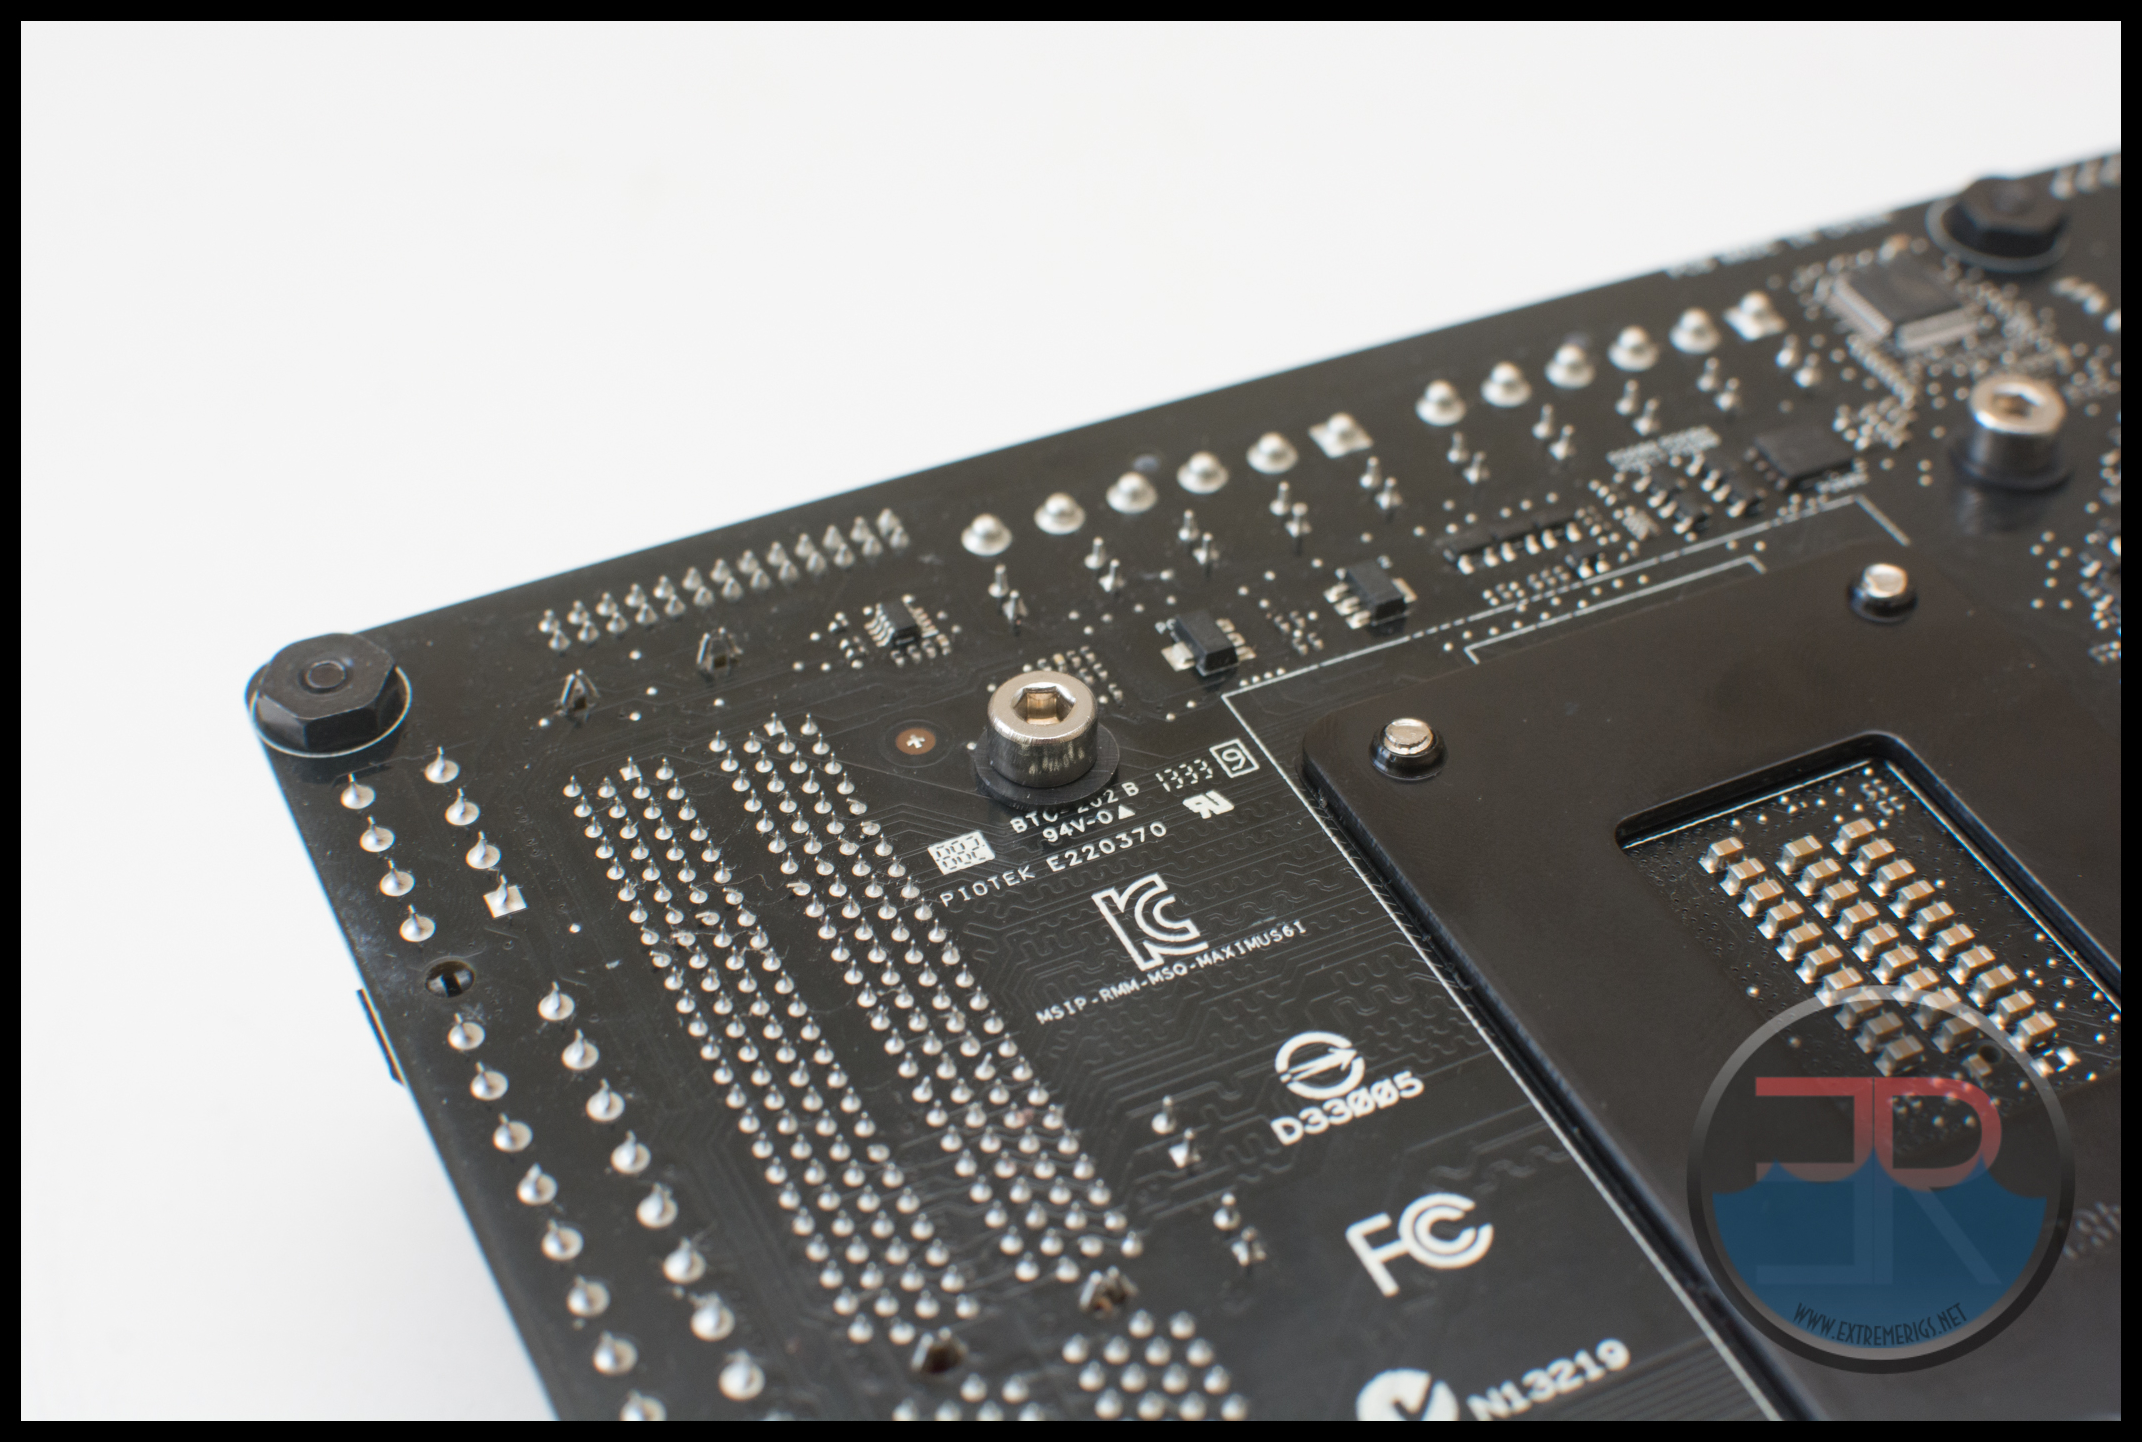
The standoffs then have different thumbscrews that can be attached to them along with a spring:
 The overall look is the same for both – however the lack of backplate means that you’re unlikely to get the same amount of mount pressure safely on socket 1150/1155/1156 unless you pay for the optional one.
Overall we were very pleased with the mount system for socket 2011 – it’s vastly improved over the old one. Now let’s take a look at performance!
Flow Restriction
Flow Restriction
In this test we measure the pressure drop across the waterblock while varying flow rate through it. This is done by hooking up the block to a house faucet. Flow is measured by a King Rotameter, while the pressure drop is measured by a Dwyer Manometer. If you want to learn more about what this plot means, then check out our guide.
We’ve tested so many CPU blocks now that our comparison plot is getting out of control:
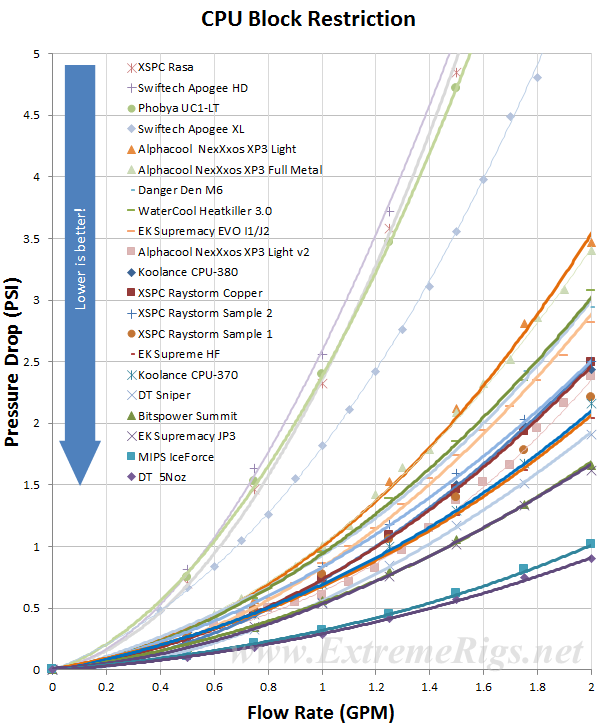
It’s far easier therefore to pick a flow rate and compare the pressure at that flow rate. Let’s choose 1GPM – a flow rate that most users will be close to:
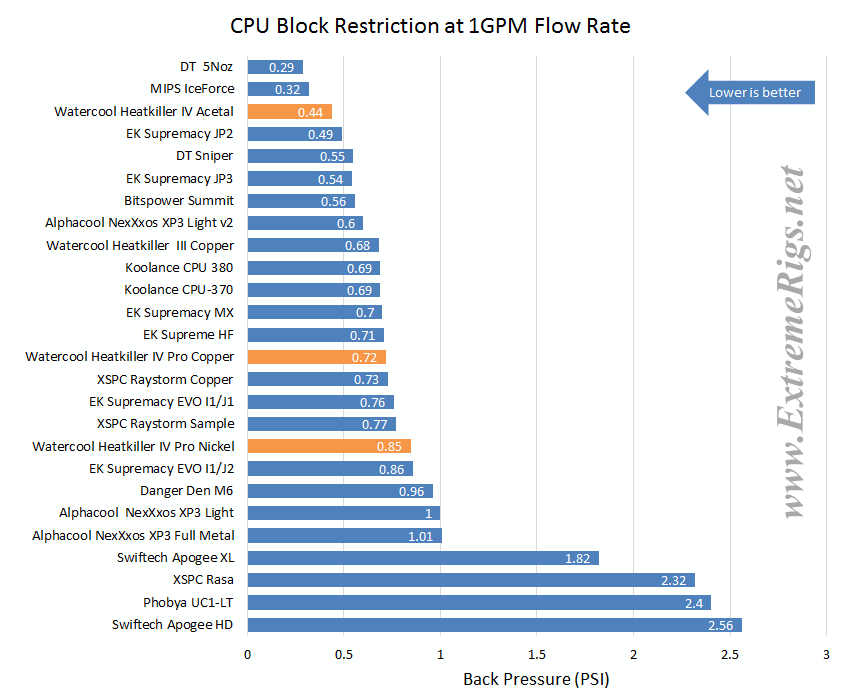
The HeatKiller IV has been highlighted in orange. The Basic acetal version is very low restriction indeed. In fact it’s the lowest restriction block we’ve seen that uses a jetplate rather than parallel flow paths.
The Pro version on the other hand is higher in restriction, but they are not as bad as some. My rule of thumb is that below 1PSI at 1GPM is good, and above it is bad. With this metric in mind we can see that both are acceptable. It’s interesting that the nickel plated version is measuring higher in restriction. Normally we discount the effect of the nickel plating on the copper having any measurable effect because it’s so thin. However these channels are very very thin already. We’ll have to see if there is any thermal effect.
Thermal Performance
Thermal Performance
Thermal performance was tested on an overclocked i7-4930K running at 4.6GHz. 3 mounts of each orientation was done to determine the ‘best’ orientation. Then a further 3 mounts were done only on the ‘best’ orientation. Of these 6 results the worst one is thrown away. In other words one bad mount is allowed as human error, but two bad mounts is assumed to be the fault of the mounting hardware and will impact results. The TIM used was Arctic Cooling MX2 – this TIM has a low cure time and is easily spreadable and has a low mount to mount variation. The TIM is burned in for an hour with a custom Prime95 run to allow it to cure and then thermal data is logged every second for thirty minutes. All 6 CPU core temperatures are logged by RealTemp, while the coolant temperature is measured by an Aquaero 6 and logged by HWiNFO. While the Aquaero isn’t the most accurate device for logging temperatures – given the standard deviation of the results and the higher temperature deltas in question it is “good enough”. During all of this testing pump power is fixed and hence flow varies slightly depending on the block in question. Flow rate for all blocks is typically slightly less than 1.5GPM.
Other hardware used – Rampage IV Gene, GSkill 4x8GB 1866 DDR3, Corsair AX1200, Samsung 840 Pro SSD, Swiftech MCP35x2 Pump at 34% PWM, King 3.5GPM 10″ Rotameter, EK X3 400mm Reservoir, Koolance Quick Disconnects, Primochill Pro LRT Tube. Due to the aging tube plasticizer build up in the system is a problem and blocks with narrow flow channels can be clogged quickly. For this reason the blocks were cleaned every single mount. This was not at all frustrating and we look forward to breaking down the bench and rebuilding with better tube, clean components on a 5820K/Rampage IV Extreme shortly.
The “Goofy” orientation was found to be the best for our 4930K:
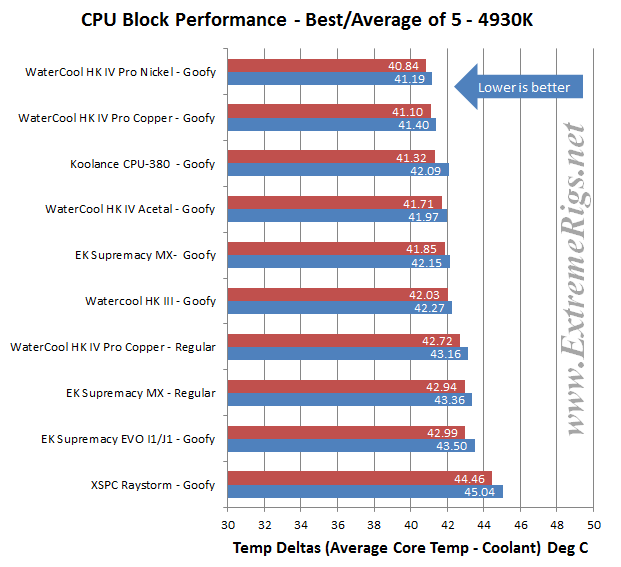
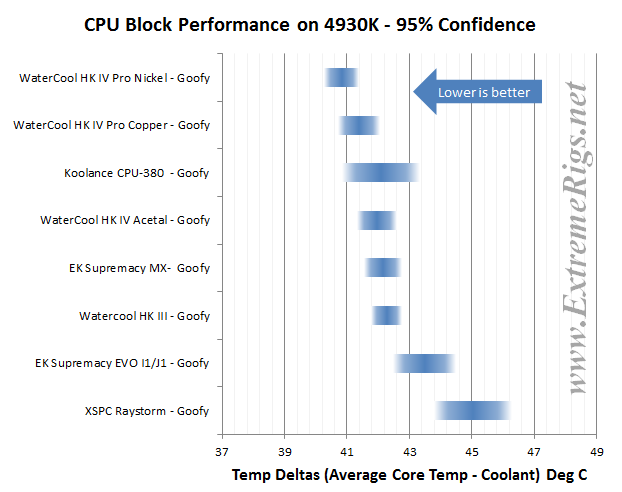
As can be seen the Watercool Heatkiller IV Pro dominated the thermal performance testing. The basic acetal version still did well and came in roughly 3-4th place. However it’s standard deviation was far better than the CPU-380 and so looks much better when we look at 95% confidence intervals:
Suspicious readers will no doubt red flag the results due to the EVO performance. It is afterall below the budget EK Supremacy MX block. This is the same EVO block that performed worse than the original Supremacy when we tested and reviewed it on the 4770K. We have another sample to try and will be testing this in case this is just a bad block.
The 95% confidence intervals also show that the nickel plated block might actually be better than the copper. Typically some users worry about nickel plating making performance worse and usually without data to back it up we reassure them that plating is too thin to make a difference. Perhaps however we have been wrong. Part of the difference may be not the plating but the surface preparation that is done before plating. The copper base has machining marks but they are more subtle on the nickel plated version:
 This may allow a slightly thinner layer of TIM and hence better performance. In addition the plating did seem to change the restriction slightly so even the ratio of coolant to metal in the channel may have slightly changed and be affecting the results. If it sounds like we’re clutching at straws to explain this slight difference then it’s perhaps because we are. It may also be sample to sample variation. It’s hard to be sure and this result should not make anyone jump to conclusions that nickel plating is always better than pure copper. To be honest it’s not a result we expected and while the difference is small given the tight grouping of the results it’s hard to just pin on error – though it could be just that!
The Heatkiller III still does very respectably too despite being such an old design. Indeed the main reason to choose the IV is perhaps not the improvement in thermal performance then but the wider ports, the better mount and the many different aesthetic options!
Summary
Summary
The Heatkiller IV then is an excellent thermal performer beating all the top blocks on our 4930K. Of course there are many other CPU options and it may not top them all, so we will be retesting on X99 soon. Without a reconfigurable bow there’s a chance that a block with more optimized bow might beat it on some other CPUs – however we actually like that it can beat other blocks without needing to open the block up.
Aesthetically there are a ton of options to meet the “look” of any user, and a budget option that sacrifices some performance still does extremely well!
The mount provided was easy to use, looked good and provided low variation of thermal performance.
Gold Award
Top performance, tons of varieties, decent flow and a good mount. What’s not to love? Our only niggles would be that the 1150/1155/1156 backplate isn’t included and that an AMD (lol) mount isn’t included, but those would unnecessarily raise the price for those who won’t use it. The only other niggle is that the ports while improved could still be spaced further apart. The package also doesn’t include any TIM meaning that the Basic edition may not be as cheap as some of the competition when you factor that and a backplate into the picture.
Where to buy: $60-$87 @ PPCS, 55-85 Euro @ Watercool Store


Greetings from Germany!
Awesome review, thorough as usual and very much appreciated.
While it may be impractical to add another block to the restriction graph, a graph with select blocks would be nice.
i remember a tweaked/moded HK3 on skinnees (http://skinneelabs.com/heatkiller-3-0-lt-lc/2/) for those with a HK3 it might be interesting to see how it compares. Vapor had an improvement of 1.3 deg C which would in theory even beat the HK4. 😮
all the best
DX2
p.s. i had a question about your testing, i sent an email.
greetings from Germany!
Awesome review, thorough as usual.
A restriction graph of the HK4 as a link or compared to a select few would be nice.
i remember on skinnees, Vapor reviewed the HK3 LT. He tweaked/modded it getting 1.3 DegC improvement. It would be really interesting to see if the tweak delivers, assuming it does, it would even beat the HK4 :-O
all the best keep the reviews coming!
i had a question about your testing. i sent a email. ^_^
greetings from Germany!
Awesome review, thorough as usual. Keep up the good work!
A restriction graph ith a select set of blocks would still be nice tbh.
The HK3 LT review from skinnee included a modded HK3. It was 1.8 Deg better than unmodded if those result hold true the modded hzk3 might best the HK4. It would be awesome if you tried the mod!!
many kind regards
DX2
p.s. i sent a question via email.
I’m curios about the price differences in these blocks. Was the universal back plate necessary at all? It adds ~12USD more to the overall price. Currently, this will make it ~100USD simply for the cpu waterblock. Just curios to know if they’re any help, or if they’re required.
Honestly I haven’t tried it, and of course its only needed for socket 115x, but I would be reluctant to not use it. CPU blocks can mount with a fair bit of pressure, and I’d want to avoid bending the board.
One thing I can add after learning from experience. The HK3 water block works real well. Then the plasticizer from the flexible tubing clogs it. This happens anywhere from 6 to 9 month intervals with a OC’d AMD FX 9590 and 2 OC’d R9 285s. After the 2nd cleaning you notice the fine cuts in base are filled with crud. I found the best cleaner is tooth paste mixed with vinegar. The real problem is finding a brush with bristles fine enough go in between the ridges and stiff enough to remove it without scratching or bending them. So if you are not using rigid tubing, the HK basic maybe be better when it comes to cleaning. It is best not reuse the old tubing (leaks). Have not done a ridged reinstall, yet,,, but I believe careful disassembly and attention to orientation can be done without heating and bending new tubes. It is possible that the heat from the 9590 is more concentrated than the heat from the 285s because I did not notice as much crud in them?
Comments are closed.